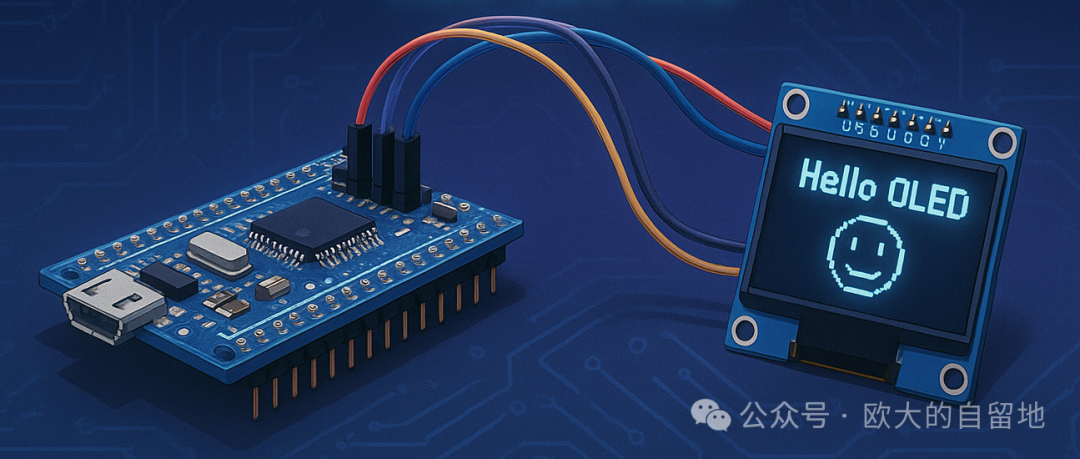
During previous projects with the CH32V003 series, I often used a 0.96-inch 12864 OLED screen to display data and perform user interactions. Initially, I directly used the <span>oled_min.c</span> from the CH32V003-GameConsole project, but that was only for displaying a bitmap and did not support displaying at arbitrary positions, so it needed some modifications.
Additionally, while working on a current meter project, I found many dot matrix fonts, all of which used a <span>DCfont</span> structure. If I could make it compatible with this format, it would be very convenient to replace different fonts in future projects.
The reason for writing this library myself is that it is used on the CH32V003, which has limited resources of 16KB Flash and 2KB SRAM, making it impossible to use the mature libraries available in Arduino, so I had to write one myself and learn in the process.
Font and Bitmap Data Structure
<span>DCfont</span> data structure is defined as follows.
struct DCfont { uint8_t *data; uint8_t width; uint8_t height; uint8_t min, max;};For monochrome XBMP images, the rendering requires similar parameters, so I can use the same function to draw both <span>DCfont</span> and XBMP.
Why Use Framebuffer
For commonly used 12864 OLEDs, the OLED controller typically packs 8 vertical pixels into 1 byte, stored as a “page”. The controller cannot display scattered pixels across pages.
In the original TinyConsole project, the bitmap was sent directly to the OLED driver chip’s video memory, which meant that when displaying a bitmap, the Y coordinate could only be set in multiples of 8.
Therefore, if I want the bitmap to display at any position or want to draw points, I must first process it in the MCU before sending it to the OLED controller.
For a 128×64 resolution OLED, if I need to store the pixel data for the entire screen in memory, it requires <span>128*64/8=1,024</span> bytes, which is exactly 1KB.
Although 1KB is a bit large for the 2K memory of the CH32V003, it is still manageable to save space elsewhere to facilitate bitmap display 🙈.
Additionally, WCH has released an upgraded version of the CH32V003, the CH32V006, which has 8KB of memory, so there is no need to worry about insufficient memory 😃.
Core Function Design
To implement this driver, the main task is to define a framebuffer and write a function to draw bitmaps.
Framebuffer Definition
Directly allocate a 1KB memory block for the OLED framebuffer.
#define BUF_LEN (128 * 64 / 8)static uint8_t display_buffer[BUF_LEN] = { 0 };Core Function display_draw_xbmp
void display_draw_xbmp(int x, int y, int w, int h, const uint8_t *data) { int byte_offset = y % 8; for (int tx = 0; tx < w; ++tx) { int px = tx + x; if (px >= 128) { break; } if (px < 0) { continue; } uint8_t prev_b = 0; int ty_len = (h / 8) + (h % 8 > 0 ? 1 : 0); int py = 0; for (int ty = 0; ty < ty_len; ++ty) { py = y / 8 + ty; if (py >= 8) { continue; } uint8_t b = *(data + (ty * w + tx)); uint8_t b2 = b; b = (b << byte_offset) | prev_b; display_buffer[py * 128 + px] |= b; prev_b = b2 >> (7 - byte_offset); } py = y / 8 + ty_len; if (prev_b > 0 && py < 8) { display_buffer[py * 128 + px] |= prev_b; } }}Design Breakdown
-
Non-Multiple of 8 Y Breakdown
-
<span>(b << byte_offset)</span>and<span>b2 >> (7 - byte_offset)</span> -
Using bitwise shift operations to split pixels scattered across two pages.
-
Mixing with Existing Pixels
-
<span>display_buffer[py * 128 + px] |= b;</span> -
Using bitwise OR operation to mix the pixels to be displayed with the existing pixels in the framebuffer.
-
Clipping Logic
-
<span>if (px >= 128) break;</span>— End the current column loop directly on right boundary overflow to avoid unnecessary calculations; -
<span>if (px < 0) continue;</span>— Skip writing on left boundary overflow to preserve the opportunity for the next column. -
Handling Remaining Pixels on the Last Page
-
There may be high pixels remaining outside the last page, which need to be checked and written to the framebuffer, and only write if still within screen bounds to prevent overflow.
-
<span>if (prev_b > 0 && py < 8) { ... }</span> -
Direction of Shift Selection
-
The OLED page mode is “least significant bit on top”. Left shifting
<span>b << byte_offset</span>aligns bit 0 close to the starting point, matching the hardware screen refresh order, reducing the cognitive load of logical inversion for the human brain.
Clear Screen Function
There is not much to say about this; simply setting the entire framebuffer to 0 achieves the clear screen effect.
void display_clear() { memset(display_buffer, 0, BUF_LEN);}Advantages Over Directly Writing to OLED Video Memory
Using a framebuffer instead of directly writing display data to the OLED video memory allows for some additional effects.
Implementing Startup Logo & Boot Animation
Since I can place bitmaps at any Y coordinate, I can create animations in the Y-axis direction by varying the Y coordinate parameters during drawing.
Real-time Waveform/Bar Graph Overlay
Compared to directly writing to the OLED controller, which would overwrite existing pixel data, using a framebuffer allows new data to overlay existing data, enabling the display of graphs without losing scale or other image data.
Easier Compatibility with Chinese Font Libraries
For Chinese font libraries, I only need to modify the <span>DCfont</span> definition to set the bitmap size to common dimensions like 16×16 pixels, allowing for direct display of Chinese characters.
Full Screen Refresh to Reduce Flicker
Although each drawing requires sending full screen data, in I2C 400Kbps mode, it theoretically takes 23ms, which is sufficient for general use cases, achieving 30 FPS. The benefit is reduced screen flicker, resulting in a better visual experience.
Additionally, using SPI + DMA can achieve higher refresh rates, no longer becoming a bottleneck for MCU applications.
Conclusion
In summary, writing such a driver is not a complex task; the main considerations are bit manipulation and boundary detection, but it is a good practice process 🙈.
References
-
https://github.com/wagiminator/CH32V003-GameConsole
-
https://www.wch.cn/products/CH32V006.html
-
https://mp.weixin.qq.com/s/0y0j2ZeuXrnyhNQIz8hSZw
Follow the Official Account for Updates
If this article has helped you, please follow, like, share, or repost. Thank you very much 😃.
Other DIY Projects
Remember that credit card-sized pure PCB keyboard? Now it has firmware!
Costing 60 yuan, making an open-source game console with ESP32-S3 that can play FC/NES, GameBoy, and has a custom colored PCB
DIY USB ammeter tutorial, getting started with hardware design, firmware development, and appearance modeling
Historical Articles
-
Multi-platform Integrated RISC-V IDE – MounRiver Studio II Hands-on Experience
-
Students playing with ESP32 and Arduino must not miss this online simulation website
-
AI did half the work, making an LCD simulated glow tube clock
-
Can AI programming be used in embedded development? Experience with Manus writing ESP32 firmware
-
How powerful is the IP KVM that raised 5 million dollars in crowdfunding? JetKVM unboxing and trial
-
Current 15uA lasting a year? CH32V003 low power application attempts
-
Remember that credit card-sized pure PCB keyboard? Now it has firmware!
-
Reproducing Xiao Zhi AI, building Arduino + ESP-SR + ESP-TTS development environment with ESP32-S3, pitfall records
-
How much does it cost to sell for 25 yuan? Disassembling a 500-in-1 game console
-
Here it comes, using the ESP32-S3 microcontroller to run a RISC-V emulator to boot Linux, this time it only takes 8 seconds
-
No-code DIY all-in-one air monitoring station AirCube, which can also connect to Home Assistant
-
Fully open-source! DIY USB ammeter tutorial using a microcontroller costing 0.7 yuan, getting started with hardware design, firmware development, and appearance modeling