ROS Summer School Courseware
They’re here! The courseware for the 2020 ROS Summer School has been packaged, and everyone can reply “Summer School” in the GuYueJu WeChat public account backend to obtain it~
PART
01
Getting to Know the Arduino Program Structure
We open the Arduino IDE to create a new Arduino program. The newly created Arduino program is always named “sketch”.
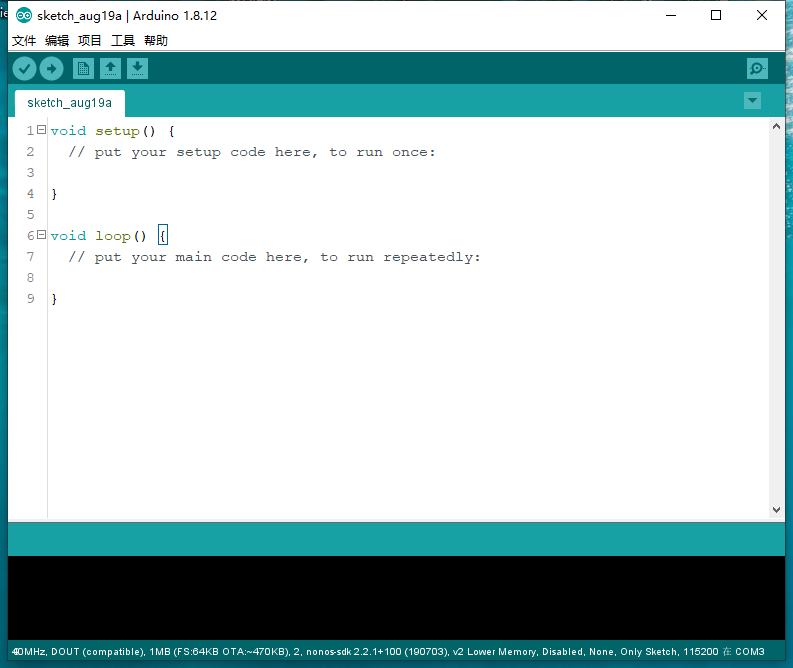
setup() function
void setup() {  // put your setup code here, to run once:
}
When the program starts, the setup() function will be called first. This function can be used to initialize variables, pin modes, enable libraries, etc.
The setup() function will only start once after the board is powered on or reset.
loop() function
void loop() {  // put your main code here, to run repeatedly:
}
After the program starts and runs the setup() function, it will continuously execute the content of the loop() function. The loop() function can be executed continuously and precisely, and it is the essence of the Arduino program.
Question
At this point, some students may wonder: “Since Arduino is edited in C/C++, why isn’t it entering the main function?” Now I will analyze this for everyone.
In Arduino development, there is no main entry function like traditional C/C++ programs. In fact, the main function exists in the Arduino core library and is still the entry point of the program. The main.cpp file can be seen in the Arduino core library, and its content is as follows:
#include <Arduino.h>
// Declared weak in Arduino.h to allow user redefinitions.
int atexit(void (* /*func*/ )()) { return 0; }
// Weak empty variant initialization function.
// May be redefined by variant files.
void initVariant() __attribute__((weak));
void initVariant() { }
void setupUSB() __attribute__((weak));
void setupUSB() { }
int main(void){        init();
        initVariant();
#if defined(USBCON)        USBDevice.attach();#endif
        setup();
        for (;;) {                loop();                if (serialEventRun) serialEventRun();        }
        return 0;}
PART
02
Understanding Arduino Data Types
| Data Type | Bytes | Value Range | Remarks |
| void | None | None | void (empty) is only used for function declarations, indicating no return value |
| bool | 1 | true/false | |
| char | 1 | -128~127 | char in Arduino is signed (can be positive or negative), equivalent to signed char. char is often used to store ASCII characters. If you want to store data, it is recommended to use byte type. |
| unsigned char | 1 | 0~255 | Unsigned character (only positive values) |
| byte | 1 | 0~255 | In Arduino, the byte type is different from the byte type in C/C++; it is unique to Arduino and is actually an unsigned 8-bit integer. |
| int | 2 | -32768~32767 | The ESP8266EX CPU is a Tensilica L106 32-bit processor, so it occupies 4 bytes in ESP8266EX. |
| unsigned int | 2 | 0~65535 | |
| word | 2 | 0~65535 | |
| long | 4 | -2147483648~2147483647 | |
| unsigned long | 4 | 0 ~ 4,294,967,295 | |
| short | 2 | -32768~32767 | |
| float | 4 | -3.4028235E+38~3.4028235E+38 | Only 6~7 decimal places of precision |
| double | 4 | -3.4028235E+38~3.4028235E+38 | Higher precision than FLOAT |
| string | Equivalent to an array of char types, but has significant differences from the String class in C/C++ |
PART
03
Understanding Arduino Variables and Constants
-
In Arduino, the declaration of variables
Example: int a = 0;
The declaration of a variable is in the format: type variableName = value;.
Note: The first letter of the variable name cannot be a digit.
The scope of a variable is called its scope, which is related to where the variable is declared. It can generally be divided into the following two types:
-
Global variables: Add extern before the type to declare it as a global variable, which can be used throughout the program.
-
Local variables: If a variable is defined within braces, it is a local variable, and its scope is limited to within those braces.
-
In Arduino, the declaration of constants
Example: const int a = 0;
The declaration of a constant is in the format: const type variableName = value;.
Note: Once we declare a constant, we cannot assign a value to it again.
In Arduino, we can also define constants using the macro definition #define.
I prefer to use #define for definitions.
PART
04
Understanding Arduino Operators
Question
| = | Assignment operator | variable=expression | a=3, assigns the value 3 to a; |
| /= | Division assignment | variable/=expression | a/=3, i.e., a=a/3; |
| *= | Multiplication assignment | variable*=expression | a*=3, i.e., a=a*3; |
| %= | Modulus assignment | variable%=expression | a%=3, i.e., a=a%3; |
| += | Addition assignment | variable+=expression | a+=3, i.e., a=a+3; |
| -= | Subtraction assignment | variable-=expression | a-=3, i.e., a=a-3; |
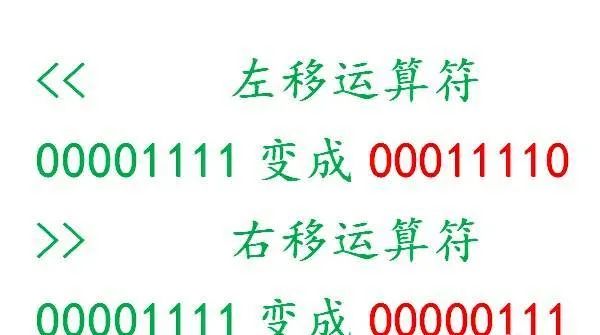
| <<= | Left shift assignment | variable<<=expression | Left shift means to shift all bits of the number on the left side to the left by a specified number of bits, with high bits discarded and low bits filled with 0; shifting by n bits is equivalent to multiplying by 2 to the power of n; |
| >>= | Right shift assignment | variable>>=expression | The right shift operator is used to shift the bits of a number to the right by a specified number of bits, specified by the right operand (the right operand must be non-negative). The low bits that move to the right are discarded, and for unsigned numbers, high bits are filled with 0; for signed numbers, some machines fill the empty parts on the left with the sign bit (i.e., “arithmetic shift”), while others fill with 0 (i.e., “logical shift”); |
| &= | Bitwise AND assignment | variable&=expression | Bitwise AND means performing a “AND” operation on two data items at the binary level. If both corresponding bits are 1, the result is 1; otherwise, it is 0; formula: 0 yields 0 |
| ^= | Bitwise XOR assignment | variable^=expression | Two quantities participating in the operation are XORed according to the corresponding bits, with 0^0→0, 0^1→1, 1^0→1, 1^1→0. Moreover, a number XORed with 0 remains unchanged, i.e., a^0=a, and a number XORed with itself yields 0, i.e., a^a=0; formula: different yields 1 |
| |= | Bitwise OR assignment | variable|=expression | The two quantities participating in the operation are ORed according to the corresponding bits, with 0|0→0, 0|1→1, 1|0→1, 1|1→1. formula: 1 yields 1 |
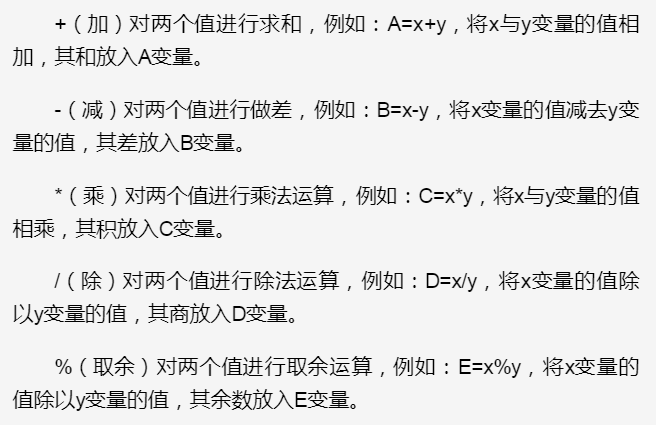
Arithmetic Operators
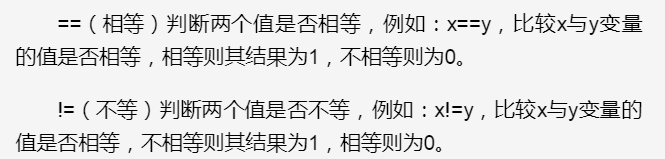
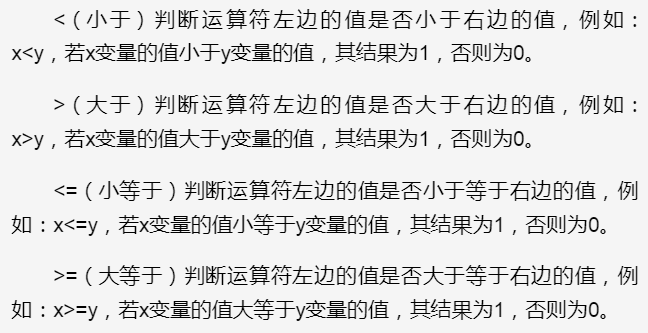
Relational Operators
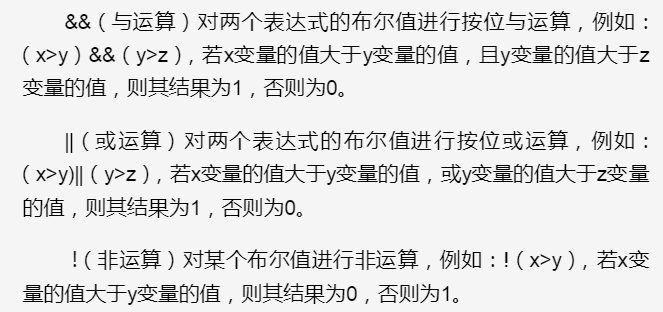
Logical Operators
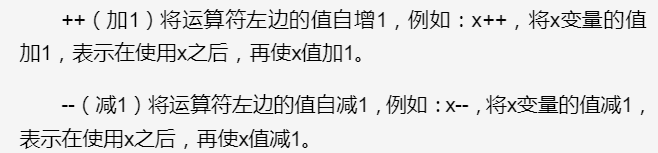
Increment and Decrement Operators
PART
05
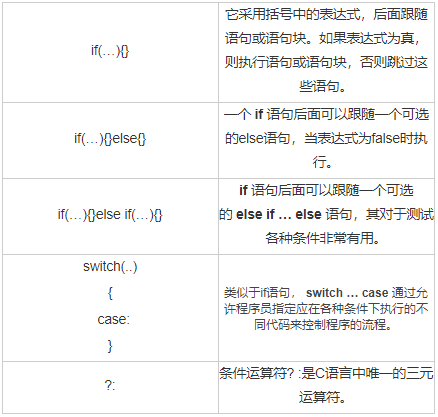
Understanding Arduino Control Statements
PART
06
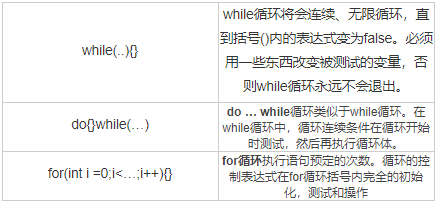
Understanding Arduino Loops
PART
07
Understanding Arduino Strings
In Arduino, a string is of char type. A string is an array of char variables. A string is a special array that has an extra element at the end, which is always set to ‘\0’ (zero). This is called an “null-terminated string”.
String Example
void setup() { char str[6]; // Create a char string of size 6 Serial.begin(9600); // Open the serial port at 9600 baud str[0] = 'H'; str[1] = 'e'; str[2] = 'l'; str[3] = 'l'; str[4] = 'o'; // Although we haven't assigned a null-terminated string to the array, the last element will default to a \0 Serial.println(str); // Print to the serial monitor }Hellovoid setup() { char str[] = "Hello"; Serial.begin(9600); Serial.println(str);}Output Example:
Hello
Since we can assign values, we can also modify the corresponding characters
Example:
void setup() { char str[] = "Hello"; // create a string Serial.begin(9600); Serial.println(str); str[0] = 'n'; str[1] = 'i'; str[2] = 'h'; str[3] = 'a'; str[4] = '0'; Serial.println(str);}nihao
PART
08
Conclusion

Limited time discount on the course! Scan to view:

 Click “Read the Original”