The accuracy of imaging examinations largely depends on imaging quality. Using the appropriate probe and making the right adjustments to the equipment during ultrasound examinations can enhance image quality, making our scans more efficient and increasing diagnostic accuracy. In this issue, we will delve into optimizing images, including probe selection and scan condition adjustments.

For an examiner, the probe is like selecting the right surgical knife during surgery. When performing ultrasound examinations, it is necessary to choose the appropriate probe based on the animal’s body type and the area being scanned. So, what is an ultrasound probe, and how should it be selected?

What Is an Ultrasound Probe?
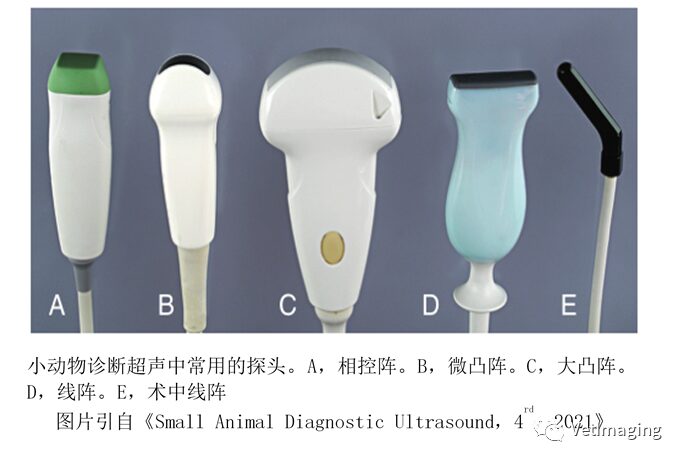
The ultrasound probe is a crucial component of ultrasound diagnostic devices. It converts electrical signals into ultrasound signals and vice versa, thus having both emission and reception functions. The probe typically consists of six parts: transducer (crystal), acoustic lens, motor lead, backing material, acoustic insulation layer, and outer casing.


Probes can be classified based on the arrangement of crystals into: micro-convex array, linear array, phased array, and large convex array. (The image below E shows a linear array used in surgery, which we will not discuss here.)
How to Select a Probe?
To know how to select a probe, one must first understand the characteristics and advantages and disadvantages of each probe.
Micro-Convex Array
The small radius curved array (micro-convex array) is the best general-purpose probe for abdominal imaging in small animal medicine (most frequently used). They have a very small contact area and a relatively wide frequency range (e.g., 5-12MHz).
Disadvantages: Low near-field resolution, far-field divergence.
Note: For small dogs, cats, and puppies, when scanning structures with a small contact area with the skin, a distance pad can be used.
Large Convex Array
Large convex arrays are typically medium to low frequency (e.g., 1-8MHz) and are used for abdominal organ examinations in larger animals. Compared to micro-convex arrays, large convex arrays have a larger near-field view, but the downside is that they require a larger contact area with the skin.
Linear Array
Linear array probes come in various sizes and frequency ranges, characterized by the highest scanning frequency (e.g., 6-18MHz or higher), providing the largest near-field image (equal to the length of the probe). They are generally used for superficial organs (e.g., thyroid, mammary glands, penis, testicles) and for scanning abdominal organs in small dogs and cats.
Disadvantages: Linear array probes require a larger contact area compared to convex array probes, making it difficult to scan beneath the sternum or between the ribs..
Phased Array
Phased array beams can focus in different directions at various levels, have a small contact area, and a wide field of view. Phased array probes are typically designed for cardiac applications, providing the high frame rates (100HZ) needed for critical assessments and a small volume required for intercostal procedures. These probes can also provide continuous wave (CW) ultrasound (which will be detailed later) for evaluating hemodynamic indicators.


Selecting the appropriate probe based on different situations is a prerequisite, and subsequently, suitable parameters need to be adjusted based on the organs being examined. Next, we will introduce parameter adjustments that significantly impact overall image quality but are often overlooked by clinicians. These parameters can usually be pre-set and do not need to be adjusted for every scan.


Dynamic Range
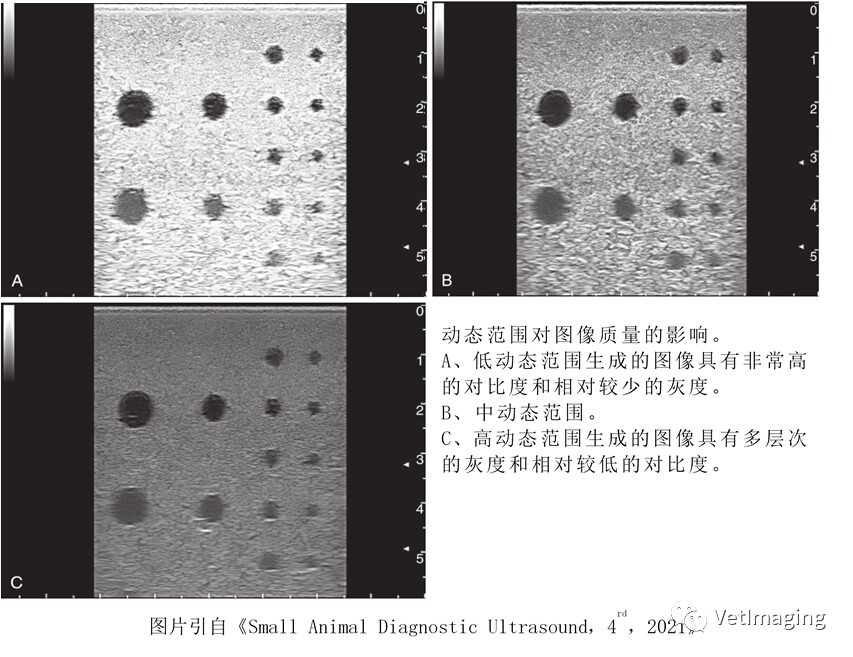
The difference between the weakest and strongest echo intensity is called dynamic range, which is the amount of compression of the wide amplitude of echoes, usually expressed in decibels (dB). It affects the contrast of the ultrasound image to some extent.
A high dynamic range can produce softer images with more gray levels, while a low dynamic range can produce images with fewer gray levels but better contrast. During cardiac ultrasound examinations, a narrower dynamic range (suitable for 30dB or 40dB) is usually adopted to display myocardial edges better; in abdominal imaging, a larger dynamic range (70dB) is generally used for more gradations of gray.
Gray Scale Map
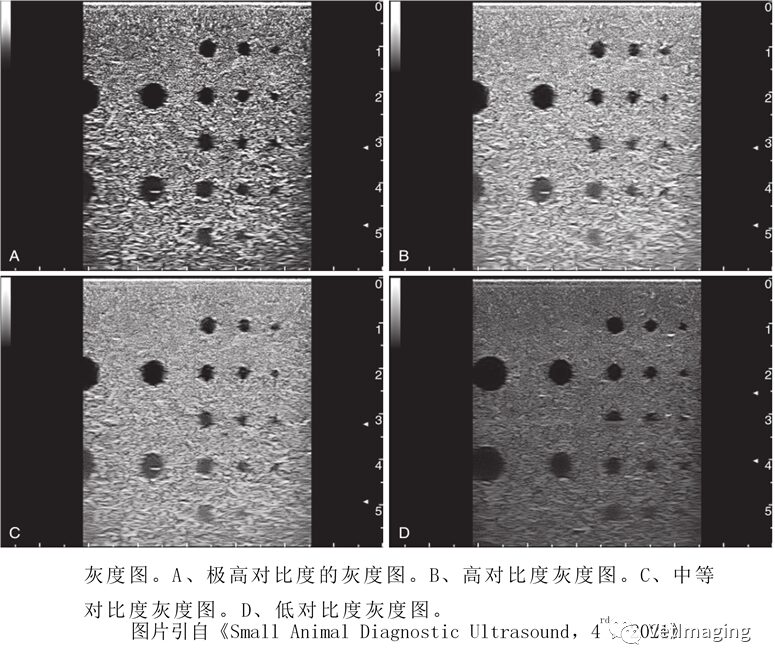
The number of gray tones represents the gradation of gray between black and white on the image.
Similar to dynamic range, a higher gray scale has lower contrast, more gray levels, suitable for abdominal imaging. A lower gray scale has higher contrast, suitable for cardiac and musculoskeletal imaging..

In the next issue, we will introduce parameters that need to be adjusted based on the organs being examined and the areas of interest during ultrasound examinations.
END
Zhang Xu
Practicing Veterinarian