Reminder: This chapter mainly covers how to publish and subscribe to MQTT topics via web services, thereby controlling the faucet. It also includes the assembly and testing of faucet components.
1. Design Requirements
Any third-party device can access the web page to control the faucet.
Graphical interactive interface.
The web access is provided by the server and does not run on the ESP32.
(1) How to Provide Web Services via Python:
1. Choose the Right Framework
The Python community offers various web frameworks for quickly developing web services, including but not limited to Flask, Django, and FastAPI. Each framework has its characteristics:
Flask: Lightweight, flexible, and easy to use, suitable for small to medium projects.
Django: A full-featured framework with built-in ORM, template engine, routing system, etc., suitable for large projects.
FastAPI: A modern, fast (high-performance) web framework that uses Python 3.6+ type hints and supports asynchronous programming.
For a simple web service, Flask is a good choice. Below are the steps to create a web service using Flask.
2. Install Flask
pip install FlaskUse pip to install Flask.
3. Create Your First Web Service
After installation, you can create a Python file to write your web service. For example, create a file named app.py and add the following content:
from flask import Flask
app = Flask(__name__)
@app.route('/')
def home():    return "Welcome to my web service!"
if __name__ == '__main__':    app.run(debug=True)
In this simple example, we import the Flask class, create a Flask application instance, and define a route / that triggers the home function and returns a welcome message when accessed.
4. Run the Web Service
After saving the file, you can start the service by running the following command:
python app.pyIf everything is set correctly, you should see terminal output indicating that the service is running on port 5000 of localhost. You can now access http://127.0.0.1:5000/ in your browser and see the returned welcome message.
5. Extend the Web Service
Flask provides rich features to help you extend the service, including handling different types of requests, accessing request data, and returning responses in different formats. For instance, you can add a new route to handle POST requests and return a JSON response:
from flask import Flask, jsonify, request
@app.route('/data', methods=['POST'])
def get_data():    data = request.json    return jsonify(data), 200
The code snippet above demonstrates how to obtain a JSON formatted request body and return it directly as a JSON response to the client.
(2) Provide a Web Page via Python’s Web Service and Send POST Requests
1. Create Flask Application
Create an app.py file with the following code:
from flask import Flask, render_template
app = Flask(__name__)
@app.route('/')
def index(): return render_template('index.html')
@app.route('/say-hello', methods=['POST'])
def say_hello(): return "Hello", 200
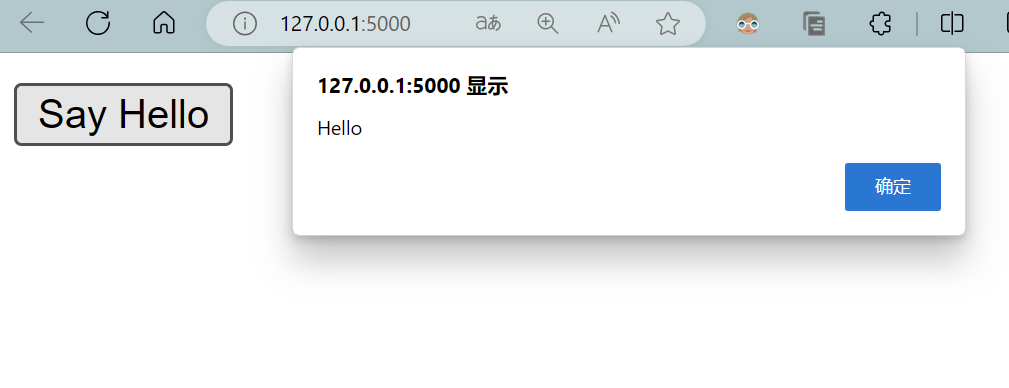
if __name__ == '__main__': app.run(host='0.0.0.0', port=5000, debug=True)3. Create HTML Web Page
Create a folder named templates in your Flask application directory. In that folder, create a new HTML file index.html:
<!DOCTYPE html><html lang="en"><head> <meta charset="UTF-8"> <title>Python Web Button</title> <script> function sendRequest() { fetch('/say-hello', { method: 'POST' }) .then(response => response.text()) .then(data => alert(data)); } </script></head><body> <button onclick="sendRequest()">Say Hello</button></body></html>In this HTML file, we create a button that, when clicked, calls a JavaScript function named sendRequest. This function uses the fetch API to send a POST request to the /say-hello path and displays the response from the server using an alert.
2. Faucet Web Control Code
Combining the above code, we can obtain:
from flask import Flask, render_template, request, redirect, url_for
import paho.mqtt.client as mqtt
app = Flask(__name__)
# MQTT Configuration
MQTT_BROKER_URL = "192.168.3.222"  # Replace with your MQTT broker address
MQTT_BROKER_PORT = 1883  # Replace with your MQTT broker port, usually defaults to 1883
MQTT_TOPIC = "slt"  # Replace with the topic you want to publish

# Create MQTT client instance
mqtt_client = mqtt.Client()
# Connect to MQTT broker
mqtt_client.connect(MQTT_BROKER_URL, MQTT_BROKER_PORT, 60)
@app.route('/')
def index():    return render_template('index.html')
@app.route('/publish/<message>')
def publish_message(message):    mqtt_client.publish(MQTT_TOPIC, message)    return redirect(url_for('index'))
if __name__ == '__main__':    app.run(host='0.0.0.0', port=5000, debug=True)
Below is a detailed explanation of the code:
from flask import Flask, render_template, request, redirect, url_for
import paho.mqtt.client as mqtt
Flask: The main class of the Flask framework used to create a web application instance.
render_template: A Flask function used to render HTML template files.
request: An object that contains request data, which is not used here.
redirect: A Flask function used to redirect the client to another URL.
url_for: A Flask function used to generate URLs within the application.
paho.mqtt.client: A module from the paho-mqtt library used to communicate with the MQTT broker.
MQTT_BROKER_URL = "192.168.3.222"
MQTT_BROKER_PORT = 1883
MQTT_TOPIC = "slt"
mqtt_client = mqtt.Client()
mqtt_client.connect(MQTT_BROKER_URL, MQTT_BROKER_PORT, 60)
Setting the address, port of the MQTT broker, and the topic you want to publish messages to. This information is used to connect to the MQTT server and specify the target for message publishing.
Create a paho-mqtt client instance and connect it to the configured MQTT broker. 60 is the timeout for maintaining the connection, in seconds.
@app.route('/')
def index():    return render_template('index.html')
This defines a route / that is associated with the index view function. When users access the root address of the web application, this view function responds and returns the content of the index.html template file through the render_template function.
@app.route('/publish/<message>')
def publish_message(message):    mqtt_client.publish(MQTT_TOPIC, message)    return redirect(url_for('index'))
This defines a route /publish/ that is associated with the publish_message view function. This function receives the message parameter, which is a dynamic part of the URL path. When this route is accessed, it calls the mqtt_client.publish method to publish the received message to the pre-configured MQTT topic. After publishing the message, it uses the redirect function to redirect the client back to the homepage.
if __name__ == '__main__': app.run(host='0.0.0.0', port=5000, debug=True)This part checks if the script is being run as the main program (and not imported as a module). If so, it will start the Flask application. host=’0.0.0.0′ tells Flask to be visible on the network, meaning any device can access the application via your computer’s IP address. port=5000 specifies the port on which the service runs. debug=True enables debug mode, allowing detailed debugging information to be displayed on the webpage when errors occur during development.
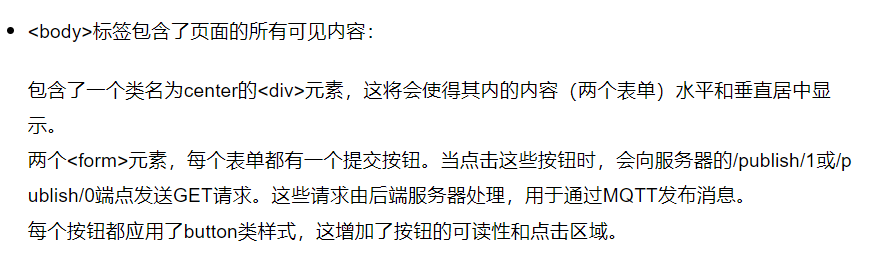
<!DOCTYPE html><html lang="en"><head> <meta charset="UTF-8"> <meta name="viewport" content="width=device-width, initial-scale=1.0"> <title>MQTT Control Panel</title> <style> .center { display: flex; justify-content: center; align-items: center; height: 100vh; } .button { font-size: 18px; padding: 10px 20px; margin: 0 10px; } </style></head><body> <div class="center"> <form action="/publish/1" method="get"> <button class="button" type="submit">Open</button> </form> <form action="/publish/0" method="get"> <button class="button" type="submit">Close</button> </form> </div></body></html>This HTML code defines a basic webpage structure for creating a control panel with two buttons for “Open” and “Close”. These buttons interact with the backend Flask application by sending GET requests to /publish/1 and /publish/0 for MQTT message publishing. Below is an analysis of each part of this HTML code:

The .center class uses Flexbox layout to center the content within the container. The justify-content and align-items properties ensure that child elements are centered both horizontally and vertically, with height set to 100vh meaning the height will occupy 100% of the viewport. The .button class adds styles to the buttons, including font size, padding, and margin.
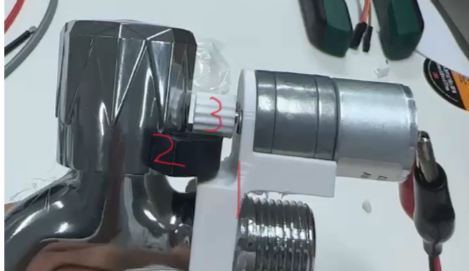
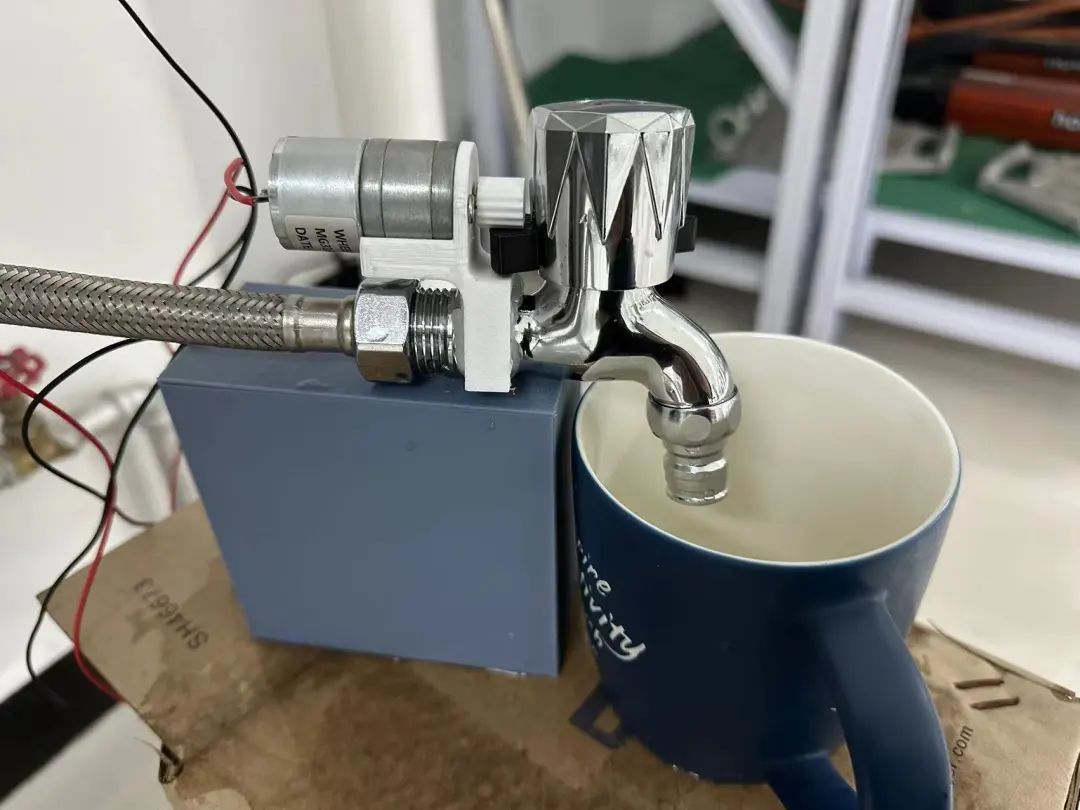
3. Mechanical Parts Installation
Installation Steps:
1. Install the motor bracket and motor, and secure it with two M2 screws.
2. Install the driven gear and faucet, and secure it with glue.
3. Install the drive gear and motor, simply tap it in (interference fit).
4. Fix the motor bracket to the back of the faucet, ensuring the drive wheel and driven gear mesh properly.
5. Power the motor and test if the faucet is driven correctly (ensure the driven gear is installed horizontally).
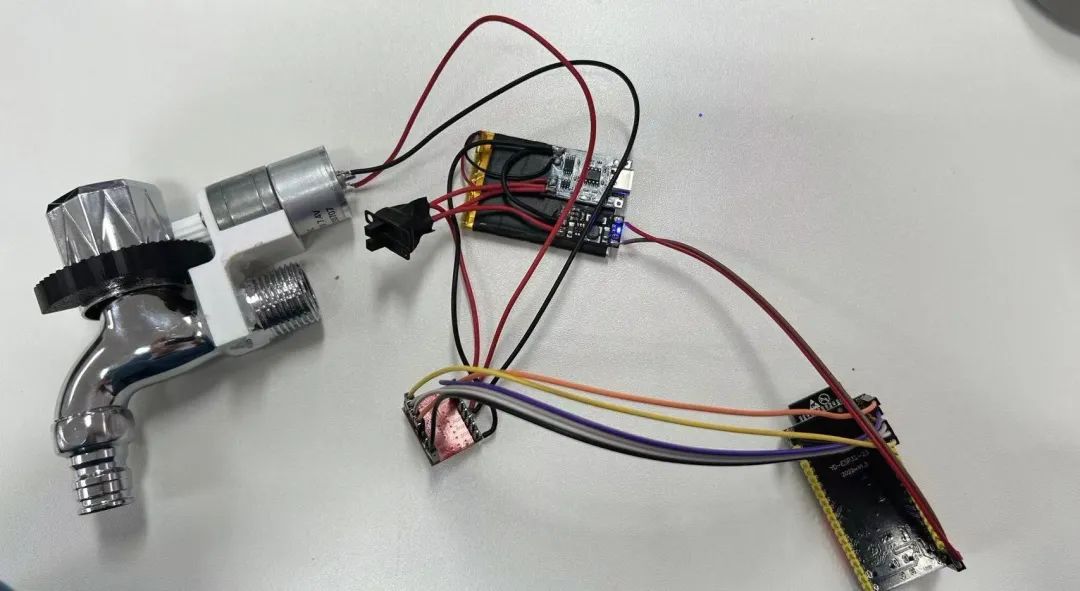
4. Circuit and Other Structure Assembly
1. Insulate and fix the circuit based on the circuit design and ESP32 program design in “Step-by-Step Guide to IoT Smart Faucet (Part 2)”.
(http://www.guyuehome.com/45420)
2. Secure the circuit within the device casing.
3. Connect the faucet to the water pipe.
5. Device Function Testing
Testing Steps:
1. Fix the MQTT server IP and the ESP32 IP.
2. Start the MQTT server, ensuring that the MQTT service is enabled. You can use the MQTT.fx tool for testing.
3. Start the client program and connect to the MQTT server.
4. Power on the IoT faucet.
5. Sequentially test the open, close, timing, and web control functions.

↑ Hot Course, Limited Time Discount Coupon! 🎉 Claim Now ↑