Hello everyone, I am Liang Xu.
This is the second article in the embedded series, and I plan to publish two articles per week on embedded topics in the future.
All of Liang Xu’s articles are exclusively published on: www.lxlinux.net/e/, feel free to bookmark it.
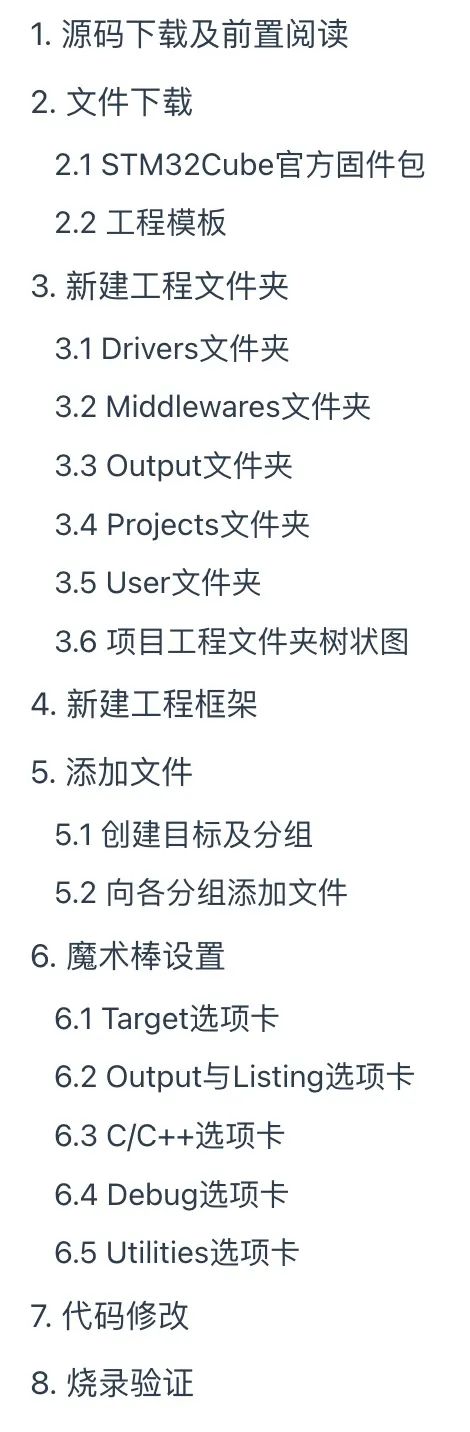
The outline of this article is as follows, please read on.
How to quickly develop STM32 projects? We cannot build a project from scratch every time, as that would be too inefficient.
Typically, we use a template project; when we need to develop a new project, we can take it out and add the corresponding modules and business code, and a project is completed.
However, for beginners, creating a project template can be a significant challenge. The process is very tedious; although not complicated, if any step is done incorrectly, all efforts will be in vain, and troubleshooting can be difficult.
This article will guide you step by step to create a HAL version MDK project template based on the STM32F103C8T6 chip. The article refers to tutorials from Keil and combines my own work experience. If you follow this tutorial, I believe you will be able to set up a HAL version MDK project template on your own.
1. Source Code Download and Preliminary Reading
If you still cannot create a HAL version MDK project template by following this tutorial, you can refer to the source files I have prepared for you.
The source code and the firmware package needed for this article have been prepared for you. You can add Liang Xu on WeChat to get it for free (note 1120):

If you do not know how to set up the STM32 programming environment or how to flash STM32 code, you can read this article:
[Getting Started with STM32 Development from Scratch (Step-by-Step Guide)]
2. File Download
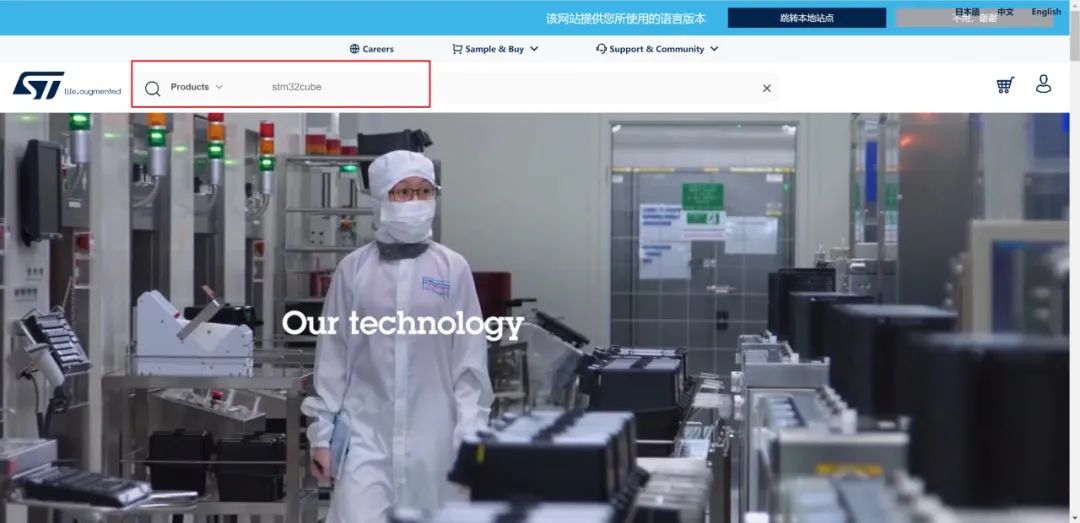
You can find the official firmware package by following these steps:
The STM32Cube official firmware package can be downloaded for free from ST’s official website, which is:
https://www.st.com/content/st_com/en.html
You can find the official firmware package by following these steps:
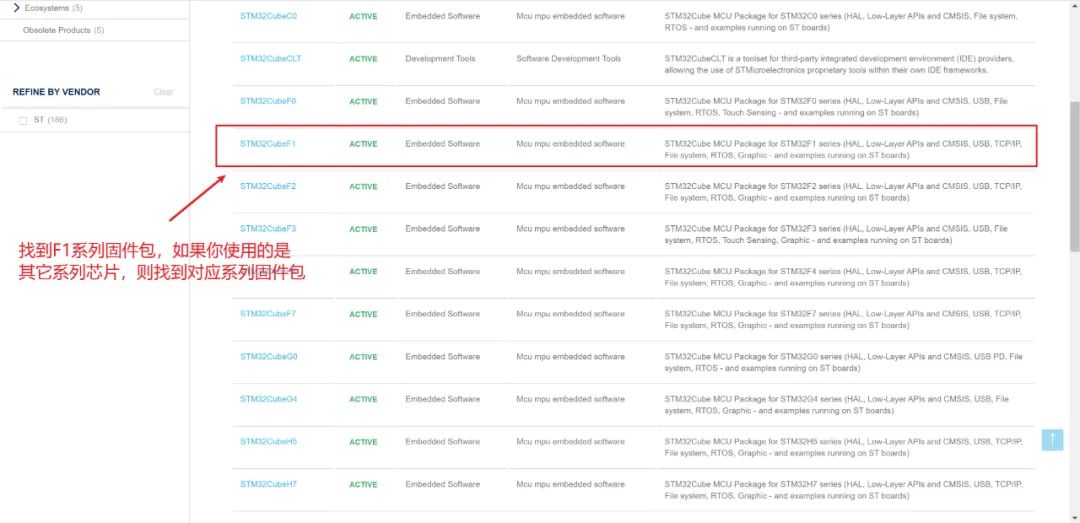
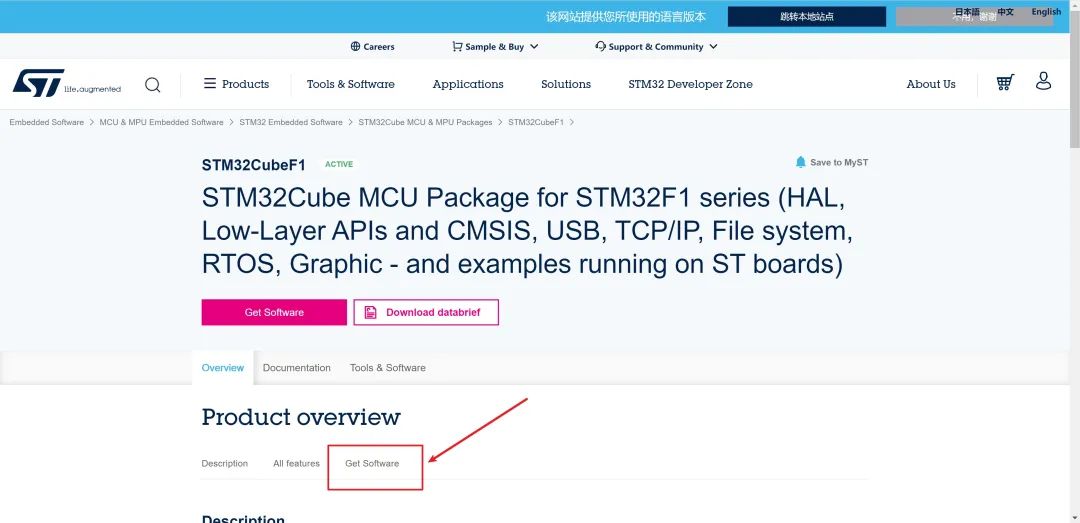
However, since the official website is abroad, the download speed is very slow, and various information needs to be filled out. Therefore, you can directly use the firmware package I provided, as it was also downloaded from the official website. The current latest version is V1.8.5.
3. Create Project Folder
Developing an STM32 project is not as simple as having one or two .c and .h files; it consists of dozens or even more files organized into a project.
First, create a folder in any location (for example, on the desktop) and name it stm32f103c8t6_template; of course, you can name it something else as well.
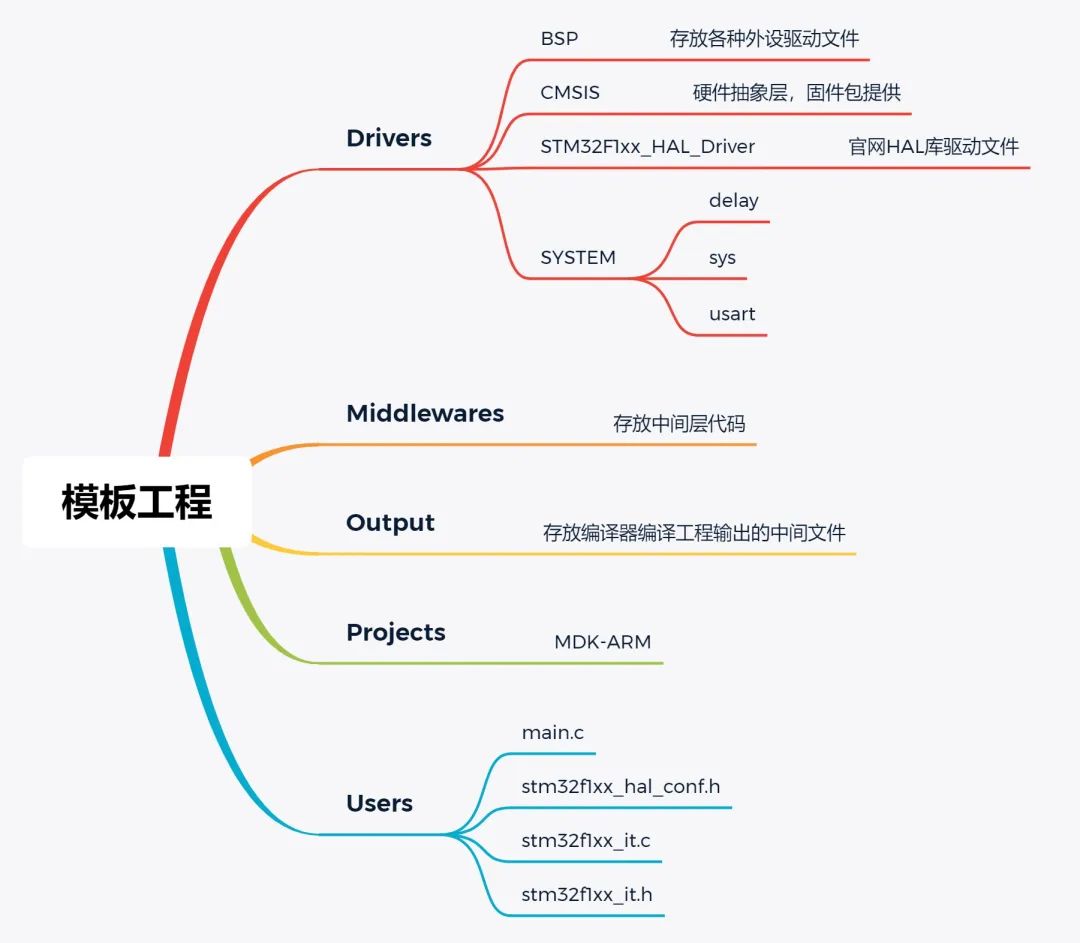
The created project template consists of the following 5 directories:
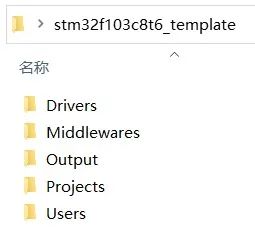
What are these 5 directories for? The specific functions are shown in the table below:
| Folder Name | Function |
|---|---|
| Drivers | Stores hardware-related driver layer files |
| Middlewares | Stores middleware files |
| Output | Stores project compilation output files |
| Projects | Stores MDK project files |
| User | Stores HAL library user configuration files, main.c, interrupt handling files, and scattered loading files |
Next, we will discuss what specific files should be placed in these 5 directories.
3.1 Drivers Folder
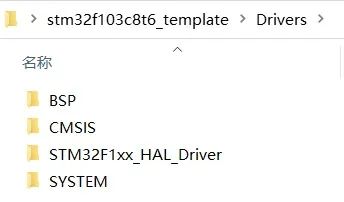
The Drivers folder contains 4 subfolders, which serve the following purposes:
| Folder Name | Function |
|---|---|
| BSP | Stores driver code for the development board’s board-level support package, such as various peripheral drivers |
| CMSIS | Stores CMSIS low-level code, such as startup files (.s files), etc. |
| SYSTEM | Stores system-level core driver code, such as sys.c, delay.c, and usart.c, etc. |
| STM32F1xx_HAL_Driver | Stores ST’s provided F1 series HAL library driver source code |
3.1.1 BSP Folder
The LED drivers, buzzer drivers, ESP8266 drivers, etc., that we usually write are placed in this directory.
However, since this is a project template, we will not consider these drivers for now, so this directory can remain empty until we need to add corresponding files for any peripherals later.
3.1.2 CMSIS Folder
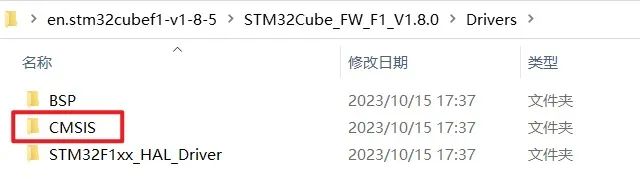
Download the firmware package provided by the official source, then navigate to the CMSIS directory as shown in the figure below.
However, this CMSIS directory is too large; we can simplify it by following these steps.
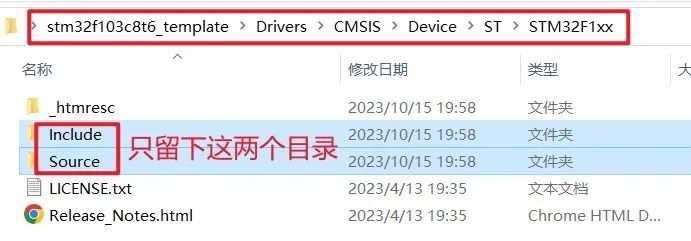

Additionally, you need to copy an Include directory under the CMSIS folder, but I don’t know where to get this directory. You can directly copy it from the template project I provided.
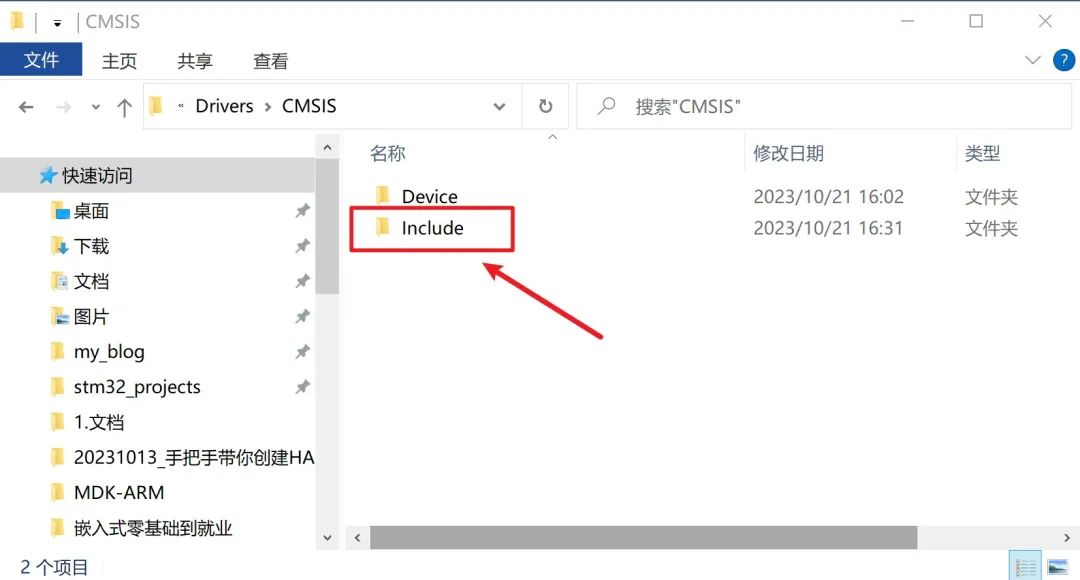
Alternatively, you can use STM32CubeMX to generate a project file and find the following files to copy over.
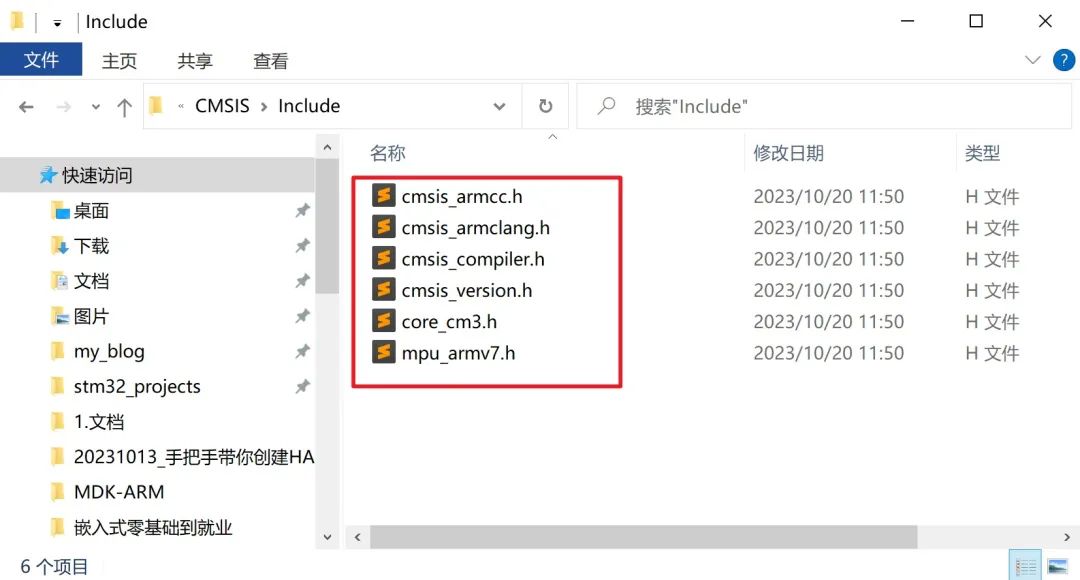
3.1.3 SYSTEM Folder
This folder mainly stores some commonly used system-level core driver codes, such as clock configuration, delay functions, serial ports, etc. These configurations are frequently used, so we don’t need to write them from scratch every time; we can reuse them directly.
Here, we will directly use the three module codes provided by Keil; there is no need to reinvent the wheel.
Find any Keil project (HAL version), and copy the entire SYSTEM folder into the Drivers directory.
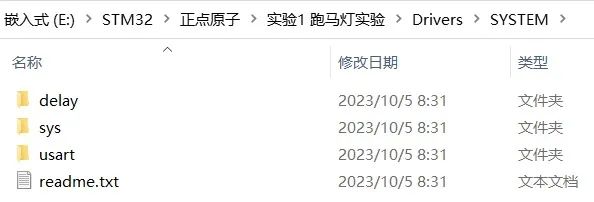
3.1.4 STM32F1xx_HAL_Driver Folder
ST’s HAL library driver source code is stored in this folder, which you can directly copy from the firmware package, located at:
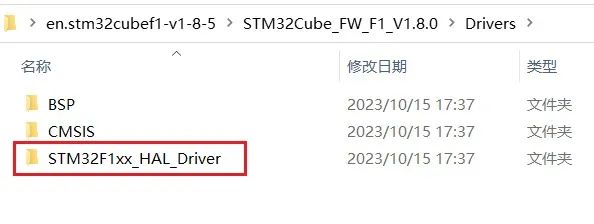
The version used here is V1.8.5, the latest version.
However, upon entering this directory, you will find many files. We need to delete the other contents, keeping only the Inc and Src folders.
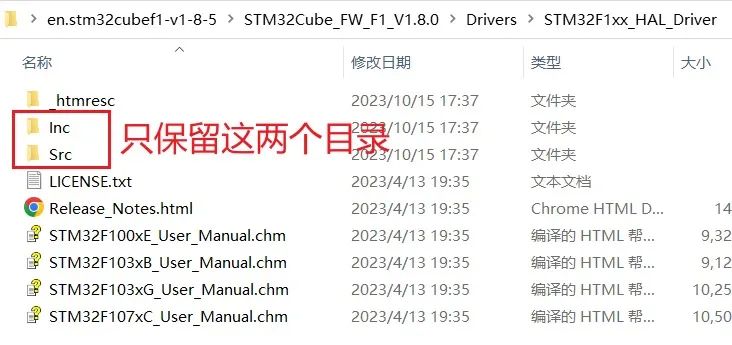
Thus, the drivers folder is fully processed, as shown in the image below:
3.2 Middlewares Folder
This folder mainly stores middleware code (components/Lib, etc.), such as FATFS, USB, LWIP, FreeRTOS, various GUI, etc. However, for the template project, we will not add these things for now, so the entire folder can remain empty.
3.3 Output Folder
This folder is used to store intermediate files output by the compiler, such as .hex, .bin, .o files, etc., so we do not need to actively place anything in it for now.
3.4 Projects Folder
This folder is used to store project files generated by the compiler. Different development tools produce different project files. Common development tools include MDK, IAR, etc. However, we most commonly use MDK, so we can create an MDK-ARM folder under this directory.
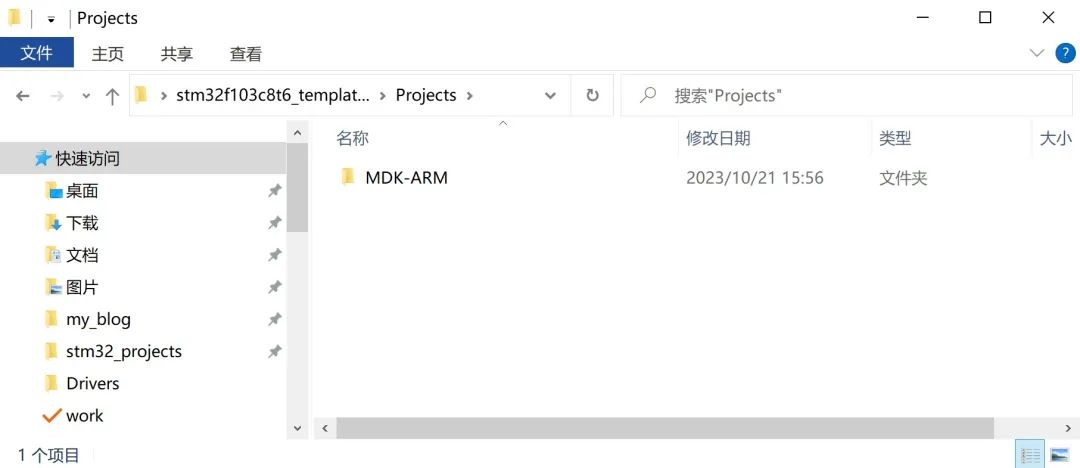
If you are using other development tools, just create the corresponding folder.
3.5 User Folder
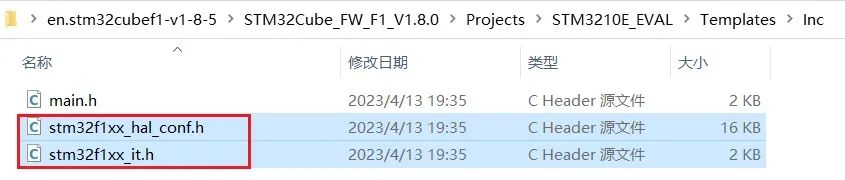
This folder is used to store user-written code, such as HAL library user configuration files, main.c files, interrupt handling files, and scattered loading files, etc.
In this folder, we need to copy the following three files:
3.6 Project Engineering Folder Structure
4. Create Project Framework
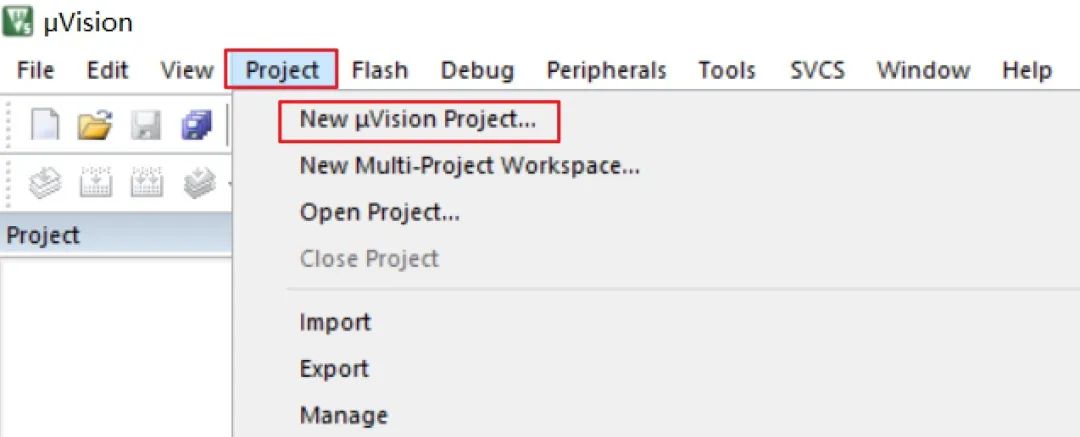
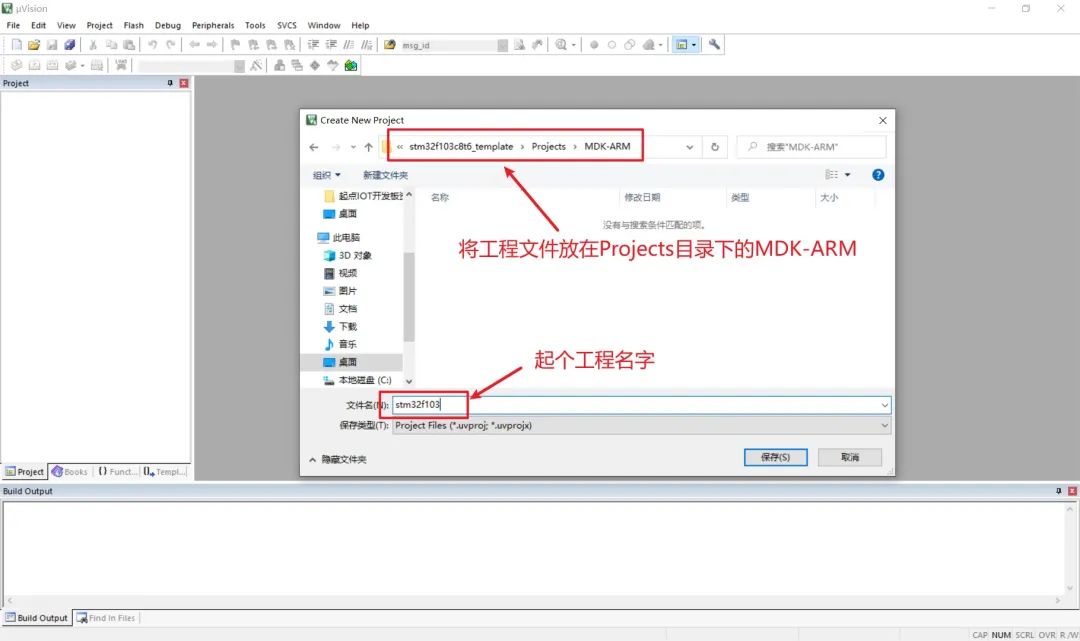
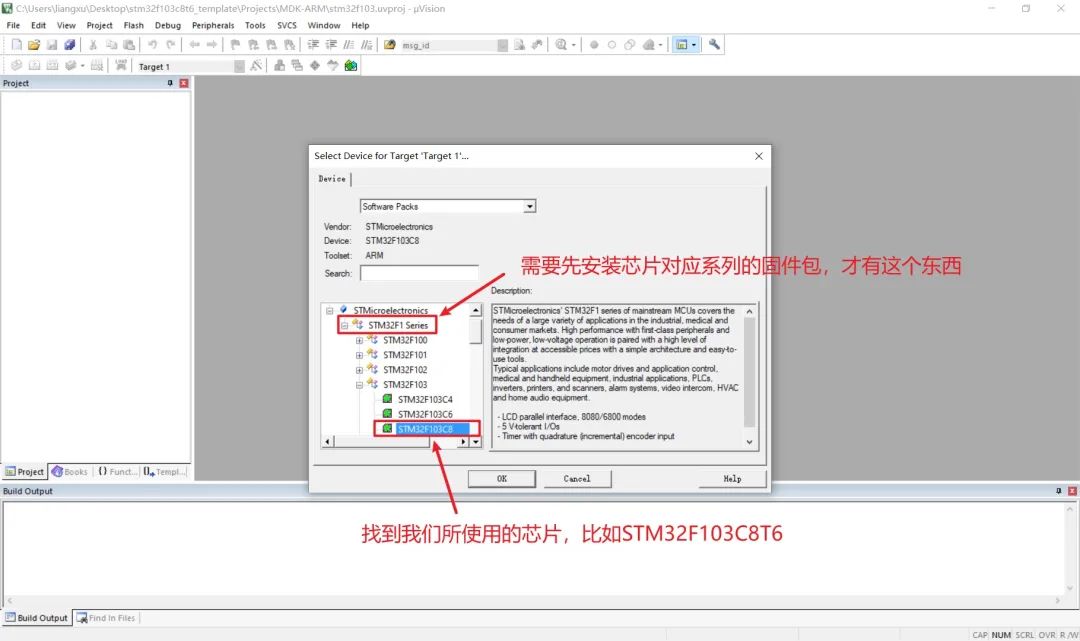
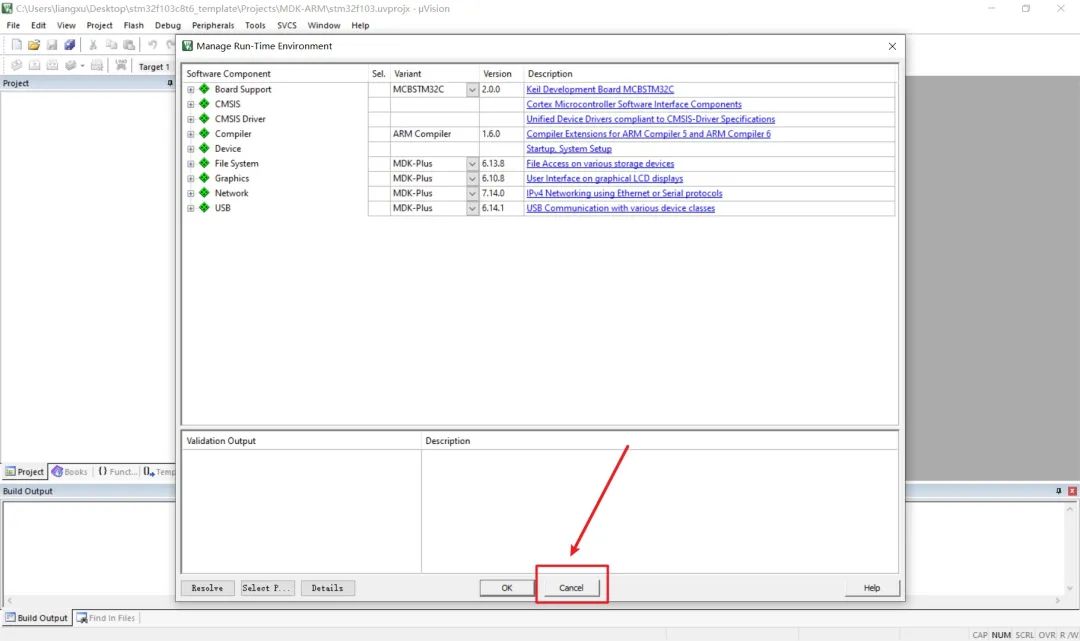
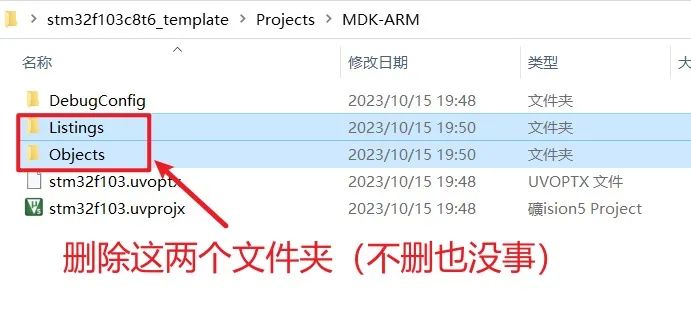
If you do not see the content in the red box in the image below, please read this article [Getting Started with STM32 Development from Scratch (Step-by-Step Guide)] and install the STM32F1 series firmware package properly.
5. Add Files
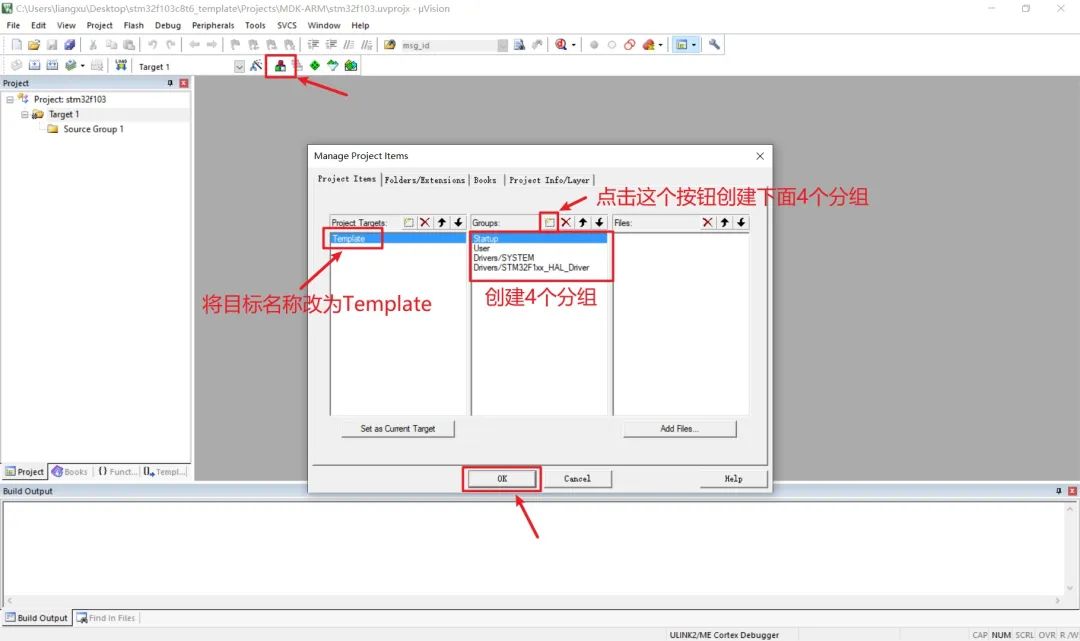
5.1 Create Targets and Groups
5.2 Add Files to Each Group
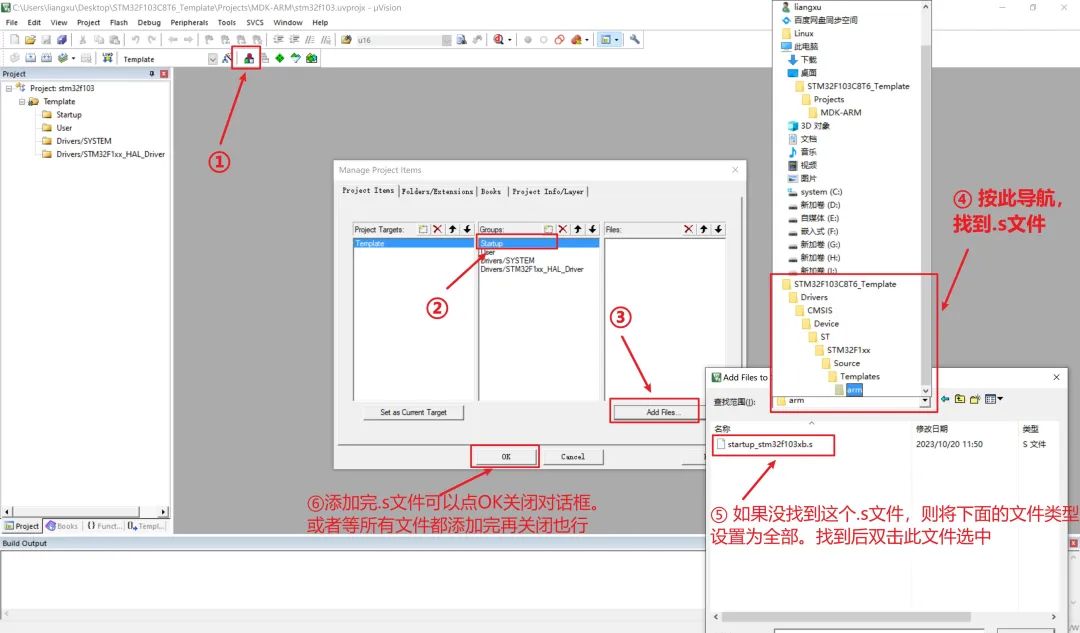
5.2.1 Add Startup Group Files
5.2.2 Add User Group Files
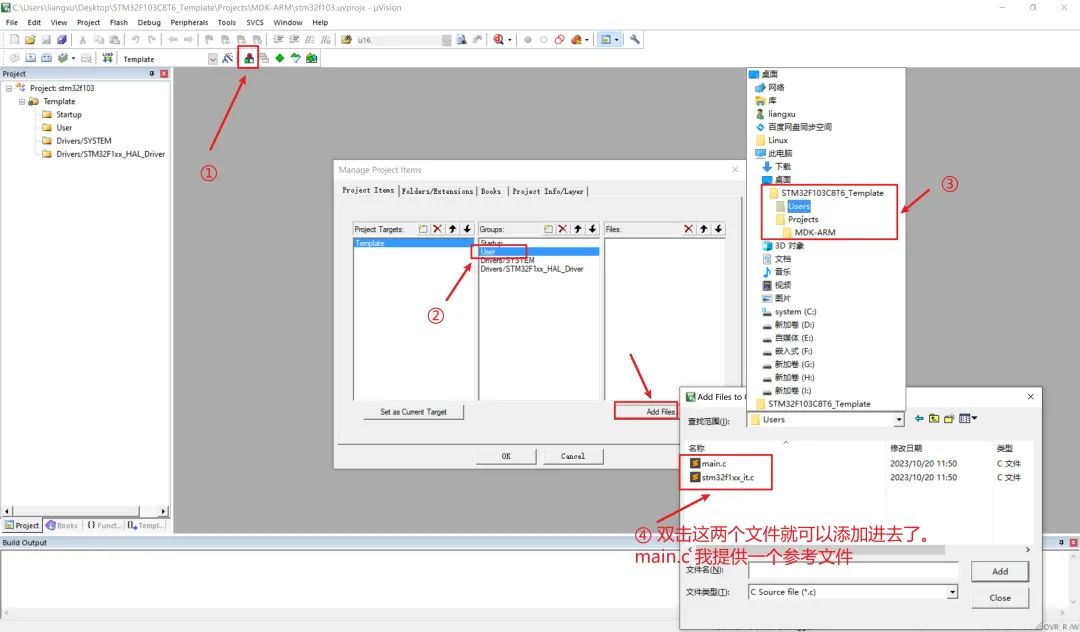
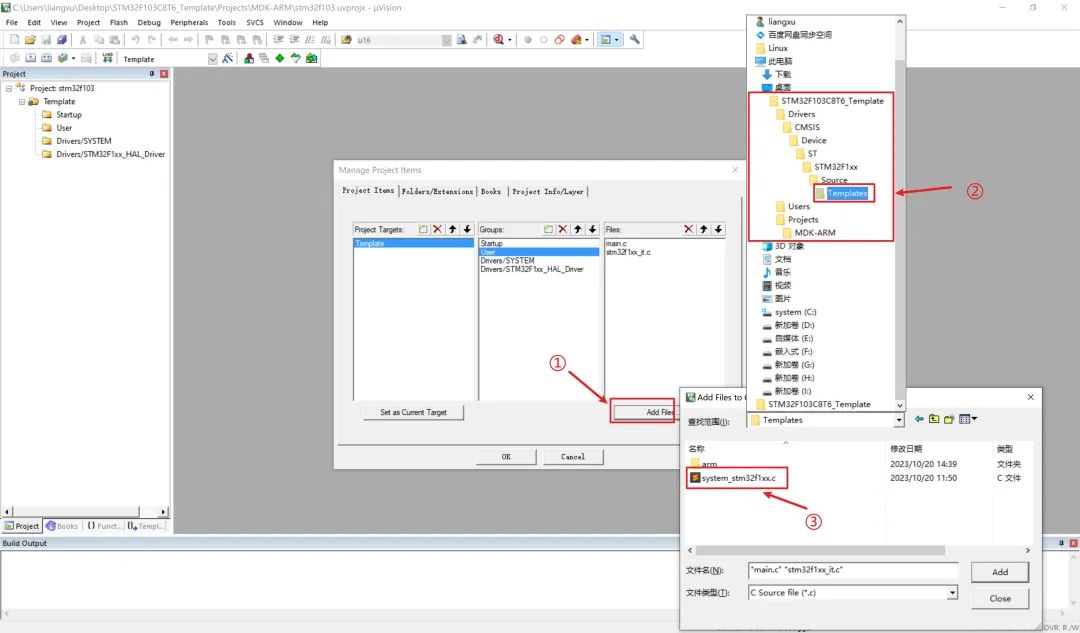
5.2.3 Add SYSTEM Group Files
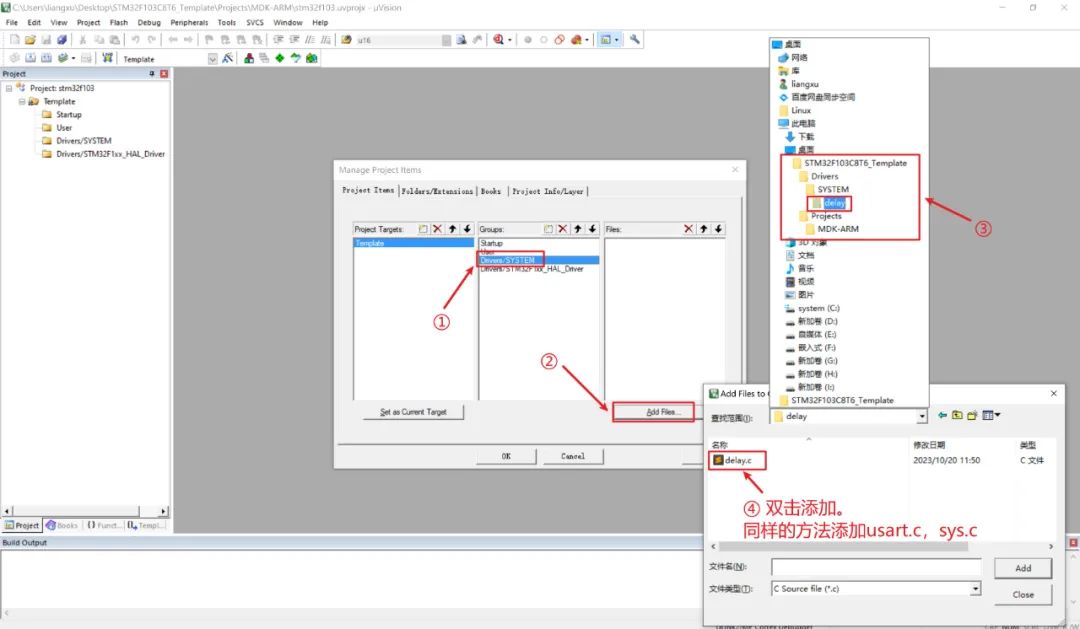
5.2.4 Add Driver Files
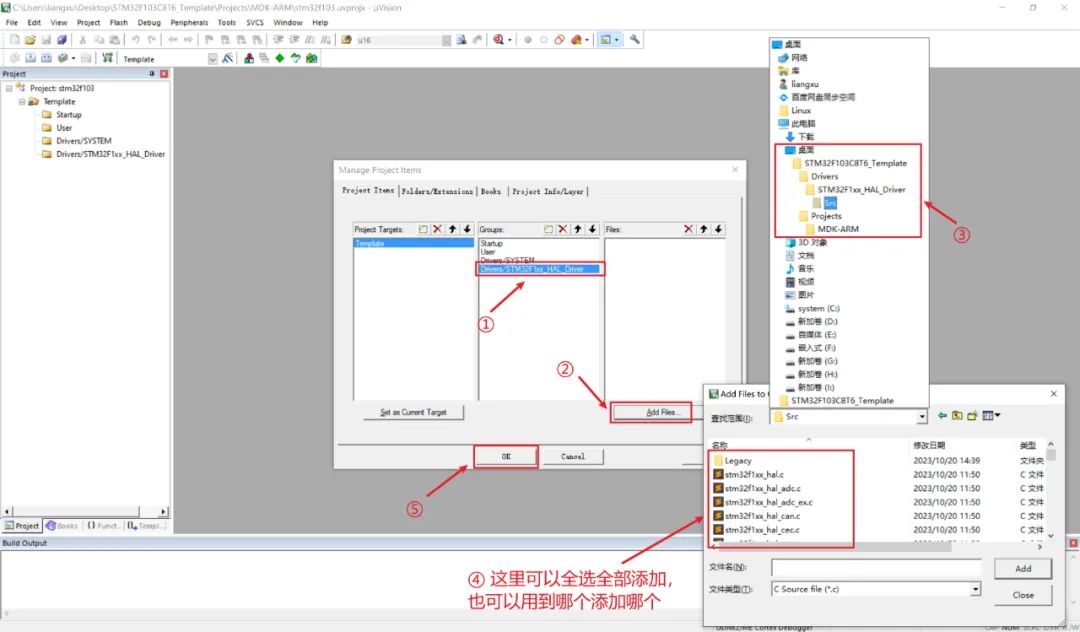
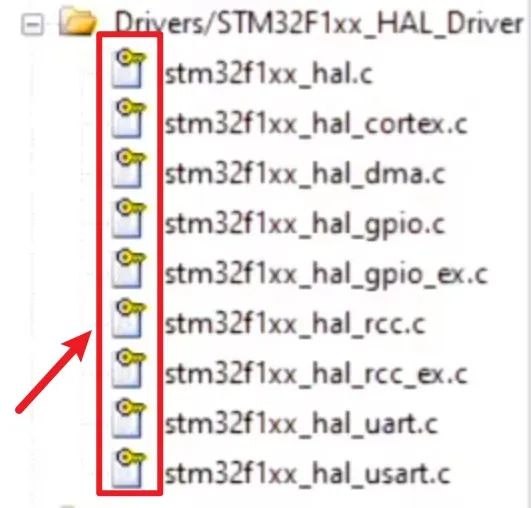
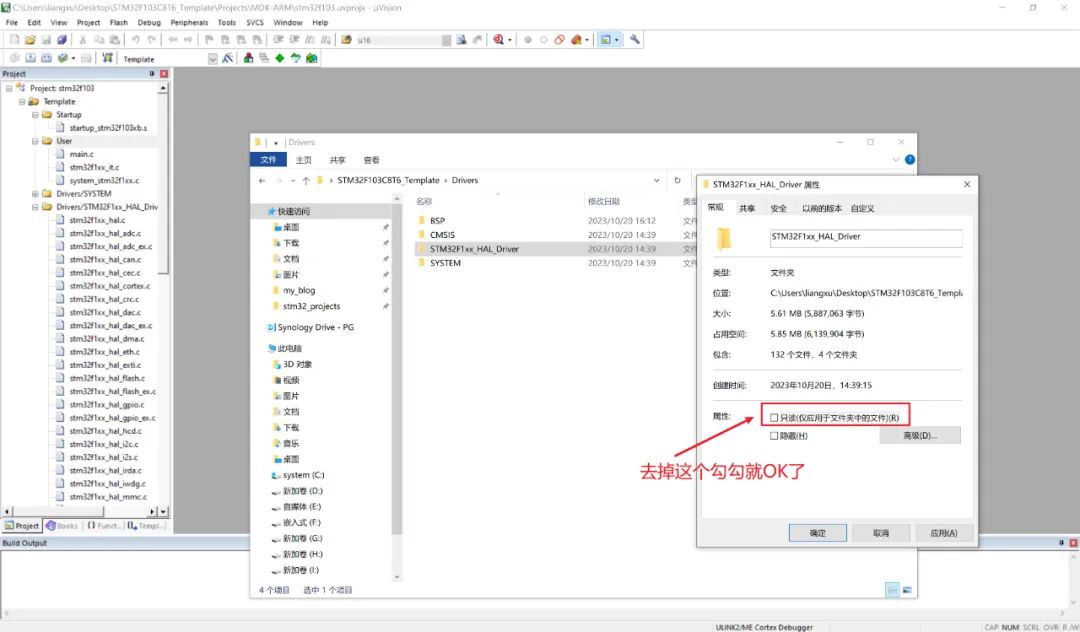
At this point, all files have been added. However, you will notice that there is a small key icon in front of the driver files, as shown in the image below:
This is because the official firmware package files are set to read-only. We just need to follow the method in the image below to uncheck the read-only option.
6. Magic Wand Settings
6.1 Target Tab
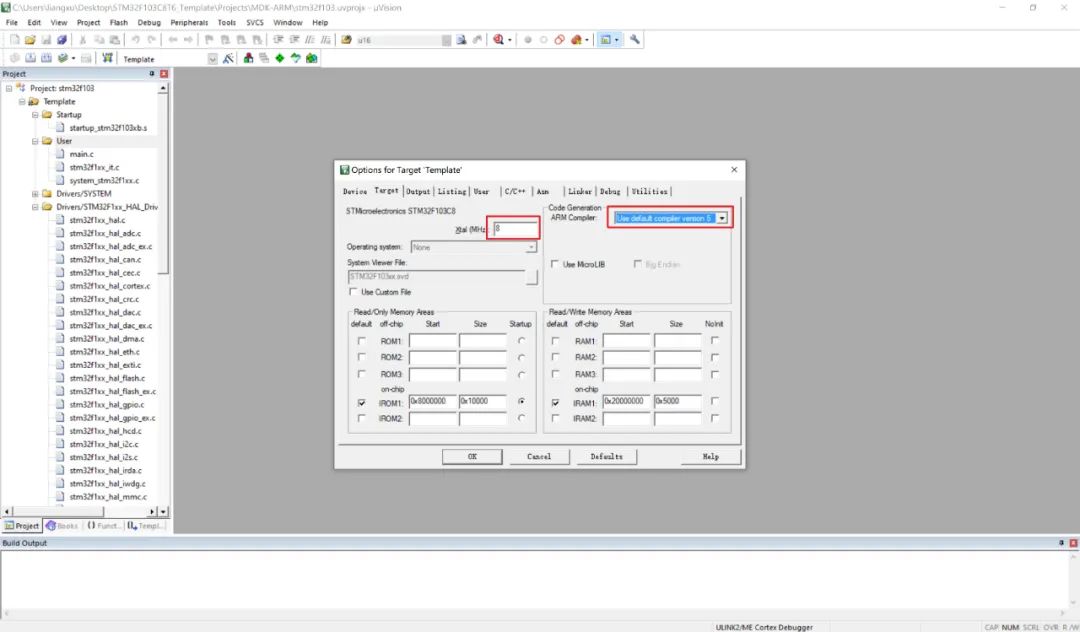
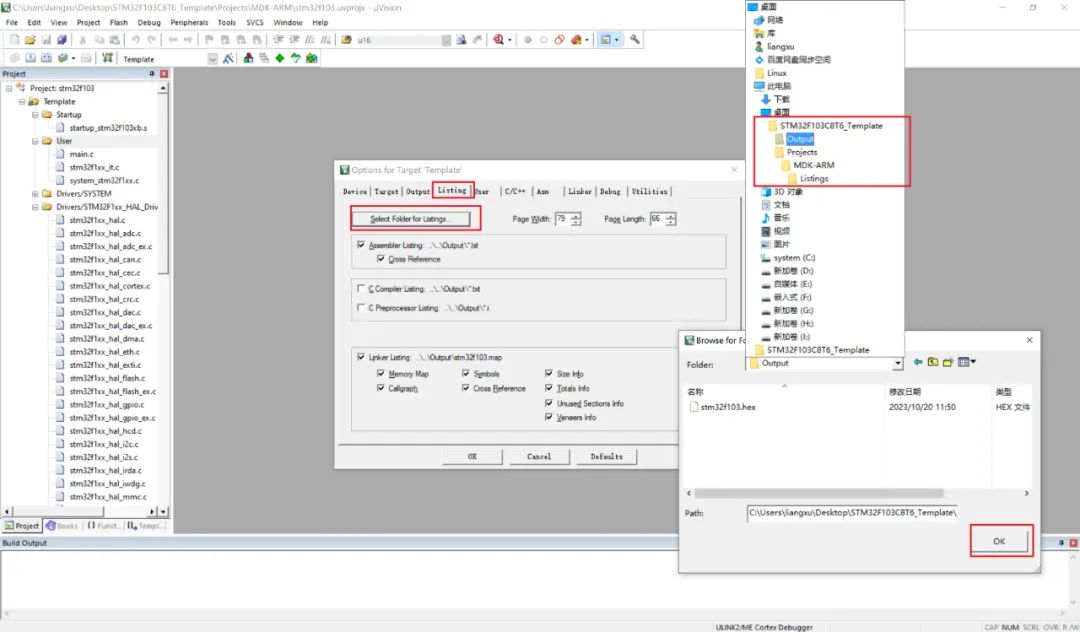
6.2 Output and Listing Tab
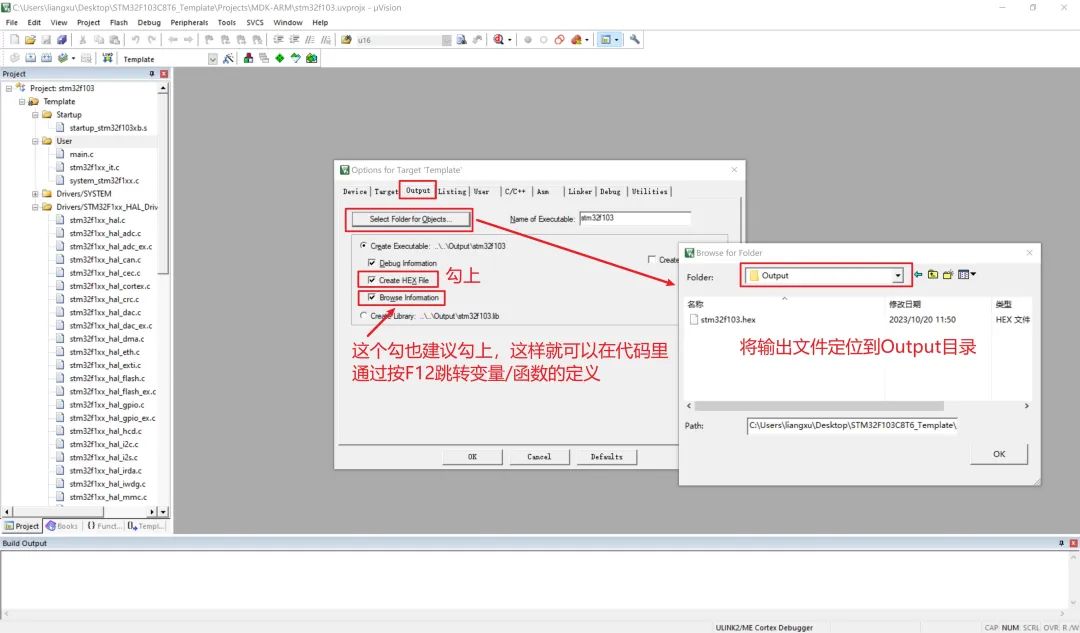
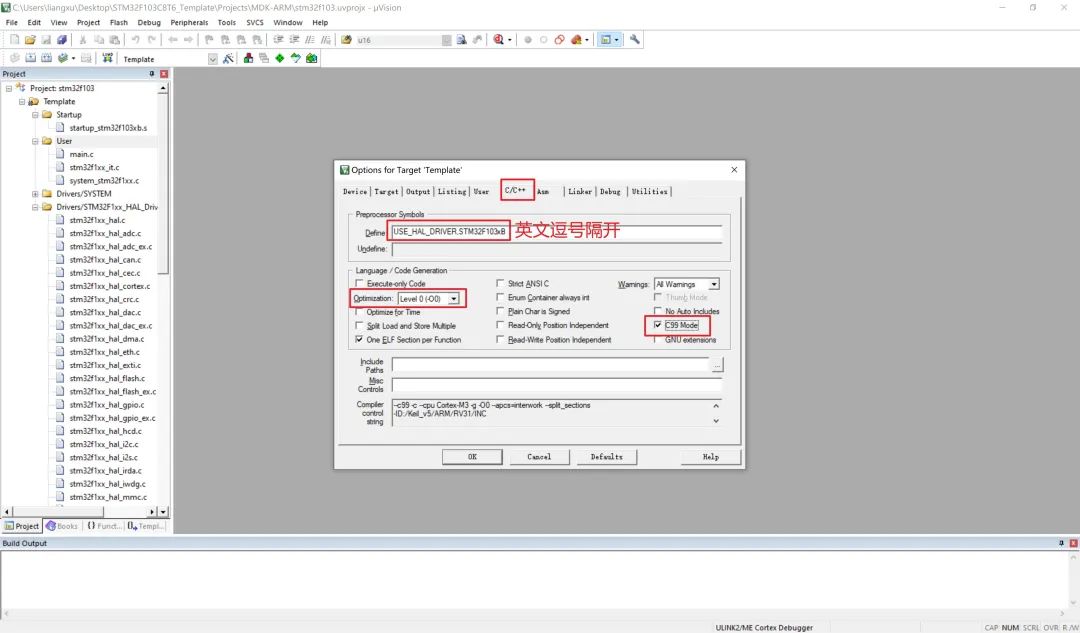
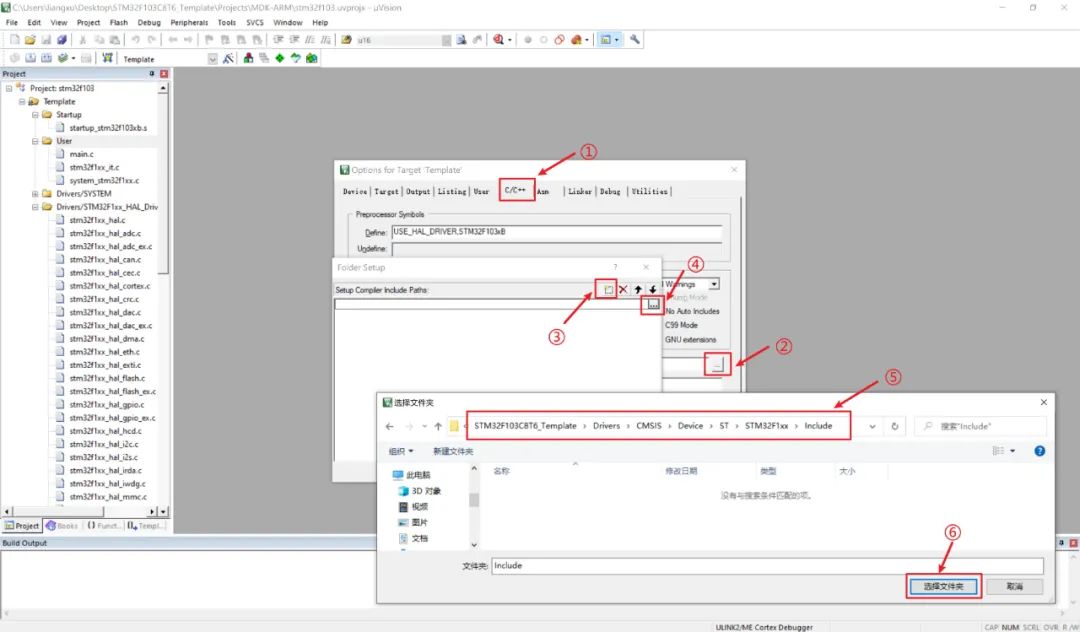
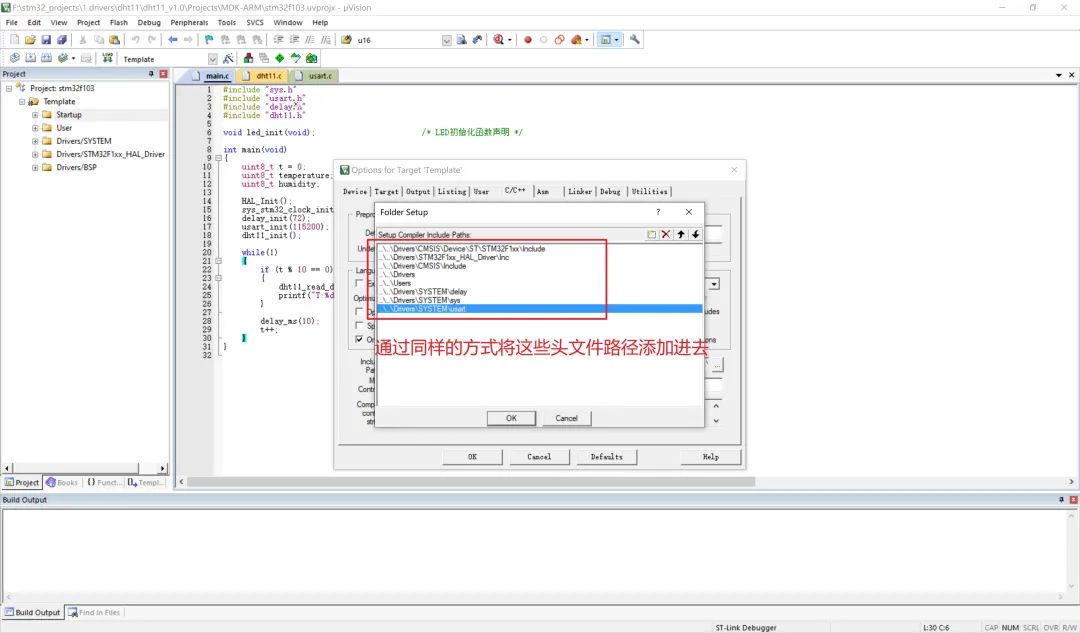
6.3 C/C++ Tab
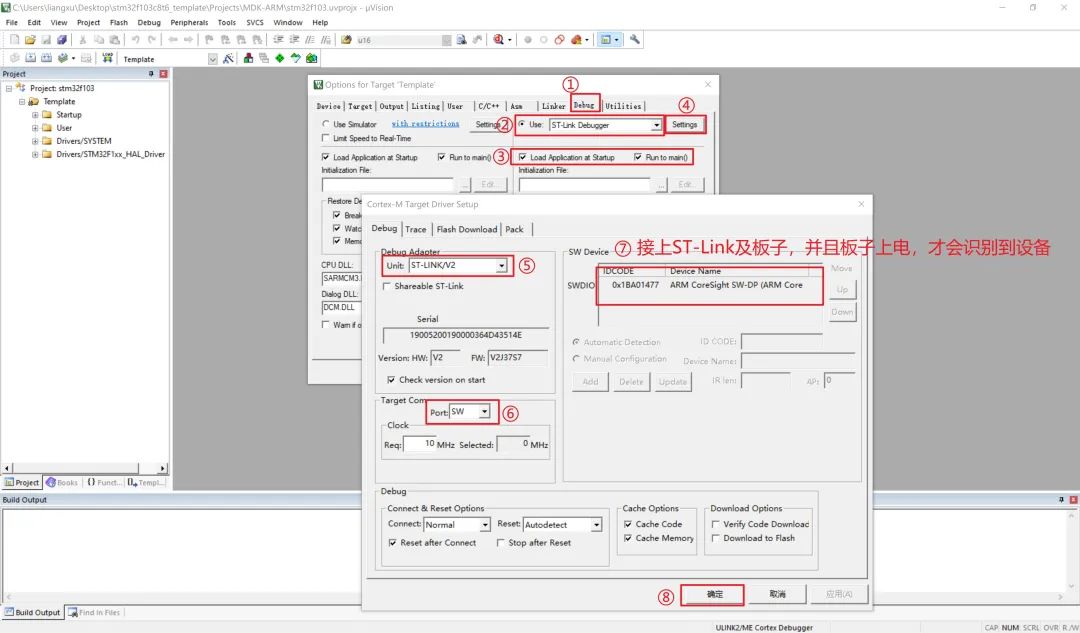
6.4 Debug Tab
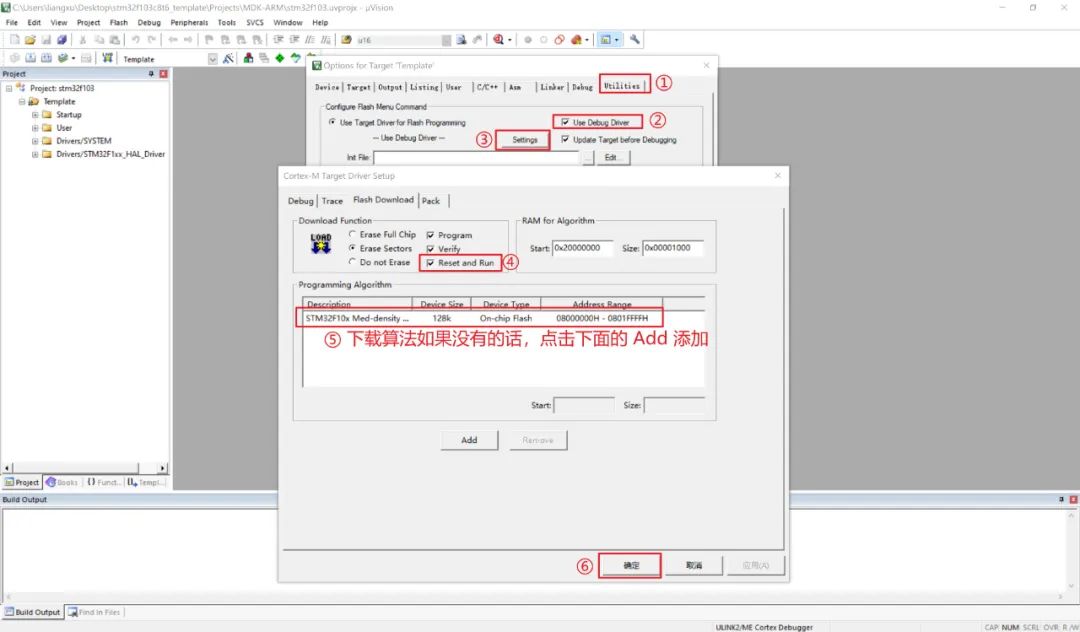
6.5 Utilities Tab
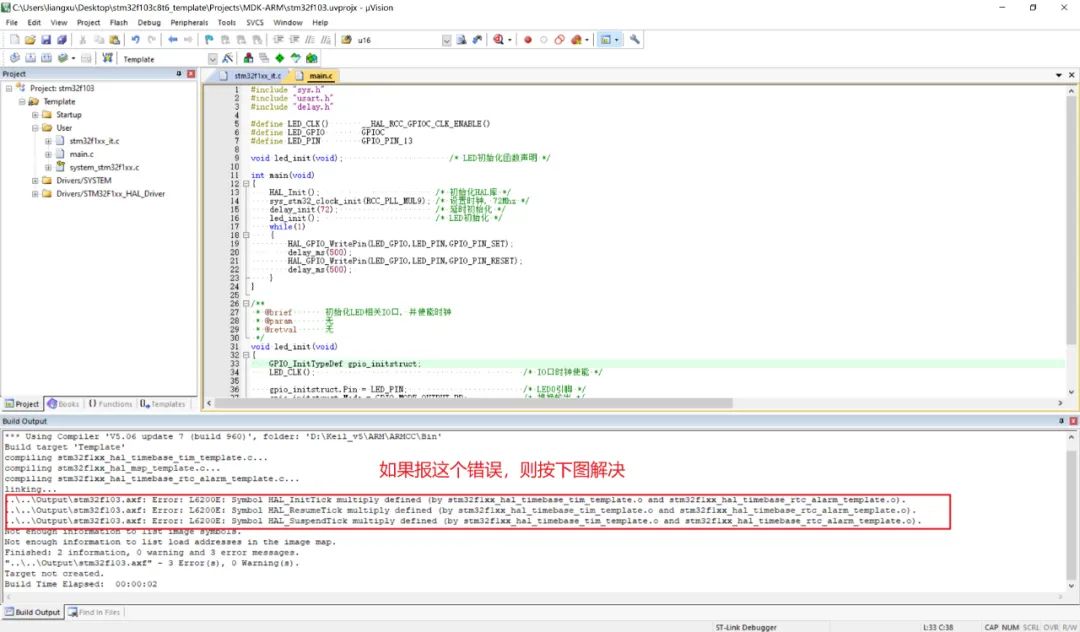
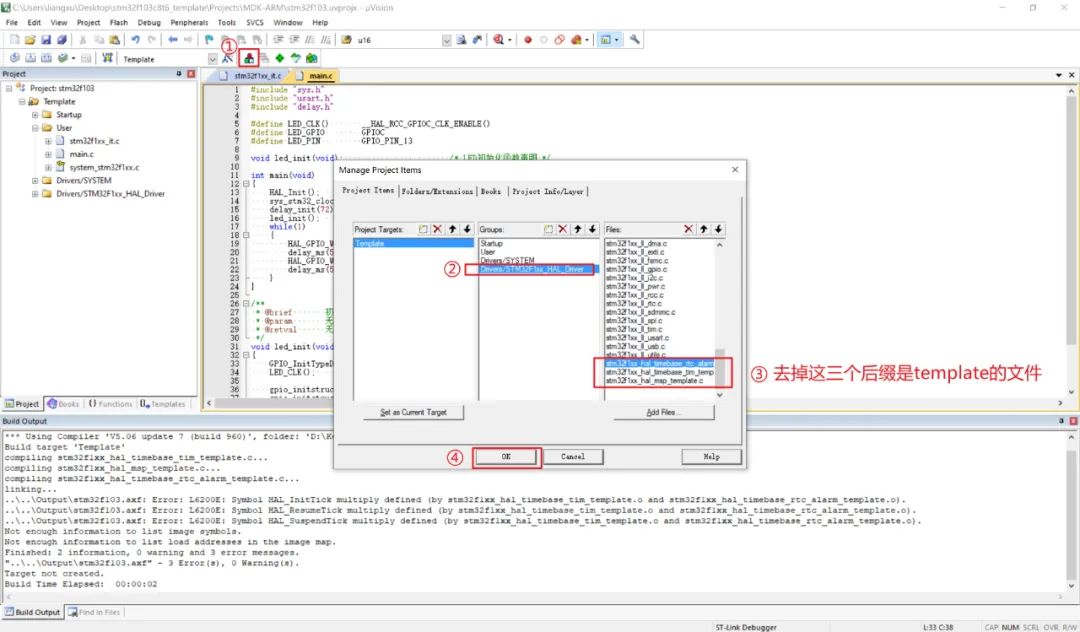
7. Code Modification
8. Flashing Verification
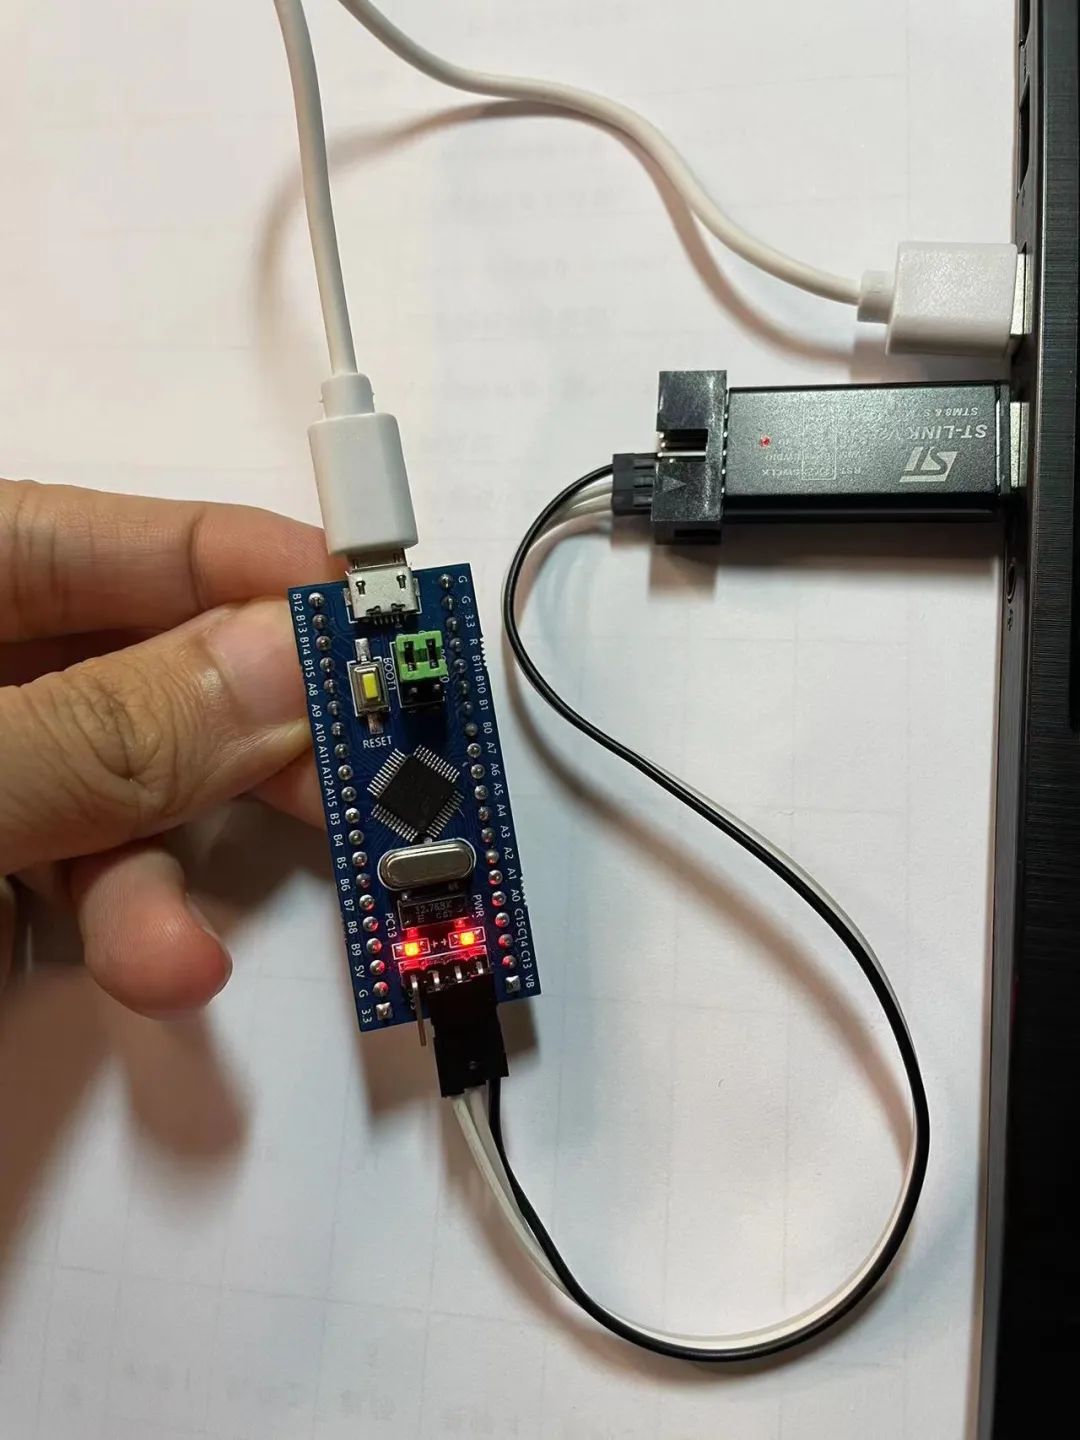
After the above operations, the template project is created. At this point, you can connect the wiring as shown in the image below for flashing verification. If everything is fine, the left LED will blink at intervals of 500ms.
If you do not know how to set up the STM32 programming environment or how to flash STM32 code, you can read this article:
[Getting Started with STM32 Development from Scratch (Step-by-Step Guide)]