Source: Darwen Says
This is a very complete open-source smartwatch project with full functionality and open-source documentation. If you are:an engineer who enjoys DIY, a student looking to enhance your development skills, or a senior student about to undertake a graduation project, this smartwatch is definitely worth making. Don’t miss out~~
All open-source materials and the original link can be found at the end of this article.
Let’s take a look at the features of this smartwatch:
- First, it is a wearable watch.
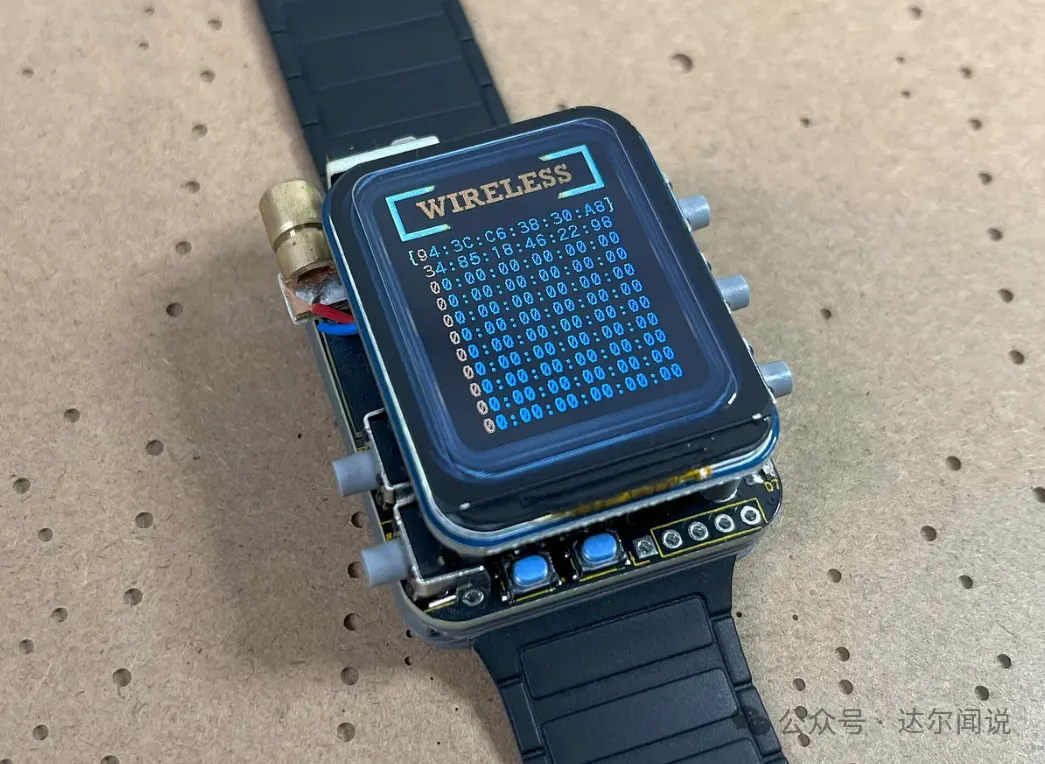
- It can act as a compact wireless access device to control all IoT devices.
- It also has a swappable MAC address and the ability to scan WiFi networks.
- It features built-in distance sensing with LiDAR
- Real-time monitoring of temperature, altitude, humidity, pressure, gas, tilt, and acceleration.
- All operations are controlled via buttons.
Detailed Explanation of Main FeaturesDistance Measurement: The LiDAR used is the ultra-compact VL53L1X ToF (Time of Flight) distance sensor from STMicroelectronics. Accuracy <±1%, capable of measuring distances from 4 cm to 4 m. It uses a 940 nm laser (which is infrared and invisible to the human eye), and a switchable bright red 650nm 5mW laser is added next to it to assist in aiming or demonstration.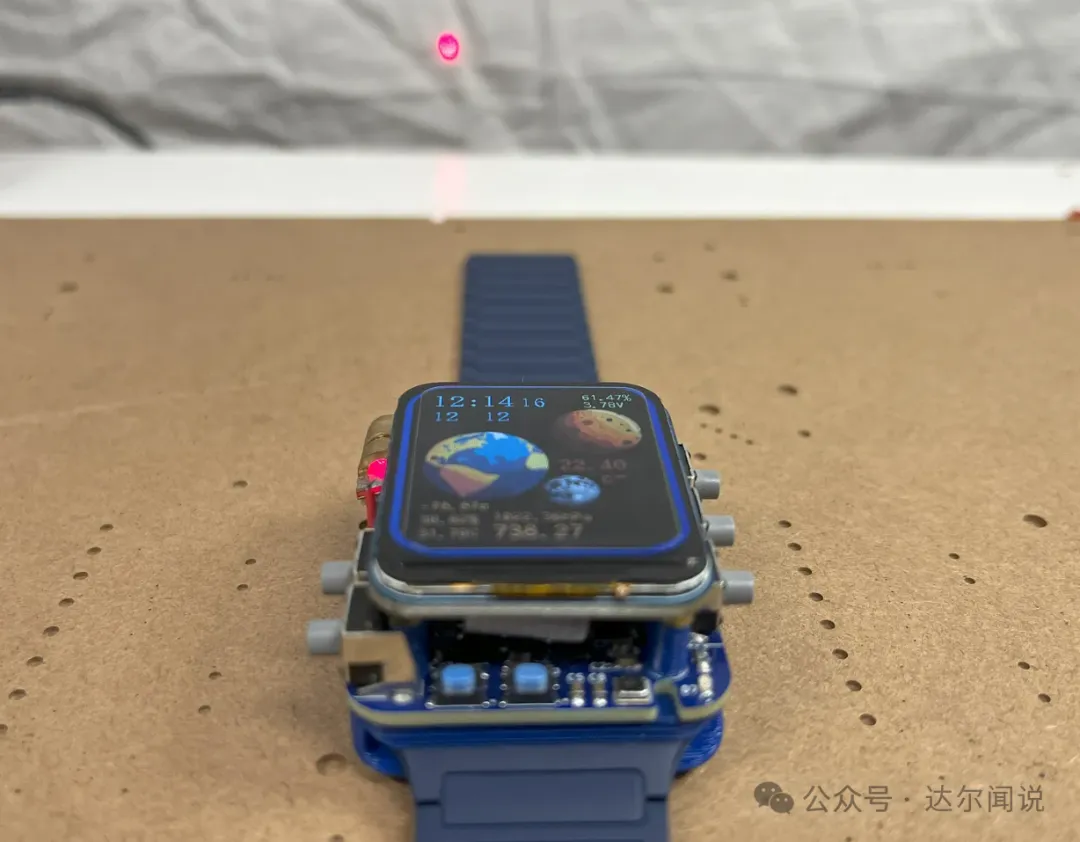 Wireless Component: The watch utilizes ESP-NOW for ultra-low power fast data broadcasting. This wireless protocol was chosen because it bypasses traditional WiFi connection setups, allowing for almost instantaneous response times between devices,and is suitable for most 32-bit MCUs.
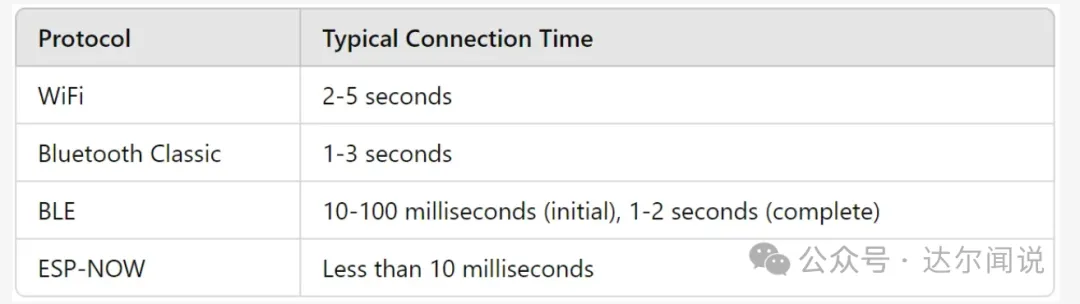
 WiFi Network Scanning:The watch can also be used toscan WiFi networksand provide network SSID, RSSI (signal strength), and authentication mode (network security 0-7).
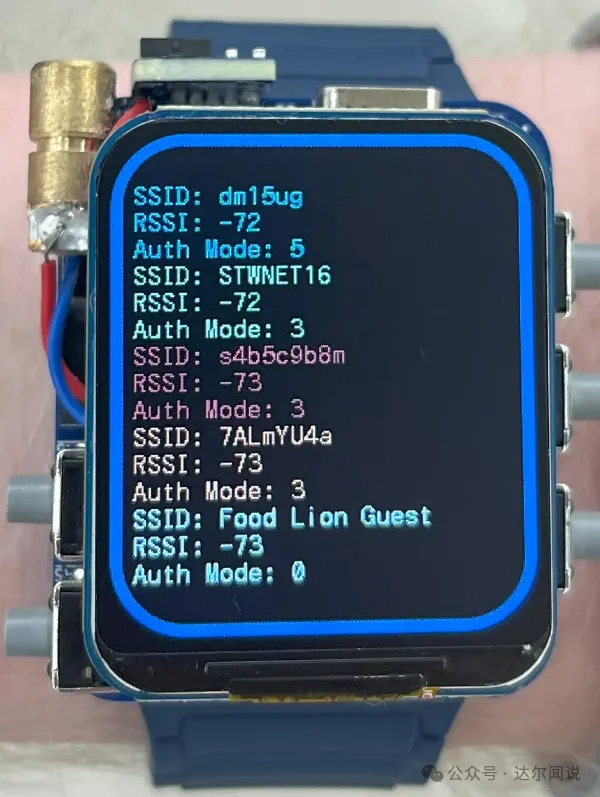 Since broadcasting wireless data is very power-consuming, the watch is programmed to temporarily activate WiFi only to send/receive data and then automatically disable it. It also features an automatic 1.5-second sleep mode timer and tilt wake detection, similar to the Apple Watch, but the Apple Watch cannot connect to DIY door locks/lights.Digital Level/Tilt Detector: Simply place the watch on the surface in question and press the IMU mode button to access real-time tilt and acceleration data.
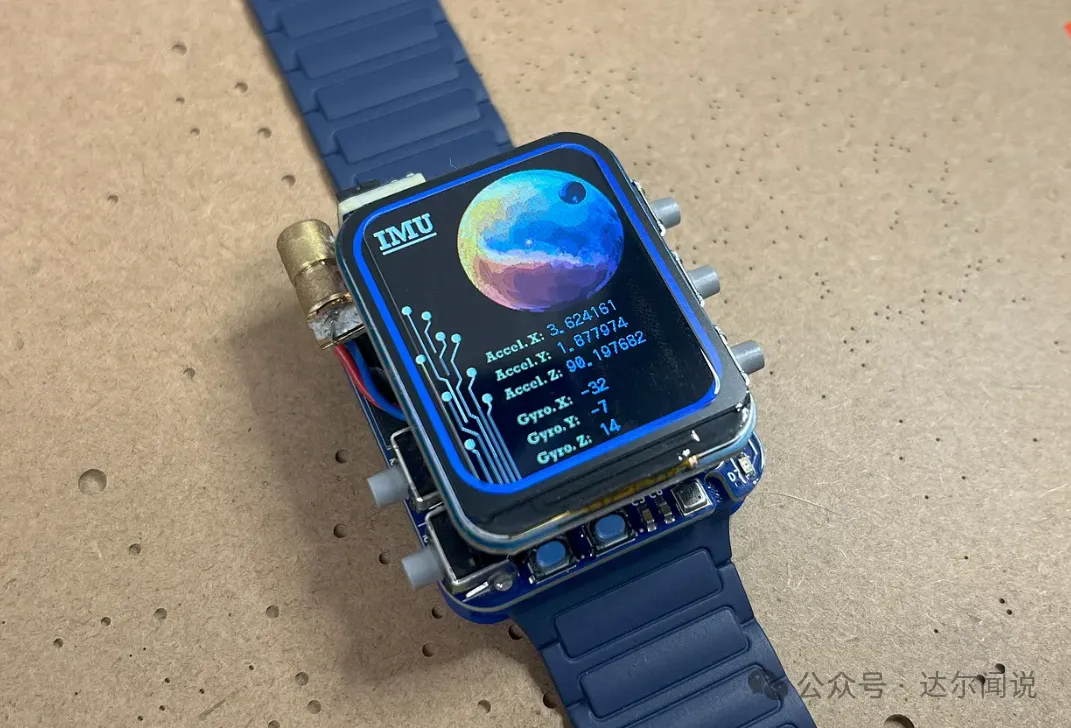 Air Quality Detection: The watch has a built-in volatile organic compounds (VOC) sensor that observes IAQ readings based on the interaction of target gases with the heated metal oxide layer of the BME680, and also monitors humidity and atmospheric pressure.
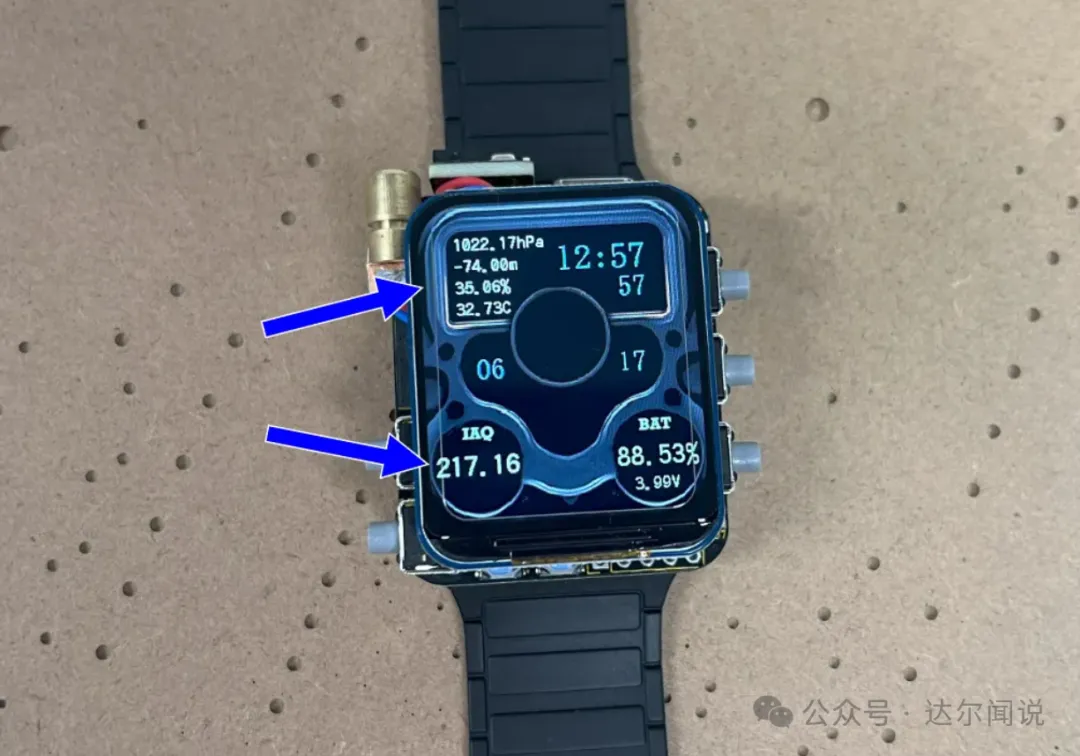 Theme Customization:The watch also comes with multiple themes to choose your favorite color.
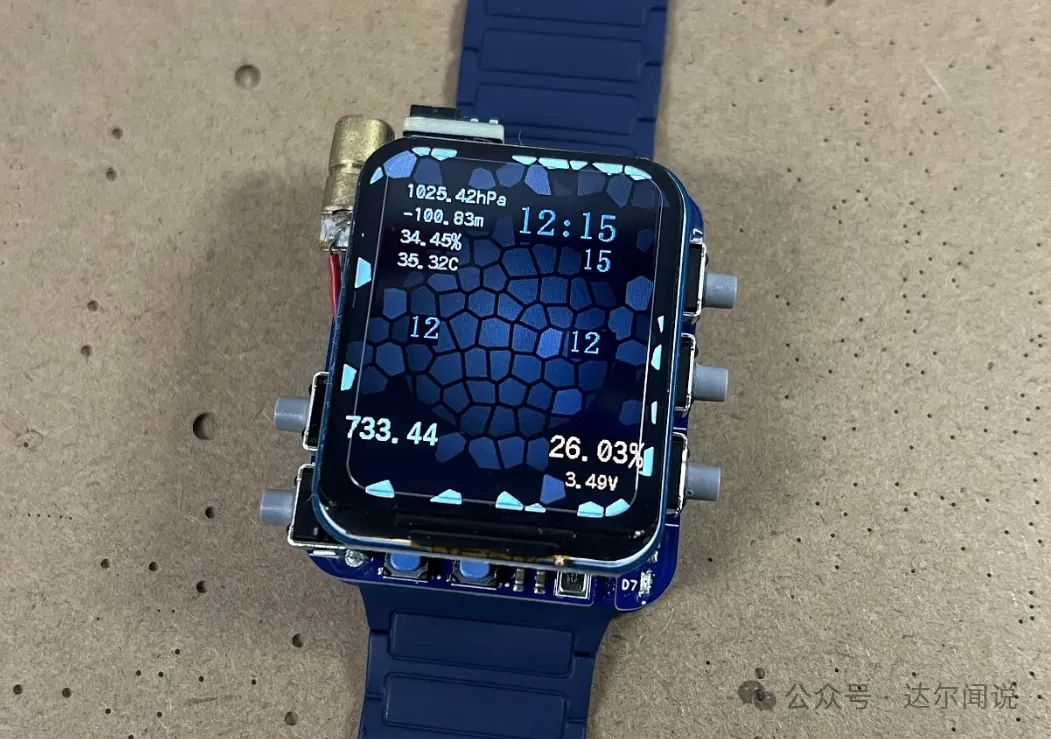 The feature introduction is complete; now let’s see how to start from the schematic——The main circuit consists of an ESP32-S3, five sensors (with an optional sixth), a LiPo battery, a laser module driver, and a typical circuit for powering, communicating, and configuring the ESP32-S3 microcontroller, along with some buttons and connectors. Here is the complete schematic:
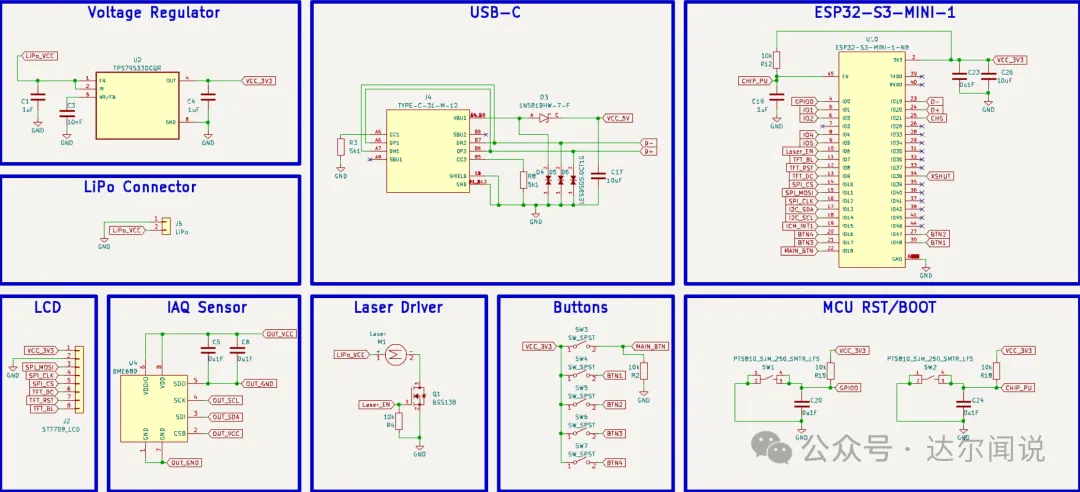
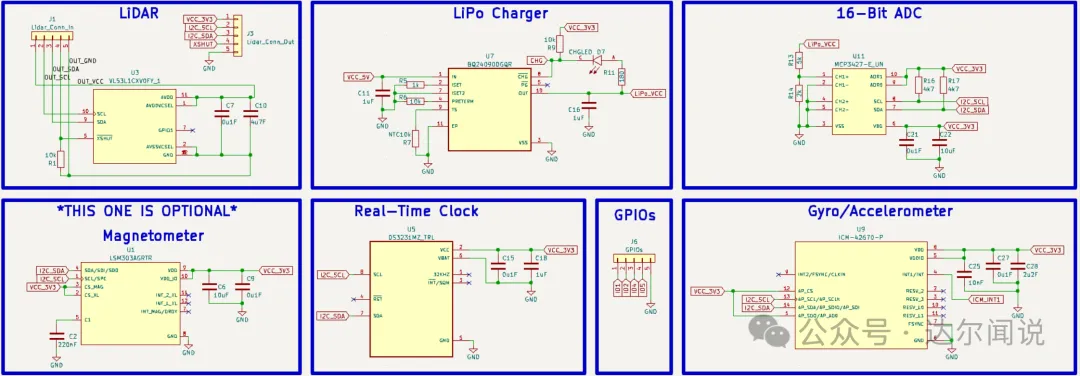 For a more detailed schematic explanation, see here: https://www.roboticworx.io/p/build-custom-esp32-boards-from-scratch#%C2%A7the-schematicTo fit so many components in such a small space (43x36mm), a 2-layer board is definitely not enough; a 4-layer board was used instead. Some components can be placed on the back, and the two middle layers serve as ground layers, providing good isolation.
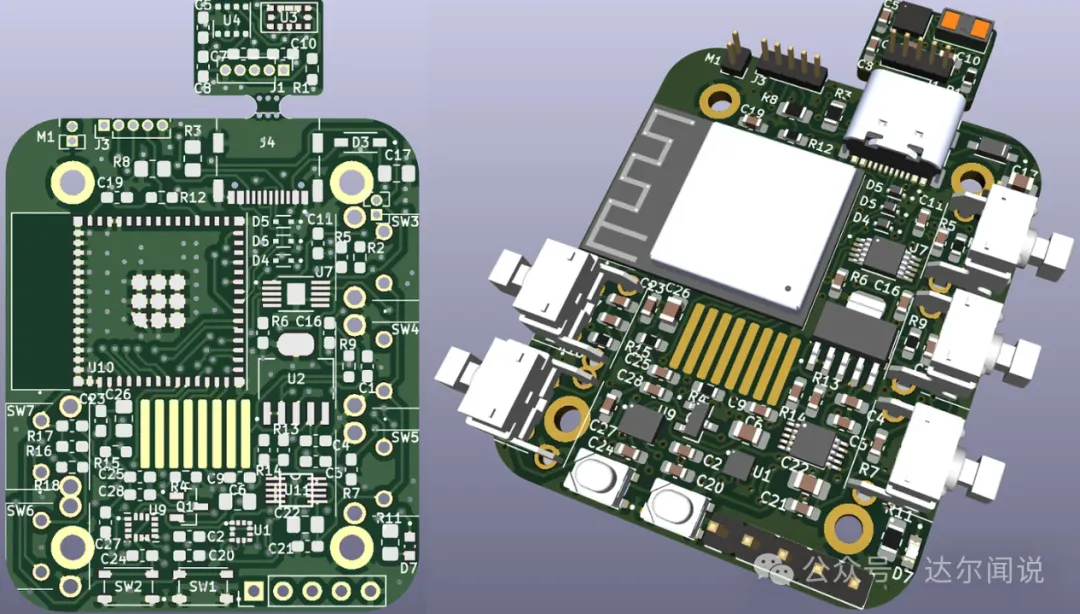 The BOM can be found here: https://github.com/RoboticWorx/Gateway-Smartwatch/blob/main/Gateway%20Part%20List%20and%20BOM.csv
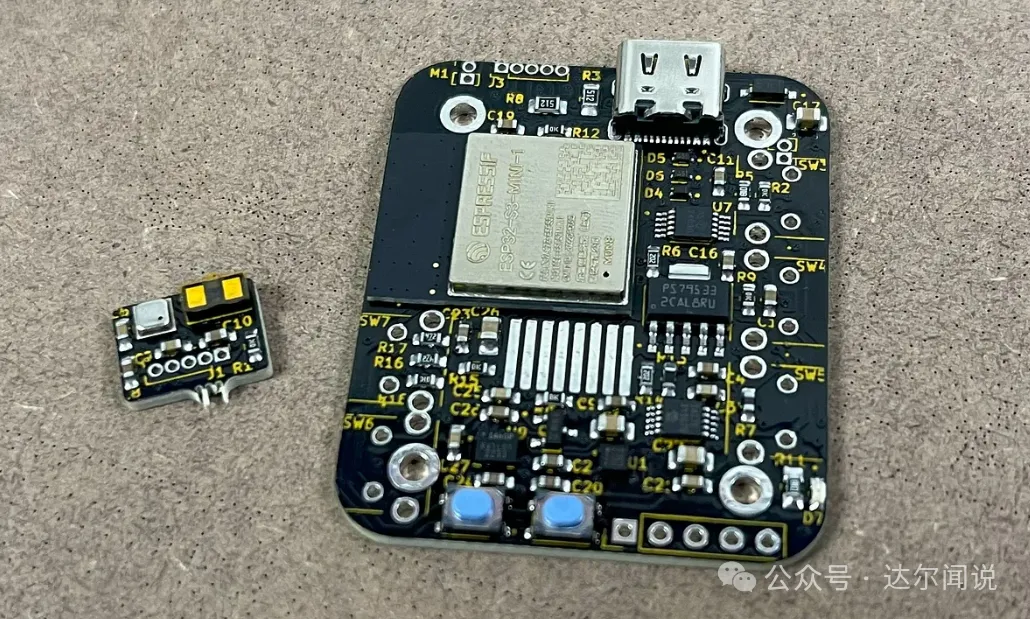
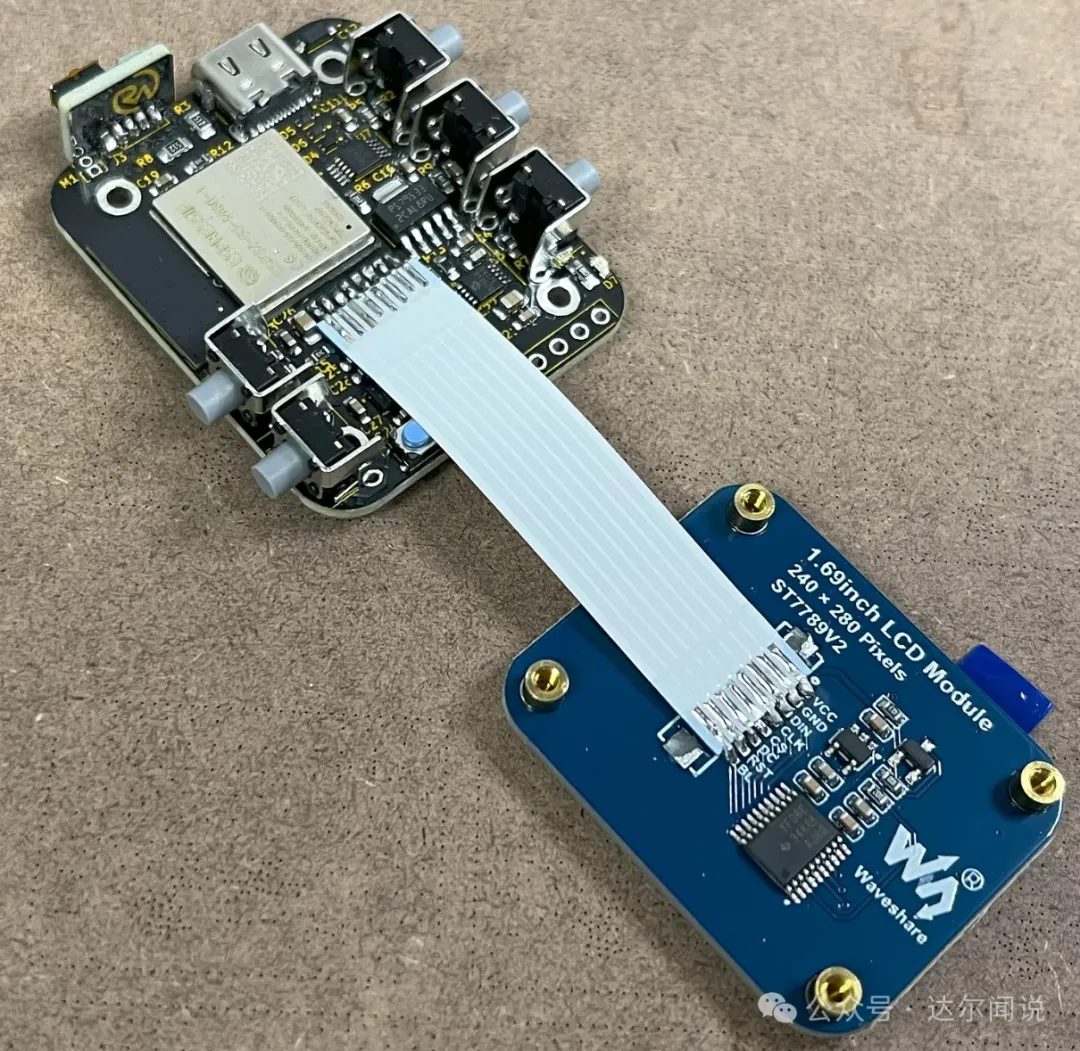 To ensure everything works properly, simple testing is required. Upload the main program via the USB-C port and ensure everything is functioning correctly. Instructions for uploading to the development board can be found in the programming section.If the screen seems unresponsive after uploading the program, you can disconnect the power and restart. You can also try pressing the reset button (the leftmost button) and restarting the power to the circuit board.
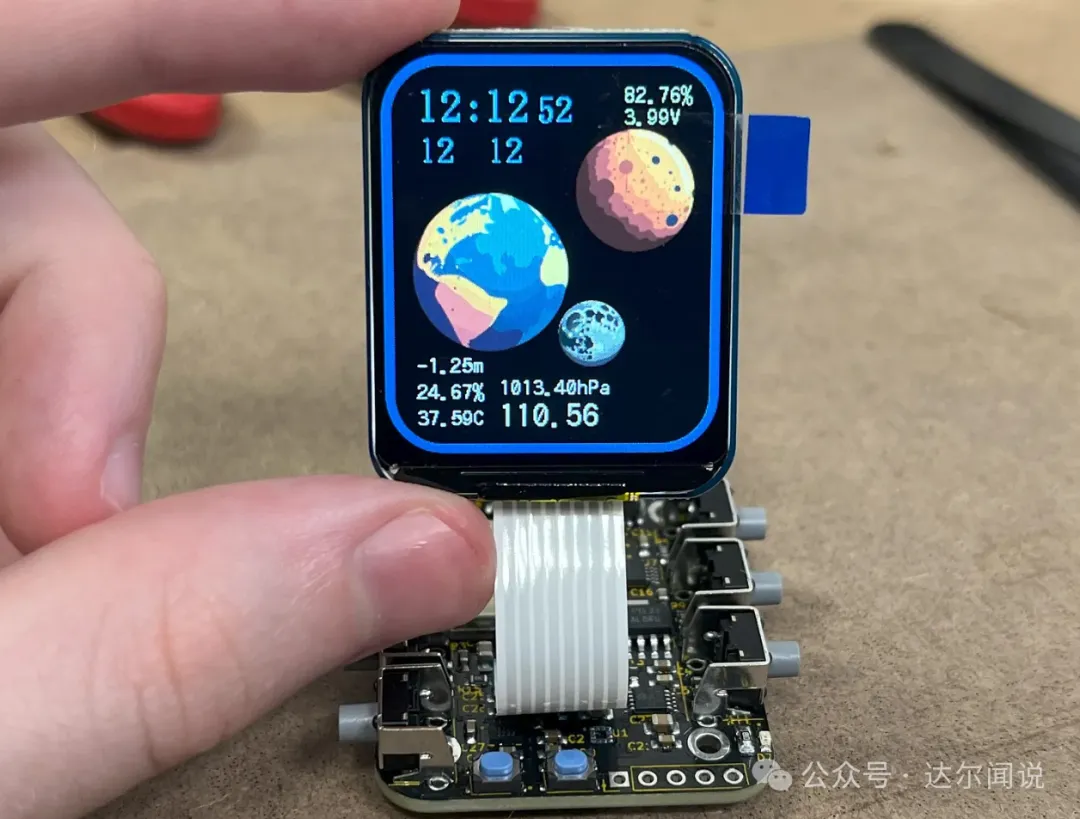 After successful preliminary testing, you can install the battery and print the case.
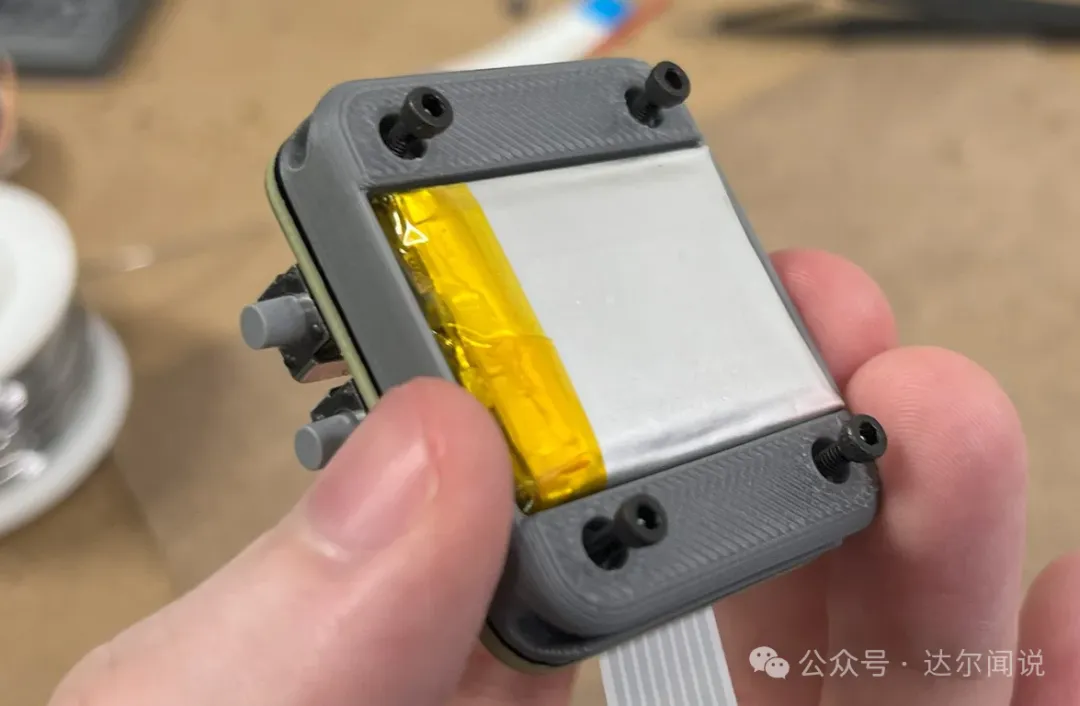
 As a very complex project, here is a section on how to use the watch and operate different buttons/combinations. Below is the general button layout and their functions:
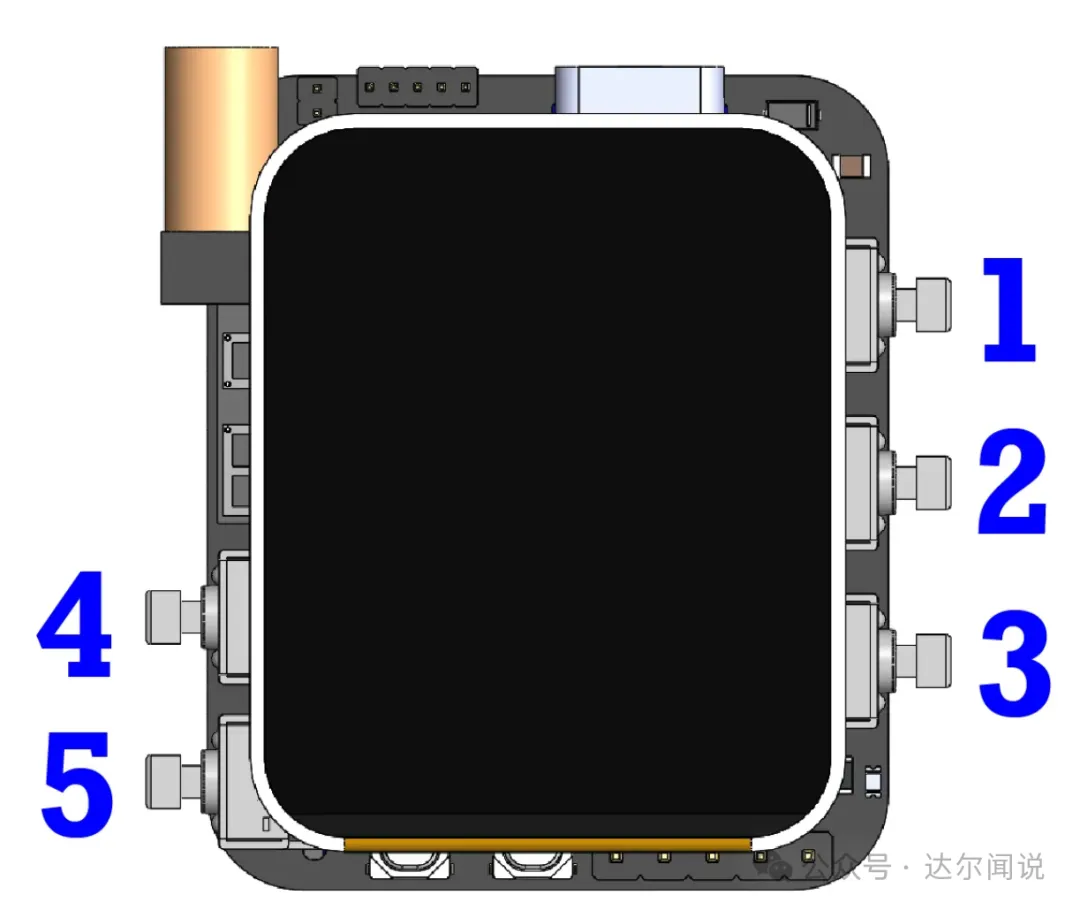 Button 1: General home button. Pressing this button at any time returns to the main watch face, and the watch can enter sleep mode (enabling the 1.5-second timer). If the watch is in sleep mode, it will also wake the watch (in addition to tilt wake).Button 2: Wireless mode. Pressing this button reassigns buttons 2-5 to help navigate different MAC addresses. Button 3 switches the MAC address, button 4 changes the selected MAC address number, and button 5 cycles through the numbers of the currently selected MAC address.Button 3: Inertial Measurement Unit (IMU) mode button. Pressing button 3 will bring up a menu displaying the current gyroscope and acceleration readings from the onboard ICM42670.Buttons 4 and 5 are special; they do not do anything by themselves but can be combined with 1, 2, or 3 to perform some functions:Press and hold button 4 and click button 1 to turn on the watch’s flashlight screen.Press and hold button 4 and click button 2 to notify the watch to start WiFi scanning. This will change the watch to a new blank screen, and after a few seconds, the local 2.4GHz networks will appear. The network data will include SSID (name), RSSI (signal strength), and authentication mode (network security 0-7).Press and hold button 4 and click button 3 to enter clock change mode.Button 5 combinations are unique as they all act as wireless hotkeys. This way, you do not have to navigate to the wireless menu every time you want to send a wireless signal. Press and hold button 5 and click button 1 to send 1 to the first MAC address in the menu, press and hold button 5 and click button 2 to send 1 to the second MAC address in the menu, and so on up to three. It should be noted that the watch must be on for all of these to work properly, unless sending data to the first MAC address (button 1 will wake it).To activate LiDAR, press and hold button 1 and press button 2. To activate the laser pointer, press and hold button 1 and press button 3.If any issues arise at any time, you can always click the hardware reset button next to the start button.
 Finally, the programming section,this project is too complex, directly usingESP-IDF (the official IoT development framework for ESP32 microcontrollers).The code can be found here: https://github.com/RoboticWorx/Gateway-Smartwatch/tree/main/CodeThis is definitely a very practical project, but there is still room for improvement:
- More RFID functionalities similar to those that Flipper Zero can perform.
- Built-in infrared camera for thermal imaging, capable of temperature sensing at 32×24 resolution..
- Change totouchscreen.
- LoRa modulefor remote wireless communication of commands.
- 5GHz wireless capability (hoping the ESP32-C5 will be released for this).
- GPS real-time coordinate functionality,magnetometer.
- Real-time camera monitoring (external camera feed to the watch display).
- Extended battery life.
Alright, this is just a summary of some content; if you want to replicate it, be sure to read the original carefully:
Original link:
https://www.roboticworx.io/p/build-the-ultimate-smartwatch-lidar
Copyright belongs to: ROBOTICWORX
END
This article is sourced from the internet, freely conveying knowledge, and copyright belongs to the original author. If there are any copyright issues, please contact me for deletion.

Illustrated: The Unidirectional Conductivity Characteristics of Diodes
PCB Safety Design: Electrical Clearance and Creepage Distance
Basic Knowledge Expansion: CAN Bus Error Analysis and Solutions
Some Common C Language Macro Definitions that can be Widely Used in Header Files