Setting Up STM32 Development Environment in VSCode

Follow+Star Public Number, don’t miss wonderful content
Setting Up STM32 Development Environment in VSCode
Author | Nuan Nuan’s Dilemma
Source | CSDN

As we all know, Keil is a paid software. Although it can be used with a workaround, many companies are still a bit hesitant, and many readers may have received ** letters.

Previously, when developing microcontroller projects, Keil was one of the best choices. However, since the emergence of VSCode, this situation has changed.

Because VSCode is free and user-friendly, it can install various plugins, and many engineers have gradually shifted from Keil to VSCode. Moreover, VSCode can achieve some functionalities that Keil cannot.

Setting Up STM32 Development Environment in VSCode

Next, I will share some common and useful features for setting up the STM32 development environment in VSCode.

1. Required Software and Tools

  1. Download the latest version of VS Code: Install the plugins, which have good code completion and debugging capabilities.
VS Code download link:https://code.visualstudio.com/
  1. Download LLVM: Used for code completion, it can actually be understood as Clang. Because the automatic completion feature of the “C/C++” plugin in VS Code is not very practical. Many library functions in STM32 cannot be completed. Remember to add the path to the environment variable after installation.
LLVM download link:http://releases.llvm.org/download.html
  1. Download and install Git for Windows: Provides Git support and MINGW64 command terminal.
Git download link:https://gitforwindows.org/
  1. Download and install arm-none-eabi-gcc: Choose<span>gcc-arm-none-eabi-5_4-2016q3-20160926-win32.exe</span> (md5) This is a 2016 version, which I am currently using. It seems that there are other newer versions available for download, GNU Arm Embedded Toolchain. After normal installation, remember to set the bin folder of the software installation directory into the environment variable PATH.
arm-none-eabi-gcc download link:https://launchpad.net/gcc-arm-embedded/+download
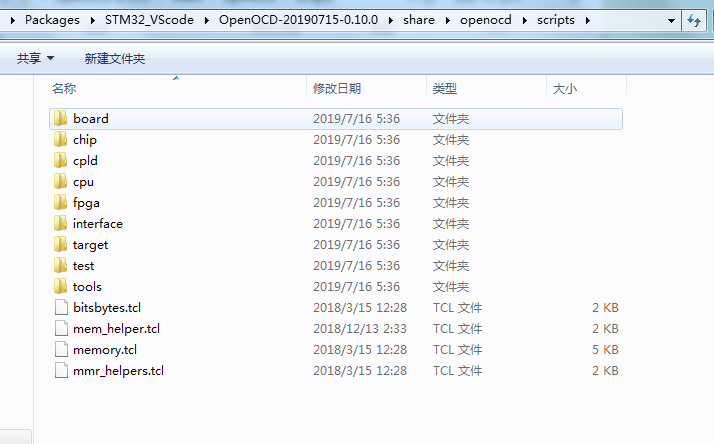
  1. Download OpenOCD for Windows: An open-source on-chip debugger (Open On-Chip Debugger). Compiling it yourself on Windows may have issues, so we choose a precompiled version. The downloaded files are not installation packages; place the program folder into your software installation directory and add the software’s bin folder path to the user environment variable PATH.
OpenOCD download link:http://gnutoolchains.com/arm-eabi/openocd/
  1. STM32CubeMX: Used to generate projects with makefile. This way, we don’t need to write MakeFile ourselves. Just use its template and modify it to our directory.
STM32CubeMX link:http://www.stm32cube.com/

2. Setting Up the Compilation Environment

1. Create a project using STM32Cube.

STM32CubeMX generates projects developed with the HAL library. The specifics of configuration will not be introduced here, only the parts related to the topic will be covered.
(1) Download the STM32CubeMx chip package (firmware library), note:

Setting Up STM32 Development Environment in VSCode

You need to select
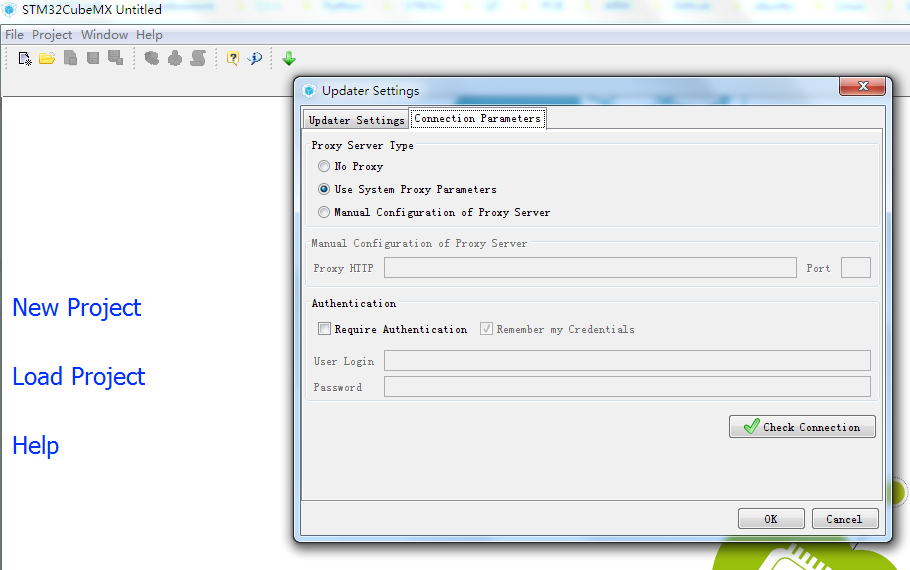
<span>help -> updater settings ->Connection Parameters</span> Set the network properly before downloading the firmware package.
(2) Generate the project. Choose the MakeFile option.
Note: Versions below 4.18.0 do not have the Makefile option. Finally, download an intermediate version, as versions above 5.0 have a messy interface. I chose version 4.27.0.

Setting Up STM32 Development Environment in VSCode

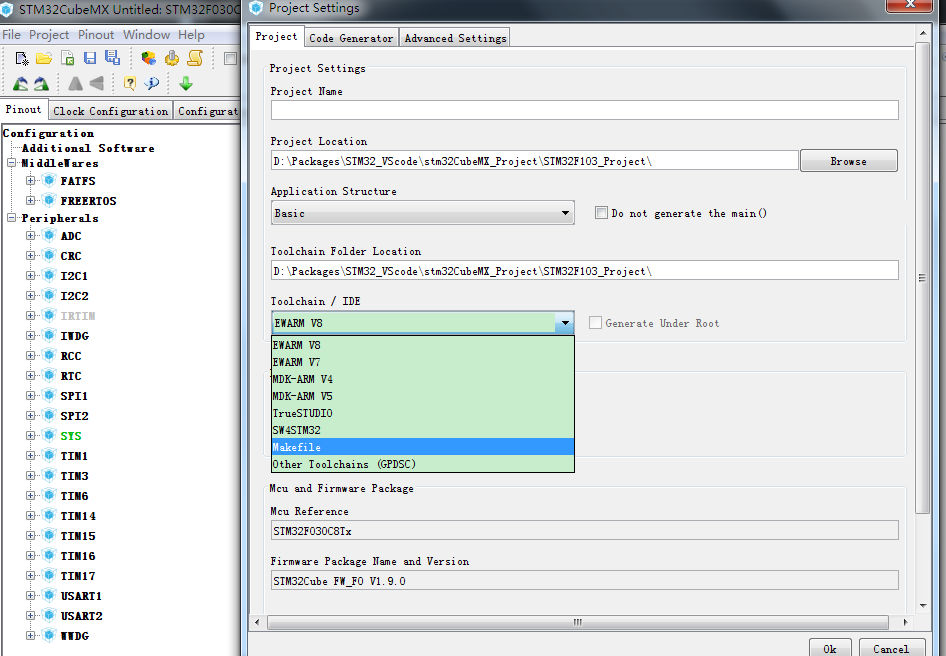
2. Configure VS Code

(1) Open the folder where the project is located. Right-click “Open Folder with VS Code”.

Setting Up STM32 Development Environment in VSCode

You will see this directory structure

Setting Up STM32 Development Environment in VSCode

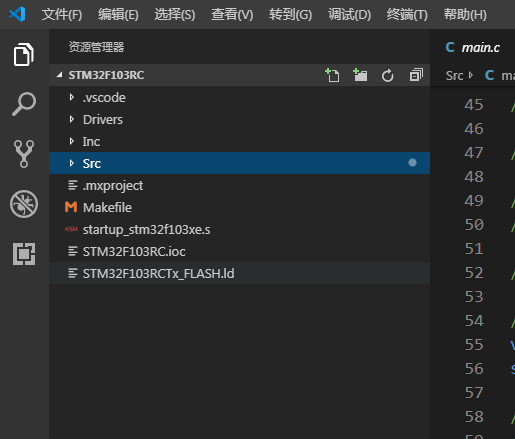
<span>.ioc</span> file is the project file of STM32Cube, Inc and Src are the user-modifiable source codes, and Driver contains the STM32 and ARM CMSIS libraries, which should not be modified.
However, if you want to use the standard library for development, change it to the standard library Driver.

(2) Install VS Code plugins, you need these:

Setting Up STM32 Development Environment in VSCodeSetting Up STM32 Development Environment in VSCode

(3) Configure the built-in terminal of VS Code

Here we will set the Git for Windows we installed above as the built-in terminal of VS Code.
File – Preferences – Settings, search for terminal, set the built-in terminal’s Shell to Bash (when installing VS Code, it will recommend you install Git, which includes this Bash). Or open Settings.json and add the following two lines.

"terminal.integrated.shell.windows": "D:\Program Files\Git\bin\bash.exe",
"terminal.external.windowsExec": "D:\Program Files\Git\bin\bash.exe"

Then press Ctrl+` to open the terminal and see Bash.

Setting Up STM32 Development Environment in VSCode

(4) Configure smart completion and smart sensing plugins.

Previously, we installed LLVM to achieve smart completion and error correction, naturally, we need a path to find these files. Therefore, we need to create a configuration file.
We create a<span>c_cpp_properties.json</span> configuration file in the .vscode folder of the current directory to tell VS Code about the macros we defined and the paths of the files.
{
    "configurations": [
        {
            "name": "Win32",
            "browse": {
                "path": [
                    "${workspaceFolder}/",
                    "${workspaceFolder}/Drivers/CMSIS",
                    "${workspaceFolder}/Drivers/FWlib/inc",
                    "${workspaceFolder}/Drivers/CMSIS/startup",
                    "${workspaceFolder}/User/inc",
                    "${workspaceFolder}/User",
                    "${workspaceFolder}/ThirdParty/crclib/include"
                ],
                "limitSymbolsToIncludedHeaders": true
            },
            "includePath": [
                "${workspaceFolder}/",
                "${workspaceFolder}/",
                "${workspaceFolder}/Drivers/CMSIS",
                "${workspaceFolder}/Drivers/FWlib/inc",
                "${workspaceFolder}/Drivers/CMSIS/startup",
                "${workspaceFolder}/User/inc",
                "${workspaceFolder}/User",
                "${workspaceFolder}/ThirdParty/crclib/include"
            ],
            "defines": [
                "_DEBUG",
                "UNICODE",
                "_UNICODE",
                "__CC_ARM",
                "USE_STDPERIPH_DRIVER",
                "STM32F10X_HD"
            ],
            "compilerPath": "C:\Program Files\LLVM\bin\clang-format.exe",
            "cStandard": "c11",
            "cppStandard": "c++17",
            "intelliSenseMode": "clang-x64"
        }
    ],
    "version": 4
}

Note: If prompted<span>variable “uint32_t” is not a type name</span> is not a type.
You need to add the macro definition<span>__CC_ARM</span>. If this macro definition is missing, the<span>uint32_t</span> type will throw an error. Additionally, if a structure uses members defined with<span>uint32_t</span>, it will also not complete.

(5) Compile the program

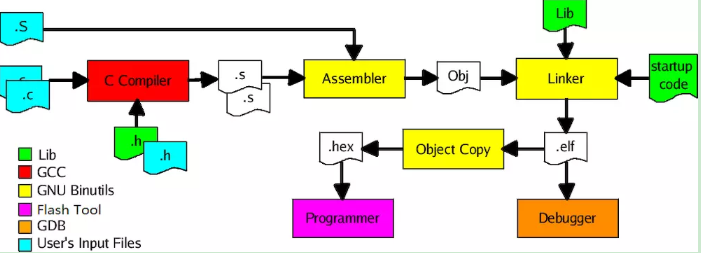
The compilation process under gcc is shown in the figure below:
  • <span>.c</span> file is compiled into <span>.o</span> file using <span>arm-none-eabi-gcc</span>
  • <span>.s</span> file is compiled into <span>.o</span> file using <span>arm-none-eabi-as</span>
  • <span>.o</span> file and <span>.a</span> file are linked into <span>.elf</span> file using <span>arm-none-eabi-ld</span>
  • <span>.elf</span> file is converted into hex file<span>/dis</span> file using <span>arm-none-eabi-objcopy</span> and <span>arm-none-eabi-objdump</span>
  • <span>arm-none-eabi-gdb</span> is used for debugging with <span>.elf</span> file
Setting Up STM32 Development Environment in VSCode
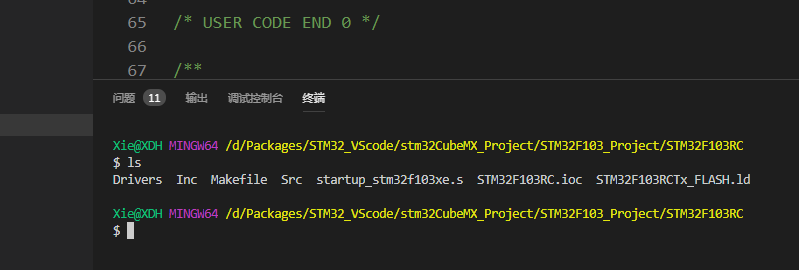
In the Terminal, enter the make command to start building the program
Setting Up STM32 Development Environment in VSCode
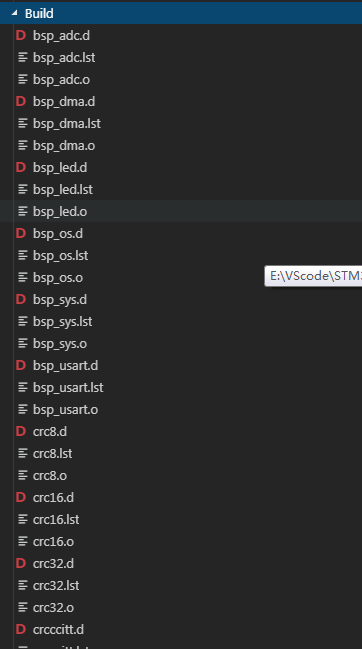
After compilation, all generated files will be placed in the Build folder.

Setting Up STM32 Development Environment in VSCode

Note: Since I installed Qt, it comes with mingw32-make.exe. I copied this file and renamed it to make.exe. I also added it to the environment variable, so I can use make directly.
If you don’t have a make environment, you can download a choco package manager, which is similar to apt in Linux, but used in Windows. Then use choco to install make:

Setting Up STM32 Development Environment in VSCode

If you modify the source code, you need to recompile the program, first execute the make clean command to delete all previously built items, and then execute the make command again.

3. Setting Up the Debugging Environment

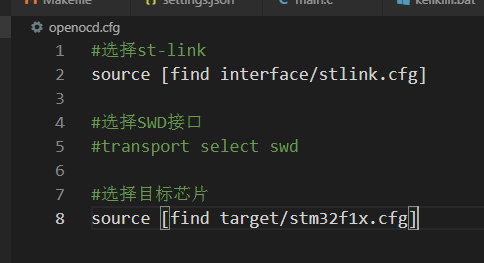
1. Configure openocd.

To run the openocd gdb server, you need to configure the following parameters:
  • What emulator to use? (J-link, ST-link…)
  • What interface to use? (JTAG, SWD…)
  • What is the target chip? (STM32F4x, tm4c123g…)
First, we open the installation directory of openocd, open share/openocd/scripts, where there are many pre-written configuration files.

Setting Up STM32 Development Environment in VSCode

Target contains configuration files for the target chip, for example, stm32f4.cfg
Interface contains configuration files related to the emulator, for example, jlink.cfg, stlink.cfg.
When we start openocd, we can use the -f parameter to specify a configuration file. For example:
 openocd –f interface/stlink.cfg –f target/stm32f4.cfg

【Note】 The emulator configuration parameters must be specified before the target MCU parameters; otherwise, an error will occur.
If we start without parameters, openocd will automatically look for a file named openocd.cfg in the current directory and use it as the configuration file to start. Therefore, we create a file named openocd.cfg in the current project directory.
Setting Up STM32 Development Environment in VSCode
We choose to use ST-link, SWD interface, and the target chip is stm32f1x. (PS: Here the SWD interface is commented out; if using Jlink, the SWD interface is required).
Thus, we connect the board and power it on, and directly type openocd in the terminal to start.
Setting Up STM32 Development Environment in VSCode
When openocd is running, this shell terminal is occupied, so we need to open a new terminal.

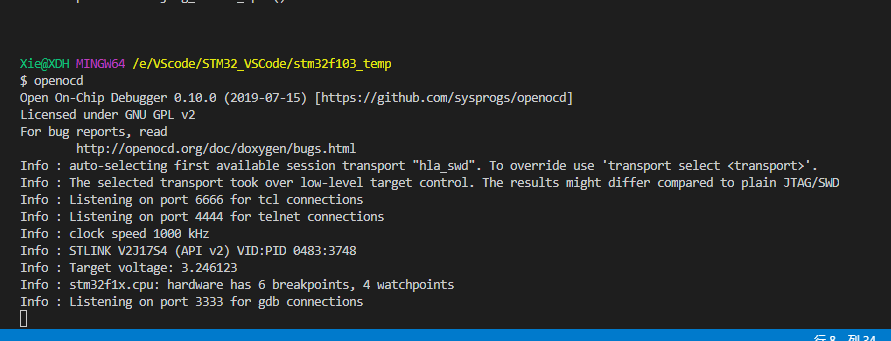
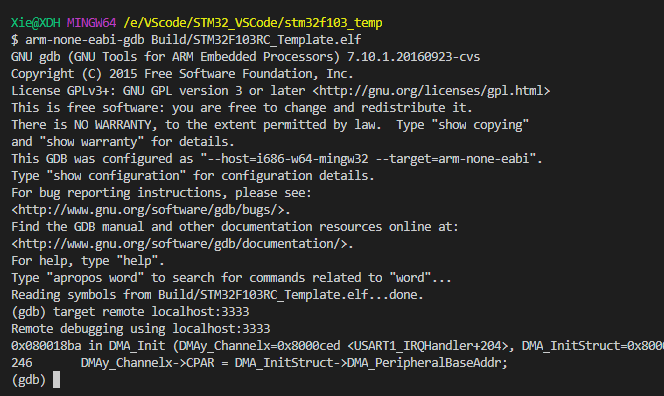
2. Connect gdb to openocd

(1) Start gdb directly, with the parameter being the compiled debug file (.elf)

Setting Up STM32 Development Environment in VSCode

(2) Make gdb connect to openocd. It has been mentioned that the TCP/IP port allocated for gdb by openocd is 3333, so enter:
target remote localhost:3333

Setting Up STM32 Development Environment in VSCode

Note, when connecting to openocd, you must first run the openocd service to communicate; otherwise, the target remote error will continuously appear.
(3) Download the code.

Setting Up STM32 Development Environment in VSCode

From here on, the operations are the same as with regular gdb, setting breakpoints, stepping through, etc. Many tutorials can be found online.
【Note】 Finally, remember to input q to exit gdb to avoid affecting subsequent configurations.

3. Configure openocd tasks and build tasks

To avoid typing make and make clean in the terminal every time, and openocd, we can create a Task in VSCode to help us complete this task.

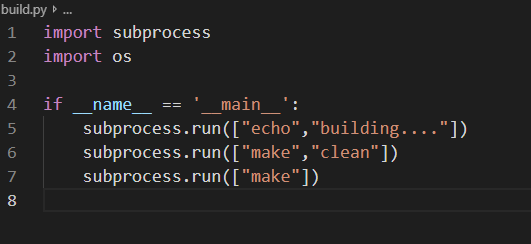
(1) Create a build.py file in the current directory.

Setting Up STM32 Development Environment in VSCode

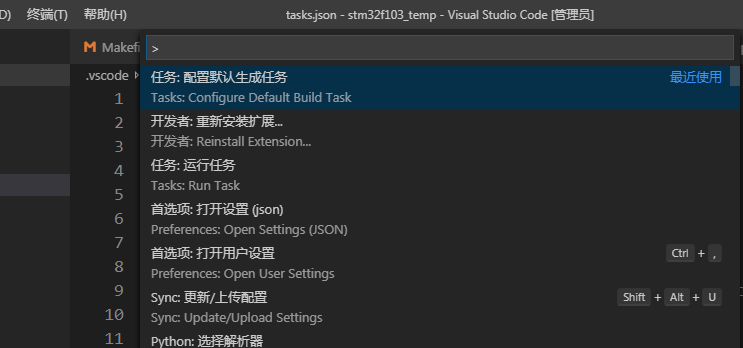
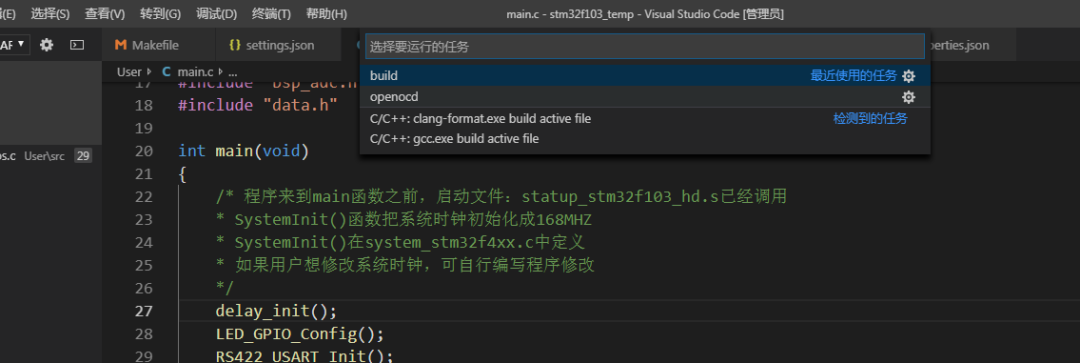
(2) In the VSCode interface, click on “Tasks”, select “Configure Task”

Press F1, select “Configure Task”. A tasks.json configuration file will be created in the .vscode directory.

Setting Up STM32 Development Environment in VSCode

Open tasks.json, modify the content as follows:

Setting Up STM32 Development Environment in VSCode

Note that the above are two tasks, one is openocd, used to connect to st-link for debugging, and the other is build for compilation.
This essentially creates a task named build, which executes the command python build.py in the shell without requiring manual input.

4. Configure the debugging function of VS Code

Using VS Code, the goal is convenience and aesthetics. Therefore, I certainly won’t let everyone debug by typing commands, which would be counterproductive compared to using keil. Thus, we need to configure the debugging function of VS Code, which is equivalent to a graphical interface for gdb.
In VS Code, select debug (the bug icon on the left), choose “Add Configuration”, type GDB. This will generate a launch.json configuration file in the .vscode folder. Configure it as follows:
{
    "version": "0.2.0",
    "configurations": [

        {
            "name": "ARM Debug",
            "type": "cppdbg",
            "request": "launch",
            "program": "${workspaceFolder}/Build/STM32F103RC_Template.elf",
            "args": [],
            "stopAtEntry": false,
            "cwd": "${workspaceFolder}",
            "environment": [],
            "externalConsole": false, 
            "MIMode": "gdb",
            "miDebuggerPath": "C:\Program Files (x86)\GNU Tools ARM Embedded\5.4 2016q3\bin\arm-none-eabi-gdb.exe",
            "targetArchitecture": "arm", 
            "setupCommands": [
                {
                    "description": "Select debug file (.elf) to gdb",
                    "text": "file E:/VScode/STM32_VSCode/stm32f103_temp/Build/STM32F103RC_Template.elf",
                    "ignoreFailures": false
                },
                {
                    "description": "Connect to GDB Server",
                    "text": "target remote localhost:3333",                                 
                    "ignoreFailures": false
                },
                {
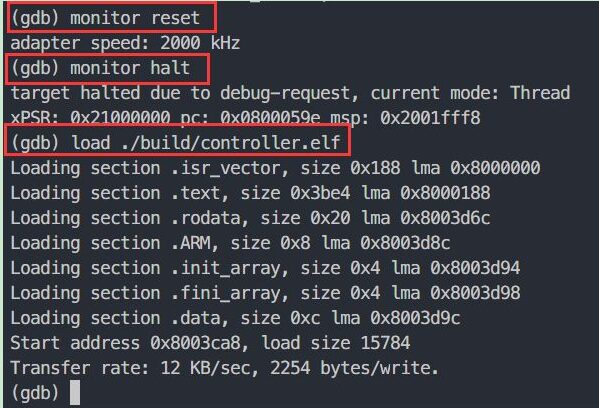
                    "description": "Reset MCU",
                    "text": "monitor reset",                                               
                    "ignoreFailures": false
                },
                {
                    "description": "Halt",
                    "text": "monitor halt",                                                  
                    "ignoreFailures": false
                },
                {
                    "description":"Download code to MCU",
                    "text": "load" ,              
                    "ignoreFailures": false                                      
                }
            ],
            "preLaunchTask": "build", 
        }
    ]
}

You can see that the setupCommands are the same as the steps we previously took with gdb: connect to GDB Server—reset—halt—download code.
And in preLaunchTask is the build task we configured in tasks.json. It allows us to compile each time before debugging.
After saving, set a few breakpoints, press F5, and you can happily debug. The functionality is quite comprehensive.

Setting Up STM32 Development Environment in VSCode

【Note】: When debugging, you need to first press F1 –> Tasks: Run Task and select the openocd task to run.

Setting Up STM32 Development Environment in VSCode

Because debugging requires connecting to st-link, and the openocd task starts the st-link service. This way, the client can connect. Otherwise, the target remote localhost:3333 error will keep appearing.
At this point, we are almost done, and developing STM32 is completely feasible.
Source:
https://blog.csdn.net/qq_33559992/article/details/97548915
Statement: The materials in this article are sourced from the internet, and the copyright belongs to the original author. If there are any copyright issues, please contact me for removal.

———— END ————

Setting Up STM32 Development Environment in VSCode

● Column “Embedded Tools

● Column “Embedded Development”

● Column “Keil Tutorial”

● Selected Tutorials in Embedded Column

Follow the public account reply “Join Group” to join the technical exchange group as per the rules, reply “1024” to see more content.

Setting Up STM32 Development Environment in VSCode
Click “Read Original” to see more shares.

Leave a Comment