Introduction
Recently, I discovered a “treasure”: Microchip’s AN4515 application note, which explains how to run several classic digital signal processing (DSP) algorithms on its AVR® EA 8-bit microcontroller (MCU) along with examples:
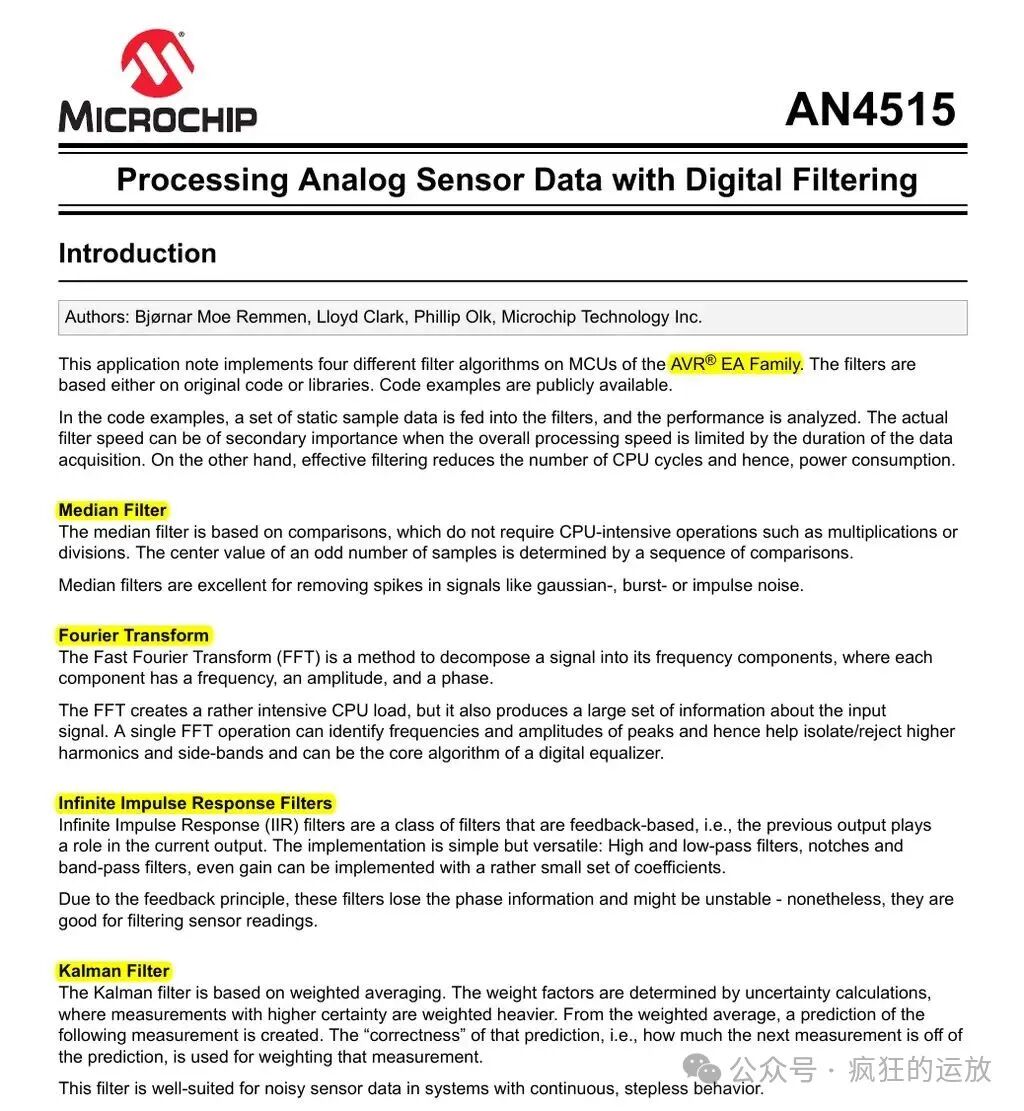
This article introduces the basic usage and the first example — the Median Filter.
Subsequent articles will gradually introduce IIR filters, FFT transformations, Kalman filters, and other examples.
Hardware Support
The code corresponding to AN4515 is suitable for the Microchip AVR64EA48 Curiosity Nano Evaluation Kit:
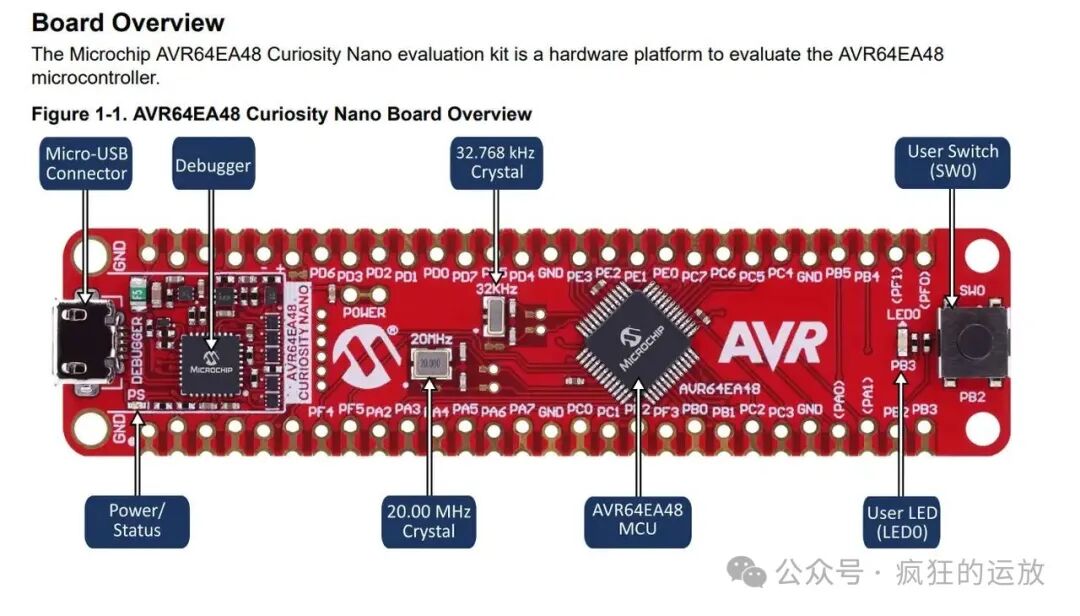
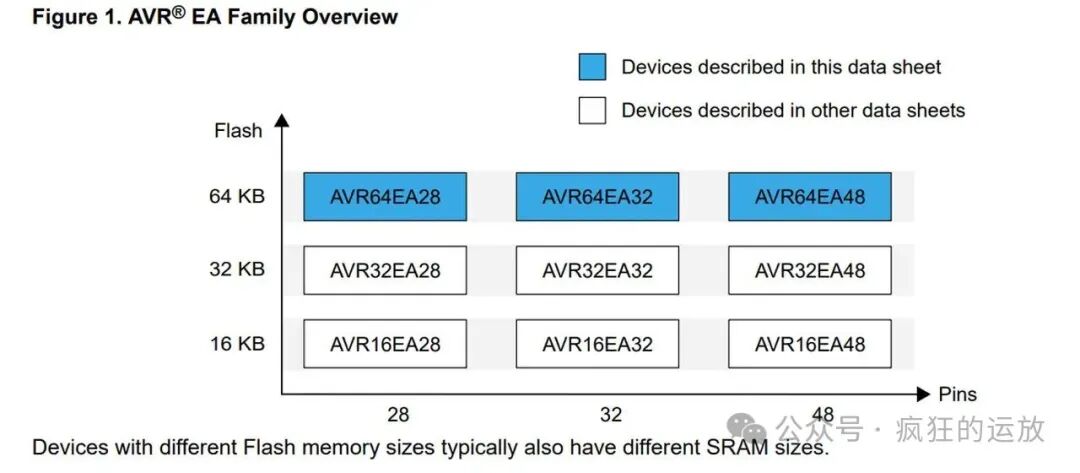
The onboard MCU model is AVR64EA48, featuring an AVR® 8-bit CPU with a hardware multiplier, a maximum clock speed of 20 MHz, and internal resources of 64KB flash, 6KB SRAM, and 512 bytes EEPROM.
Its position in the AVR® EA series is as follows:
Software Support
The software requires support in three areas:
- IDE: Microchip Studio IDE v7.0.2594+ or MPLAB® X IDE v5.50+
- Compiler: XC8 Compiler v2.40+
- Device Family Pack: Microchip AVR64EA48 Device Support Pack AVR-Dx_DFP 2.2.56+
Please note that the two IDEs correspond to different example codes, which can be obtained from different repositories on Microchip’s GitHub (see references [4] and [5]).
I am using MPLAB® X IDE v6.25, and I will use this IDE as an example for the introduction.
Steps to Use the Median Filter Example
Now we will document the usage of the Median Filter example.
1. Preparation
First, prepare the MPLAB® X IDE and the AVR64EA48 Curiosity Nano board, as shown below:
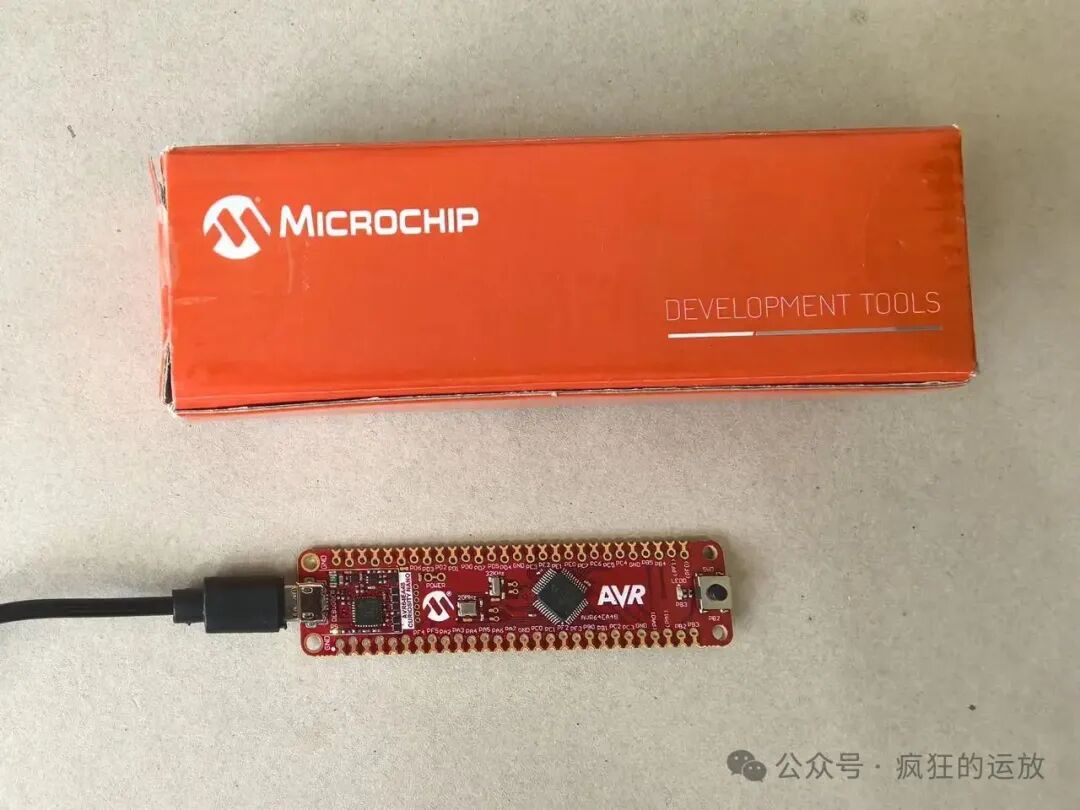
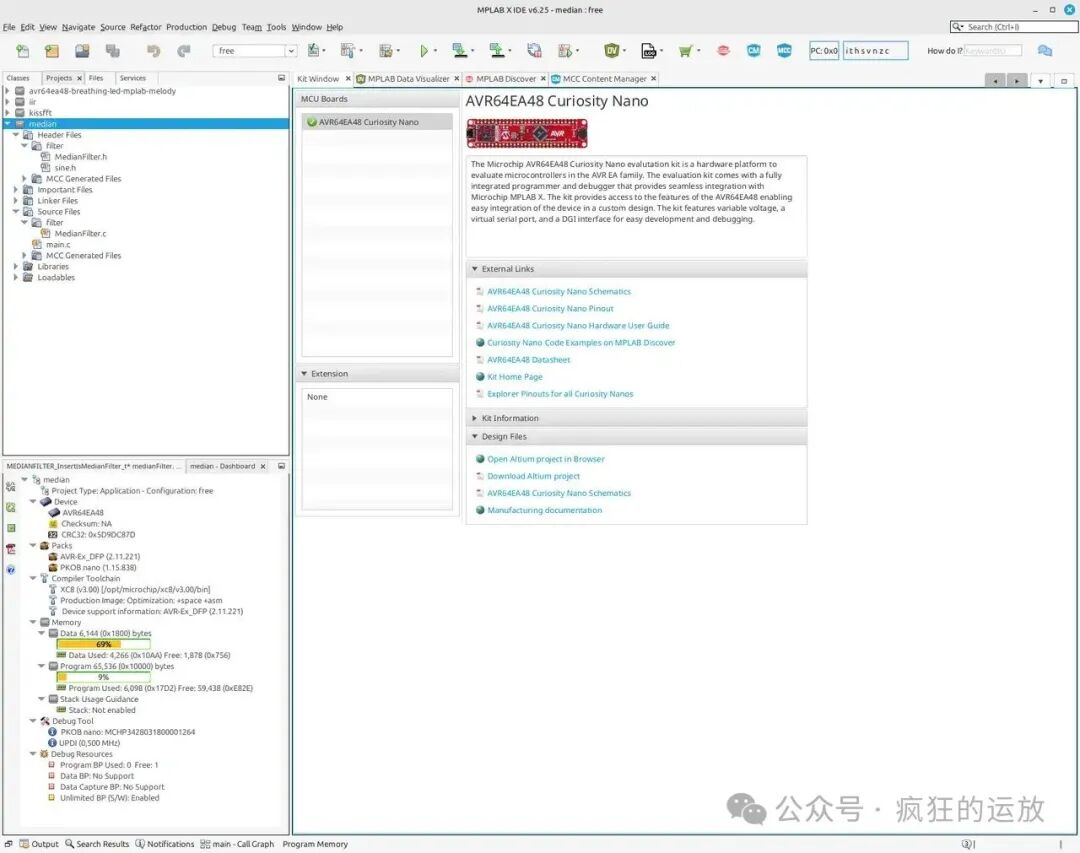
Since the AVR64EA48 Curiosity Nano board comes with a built-in debugger chip, when connected to the computer, the MPLAB® X IDE can automatically recognize the board:
2. Obtain Code
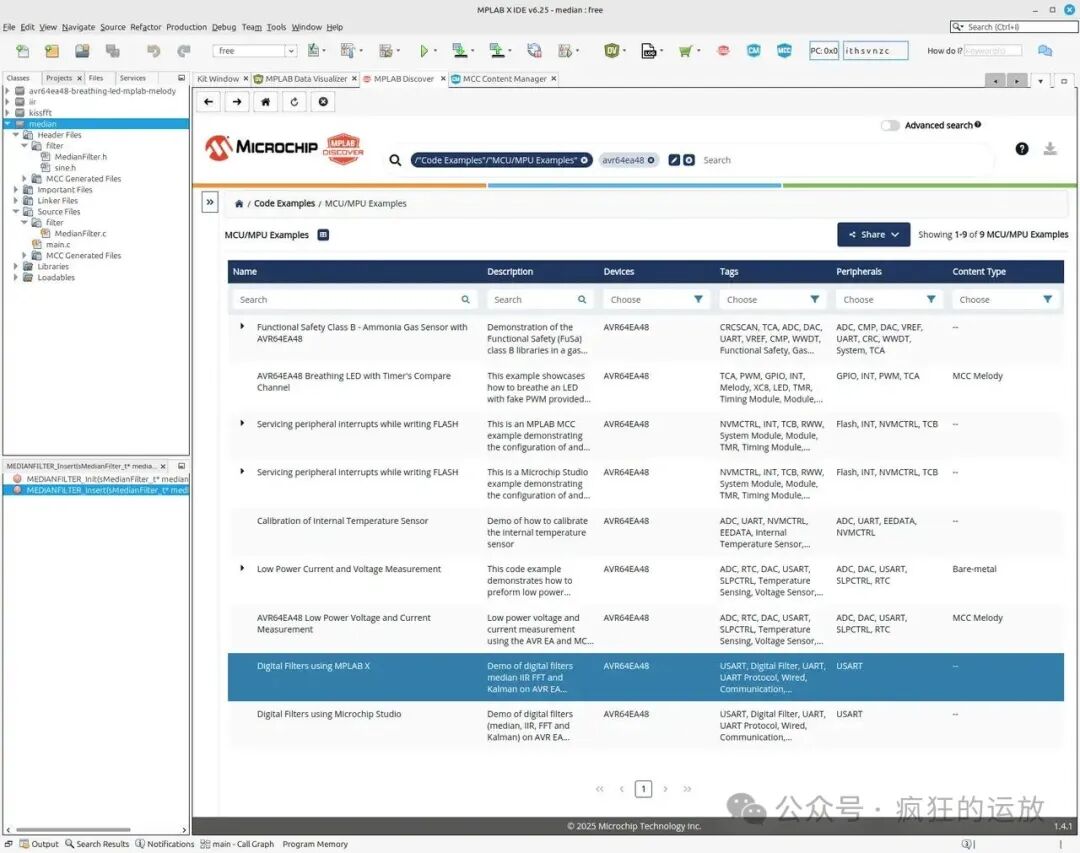
In MPLAB Discover, you can see all the officially supported examples, including “Digital Filters using MPLAB X” and “Digital Filters using Microchip Studio”; we will use the former:
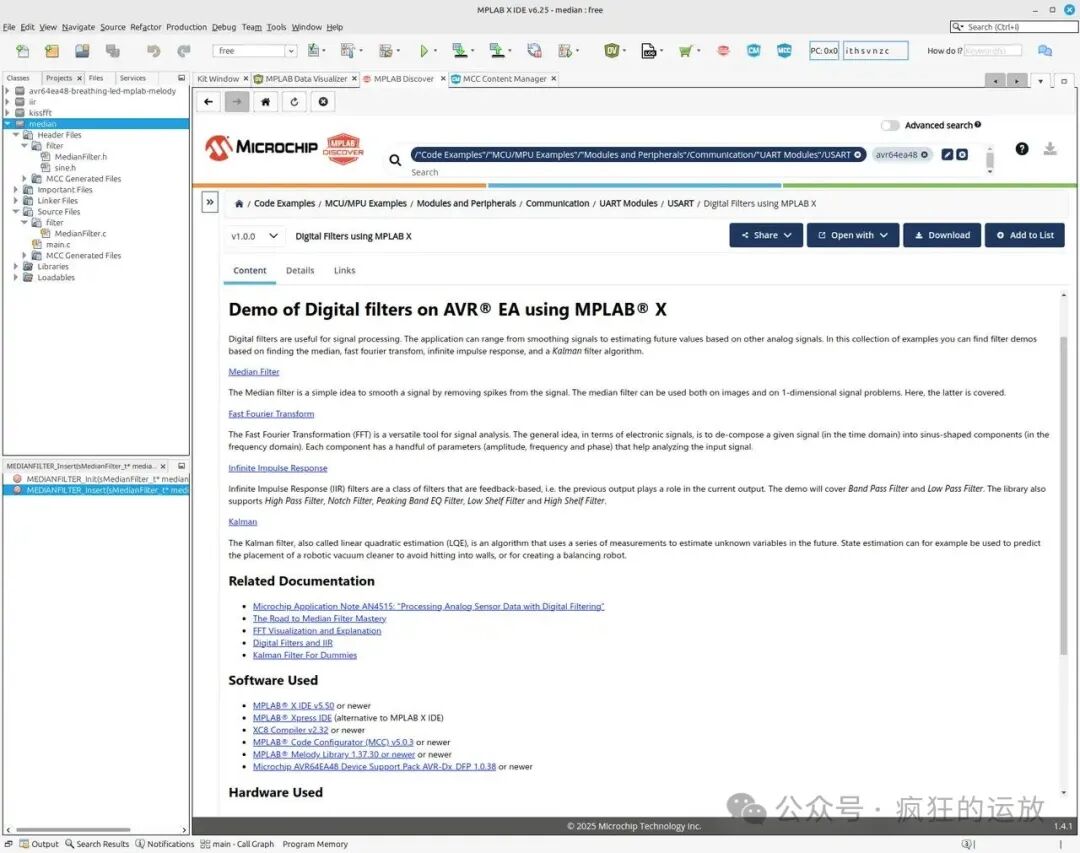
In “Digital Filters using MPLAB X”, you can see a brief introduction to the code, then click the “Download” button in the upper right corner to download the code (similar to downloading directly from the Microchip GitHub code repository):
3. Project Operations
Import the code project into the IDE, update the Device Family Pack, and perform compilation, download, and run operations, which usually complete successfully.
4. Data Visualization
Open the Data Visualizer in MPLAB® X IDE, load the data_visualizer.dvws file from the code project directory, and after opening the serial port (the serial port number in my image is ttyACM0), the effect is as follows:
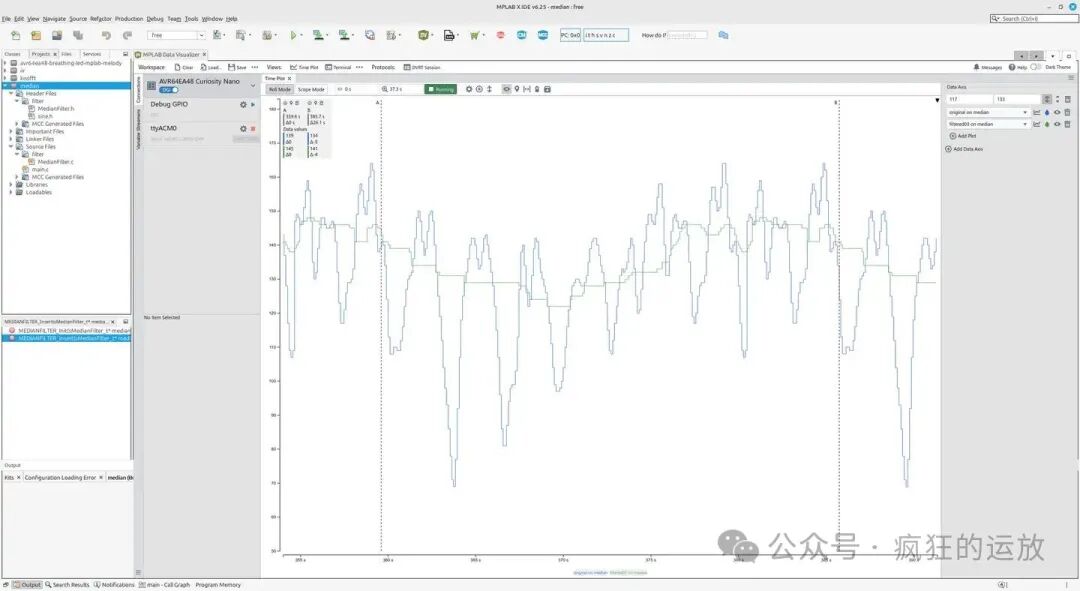
The blue curve represents the original signal (the pre-stored guitar waveform in the code), and the green curve represents the signal after median filtering. The median filter effectively removes spikes from the signal, making the filtered waveform smoother.
Code Explanation for the Median Filter Example
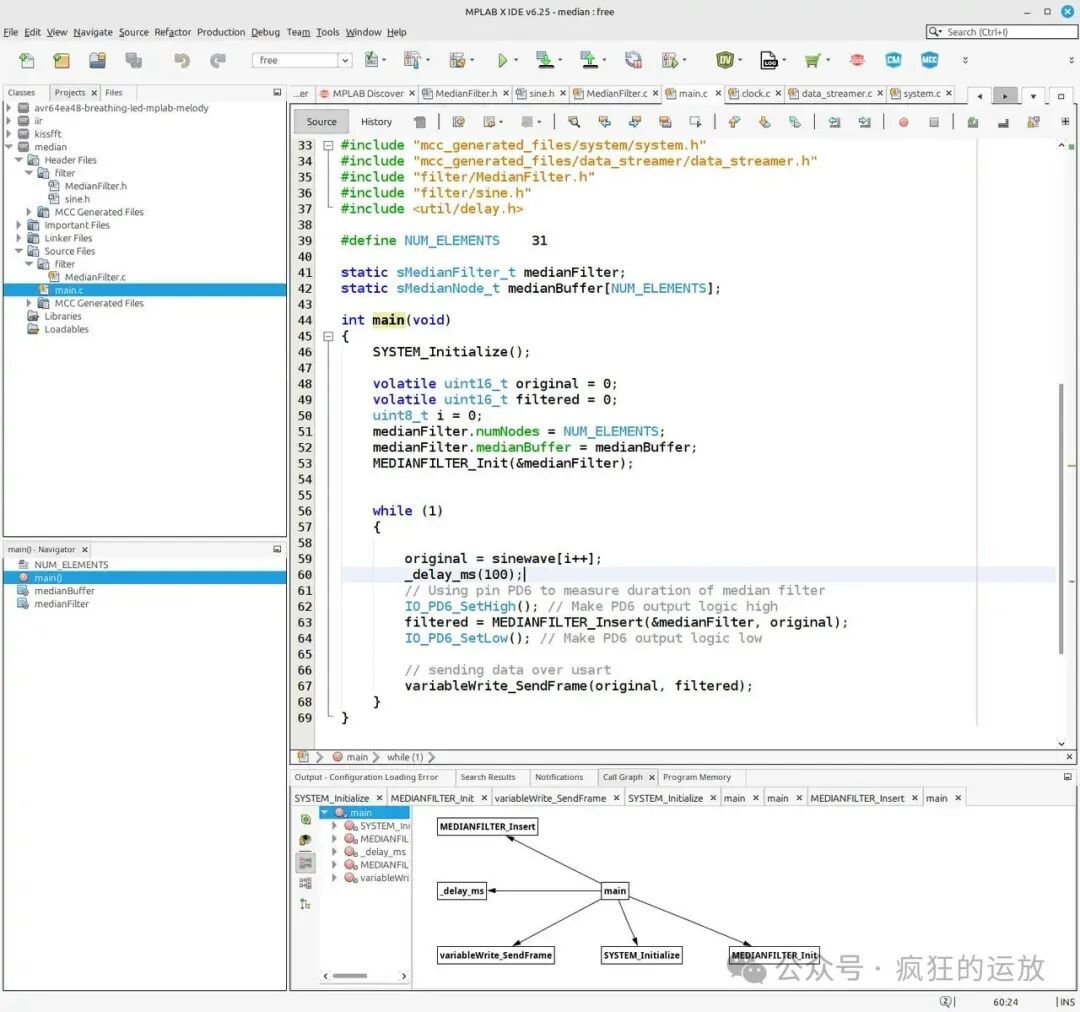
By examining the main function, we can see the code logic (refer to Figure 8).
The original signal is stored in the sinewave array.
Each time, one original signal data (original) is taken and processed through the MEDIANFILTER_Insert function to output a filtered signal data (filtered).
These two data points are sent to the Data Visualizer in the IDE via the serial port, and data_visualizer.dvws is responsible for parsing these data and presenting the waveform.
The core of the median filtering algorithm is “window + sorting”. AN4515 provides an example where, for a window of 9 data points, the data is sorted, and the 5th data point in the sorted order is taken as the “median”:
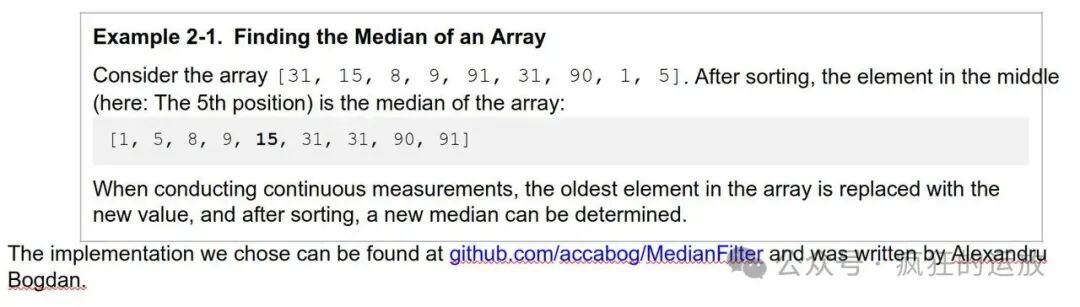
In the actual code, UINT8/16 types are used, and the window size is set to 31. For more details, refer to the code file MedianFilter.c in the project.
If performance measurement is needed, the code also reserves GPIO toggles to observe the execution time of the MEDIANFILTER_Insert function.
Conclusion
This article, based on Microchip’s AN4515 application note, introduced the example of running the Median Filter on the AVR64EA48 Curiosity Nano board.
Note: The images in this article are of high resolution, and WeChat may compress them. If they appear unclear, you can click “Read the original text” in the lower left corner.
References
-
https://ww1.microchip.com/downloads/aemDocuments/documents/MCU08/ApplicationNotes/ApplicationNotes/ProcessAnalogSensorDataDigitalFiltering-DS00004515.pdf
-
https://www.microchip.com/en-us/development-tool/EV66E56A
-
https://www.microchip.com/en-us/product/avr64ea48
https://github.com/microchip-pic-avr-examples/avr64ea48-digital-filters-mplab-mcc
-
https://github.com/microchip-pic-avr-examples/avr64ea48-digital-filters-studio
About Crazy Op-Amps
Interpreting mixed-signal hardware and software, but correctness is not guaranteed. Welcome to follow~