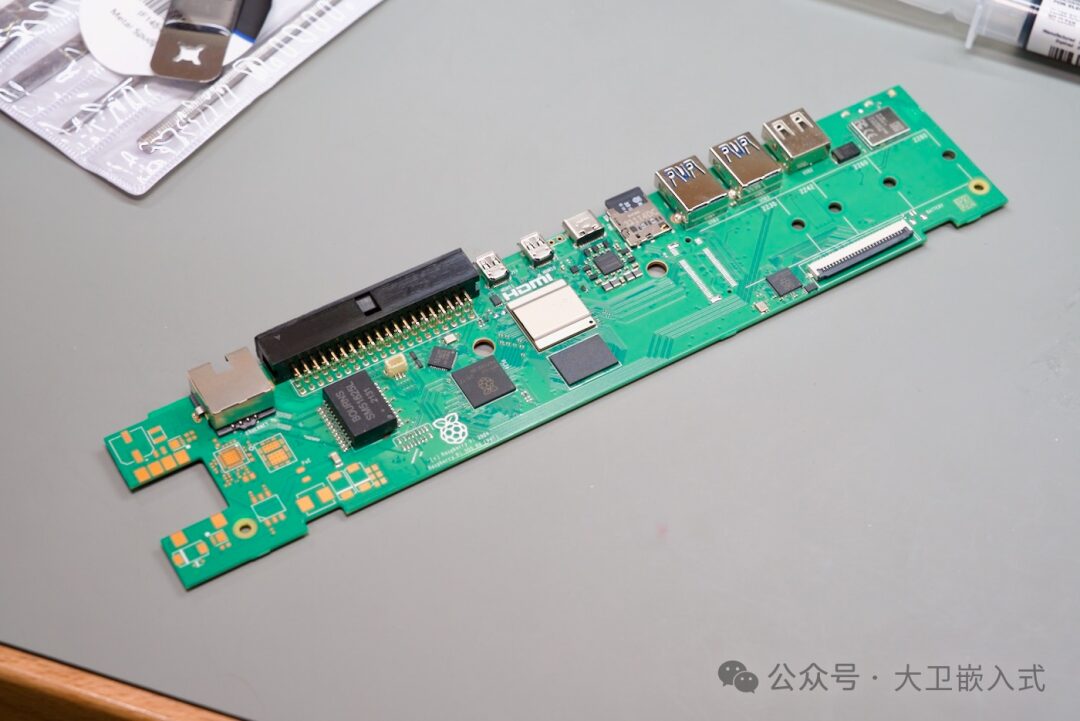
The above image shows the reserved M2 interface pads.
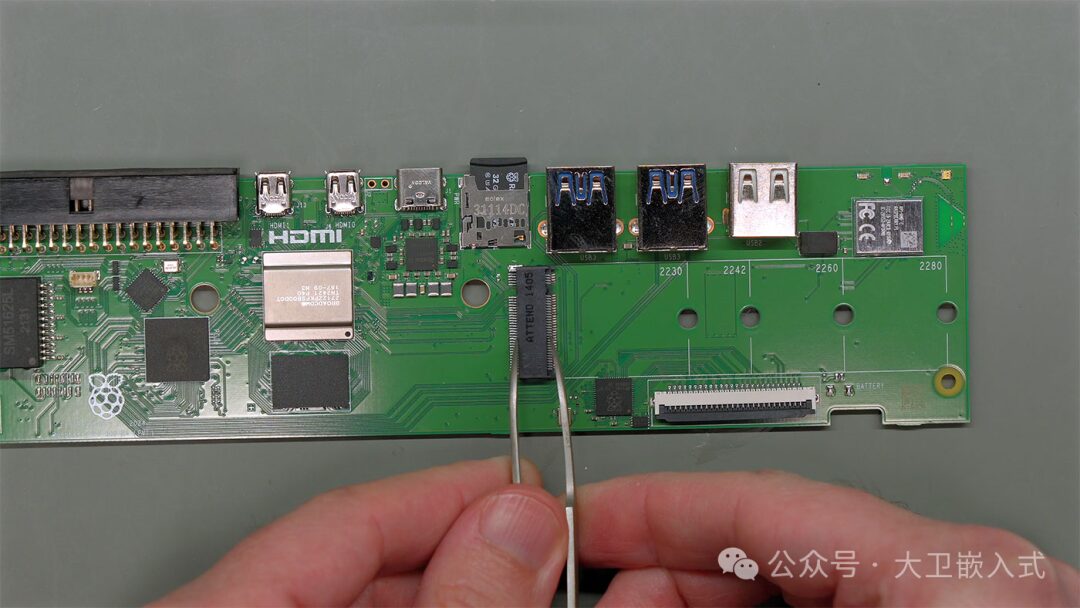
The soldered interface cannot work due to a lack of power supply.
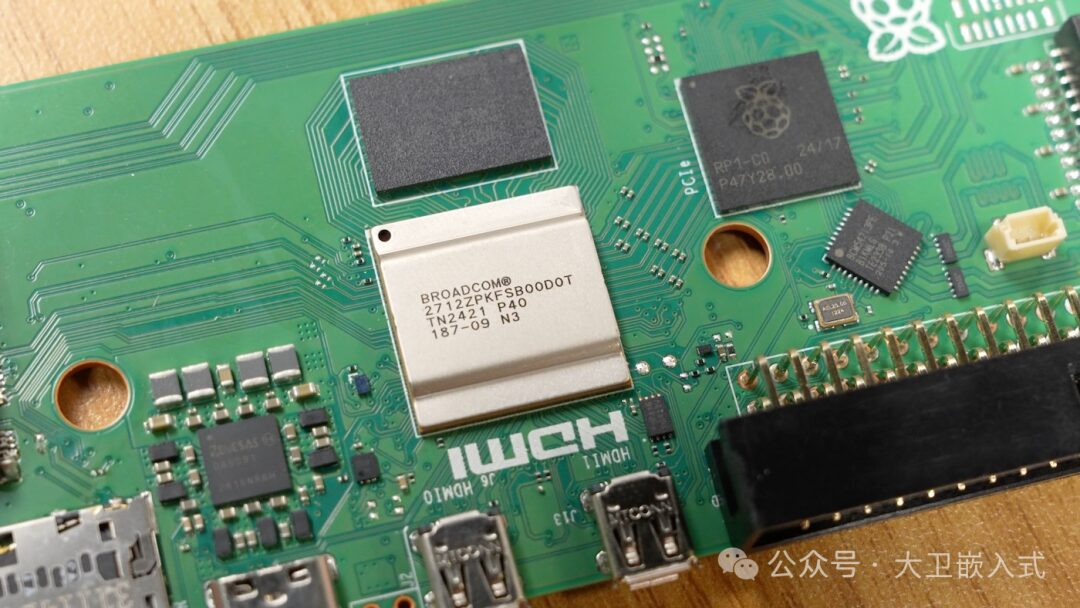
Let’s take a look at other parts of the Pi 500 PCB; the layout in the middle section is almost identical to that of the Pi 5, possibly saving on design costs. For keyboard input,
Raspberry Pi has switched to its own microcontroller, the RP2040.
Overview of Pi 500 (and Comparison with Pi 400)
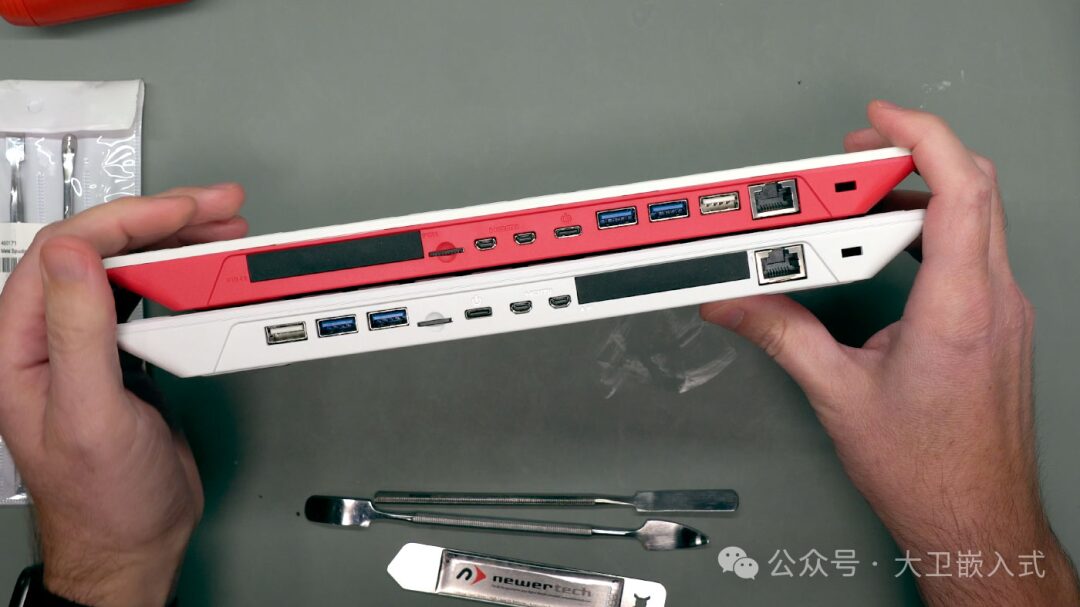
From the outside, at least on the back, the ports are the same—except that the USB ports on the Pi 500 have a dedicated USB 3.0 bus (for 2×5 Gbps, rather than shared 5 Gbps bandwidth). The layout has changed, but the external I/O remains the same (the Pi 400 is the red and white model in the image above).
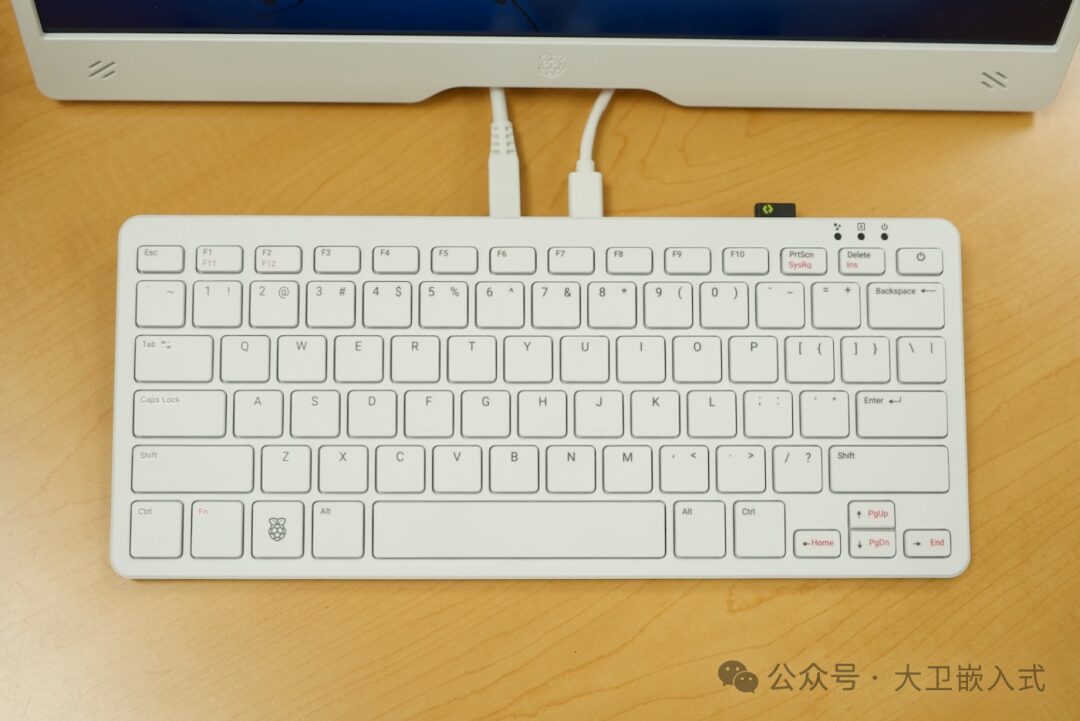
From the top view, the keyboard layout and printing have slightly changed. The keyboard design itself is different, with a slightly better feel (though “feel” is somewhat subjective), but it still has a bit of a “Chromebook” feel (key action feels like mid-range laptops). It is practical and better than the Pi 400’s keyboard, but not stunning.
A significant improvement is the new dedicated power button located at the top right, where it should be. The setup on the Pi 400 was odd, with the function/power button located several spaces to the left, which I could never get used to.
Now, when the Pi 500 is powered on, the LED lights up green, and when off, it lights up red. The power button is the same as the Pi 5 power button, and a long press can force a shutdown.
After some detailed benchmarking, I found that the performance of the Pi 500 is within the margin of error compared to the Pi 5, at least for any normal benchmark. Under extreme load for over 30 minutes, I did not see any thermal throttling, but the performance of the Pi 500 was slightly lower than my Pi 5.
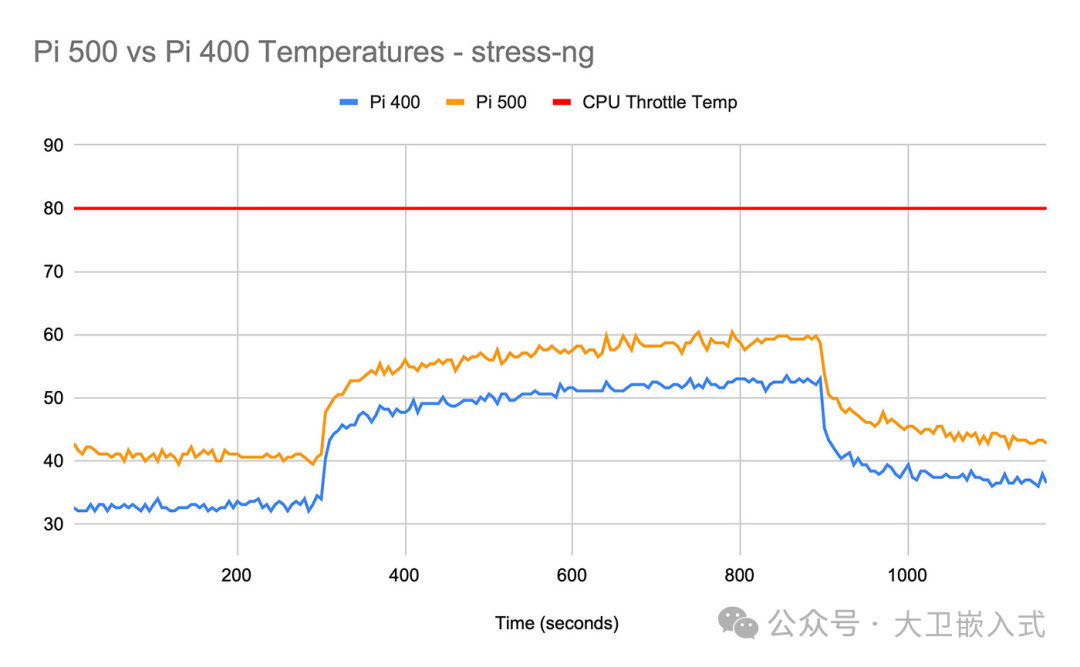
In terms of heat dissipation, the Pi 500 uses a large heatsink and provides internal structure for the plastic casing. Its weight is almost the same as the Pi 500, and I saw that the temperature on the SoC of the Pi 500 was consistently 6-8°C higher, but the keys never felt noticeably warm, even after extensive benchmarking:
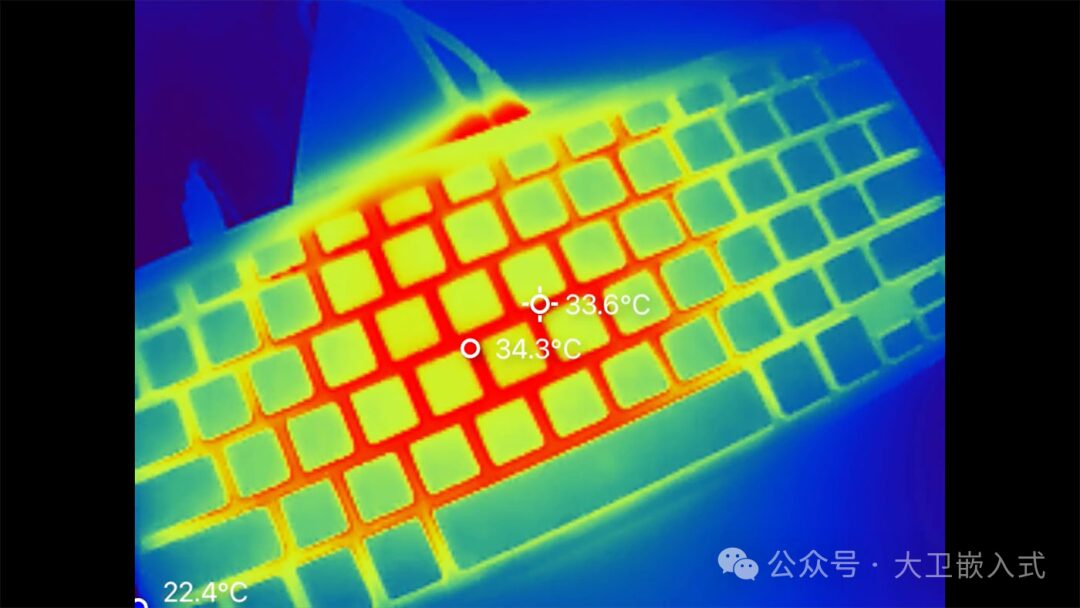
The heatsink dissipates heat well, without creating hot spots like during the Intel MacBook era. However, the passive heatsink cannot keep up with the 3.0 GHz overclocking. For that, you need to figure out a custom active cooling solution or find a way to improve ventilation inside the plastic casing. I was able to overclock to 2.8 GHz under moderate workloads, but 3.0 GHz resulted in severe thermal throttling after just a few minutes of benchmarking.
Compared to the Pi 400, the Pi 500, with a default clock speed of 2.4 GHz, is always 2-3 times faster. The same acceleration can be seen from Pi 4 to Pi 5, or from CM4 to CM5:
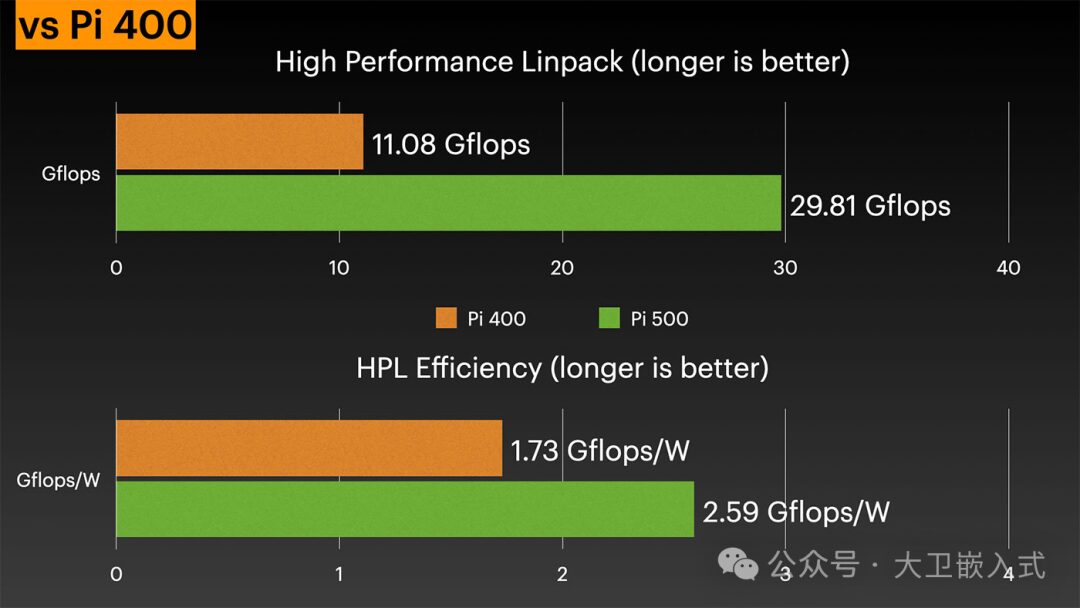
Raspberry Pi has also just released a software update to adjust SDRAM timings, providing an additional 6-18% acceleration based on workload (with multi-core workloads benefiting the most, as well as the now-default NUMA emulation).
Pi Monitor
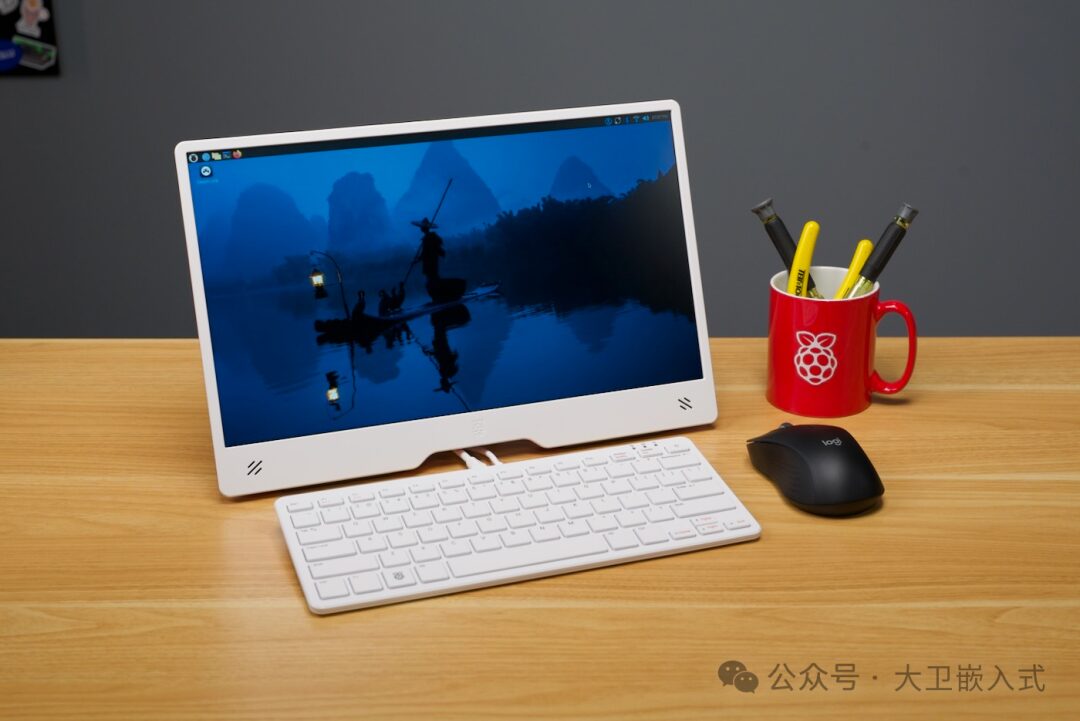
Raspberry Pi also launched a brand new “Pi Monitor” today for $100. This is a 15.6-inch IPS LCD display that can be powered directly through the Pi’s USB port (at 60% brightness and volume) or via an external USB-C charger (charging at 100%).
I measured the power consumption of the Pi Monitor (at the wall, using Raspberry Pi’s own USB-C power adapter), which seems to be between 5-5.5W at 100% brightness, and between 4-5W at 60% brightness. When the Pi 500 is off, the monitor does not consume enough current to register on my ThirdReality Smart Outlet.
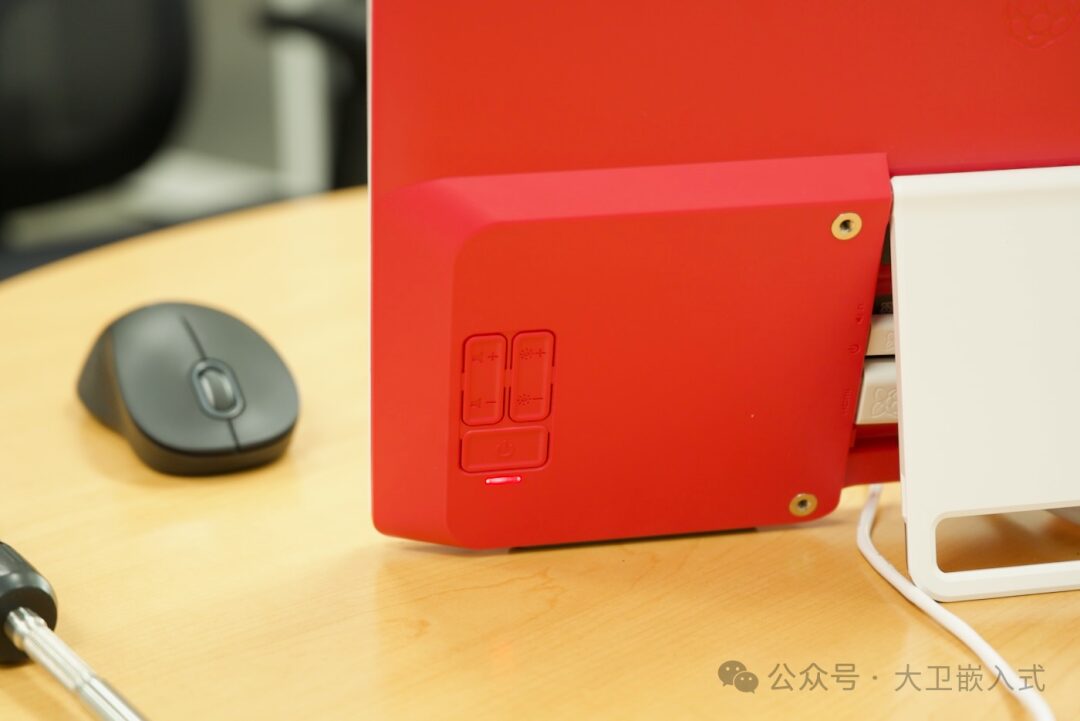
The hinge mechanism on the back provides multiple viewing angles and even flips up to reveal a nail stand if you just want to nail a few nails on the wall and hang it there!
However, the back is also where all the controls and power LED are located—this latter choice is odd, as I typically wouldn’t turn the monitor around to check if it’s on or powered (see above).
Fortunately, the controls are very intuitive and can be easily felt without looking—there’s a large power button at the bottom, followed by separate volume and brightness adjustment buttons.
The tiny built-in speaker is very quiet and can only be heard in a quiet place, but it’s useful in emergencies. A better option is to plug headphones or speakers into the headphone jack on the back—it separates audio from the Pi’s HDMI output, which is especially convenient for Pi 5 / Pi 400 / Pi 500 users, as these models do not have an analog audio jack!
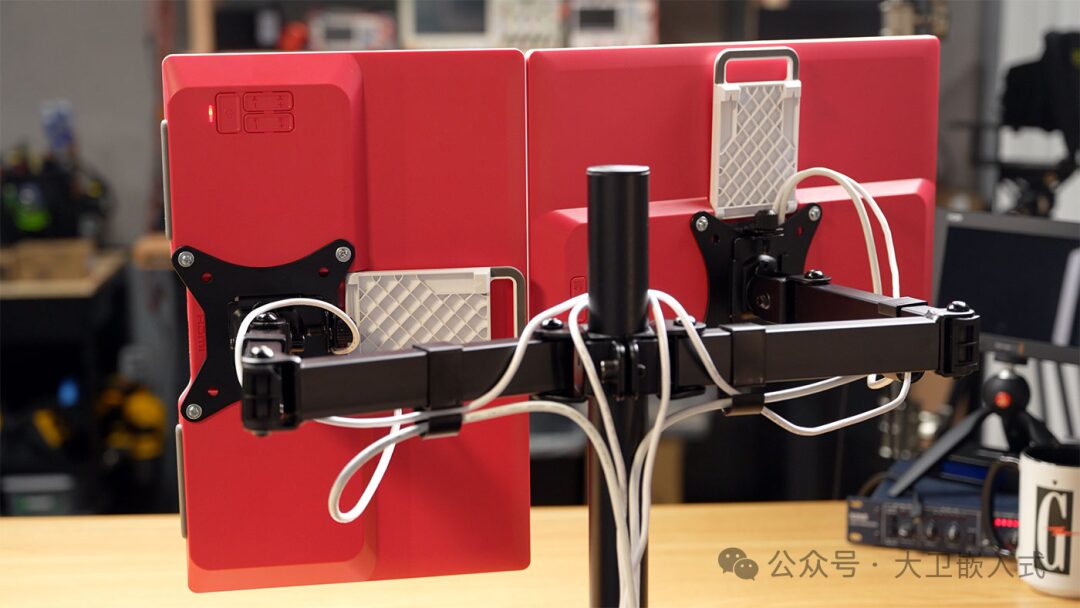
My biggest complaint about this monitor (which is just a small issue overall) is the VESA mounting option. It’s okay… but the mounting plate completely covers the port area, so if you need to change cables or insert headphones, you have to completely remove the VESA mount. This also makes installation more challenging, especially if your VESA mount does not have a removable mounting plate!
Usage of Pi 500
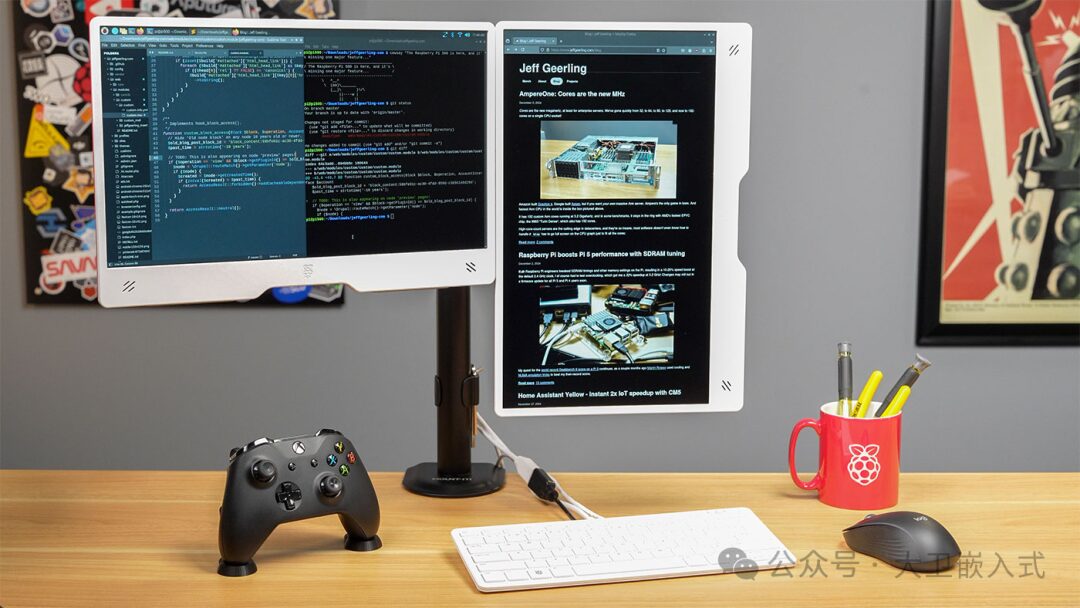
I built a dual-monitor Pi workstation, with one monitor being a vertical display (easily done using the screen configuration tool in Pi OS).
The Pi 500 is very fast, and all the containers and tools I need for web development (Docker, Sublime Text, Firefox, PHP, MySQL, etc.) run perfectly.
The 8GB of RAM is somewhat limiting, as running multiple containers and applications quickly loads and swaps—this is painfully slow on a microSD card.