1. Preparation of Flashing Tools
Hardware Preparation:
A TF card of 16GB or more and a card reader. It is recommended to use a high-speed TF card (the read and write speed of the card directly affects the operating speed of the Raspberry Pi).
Software Preparation: (Choose one of the two methods below)
Method 1: Official Raspberry Pi flashing tool Raspberry Pi Imager Method 2: SD card formatting tool: SD Card Formatter, flashing tool (choose one of the two): Etcher / Win32 Disk Imager (the demonstration below uses Win32 Disk Imager)
2. Image Flashing (Choose one of the two methods below)
Method 1: Flashing using the official tool
1. Download and install the flashing tool: Raspberry Pi Imager
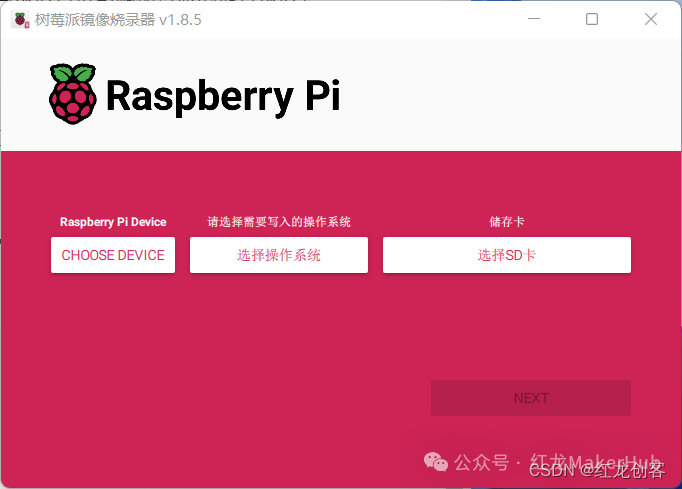
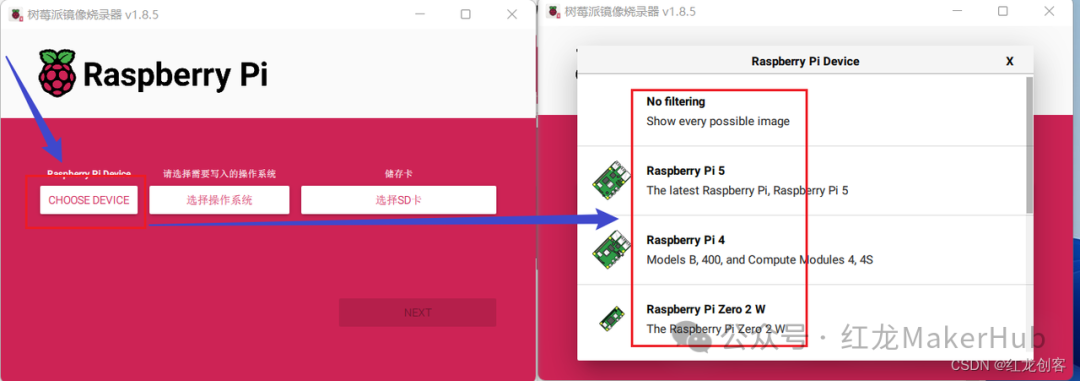
2. Select the corresponding device model
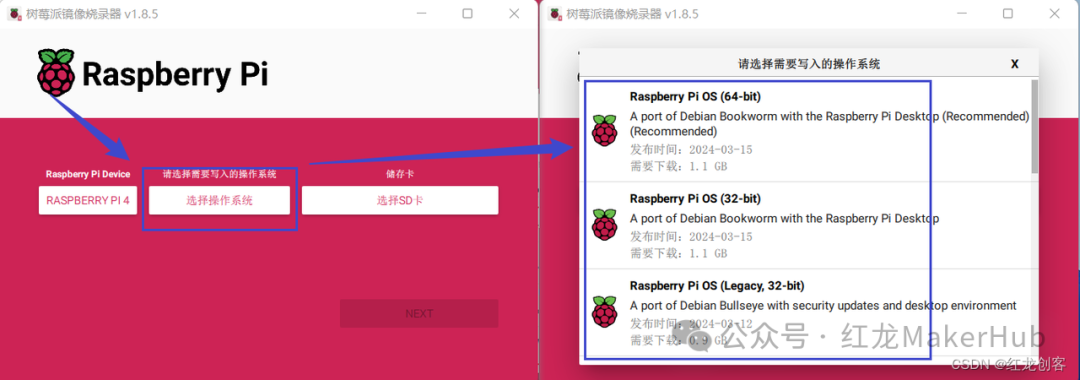
3. Select the operating system
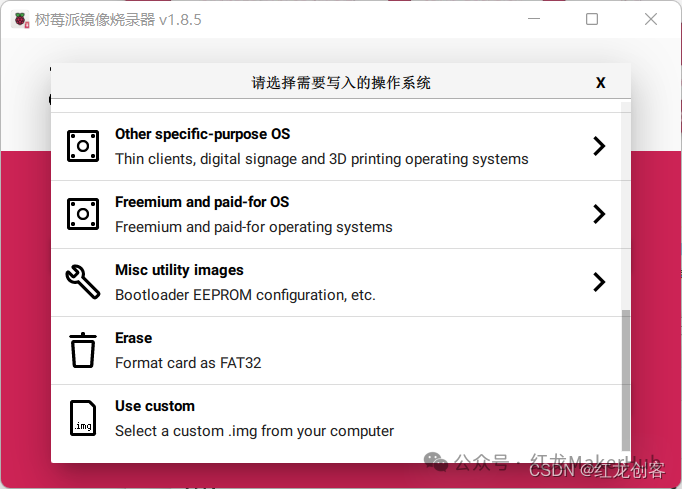
You can also choose third-party systems and locally downloaded systems here
4. Select the SD card
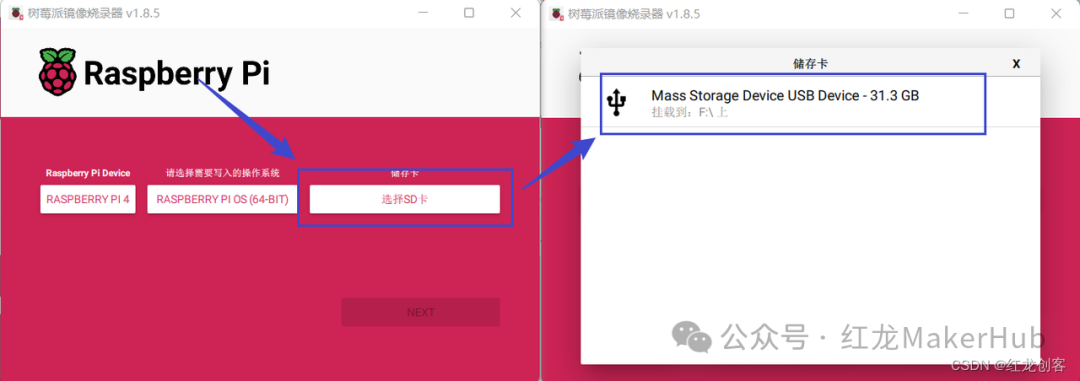
5. Enable SSH and WiFi
Clicking next will pop up an editing interface where you can click to enable SSH, WiFi, etc.
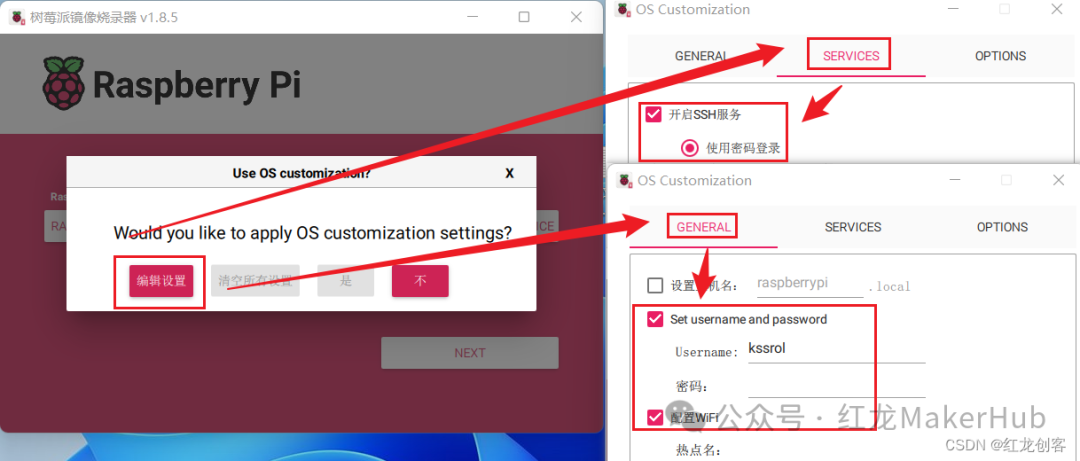
After editing, click save, then click flash and wait for the flashing to complete.
Method 2: Flashing using third-party tools
1. Download the system image
The download address on the Raspberry Pi official website: https://www.raspberrypi.com/software/operating-systems/
You can also download other system images from other third-party official platforms.
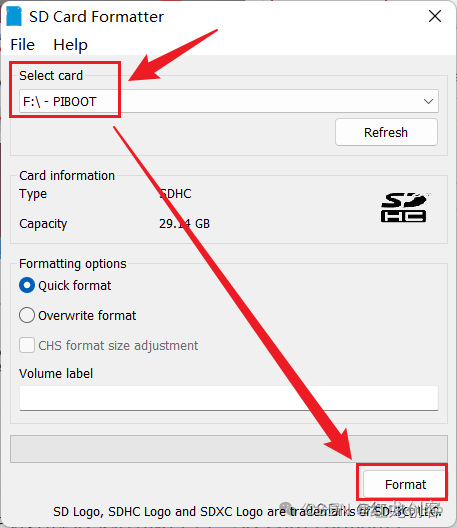
2. Format the SD card
Open the downloaded and installed SD card formatting tool: SD Card Formatter, select the inserted SD card and click format.
3. Flash the system
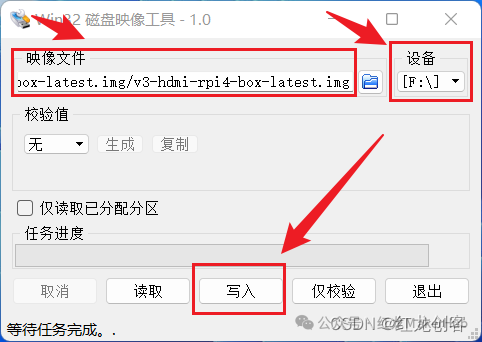
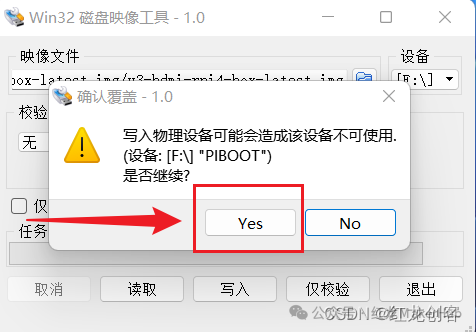
Open the installed flashing tool (choose one of the two): Etcher / Win32 Disk Imager (the demonstration below uses Win32 Disk Imager, Etcher is similar)
Select the system image that has been downloaded to your local machine, then select the inserted SD card and click write, and wait for the flashing to complete.
If there are any issues downloading the above software, please reply in the comments, and I will provide you with the installation package once I see it.