
Hardware Preparation
-
Raspberry Pi -
Breadboard -
HC-SR04 Ultrasonic Sensor
Configuration Steps
1. Connect the hardware according to the wiring diagram

2. Enter the example folder

Create and edit a python file named ultrasonic_sensor.py
nano ultrasonic_sensor.py
Enter the editing interface and input the code
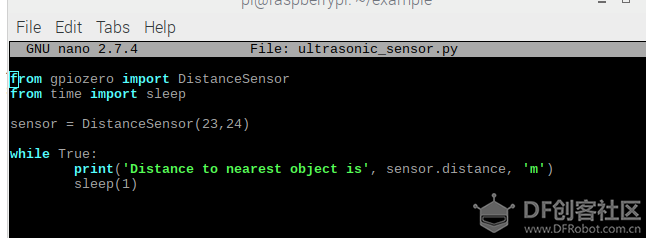
3. Editing completed
Press ctrl+x to exit, then press y and hit enter to confirm.
4. Run the test
sudo python3 ultrasonic_sensor.py
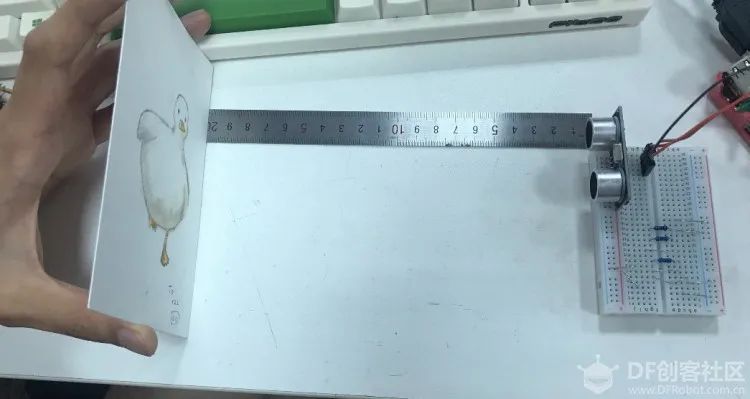

Output result: 0.2m.
Give it a try!
– END –
Hardware Arsenal
Click to learn more👆
If you have any thoughts or corrections about the article, feel free to leave a comment below!
For those who are eager to learn more, click on Read Original to continue learning in the community!
Previous Reviews
What is Raspberry Pi? Can it be eaten?
Raspberry Pi Basic Tutorial Series 1: Configuring and Initializing Raspberry Pi
Raspberry Pi Basic Tutorial Series 2: Remote Connection to Raspberry Pi
Raspberry Pi Basic Tutorial Series 3: Learning Linux Commands
Raspberry Pi Basic Tutorial Series 4: Lighting Up an LED
Click to read👆