RT-Thread is an open-source real-time operating system that mainly consists of a real-time kernel and various components related to real-time applications. This includes the RT-Thread kernel, FinSH command line tool, device file system, TCP/IP protocol stack, RT-Thread/GUI, extensive CPU architecture support, and a wealth of third-party software. More information about RT-Thread can be found on the official RT-Thread website ( https://www.rt-thread.org/ ).
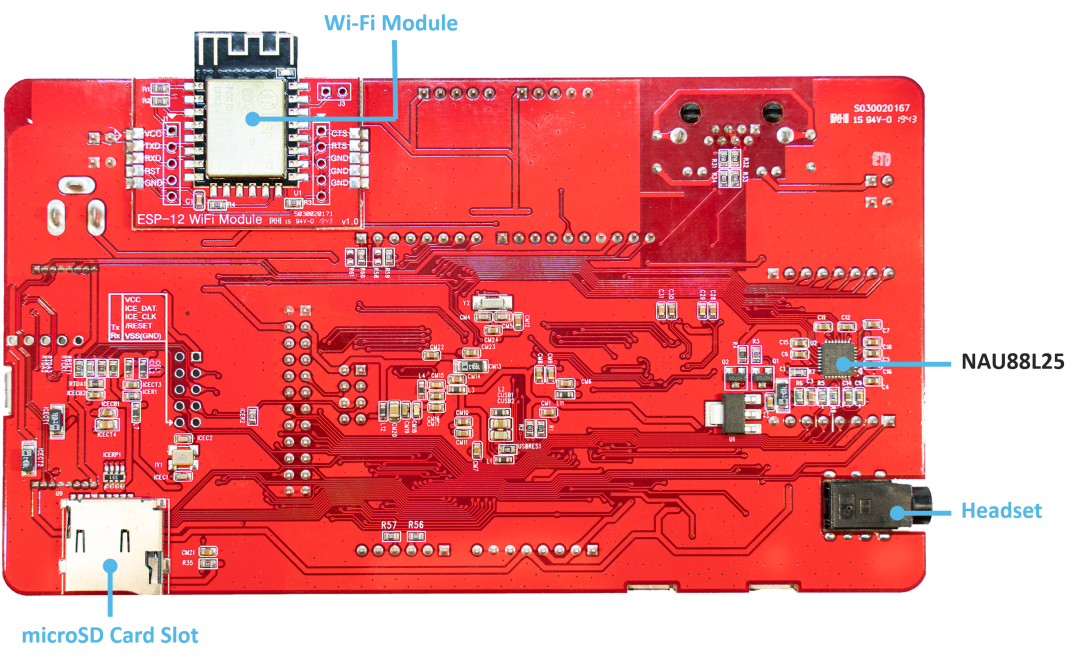
NuMaker-IoT-M487 is a development board launched by Nuvoton Technology, suitable for Internet of Things (IoT) applications, based on the NuMicro M487 series microcontroller (Cortex-M4, with a maximum operating frequency of 192 MHz). It features an RJ45 Ethernet and Wi-Fi module, allowing users to connect to the cloud either wired or wirelessly. It can also provide connectivity capabilities such as NB-IoT and 6LoWPAN through various wireless sub-boards to meet different application scenarios; combined with the built-in encryption accelerator of the NuMicro M487 series microcontroller, it enhances the efficiency of encrypted network connections.
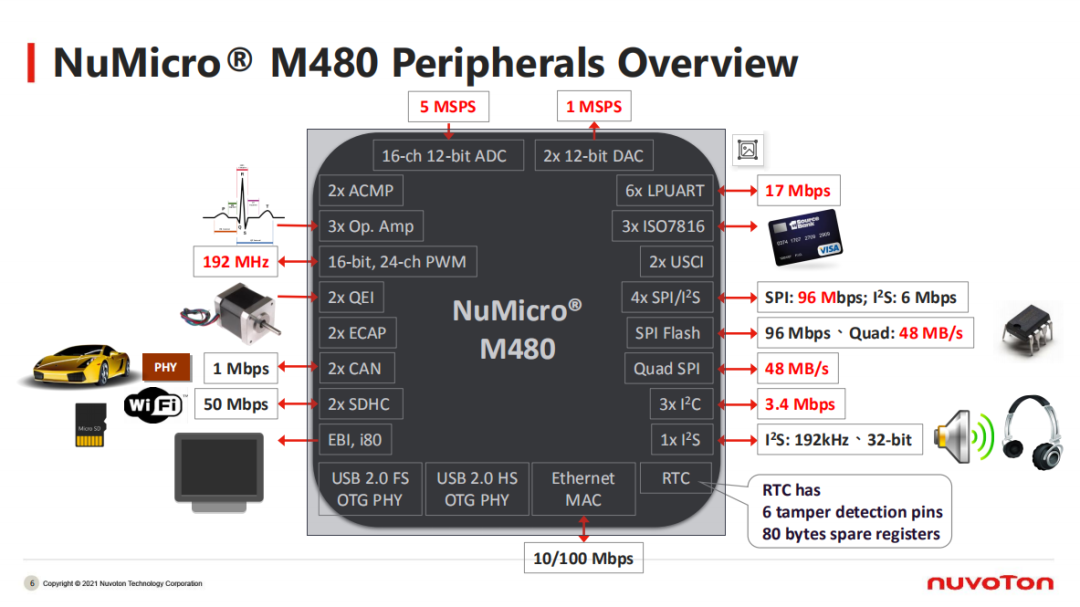
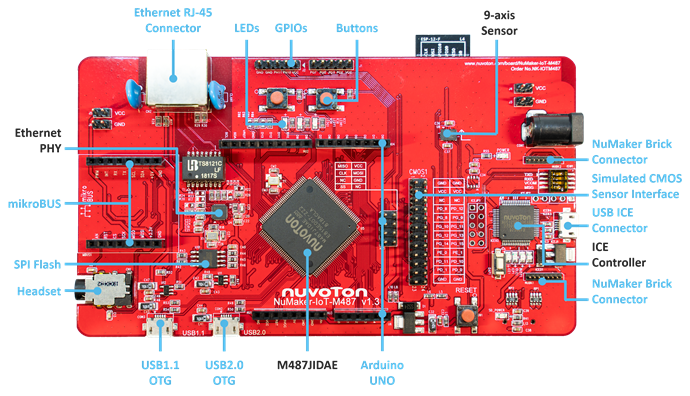
The NuMaker-IoT-M487 development board supports RT-Thread, integrates commonly used components, and includes multi-axis sensors, providing compatibility with Arduino UNO and mikroBUS™ interfaces. It can connect various interfaces such as GPIO, UART, ADC, PWM, SPI, and I2C; it also supports external SPI Flash and provides a microSD card slot.
-
Software Requirements
1. Windows 10 operating system.
2. RT-Thread Studio development tool.
3. Terminal connection tool, such as Tera Term. (Optional)
-
Hardware Requirements
1. NuMaker-IoT-M487 development board.
2. Micro USB data transfer cable.
Step One: Download and Install RT-Thread Studio Development Tool
Download RT-Thread Studio, the website is
https://www.rt-thread.org/page/download.html#studio
After downloading, directly execute the installation package. For more information on RT-Thread Studio , please refer to the online documentation
https://www.rt-thread.org/document/site/#/development-tools/rtthread-studio
(Please copy the above links to an external browser to open)
Step Two: Install NuMaker-IoT-M487 Development Package
When using RT-Thread Studio for the first time, you need to install the NuMaker-IoT-M487 development package. Follow the instructions in the image below to open SDKManager

In NUVOTON, check NUMAKER-IOT-M487. Under Debugger_Support_Packages, check OpenOCD-Nuvoton. Then click Install Packages to download and install.
Step Three: Create a New Project
Press the button in the image below, select RT-Thread Project, and the New Project dialog will appear

Click on “Base On Board”, select NUMAKER-IOT-M487 in Board: . In Project name: enter the project name, such as BlinkLED. Then click Finish to start creating the new project. The newly created project will be located in the workspace path under the RT-Thread Studio installation path, with the project name as a sub-path.
Step Four: Compile
Use the default configuration. Click the button in the image below to start the full compilation

Finally, the generated binary executable file is rtthread.bin. Assuming the project name is BlinkLED, the path of the binary executable file will be
<Path-to-RT-Thread>\workspace\BlinkLED\Debug\rtthread.bin
Step Five: Firmware Download
The simplest download method: drag the binary image file to the NuMicro MCU virtual disk or use the method to transfer to the NuMicro MCU virtual disk to complete the firmware download.
(1) NuMicro MCU Virtual Disk
First, configure ISW1 on NuMaker-IOT-M487, turning all four switches to the ‘ON’ position, as shown in Figure 1. After configuration, connect the development board to the computer using the Micro USB cable (Figure 2), and a NuMicro MCU virtual disk will appear on My Computer. Next, we will use this virtual disk to perform the firmware download. (Note: If you need to perform source debugging, you need to switch the fourth switch back to the OFF position. The switch must be re-powered to take effect.)
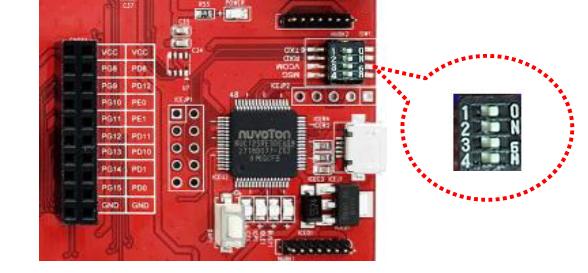
Figure 1 NuMaker-IOT-M487 Development Board ISW1 Configuration
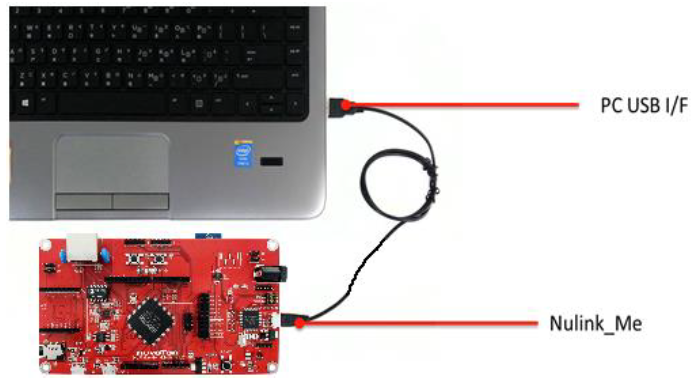
Figure 2 NuMaker-IOT-M487 Connected to Computer USB Port
(2) Flash the Binary Executable File
Transfer the rtthread.bin binary executable file mentioned in step four to the NuMicro MCU disk to complete the firmware download.
You can also download directly in RT-Thread Studio. Using this method requires switching the fourth switch on Nu-Link ISW1 back to the OFF position. Click the image below to download.

(3) Test the RT-Thread System Boot
Press the button in the image below to open the terminal

Or use Tera Term terminal software to operate the rt-thread finsh/msh command line function. The serial port configuration is shown in the image below. (Note: The corresponding serial port number for Nuvoton Virtual Com Port can be found in the device manager. For example: the serial port number is COM30.)
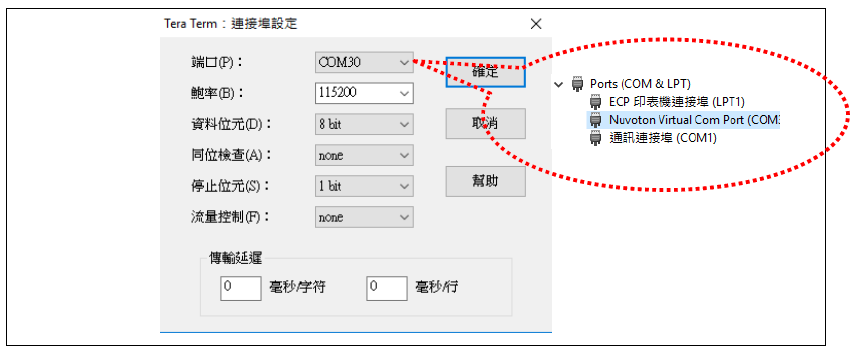
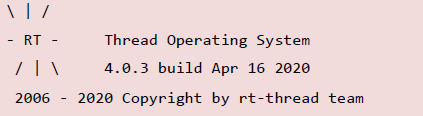
After opening the serial communication and pressing the Reset button on the board, wait for the system to reset, and the Tera Term terminal screen will display the boot information.
Related Reading:
-
[Development Board Review] Nuvoton M487 Module Review Challenge
-
M480 Training Video:
In the current situation of chip shortages and price increases, choosing a more suitable chip for projects is not an easy task,
If you are interested in the Nuvoton M480
If you have never used Nuvoton products
Want to know if the MCU model selected for your project is the best? Is the supply guaranteed?
Now you can directly talk to the product manager of Nuvoton’s M480 series MCU, consult the above questions, and scan the code to make an appointment, limited spots:


Follow us

You can add WeChat number 13632716562 to sign up for teacher training!


↓ Click to read the original text and enter the official website