Follow+Star Public Account, don’t miss out on exciting content
Author | strongerHuang
WeChat Official Account | strongerHuang
In April 2022, Arm launched the all-new MCU-level core Cortex-M85. As of now (February 2024), Cortex-M85 is the latest and most powerful Cortex-M core.
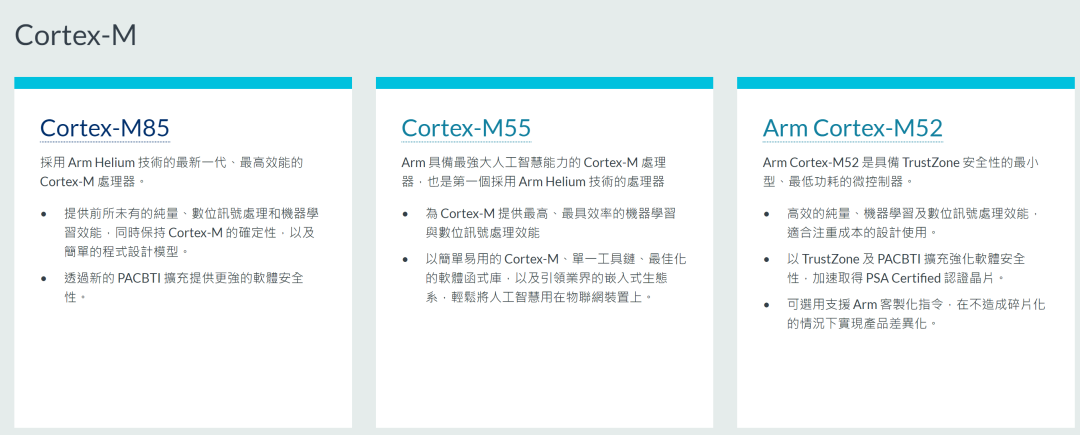
In October 2023, Renesas Electronics launched the industry’s first MCU based on the Cortex-M85 core — RA8M1 Series MCU
Today, I will discuss a quick start guide for the Renesas RA8 microcontroller based on the Cortex-M85 core.
Setting Up the Development Environment
Due to the Cortex-M core, the Renesas RA8 series microcontrollers support various commonly used development environments, such as Keil MDK, IAR EWARM, etc. This article discusses Renesas’ own official IDE (e2 studio).
Why use e2 studio? First, it is an official tool, which provides better support. Secondly, this tool not only allows for editing, compiling, and downloading code but also configures and generates peripheral initialization code, making it easier for beginners to get started and for developers to configure the lower-level (drivers) more quickly.
1. Download e2 studio and FSP Software Package
Downloads can be found on the Renesas official website, Chinese website, or official GitHub.
Renesas Official Website:
https://www.renesas.com/us/en/software-tool/e-studio
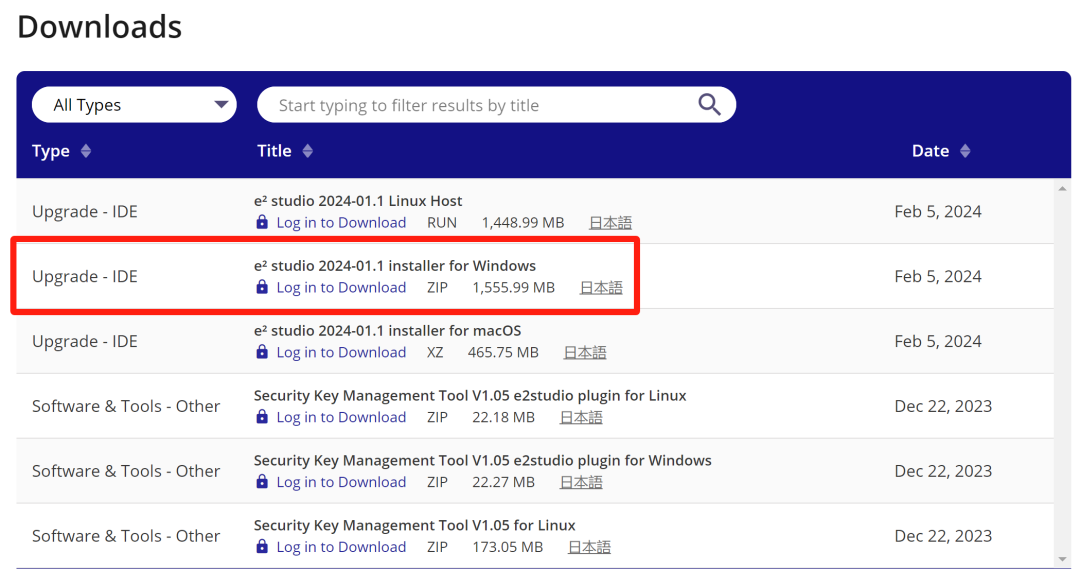
https://github.com/renesas/fsp/releases
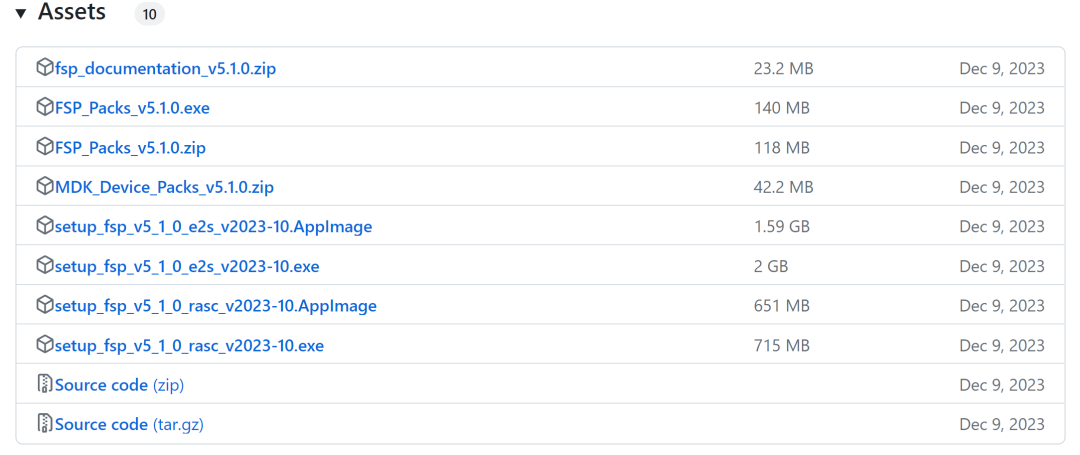
Renesas Domestic Ecological Community:
https://ramcu.cn/lists/21.html
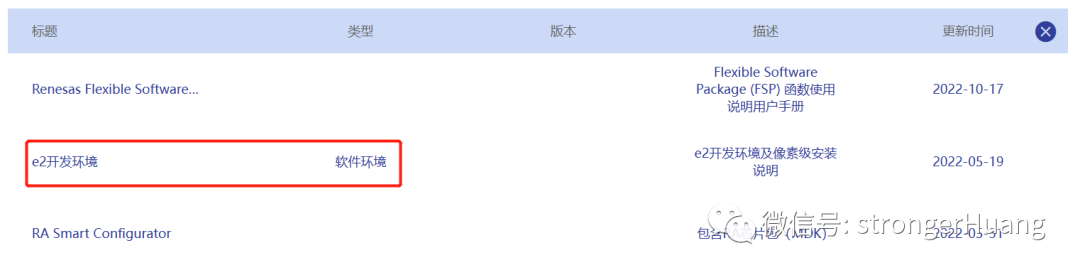
The version on the official website may be newer, but downloading from the official website requires registration, which can be cumbersome. You can download from the domestic ecological community if you prefer.
2. Install e2 studio, FSP Software Package, and Supporting Toolchain
The installation method is straightforward, as both the official website and community site provide installation instructions, which typically involve the standard exe installation method, just click next.
Of course, during installation, some tools may fail to install. In this case, you need to check the prompt information. For example: gcc online installation fails.
Solution for gcc Online Installation Failure:
Open the software -> Help -> Add Renesas Toolchains -> Renesas -> Renesas Toolchain Management···
This is to install online within the software, see the animation below:
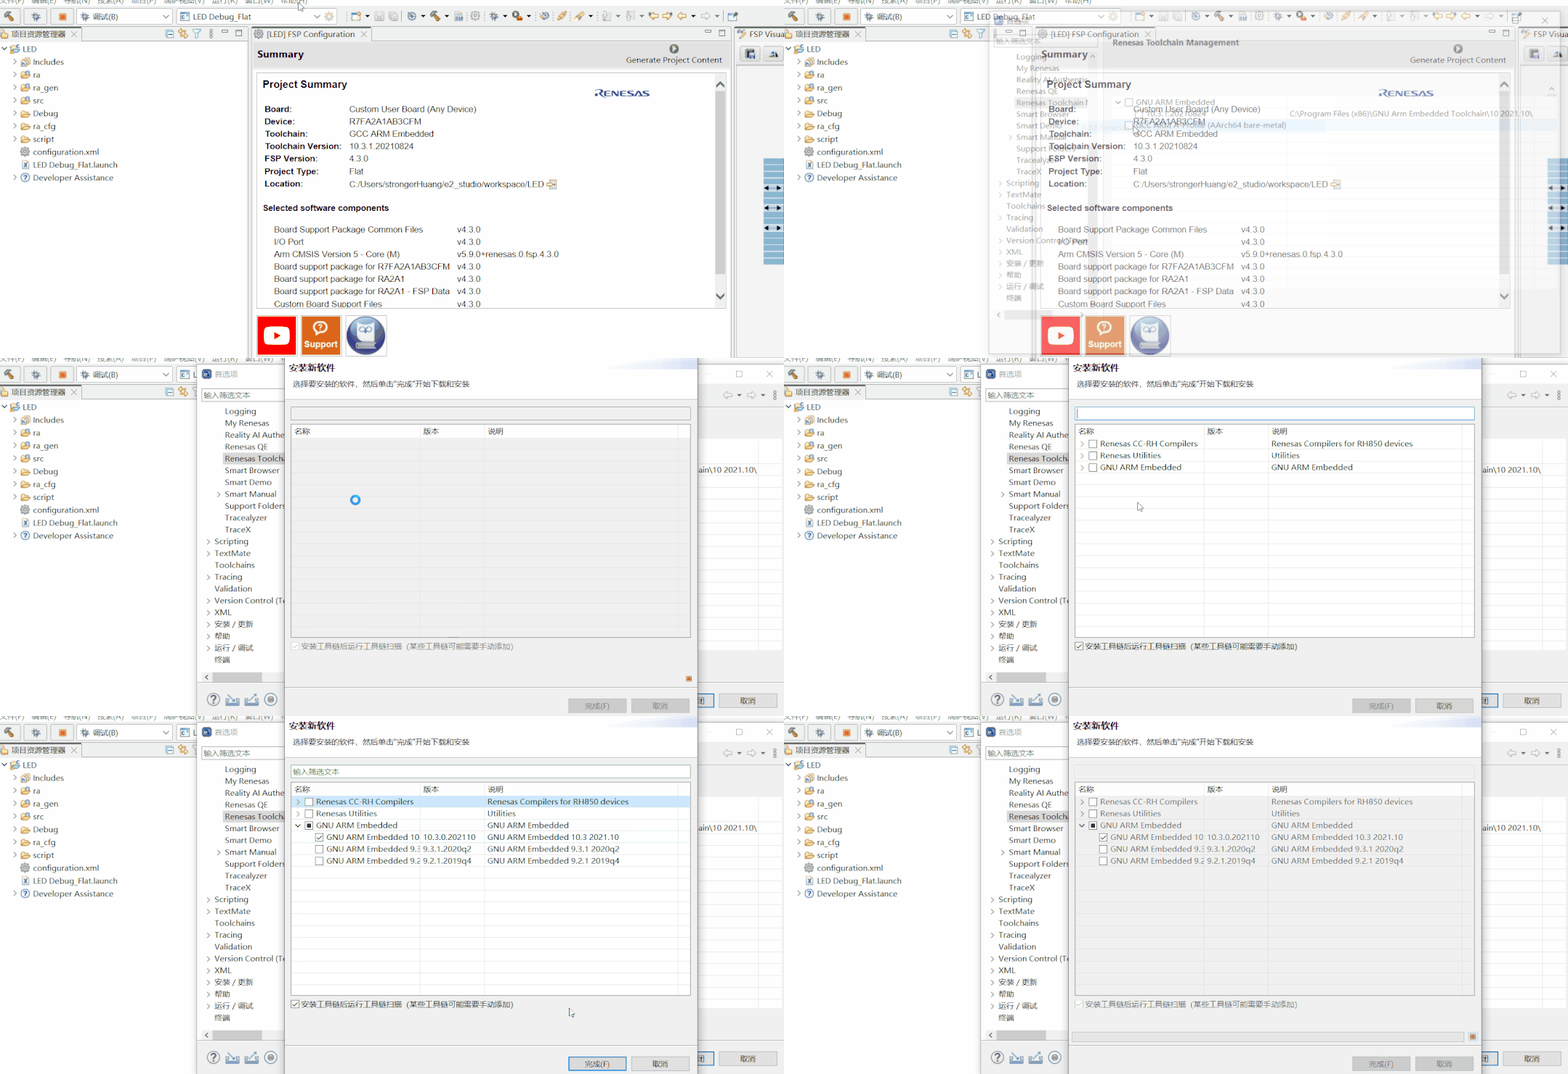
Solution for FSP Software Package Online Installation Failure:
Most people will probably install online, and the solution is simple: download the FSP software package and install it offline.
For specific details on downloading and installing related to this section, you can refer to the video I shared:
Create a Project and Light Up an LED
For most people, installing e2 studio and FSP is not difficult; the key is to master the usage of the e2 studio tool.
Note: e² studio was developed from the open-source Eclipse integrated environment. If you have used Eclipse, using e² studio will not be difficult.
This section will discuss how to create a project and light up an LED using Renesas’ latest Cortex-M85 core (RA8 series) microcontroller.
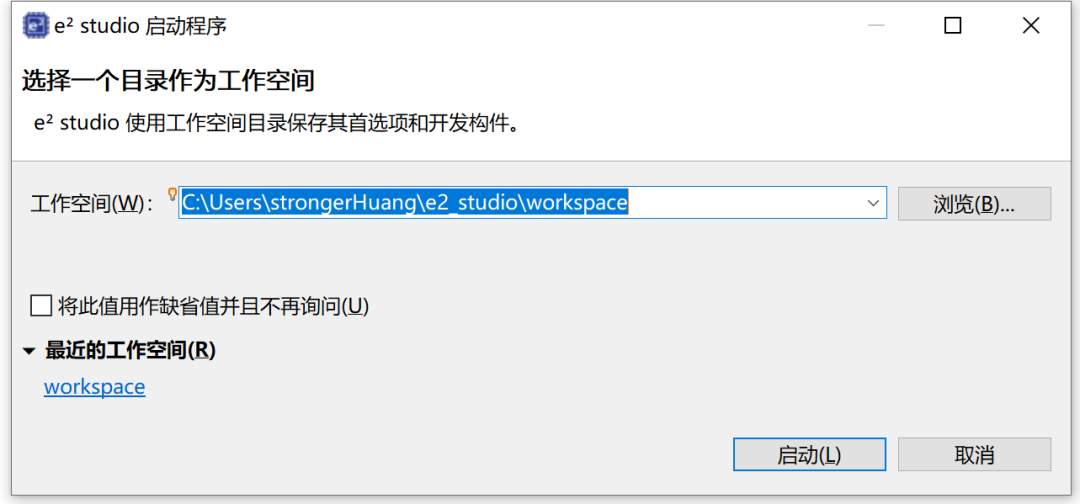
When you first open e2studio, it will prompt you to set the workspace save location (you can use the default location):
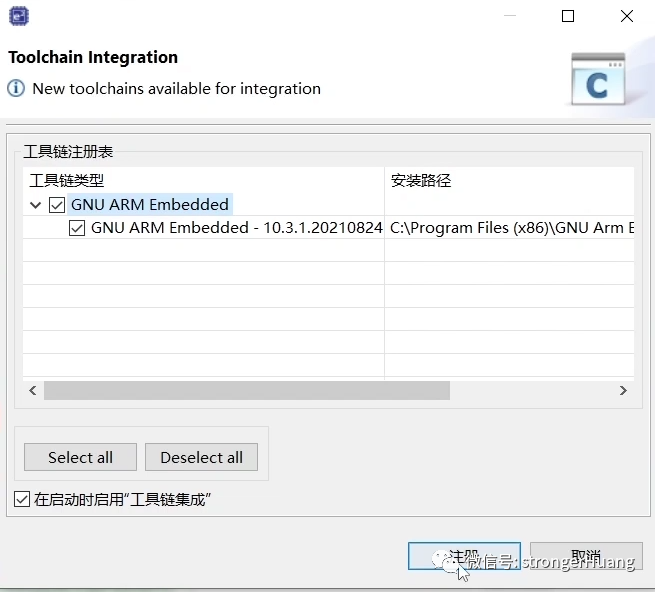
It will also remind you to register (just click register):
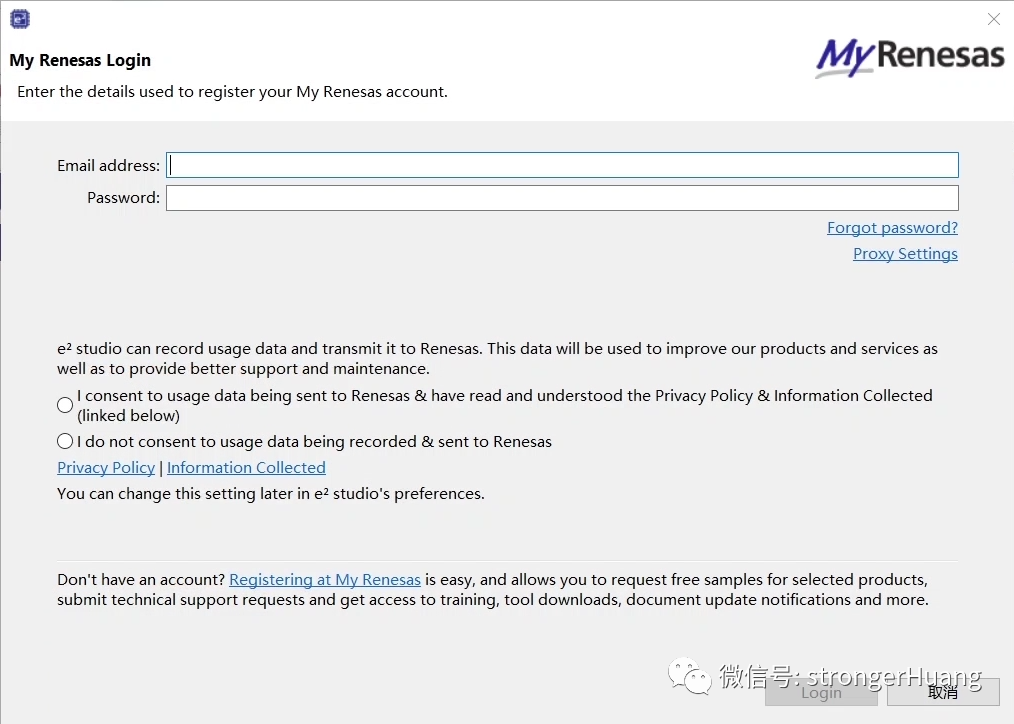
It will also remind you to log in (if you have an account, log in; if not, you can still use it without logging in):
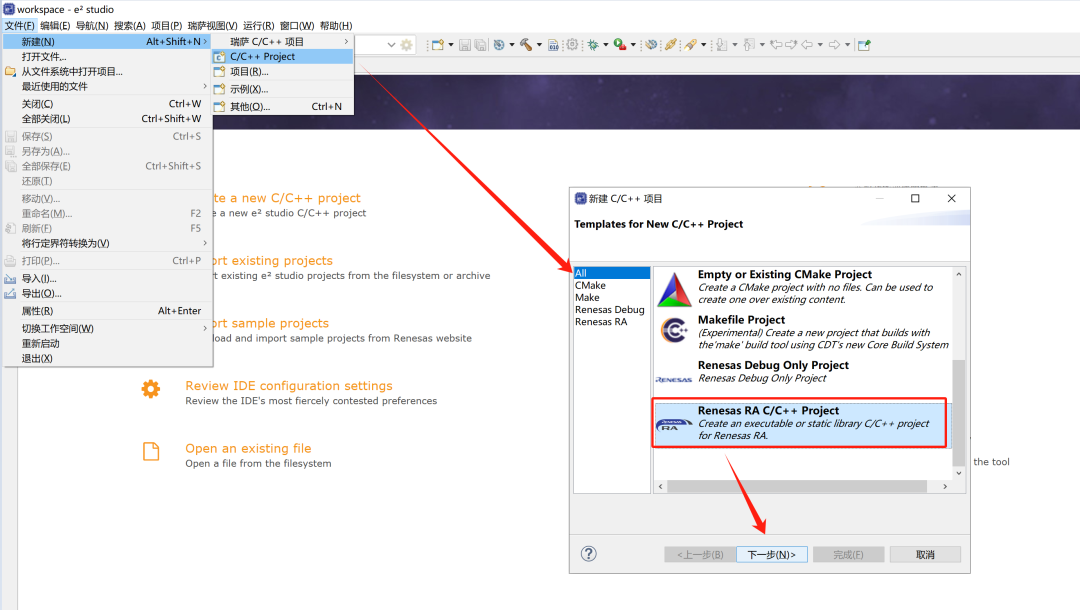
2. Create a (Renesas) C/C++ Project
Create a new project through the menu -> C/C++ Project:
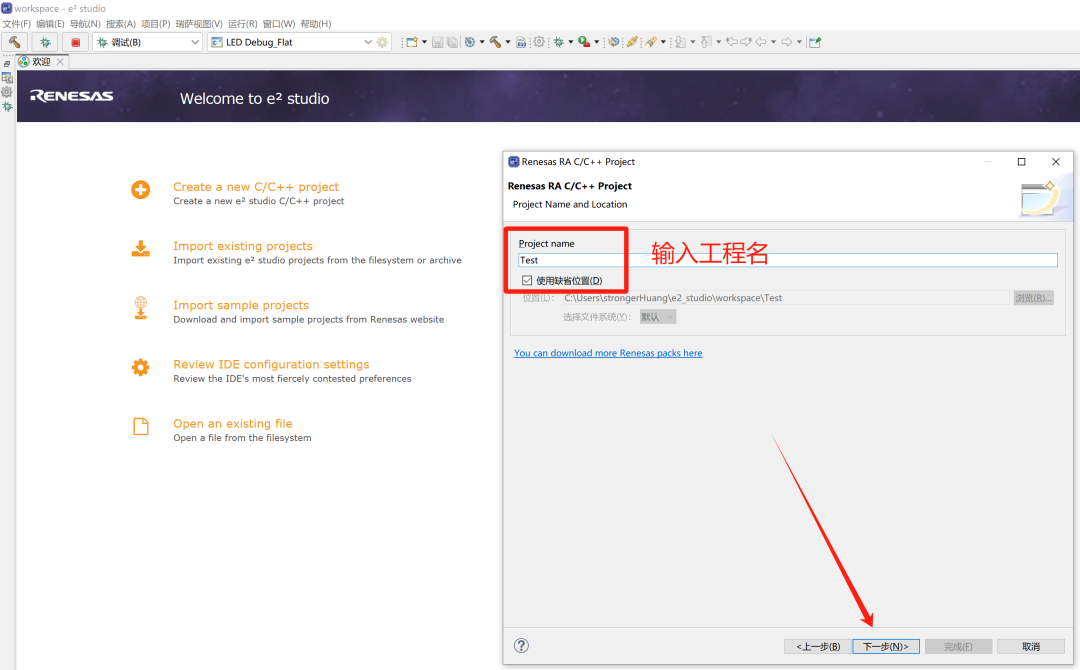
Enter the project name (default save location):
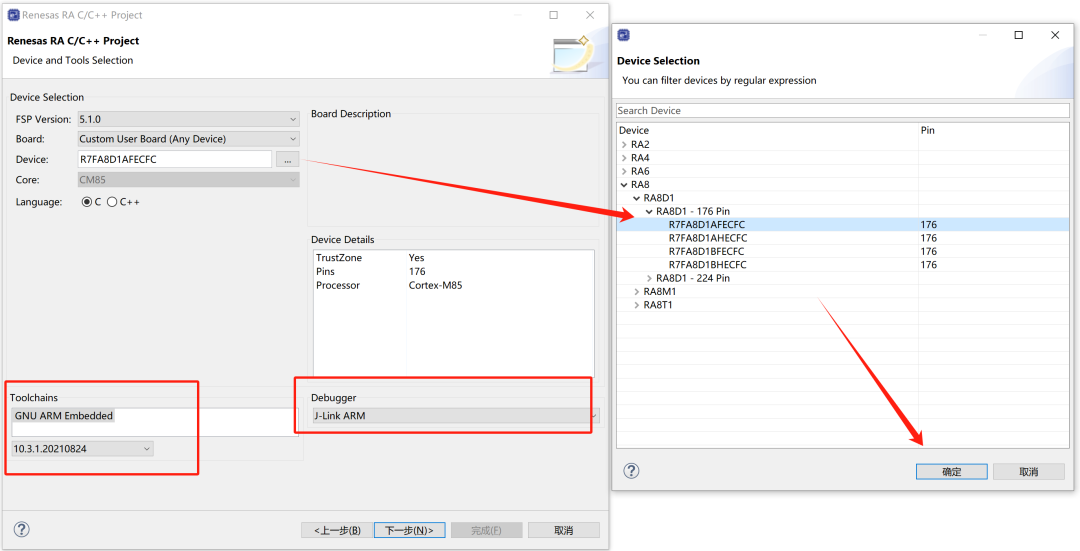
Select the MCU type, toolchain, and debugger as default.
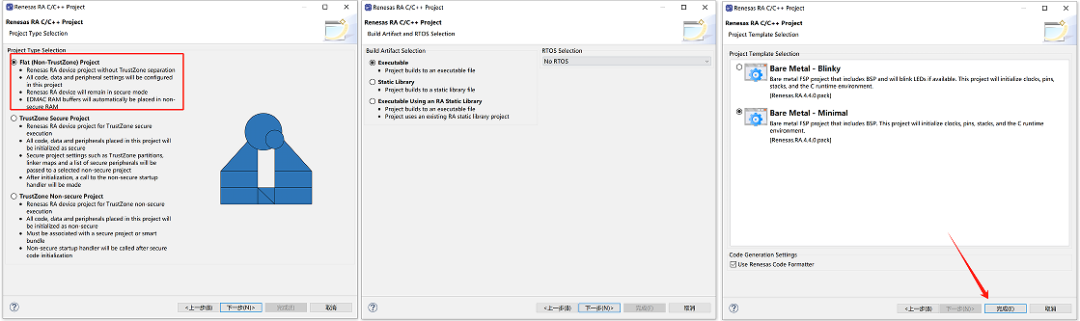
Then select the necessary “components” based on the situation, and finally generate the project:
Add application code in hal-entry, for example, LED blinking with a delay of 500ms:
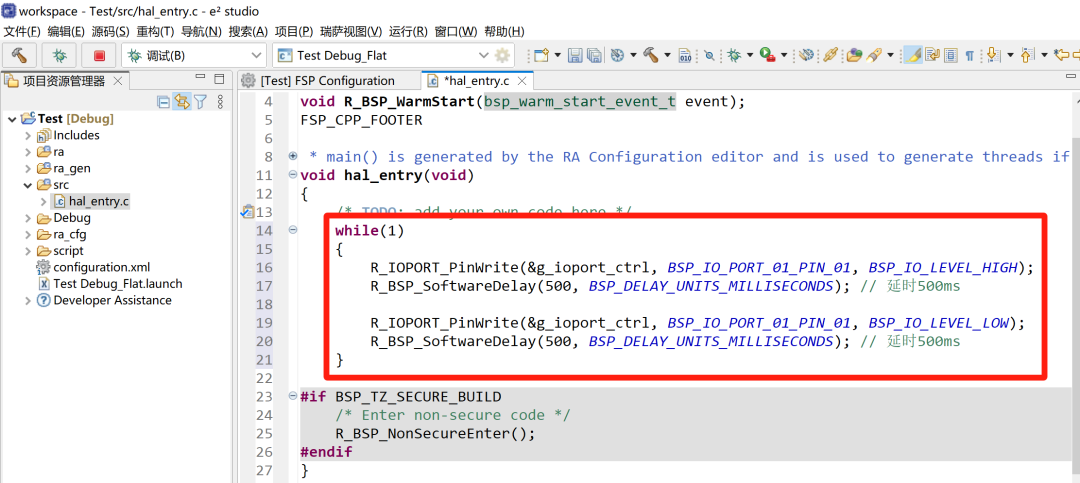
while(1){    R_IOPORT_PinWrite(&g_ioport_ctrl, BSP_IO_PORT_01_PIN_01, BSP_IO_LEVEL_HIGH);    R_BSP_SoftwareDelay(500, BSP_DELAY_UNITS_MILLISECONDS); // Delay 500ms
    R_IOPORT_PinWrite(&g_ioport_ctrl, BSP_IO_PORT_01_PIN_01, BSP_IO_LEVEL_LOW);    R_BSP_SoftwareDelay(500, BSP_DELAY_UNITS_MILLISECONDS); // Delay 500ms}
Then compile and download to the development board, and you will see the phenomenon.
At this point, doesn’t it seem very simple?
Yes, today’s development tools are very friendly to beginners, making it easy to get started in just a few steps.
Microcontroller CRC Principle and Monitoring Application
What Key Points Are Included in Artificial Intelligence in Embedded Systems?
The Importance of Initializing Local Variables in MCU Programming