Proteus 8.17 is primarily used for simulating microcontrollers and peripheral devices.Proteusnot only has simulation capabilities like other EDA tools but also simulates microcontrollers and peripheral devices, making it the only design platform in the world that integrates circuit simulation software, PCB design software, and virtual model simulation software into one.
Below is an installation guide shared by Su Xiaoxiao.
1. Download the Proteus 8.17 software installation package to your computer, right-click and select 【Extract to Proteus 8.17】.
2. Right-click to 【Open】 the extracted folder.
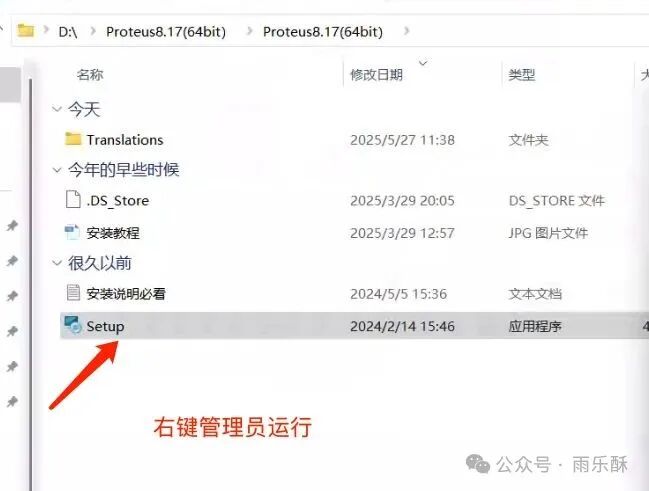
3. Find the 【Setup】 application, right-click and select 【Run as administrator】.
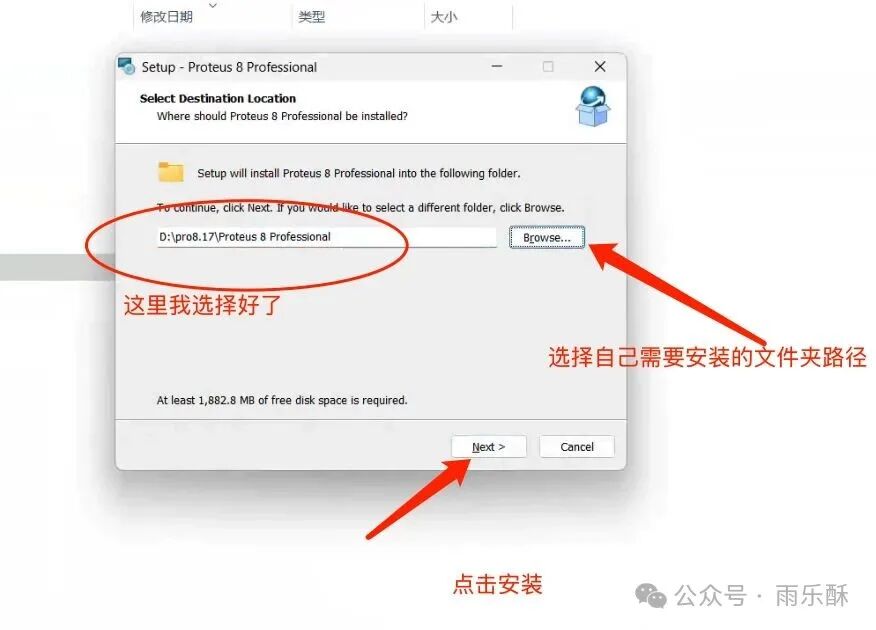
4. The software is installed by default on the C drive, but you can customize the installation location. Here, I choose to install it on the D drive; click 【Next】.
 5. Click 【Next】.
 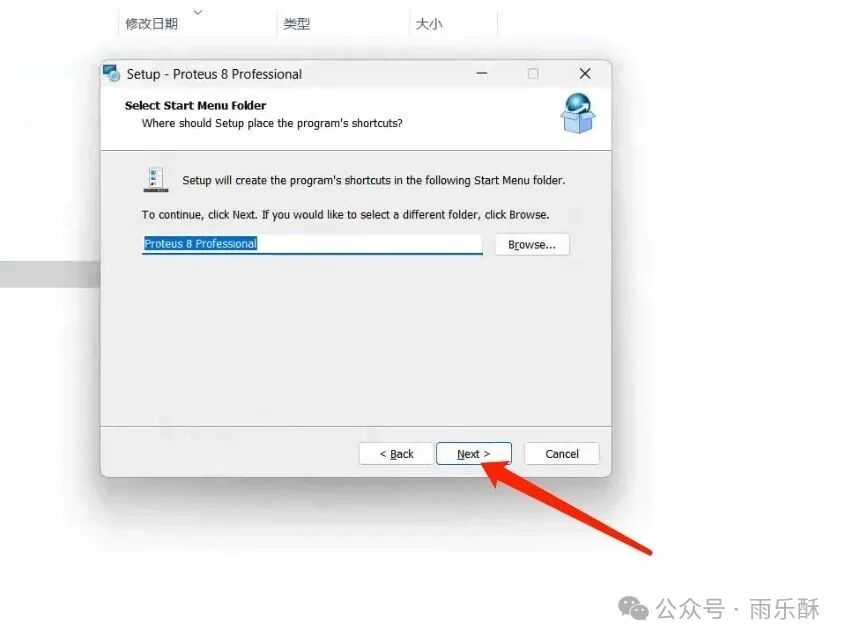 6. The software is installing, please wait a moment.
 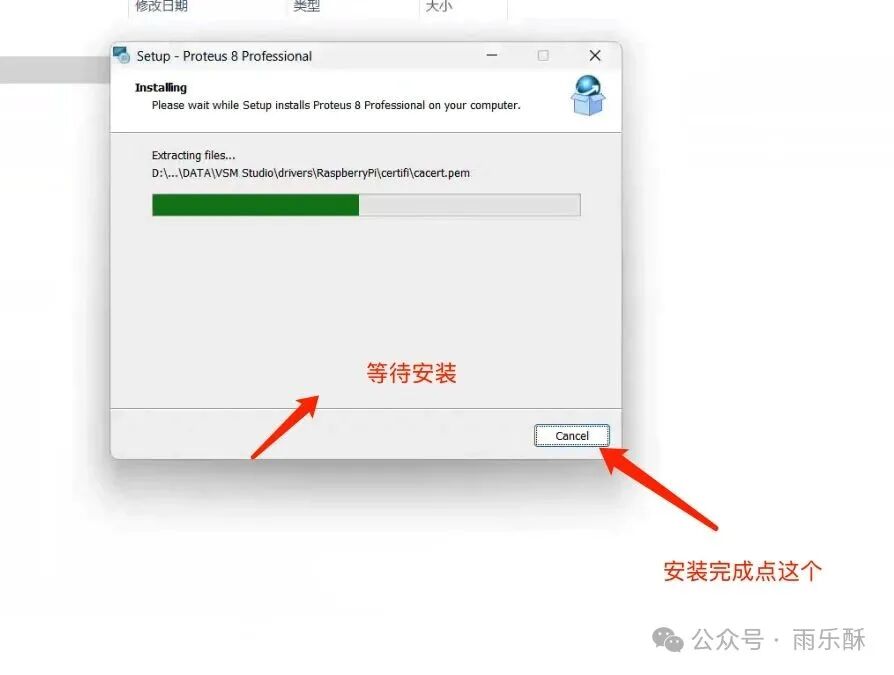 7. Click 【Finish】.
 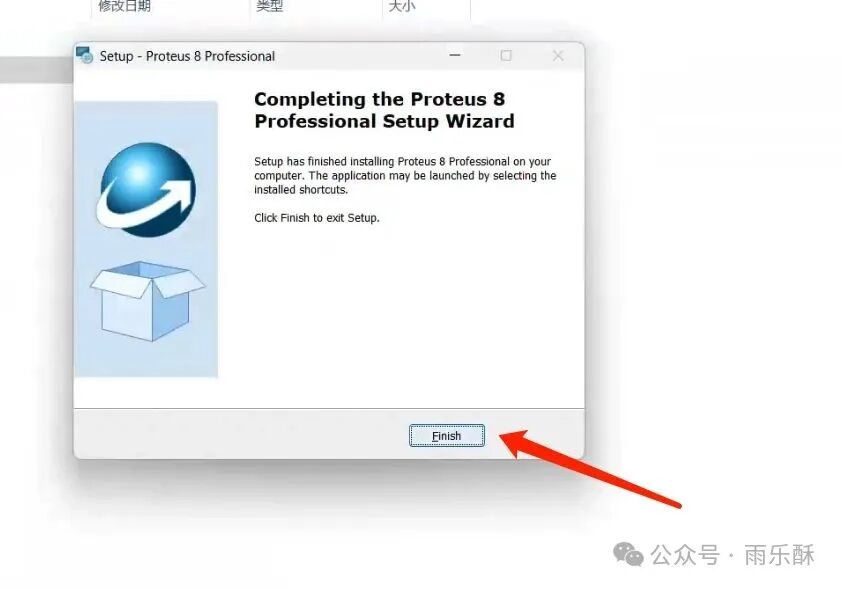 8. Go back to the Proteus 8.17 folder, find this folder, and right-click to copy it.
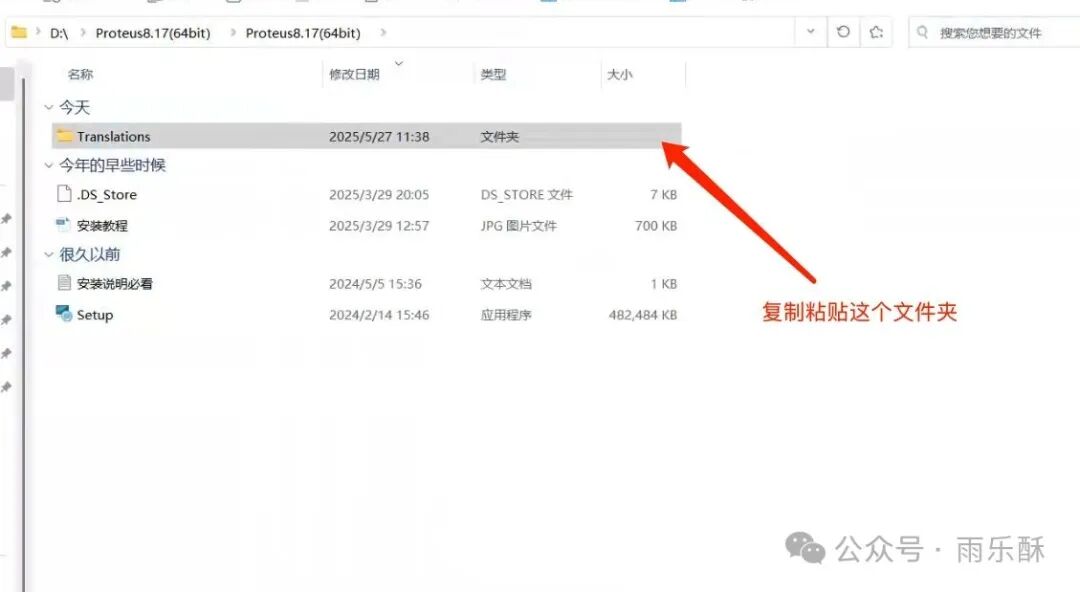 9. Return to the desktop, right-click on the 【Proteus 8 Professional software icon】, and click 【Open file location】.
 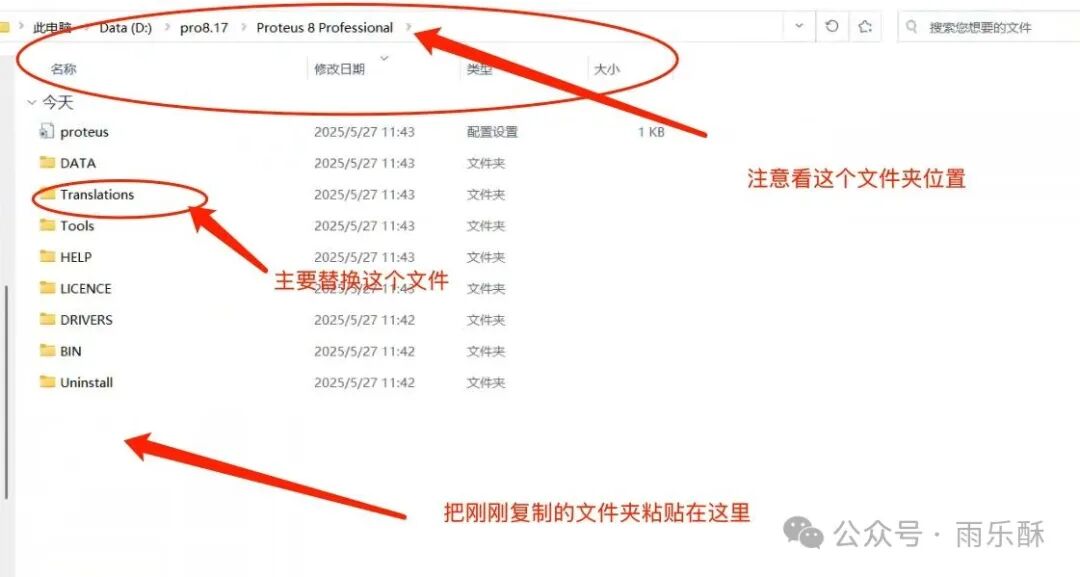 10. Right-click in the empty space of the folder and click 【Paste】.
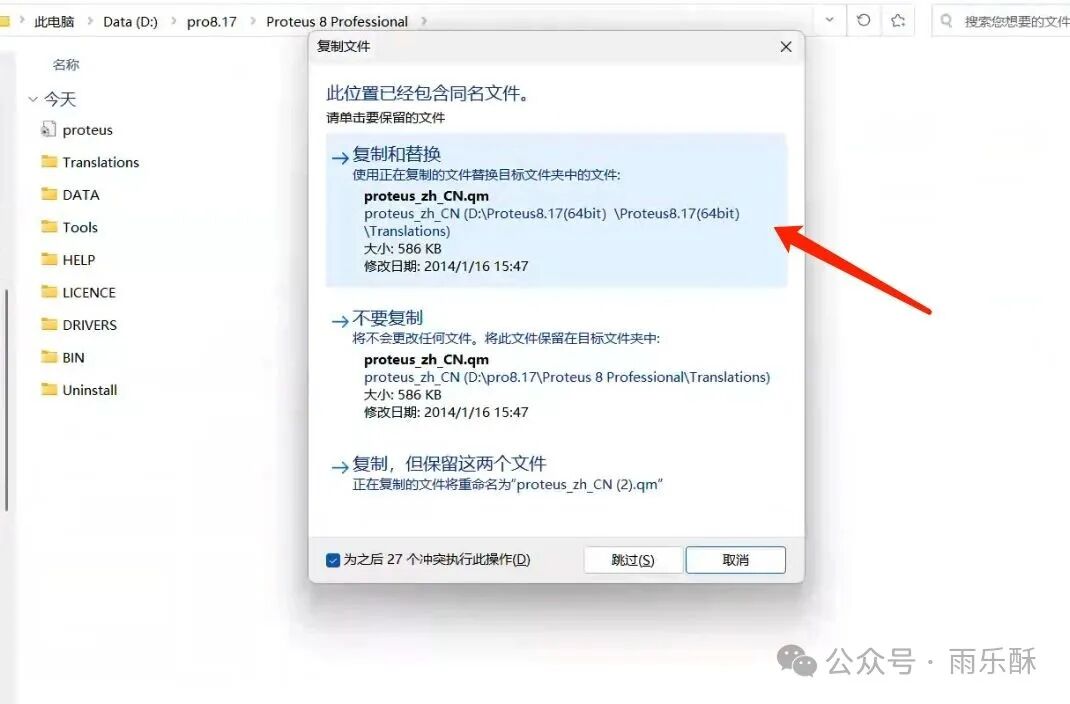 Now you can open the software to learn how to use it. If you don’t have the installation package, feel free to reach out. If you encounter any issues during the installation process, please consult us immediately.