1. Wired to NAT HotspotFeatures: The most common internet mode, wired and wireless on different subnets, with wireless being a subnet of wired.Keywords: Wireless Network Card Master Mode/Access Point AP, Wireless Network Card connecting to LAN area:In Master mode, we can connect the router’s WAN port to the optical modem or switch via an Ethernet cable, at which point the WAN port will have a public IP, while devices connected to the LAN port will receive a private IP via DHCP. The OpenWrt interface configuration is as follows: At this point, the mode is Access Point AP, and the network is LAN.There should be three interfaces: WAN, WAN6, and LAN, where the WAN port’s IP should be your public IP. Since this is a secondary router, the primary router’s LAN subnet is 192.168.12.X, so this router’s WAN port address becomes 192.168.12.106, while the OpenWrt router’s own subnet is 192.168.1.X, making its LAN port IP 192.168.1.1. Devices connected to this OpenWrt router will have IPs of 192.168.1.X.At this point, the client’s IP is 192.168.1.X, the gateway is the OpenWrt router, and the DNS server is generally the OpenWrt router.2. Wired Directly to Hotspot (Wired Repeater)Features: Wireless and wired on the same subnet, router has no DHCP.Keywords: Router Master Mode/Wireless AP, Wireless Network Card connecting to WAN area.There is often a need to convert wired to wireless, as if an Ethernet cable is plugged into a switch, creating a WiFi network that is on the same subnet as the original wired network. For example, if I have a primary router with a subnet of 192.168.12.X, and I want to add a wireless router to share WiFi, the devices connected to the WiFi will still be on the 192.168.12.X subnet, without creating a new subnet or NAT. Devices under the primary router can freely access any devices under the secondary router without needing port forwarding. The configuration can be done as follows:Master + Wireless AP + Network WAN
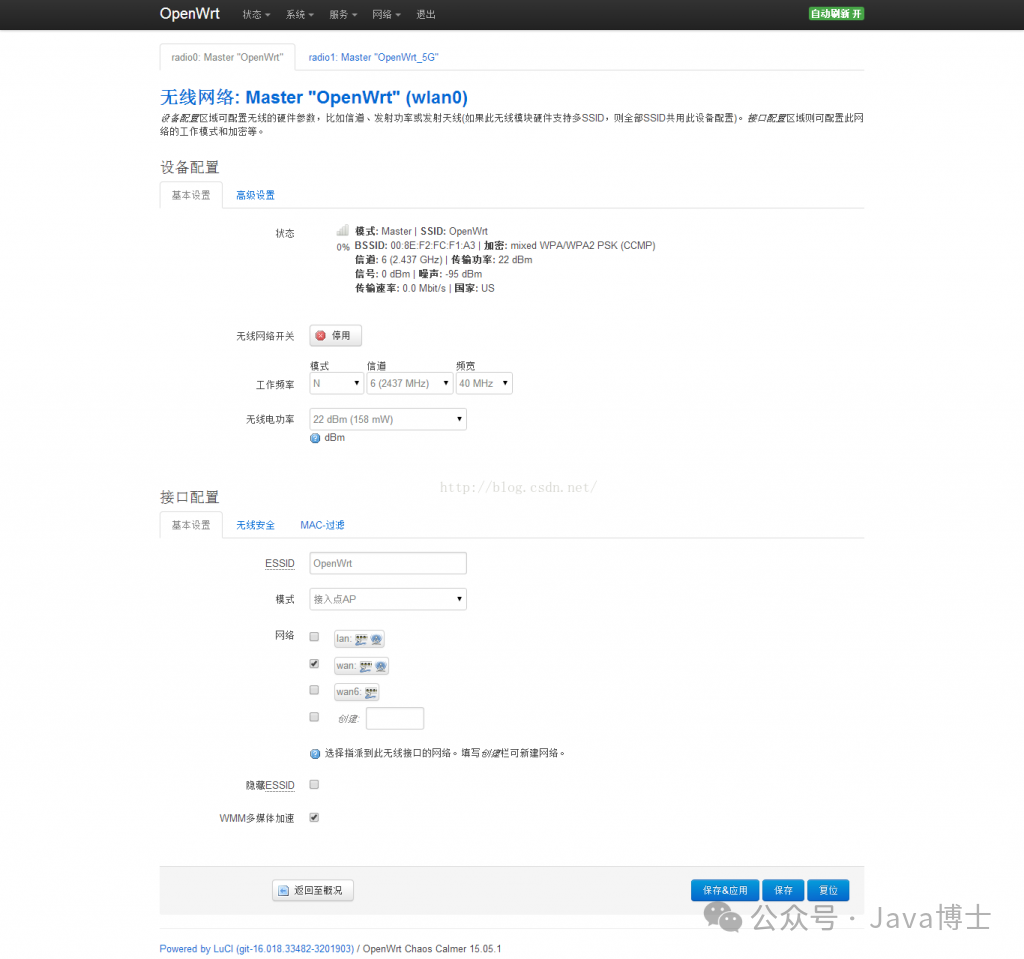 Simply change the network from LAN to WAN in the previous mode; nothing else has changed.Now, when connecting to this WiFi, the IP address is no longer 192.168.1.X as in the first method, but has changed to the upper router’s subnet of 192.168.12.X, with the gateway being the upper router and the DNS server being the one assigned by the primary router, achieving the wired repeater mode.Method Three: Router Wireless AccessFeatures: The router acts as a signal amplifier, allowing internet access without any Ethernet cable plugged in, commonly used to connect to CMCC and share the same mobile account with multiple devices.Keywords: Router Client Mode + Wireless Network Card split into two, one connecting to XXX (new interface), one connecting to LAN.Sometimes, you may not have an Ethernet cable to connect to your OpenWrt router. For example, you want your wireless router to connect to CMCC and then share a new WiFi with multiple devices, or you want to use a wireless router to connect to hotel WiFi and then share another WiFi signal. In this case, your OpenWrt is not connected to the WAN via an Ethernet cable but through an existing WiFi connection.Using a primary and secondary router as an example, first, the primary router shares a WiFi, which you can imagine as CMCC. You want to connect OpenWrt to it and then share a new WiFi. At this point, you need to consider the number of network cards. Some dual-band routers have two network cards, one for 2.4G and one for 5G, while most single-band routers only have one 2.4G network card. In OpenWrt CC 15.05 and 15.05.1, you can configure one physical wireless network card to create multiple WiFi networks, similar to dd-wrt. Below, I will use a single-band ultra-cheap router HG255D as an example to explain how to make one physical network card act as a client to receive signals from the upper router while also acting as a Master to send WiFi to its clients.First, connect the LAN port of the wireless router via an Ethernet cable, enter the router’s backend, select the “Wireless” page, and then disable the existing wireless network:
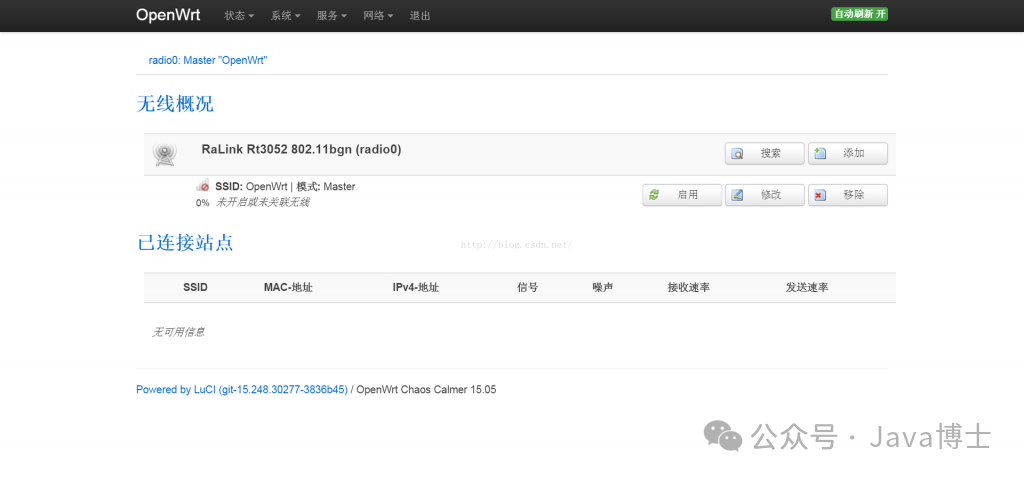 Then click the “Search” button, select a wireless signal you want to relay (e.g., CMCC), and click “Join Network:
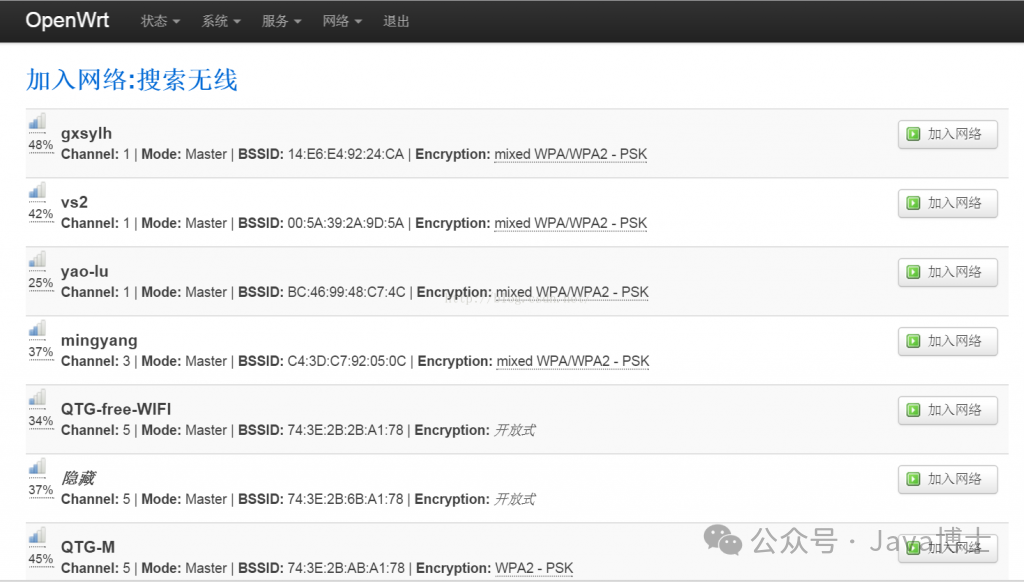 Then enter the password for the parent WiFi (if the parent WiFi has no password, this step will not appear). The “New Network Name” is the new interface name, defaulting to “wwan”; I changed it to “cmcc” in the image below, and then click “Submit “:
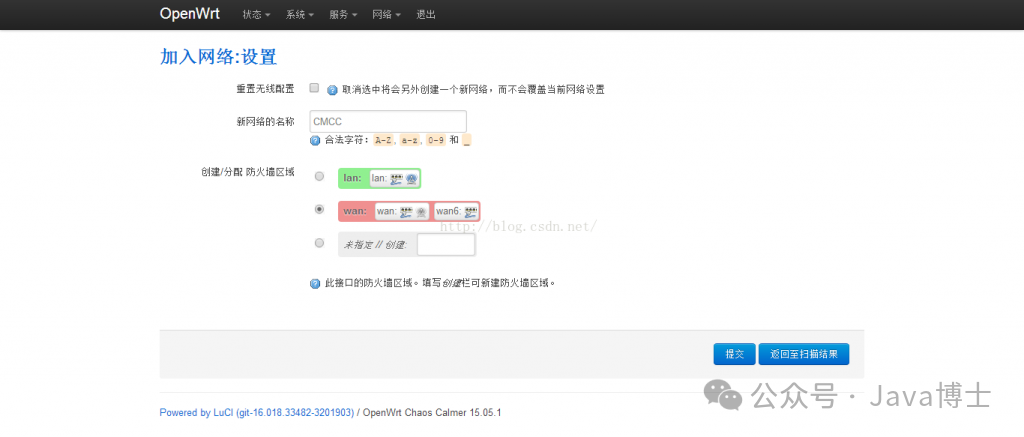 Then, on the next page, the frequency band will be that of the upper WiFi, which is already filled in automatically. The encryption method and password in “Wireless Security” will be the password of the upper WiFi, which is also filled in automatically, so no changes are needed. ESSID is the name of the upper WiFi, which should not be changed. The network is a new interface, generally “wwan”, but since I changed it to cmcc above, it will not be wwan here. Just click “Save & Apply”.
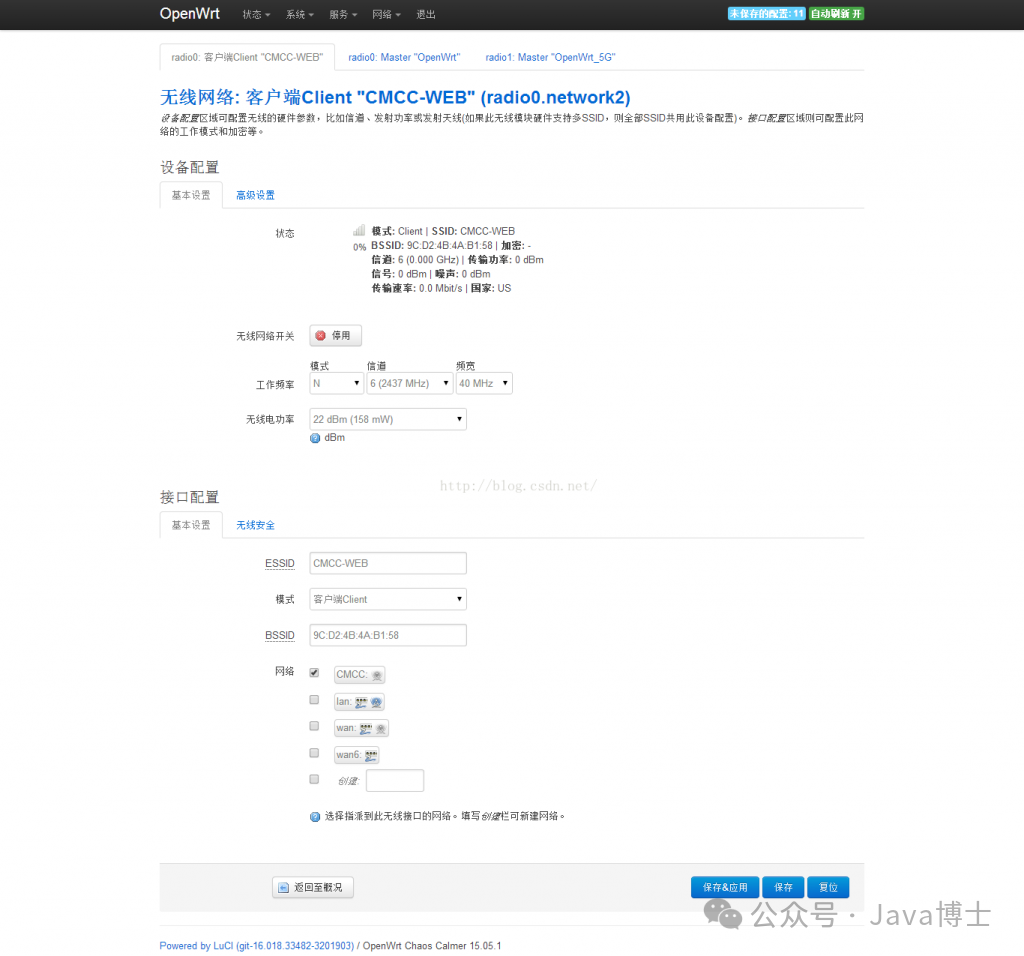 Then return to check the “Interfaces”, and you will see the interface you just created. Your OpenWrt router has changed from a wired connection method on the original WAN port to a wireless connection method, and a WiFi access mode is now set up. You can now access the internet through a computer connected to the LAN port. By checking the IP, you can see that you are accessing the internet through the primary router’s IP, and nothing is plugged into your OpenWrt router. If your computer cannot access the internet at this point, check if the newly created interface wwan has been assigned an IP address. If not, click the “Connect” button. If it still doesn’t work, restart your router. The 192.168.13.84 shown in the image below is the IP address assigned to the OpenWrt secondary router by the upper router (the image below is a screenshot of HG255D, while the previous two images are screenshots of WNDR4300).
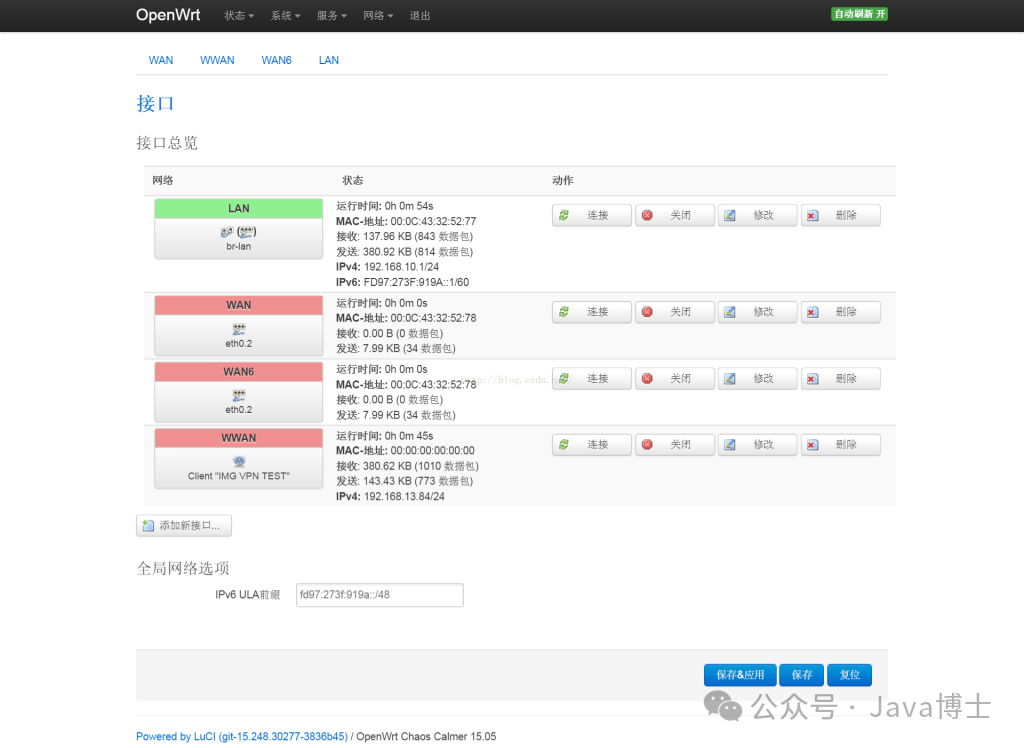 However, if you want your phone to also access the internet wirelessly, you need to ensure that one of the network cards on the OpenWrt router is connected to the upper router while also sharing a WiFi network. Some online resources and blogs state that OP cannot perform both tasks with one network card, but that may be due to their OP version being too old. I successfully enabled this in both CC 15.05 and 15.05.1. This blog is written based on my experience with the HG255D single network card 2.4G router relaying a wireless signal.We just need to go to the “Wireless” page based on the above and click the “Add” button, then configure a WiFi network after relaying like in method one. The frequency band and the main WiFi’s frequency band should be the same because one network card cannot operate on two frequency bands, but the WiFi ESSID, which is the new WiFi name, and the WiFi password can be customized. In the image below, I named the new WiFi “Bridge” with no password.
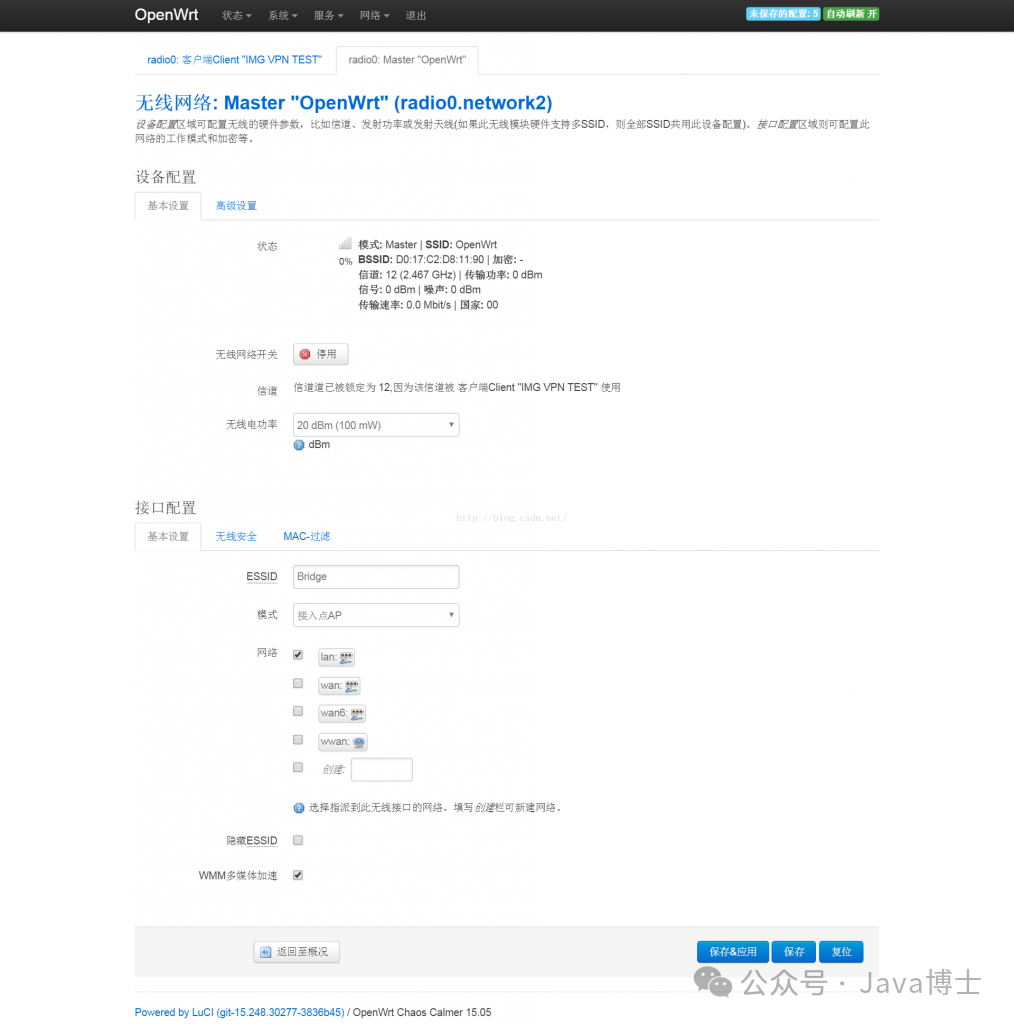 Click “Save & Apply”, and a network named Bridge will be established, allowing you to connect to this Bridge with your phone and access the neighbor’s or CMCC’s network.The image below shows that after I achieved the relay amplification of the wireless signal and connected a device (192.168.10.107), where 192.168.13.1 is the upper router’s address, and “IMG VPN TEST” is the name of the upper WiFi.
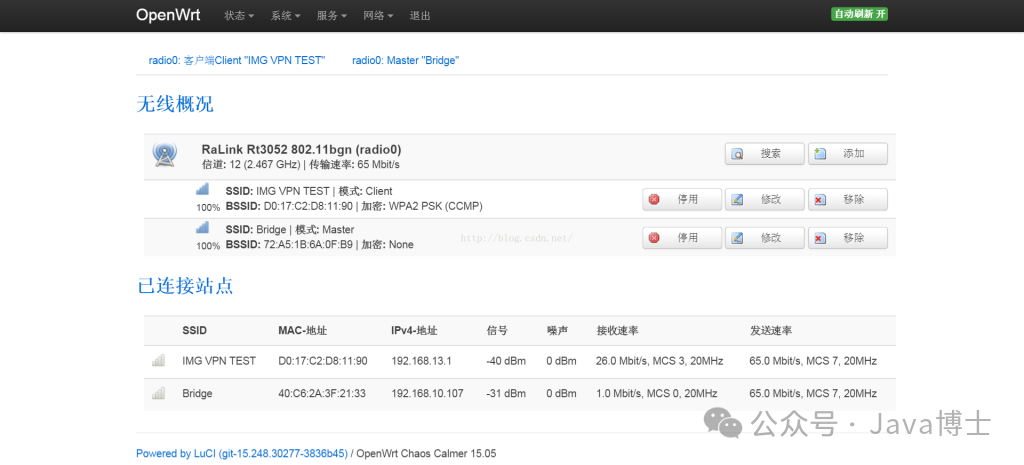 Note: In the Netgear WNDR4300, connecting to Bridge allows immediate internet access, but the cheap HG255D may not work. In this case, you need to restart the HG255D, disable all WiFi nodes, then enable the Client access signal, click the “Connect” button in the “Interfaces” for wwan, wait for the upper router to assign an IP address, and then enable the Bridge hotspot in the “Wireless” page to access the internet. If it still doesn’t work, try multiple times; I also had to restart the router several times before achieving WiFi relay.Warning: Using one network card to perform both access and WiFi sharing tasks will halve the bandwidth of that wireless network card, significantly affecting the maximum internet bandwidth. Therefore, it is recommended to use two network cards, one for connecting to the parent WiFi and one for generating the child WiFi. For specific methods, refer to Method 5.4. Turning the Router into a Wireless Network CardSome Linux desktops, such as Ubuntu desktops, often cannot use Xiaomi WiFi, 360 WiFi, and other wireless network cards due to driver issues, so how can Linux devices access the internet wirelessly? Do we need to buy a wireless network card from Taobao and download and compile its driver? Actually, no. You can use the OpenWrt wireless router as a wireless network card and connect it directly to the RJ45 port of the Linux computer via a twisted pair cable, following the method in Method Three.5. Converting 2.4G to 5G or 5G to 2.4GIn Method Three, different subnet WiFi relaying and signal amplification have been achieved, but using one network card to work on two subnets will halve the maximum bandwidth. However, using two network cards will not have this issue, so you might as well amplify the 2.4G wireless signal to a 5G signal, or let two 2.4G network cards handle these two tasks. For example, my Netgear WNDR4300 dual-band router has one 2.4G and one 5G network card. Just apply the configuration from the 2.4G network card in Method Three to the new hanging network card area. Below, I will take WNDR4300 as an example.First, just like in Method Three, disable the original 2.4G WiFi, then go to the “Wireless” page, click “Search”, select a WiFi, click “Join Network”, and fill in the password, etc. This is exactly the same as in Method Three; no configuration changes are needed, just keep the defaults. If the parent WiFi has a password, don’t forget to enter the correct password, and ensure the mode is Client, then click “Save & Apply”.Unlike Method Three, we will not click the “Add” button on the 2.4G network card item, but will disable the original hotspot on the 5G network card, then click “Add” on the 5G network card. The subsequent configuration is the same as the new WiFi configuration for the 2.4G in Method Three, giving it its own ESSID name and setting a password, allowing the new WiFi to connect to “Network-LAN”, thus achieving the signal conversion mode where the 2.4G network card receives and the 5G network card transmits. The bandwidth will not be halved as in Method Three, and the shared network will be a new NAT subnet.
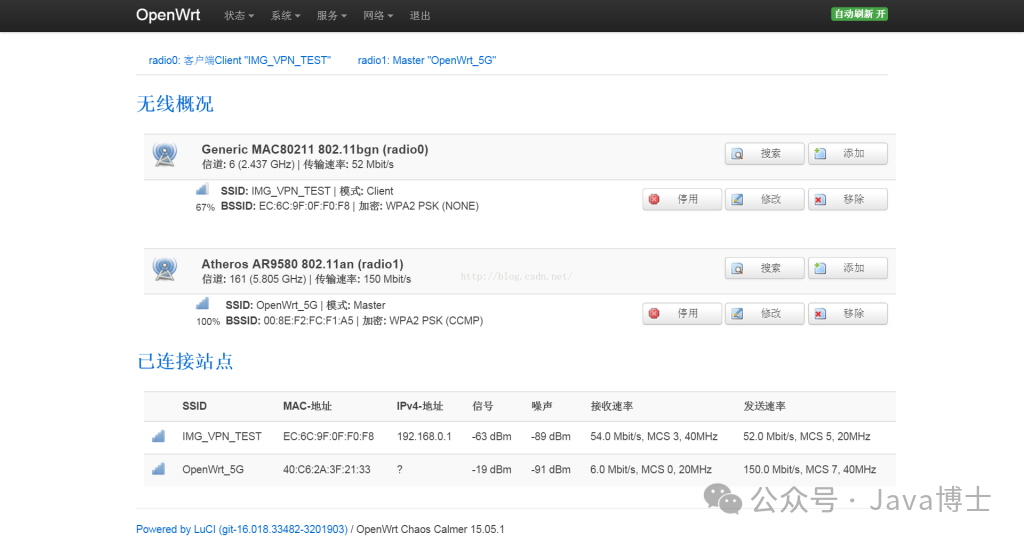 6. Attaching a USB Network Card for Long-Distance Signal ReceptionSimilar to Method Five, just apply the configuration from the 5G network card’s “Add” button to the new hanging network card area.7. Pure Signal Amplification Without Creating a New SubnetIn the above methods three, four, five, and six, using the OpenWrt router for signal relaying and amplification has placed all clients behind the router, forming a subnet. This is how the CMCC shared account function is achieved. For example, if the parent router’s IP range is 192.168.12.1, the client’s IP range becomes 192.168.1.X. Is there a way to simply convert the WiFi signal while keeping the clients on the original subnet? This operation is relatively difficult to achieve on OpenWrt, but it is said to be very easy on dd-wrt. I found some information online, but during the experimental process, I found that Windows clients had no major issues after signal relaying, but iOS devices were unstable, and Android devices could not access the internet after connecting to the relay. Here I will share this for reference.For methods, refer to http://blog.ltns.info/linux/wds_over_openwrt_router/. I won’t take up space here. If you have a need for relay on the same subnet, you can try this, but I only have the WNDR4300 where Windows devices connect normally, while all devices on HG255D do not work. The risk of executing this method is very high because even if this function is achieved, you cannot access the router’s backend, and the router may become bricked. You will need to use reset to restore the original configuration.Another seemingly reliable method requires installing a component called luci-proto-relay.For methods, see: http://www.right.com.cn/FORUM/thread-190115-1-1.html. I haven’t tried it yet, but if needed, you can try it. Another keyword to introduce is relay bridge, which you can use to search for related information.