01
IntroductionLearning Linux is not difficult; the challenge lies in not finding the right tutorials and having no one to guide you quickly.After buying the development board, it just sits there collecting dust. Watching videos is hard to continue, and the documentation is hard to understand; it’s too difficult!This article aims to explain the basic steps to run a Qt program on the ZhiDian Atom Linux development board in a simple and understandable way, hoping that beginners can run their first program within half a day.
Hardware: ZhiDian Atom Linux mini development board
Software: Windows 10, VMware, Ubuntu, Qt Creator
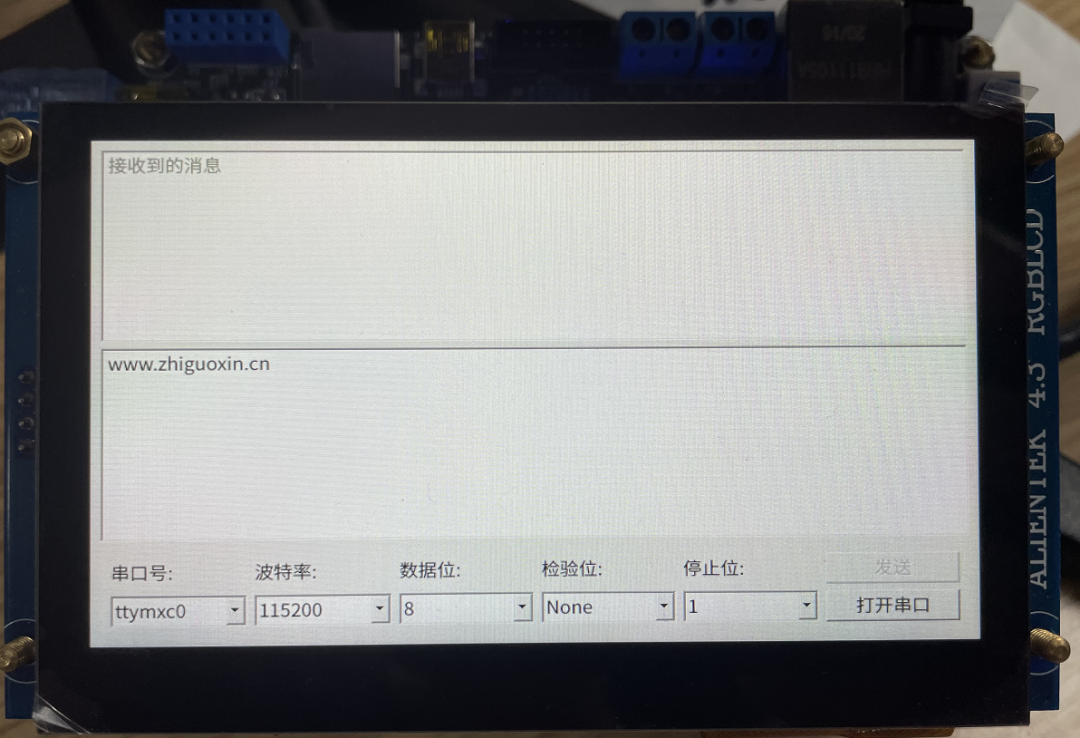
The running effect is shown in the figure below, which is based on the default UI interface of ZhiDian Atom, running a <span>serialport</span> example.
First, let me share my feelings about learning Linux embedded development. When learning STM32, I became familiar with the Keil or IAR integrated development environment and could control a pin using simple registers.After doing Linux development, I was first intimidated by the dozens of gigabytes of installation images, feeling that compiling Linux was particularly complex and difficult. Also, the numerous commands with hundreds of characters were overwhelming for someone used to graphical development.Moreover, the sellers often have videos that last dozens of hours, divided into several parts: driver development, application development, Qt development, etc.

Each video is long and tedious. I initially bought the board to play around, but after realizing I had to watch so many videos, I lost interest and ended up abandoning it, leaving the board to collect dust.The purpose of this article is to help everyone set aside the videos and condense the hours of video into a single article, allowing you to quickly experience the fun of embedded Linux development! Of course, I also suggest that the official team create a quick start tutorial to help developers quickly enjoy the fun; I believe this would be more effective!
02
Download MaterialsFirst, go to the ZhiDian Atom forum to download the materials. Be careful not to download the videos; you can watch them anytime on Bilibili, and no one would be so bored as to download the videos!
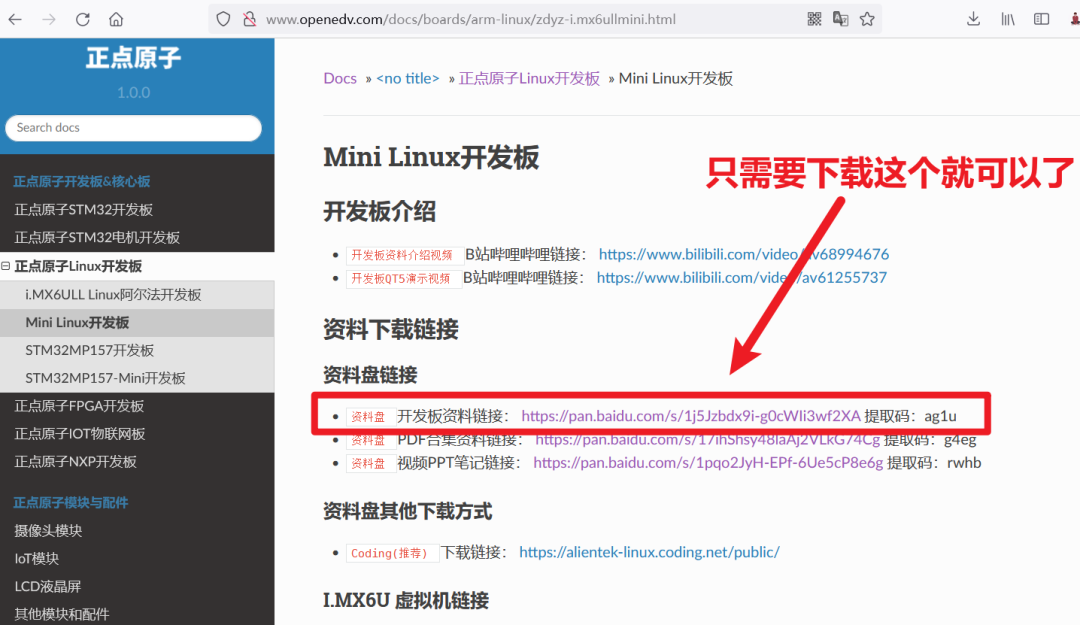 Most materials are on Baidu Cloud. If you don’t have a membership, the download speed will be very slow. It’s recommended to buy a temporary membership to download the materials quickly, and then proceed to the next step.
2. Install Virtual Machine
The installation of the virtual machine is covered in most of ZhiDian Atom’s PDF tutorials, so there’s no need to elaborate here. If you find the article unclear, you can also watch the video on Bilibili.
It is recommended that beginners carefully watch it once. If you install it incorrectly, it’s no big deal; just delete it and reinstall.During the installation of Ubuntu, it is highly recommended to directly download the image that ZhiDian Atom has packaged with Qt Creator. After installing this image, you won’t need to configure it step by step.For those who need to quickly run their first Linux program, this can help avoid the confusion of learning too many details. Skipping these tedious steps allows us to quickly understand the entire development process from a global perspective.What does this mean? It means that your newly installed Ubuntu doesn’t have any environment or software, and you need to install everything yourself, which is quite troublesome.However, you can use the Ubuntu system that ZhiDian Atom has packaged on their computer; they have packaged this system for you, and you only need to install their packaged system on your virtual machine. How amazing is that?You can even install someone else’s computer system on your computer. Where is this system?
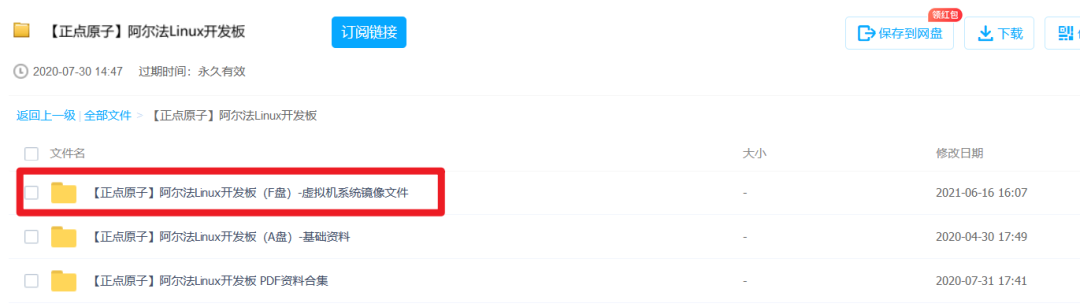
After downloading, it looks like this:

Then follow the instructions here to install the system that ZhiDian Atom has packaged for you.
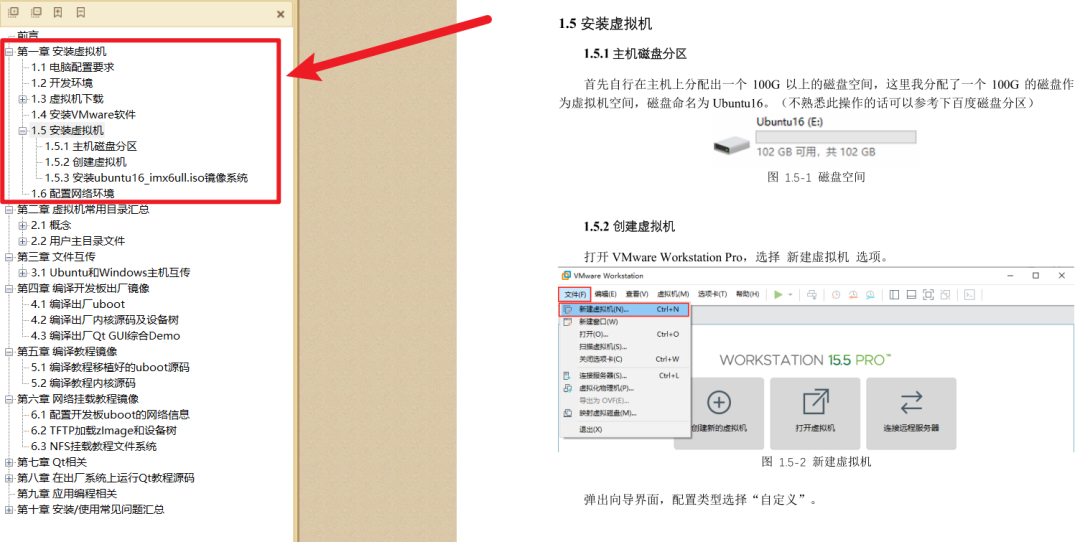
File name: [ZhiDian Atom] I.MX6U Virtual Machine User Manual V1.3.pdf
03
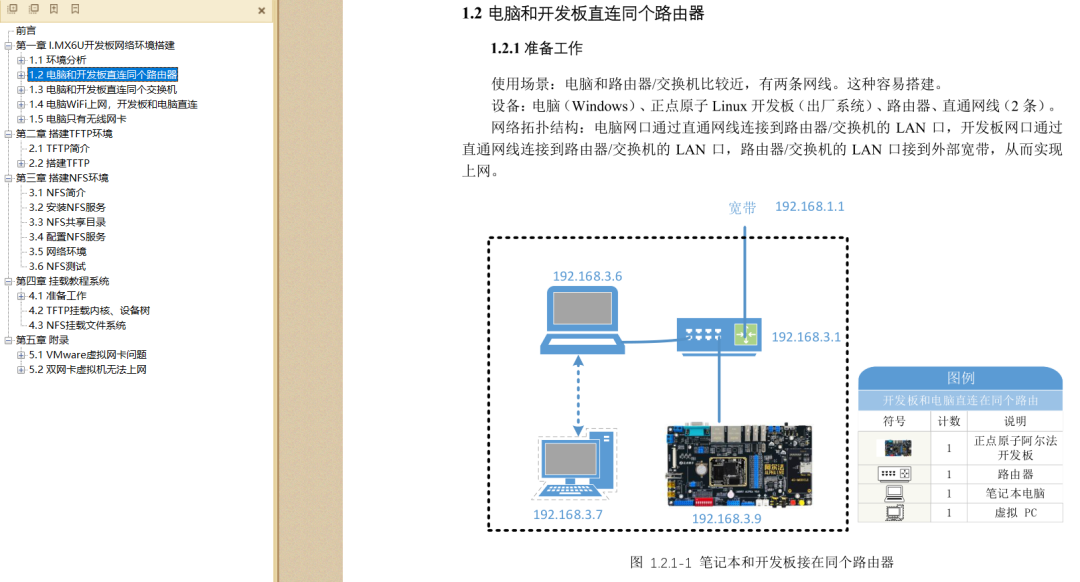
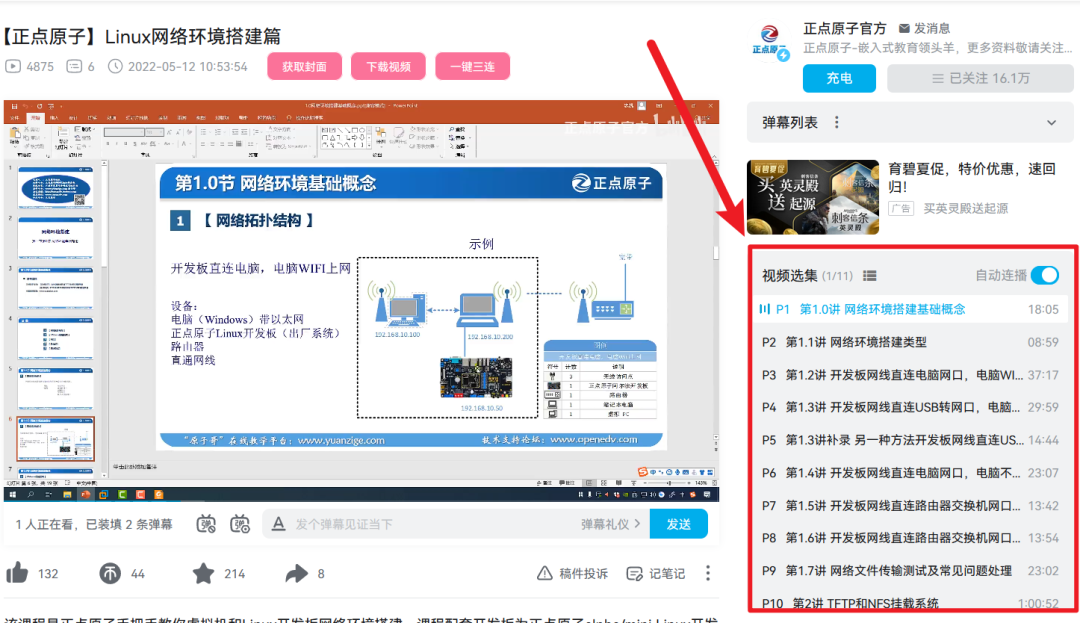
Configure Network EnvironmentAfter installing Ubuntu, you may not be able to connect to the internet. This issue varies for everyone, so it is recommended to follow ZhiDian Atom’s tutorial to ensure that your Windows, Ubuntu, and development board are all properly networked.You can refer to: [ZhiDian Atom] I.MX6U Network Environment TFTP & NFS Setup Manual V1.3.1.pdf
If the document is unclear, there are also videos available, and you can follow along step by step with the video.
So you don’t need to worry about the network part.
04
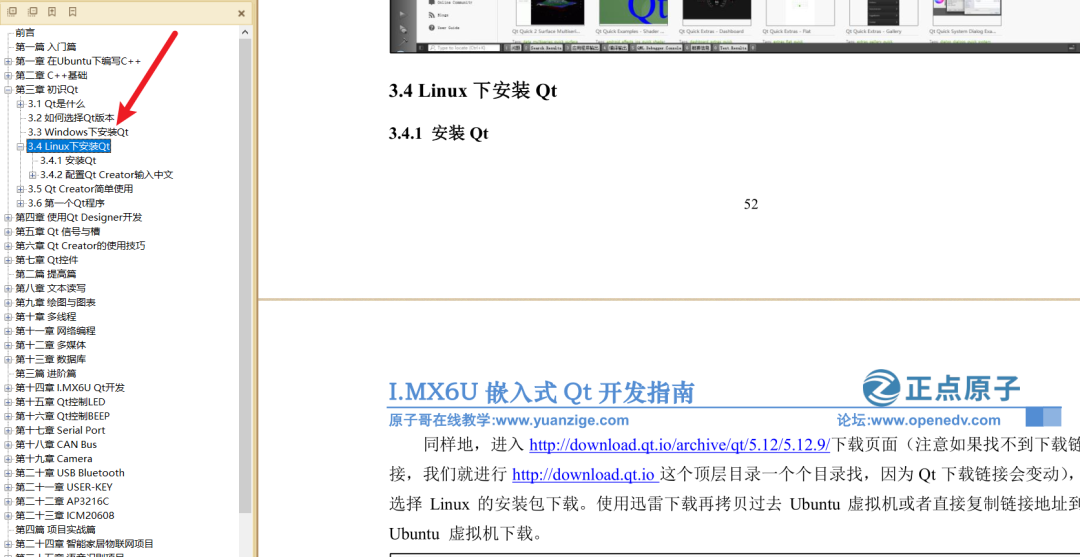
Install Qt CreatorSimilarly, you can refer to: [ZhiDian Atom] I.MX6U Embedded Qt Development Guide V1.1.pdf for installing Qt Creator software.
After installing Qt Creator on Ubuntu, you can write programs just like on Windows and run them on Ubuntu. However, our goal is to run the Qt software on our ARM development board, right?At this point, we naturally think of installing a compilation tool on Ubuntu to compile the program into code that can run on the ARM development board! This is called a “cross-compilation toolchain”.In a cross-compiler, the term “cross” means compiling code for a different architecture on one architecture, effectively crossing two architectures. Our computer is x86 architecture, while the development board is ARM architecture.
05
Install Qt Cross-CompilerYou can refer to: [ZhiDian Atom] I.MX6U Factory System Qt Cross-Compilation Environment Setup V1.6.pdf for the first chapter on installing the cross-compiler.You must install this to compile code that can run on the ARM development board in Ubuntu. This step is essential, and you must follow the tutorial step by step.

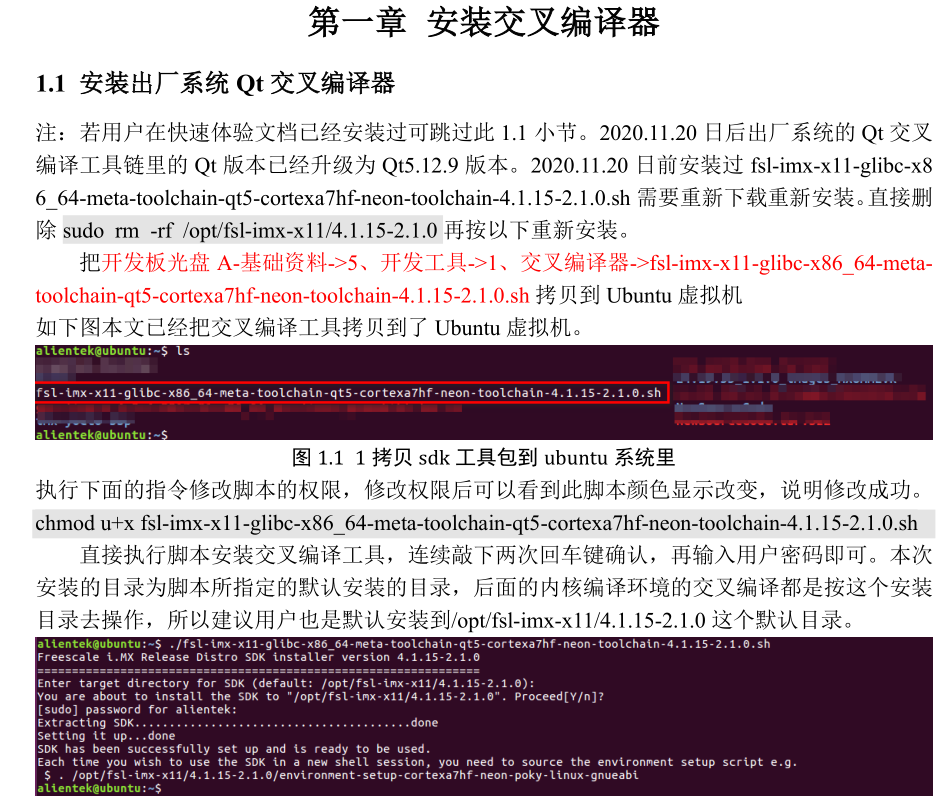
5.1 Copying the Compiler
Copy the development board CD A-Basic Materials->5. Development Tools->1. Cross Compiler->fsl-imx-x11-glibc-x86_64-meta-toolchain-qt5-cortexa7hf-neon-toolchain-4.1.15-2.1.0.shto the Ubuntu virtual machine.You can use <span>MobaXterm</span> software to copy the files; you can refer to this article for its usage: 2022 First Article, The All-Purpose Terminal Tool MobaXterm

As shown in the figure, I have already copied the cross-compilation tool to the Ubuntu virtual machine.

Execute the following command to change the script’s permissions. After changing the permissions, you will see the script’s color change, indicating success.
chmod u+x fsl-imx-x11-glibc-x86_64-meta-toolchain-qt5-cortexa7hf-neon-toolchain-4.1.15-2.1.0.sh
Directly execute the script to install the cross-compilation tool, press Enter twice to confirm, and then enter your user password. The installation directory will be the default directory specified by the script, and subsequent kernel compilation environments will operate according to this installation directory.
5.2 Configure Environment Variables
We know that in Linux, to run an executable file, you need to open a terminal in the corresponding directory and then use the <span>./</span> command to run it. But what if we want to run a specific program from another folder?Of course, it’s possible, and that’s where environment variables come in! Yes, environment variables are also needed in Linux! Their function is exactly the same as in Windows, which is to simplify a very long directory. Without environment variables, the command we need to input is:
/aaa/bbb/ccc/ddd/eee/fff/hhh/xxx.sh
With environment variables, the command we input is simply:
xxx.sh
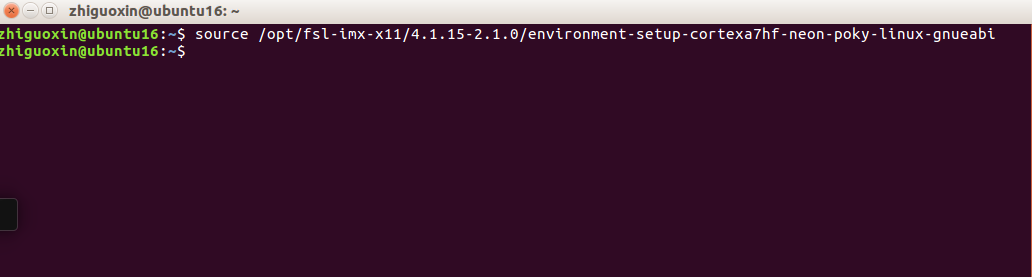
Environment variables allow the system to know that no matter where you call the xxx.sh command from, it refers to a specific program in a particular folder.The method to set environment variables is:<span>source /opt......</span>We open a terminal in the project directory and then run the environment variable.
source /opt/fsl-imx-x11/4.1.15-2.1.0/environment-setup-cortexa7hf-neon-poky-linux-gnueabi
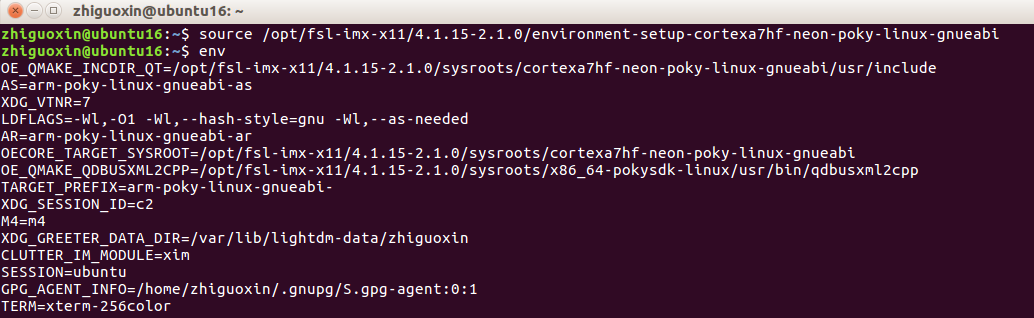
Next, use the <span>env</span> command to check the environment variables. If you see these configuration options, it means you have successfully set the newly installed “cross-compilation toolchain” to the environment variables.
Using <span>arm-poky-linux-gnueabi-gcc -v</span> command, you can check the gcc version, indicating that the environment variable is now effective.
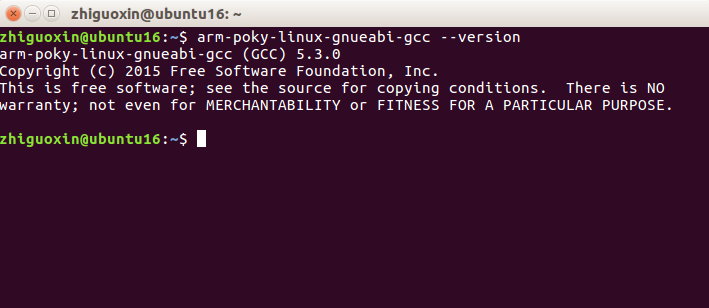
OK, your Qt cross-compiler is now installed.
5.3 Install Cross-Compilation Environment
So far, you have only installed the cross-compiler in Ubuntu. To compile Qt applications to run on the development board, you also need to set up a cross-compilation environment. Programs compiled with the ARM platform cross-compiler can run on the I.MX6U development board.The main task is to configure Kits in Qt Creator. A Kit refers to a development and compilation environment suite, allowing you to set up different platforms and compile applications for different platforms, which validates Qt’s cross-platform capabilities! If you have installed the Android kit, you can also run Qt programs on your phone.Reference document: [ZhiDian Atom] I.MX6U Factory System Qt Cross-Compilation Environment Setup V1.6.pdf section 2.3.Here, we need to write a command in the script to enable the environment variable. First, open this script.
sudo vi /opt/Qt5.12.9/Tools/QtCreator/bin/qtcreator.sh
In the <span>qtcreator.sh</span> file, insert the following command at the first line, as shown in the figure below.
source /opt/fsl-imx-x11/4.1.15-2.1.0/environment-setup-cortexa7hf-neon-poky-linux-gnueabi

Save the script file (ESC : wq). Use the following command to open Qt Creator. The “&” symbol is used to run it in the background.
/opt/Qt5.12.9/Tools/QtCreator/bin/qtcreator.sh &

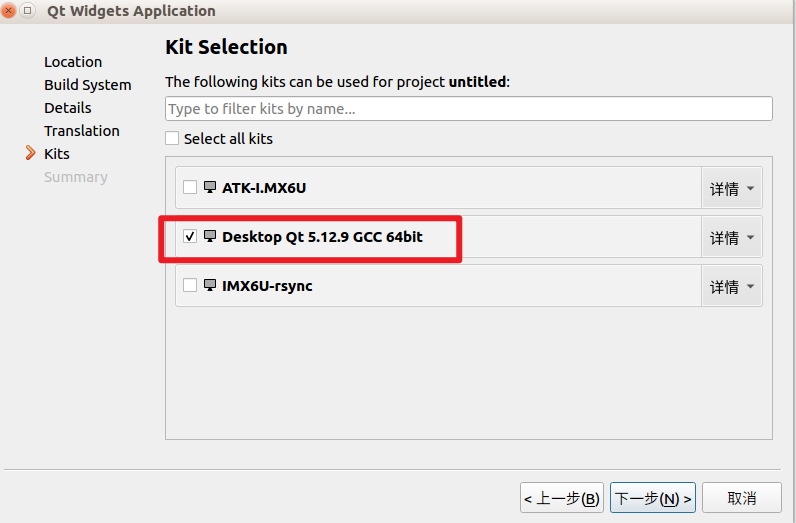
5.4 Install Kits
After installing Qt Creator, by default, there is only one kit available. Follow the tutorial to set up two additional kits, where ATK-I.MX6U is used for running on the imx6ull ARM platform. IMX6U-rsync is used for network debugging and downloading programs to the development board, meaning that after compiling in Qt Creator, clicking run will directly display your program on the development board.
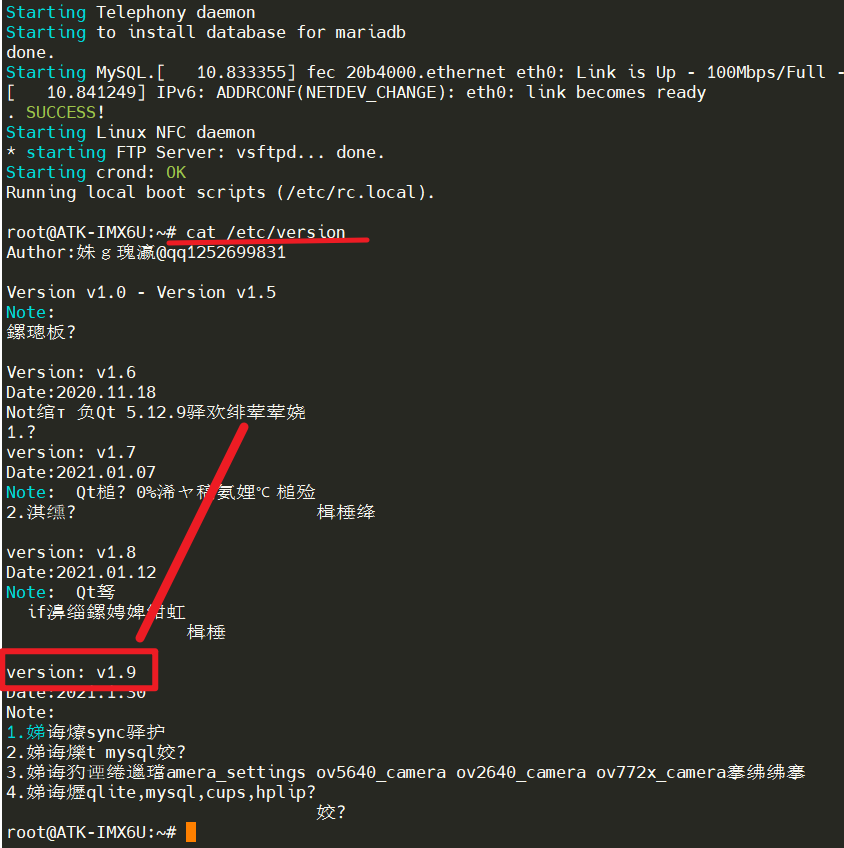
In Qt Creator, by default, it will use sftp or rsync to send programs to the board. Since the ZhiDian Atom I.MX6U factory Qt file system (version 1.9 and later) includes the rsync command, it is very convenient to use this method for Qt remote debugging. First, we need to check the current factory file system version by executing the following command on the factory system.
cat /etc/version
If the file system is not version 1.9 or does not support the rsync command, please download the latest factory system from the cloud and use the latest system.Set Static IP for Development BoardSince the LAN8720PHY network chip does not have a MAC address, the system generates a random MAC address for network use at startup. Each time a random MAC address is generated, resulting in a non-fixed IP address upon each boot. (In version 2.3, the file system has fixed a random MAC address that does not change upon each boot; please update to the latest file system.) Therefore, we need to set a static IP that does not change with the MAC address. The method for setting a fixed IP is as follows.The development board will automatically obtain an IP address at startup. The simplest method is to directly set an IP address for it. Thus, we will add the following content to the <span>/etc/rc.local</span> file in the factory file system as shown in the figure.
vi /etc/rc.local
Add the following content, and please set the corresponding IP address based on your router’s network segment. The following figure shows the static IP address set for eth0. Please ensure this IP does not conflict with other devices!
PATH=/sbin:/bin:/usr/sbin:/usr/bin
ifconfig eth0 192.168.1.115 netmask 255.255.255.0
route add default gw 192.168.1.1
echo "nameserver 114.114.114.114" > /etc/resolv.conf
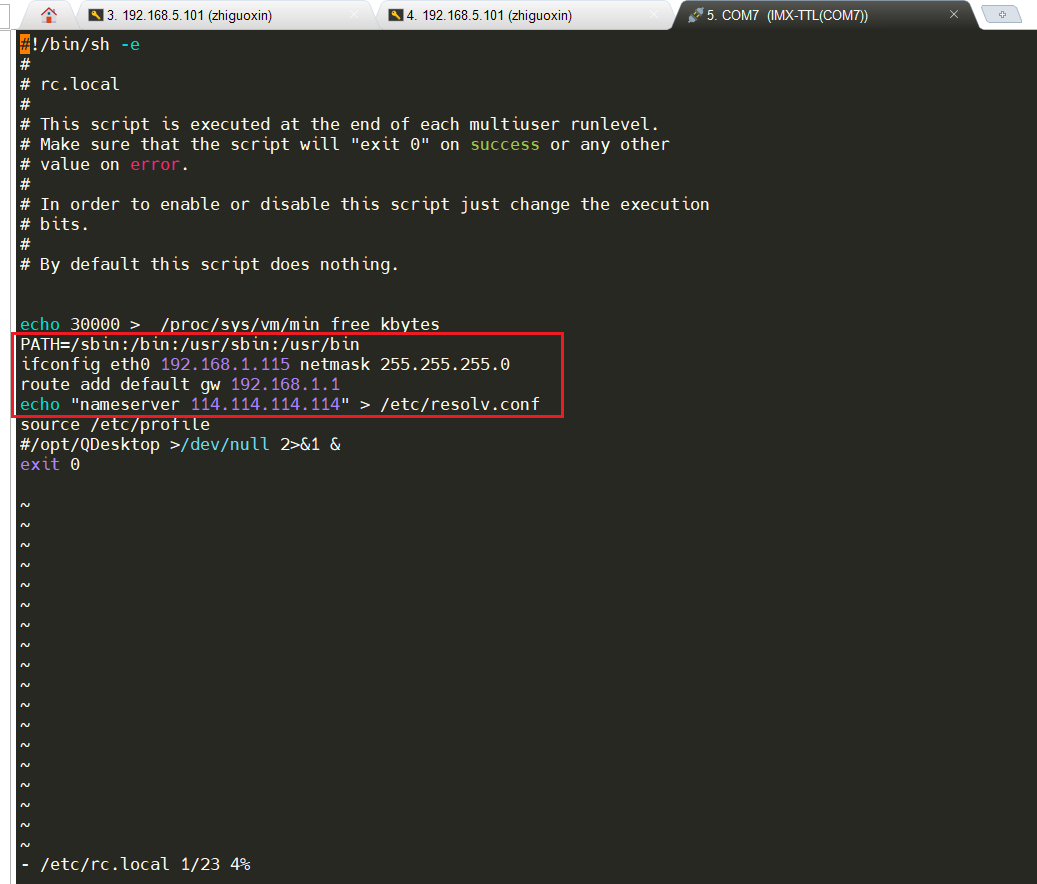
After this, every time the development board connects to the network and powers on, its IP address will be <span>192.168.1.115</span>.Next, refer to [ZhiDian Atom] I.MX6U Factory System Qt Cross-Compilation Environment Setup V1.6.pdf section 2.5.1 to complete the installation of the rsync method for Qt remote debugging kits.
06
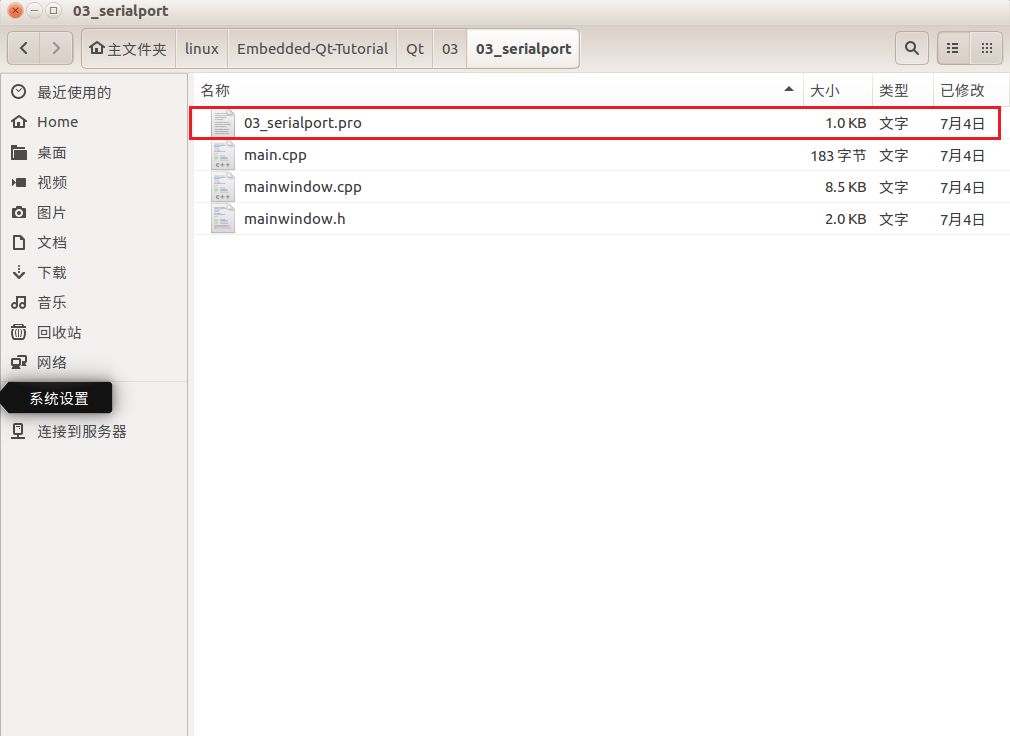
Practical ImplementationWe open the example provided by ZhiDian Atom, taking Qt/03/03_serialport as an example. Double-click <span>03_serialport.pro</span>.
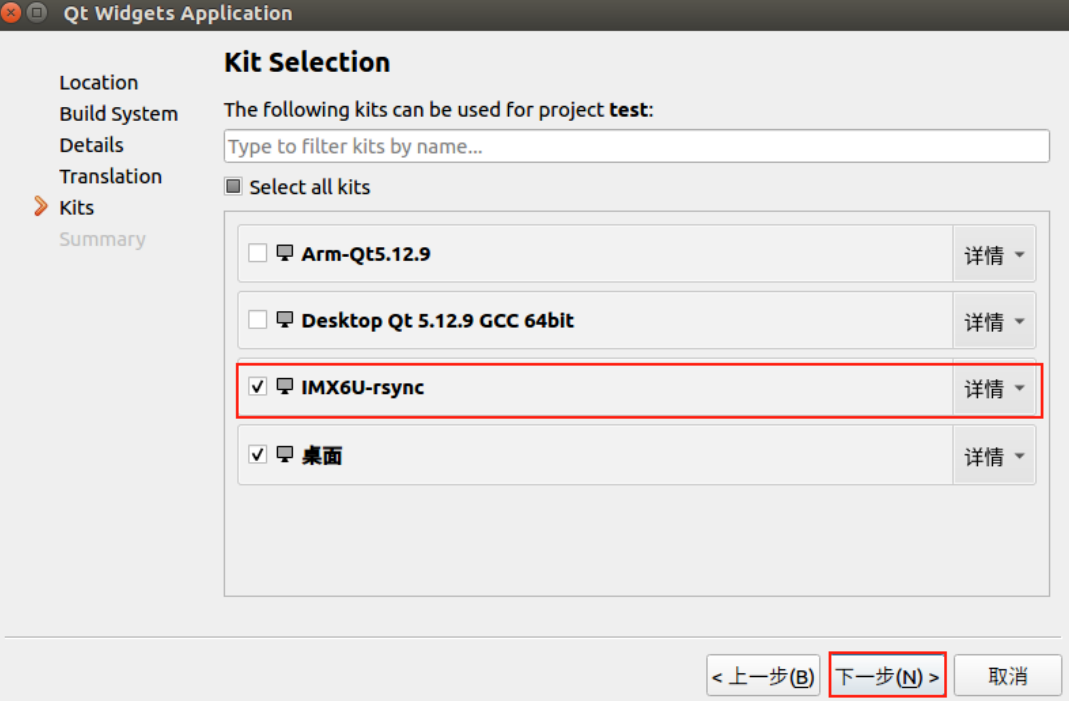
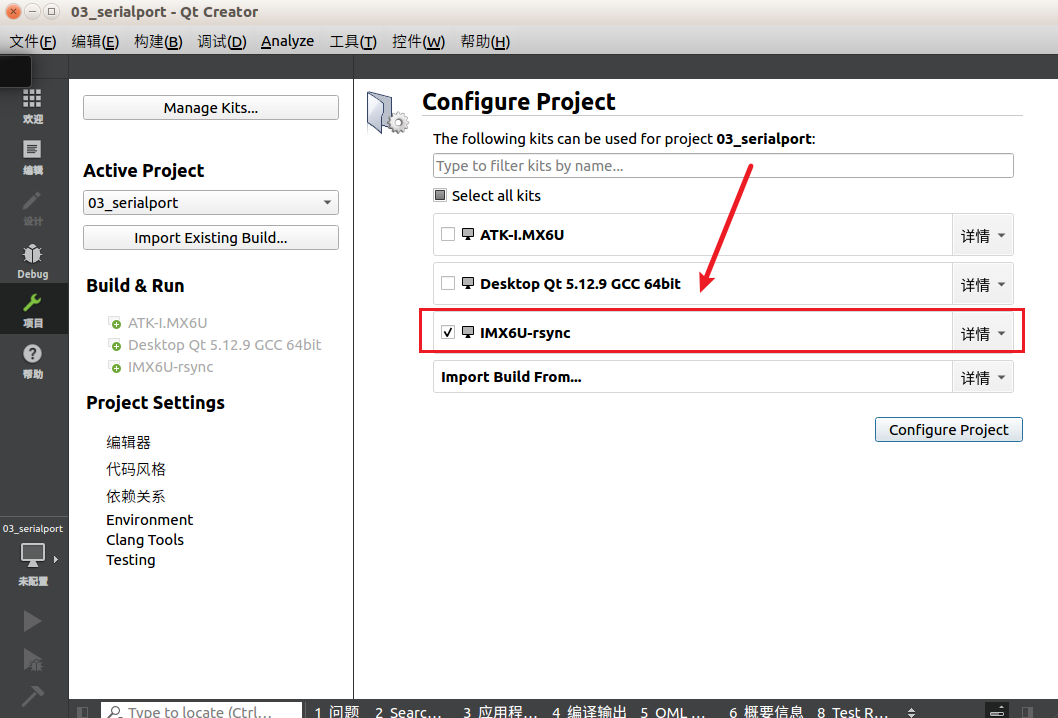
After opening, select the IMX6U-rsync kit.
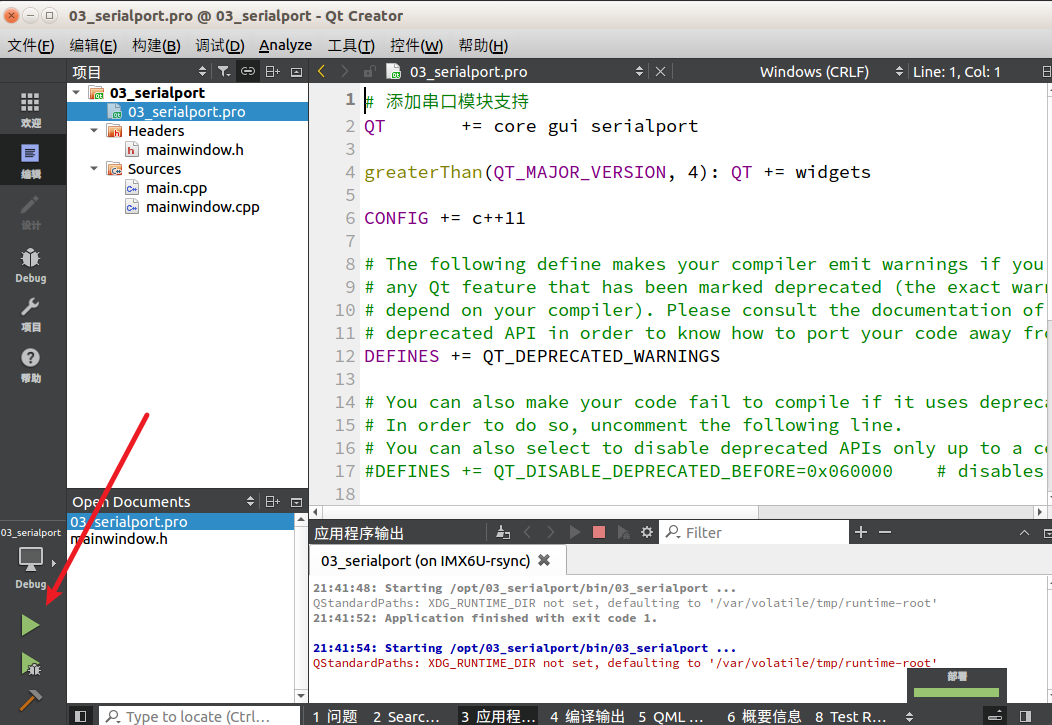
After opening, the software will automatically compile, and generally, there are no errors. Just click the green triangle at the bottom left to compile and run.
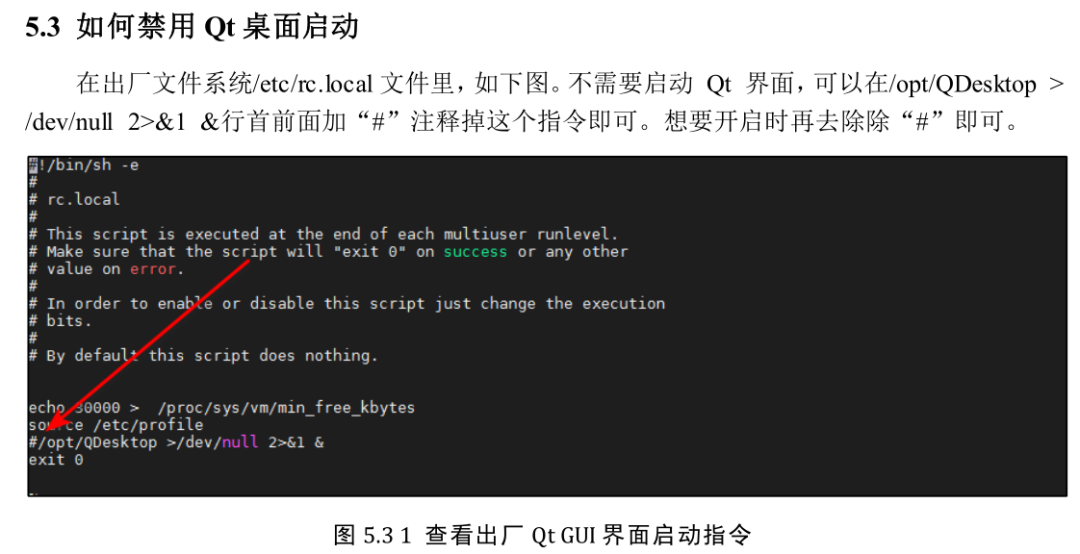
Then you will see a magical scene on the development board: your host program is running on the development board, and after connecting to the serial port on the development board, you can happily play around.Note: Since the development board has ZhiDian Atom’s boot Qt desktop, you can disable it from displaying, as shown below:
Final effect: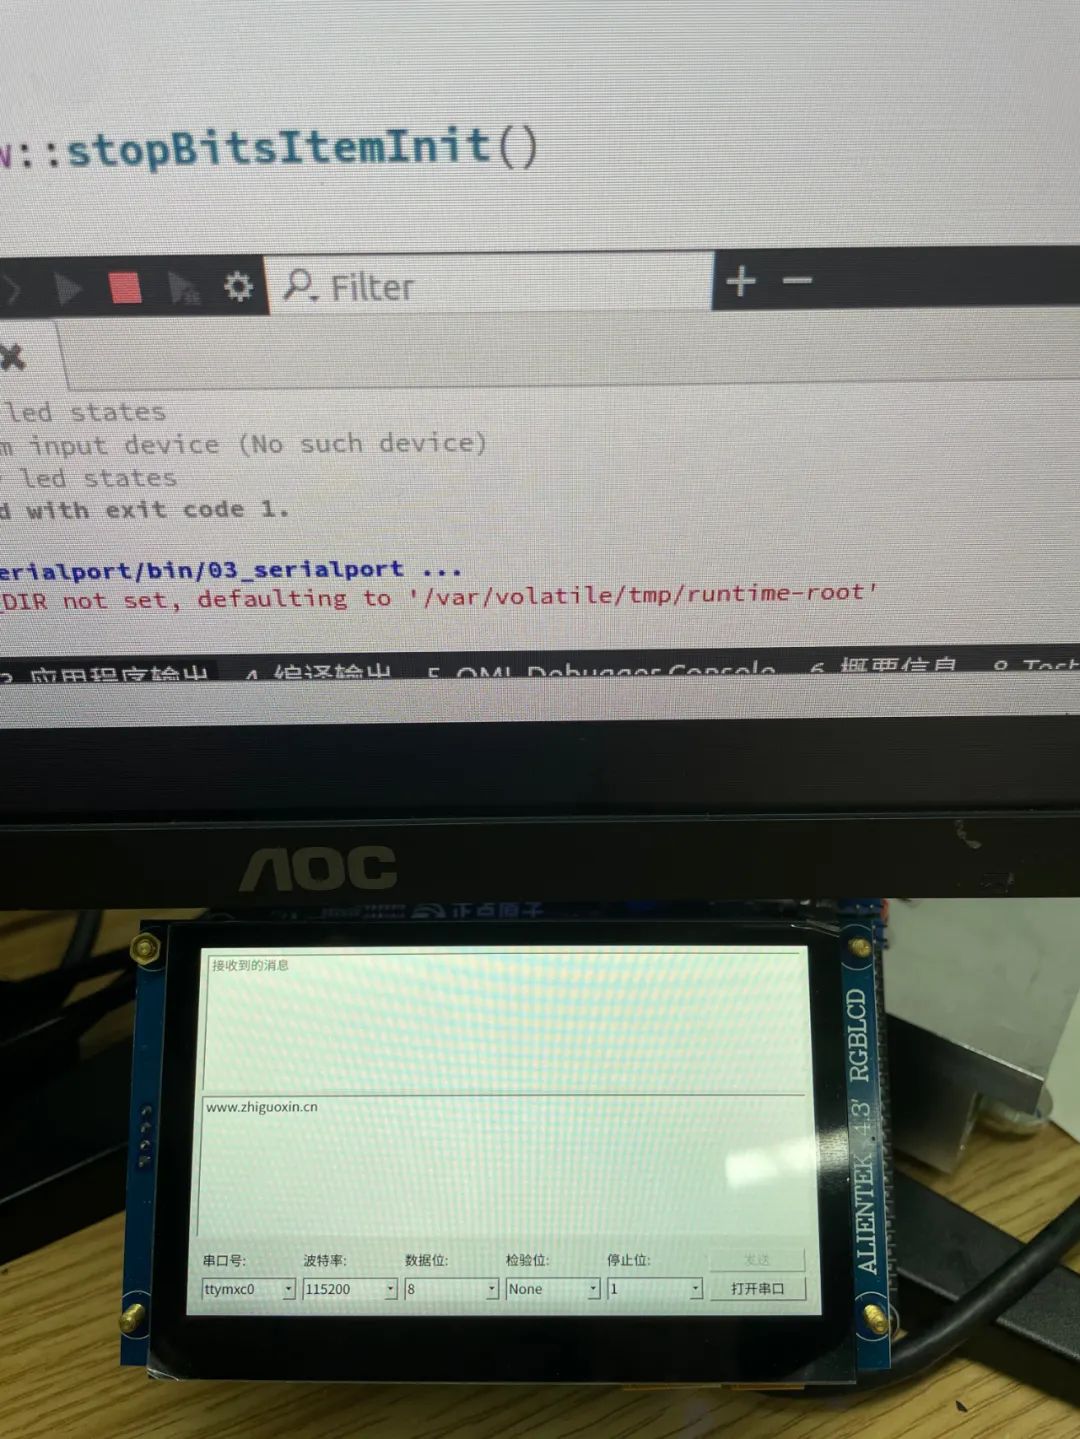 How about that? You may not know why you are doing this, but the fastest way to learn something new is to start playing with it; reverse learning can increase your interest in learning!-END-
Recommended Previous Articles: Click the image to jump to read
Setting Up STM32 Development Environment with VS Code.

Whose code is this terrible?!
Can microcontrollers perform face recognition? No, it’s Linux.
How to Draw a Perfect PCB?