This is a project created by the author. As a freshman at New York University, I joined the Chaihuo Maker team two months ago and found it very easy to get started with open-source AI hardware. Thus, I had the idea to create a project based on Arduino and XIAO AI that automatically reminds users when the lighting is insufficient in the evening. Let’s take a look together.
 Project Background
The core idea of this project is to develop a product that detects both facial presence and ambient light. When the system detects that the environment is getting darker and there is someone in front of the device, it will automatically trigger the light reminder function, helping users alleviate eye fatigue and protect visual health.
List of Structural Components (Hardware)
| Component Name | Quantity | Function Description |
|---|---|---|
|
Seeed Studio Grove Beginner Kit for Arduino |
1 | Core control input and output |
| Filament | 2 |
Lights up when conditions are met, main output |
|
Seeed Studio XIAO ESP32S3 Development Board (Seeed Studio Xiao ESP32S3) and dedicated expansion board |
1 |
Ultra-compact ESP32-S3 core development board, main input |
|
LED Light |
1 |
Controls facial recognition variables |
|
Seeed Studio Grove Beginner Kit Light Sensor |
2 |
Detects external brightness and LED light brightness, main input |
|
Heat Shrink Tubing |
2 |
Parallels two filaments |
|
Seeed Studio Grove Beginner Kit OLED Screen |
1 |
Outputs language to remind users to turn on the light |
| Grove Cable | 5 | Circuit connection |
| Laser Cutter | 1 | Appearance production |
| Wood Board | 1 | Appearance material |
List of Structural Components (Software)
| Component Name | Function Description |
|---|---|
|
SenseCraft AI |
Software platform for controlling XIAO ESP32S3 |
|
Arduino Integrated Development Environment (Arduino IDE) |
Embedded development programming tool |
| Boxes.py | Appearance design |
Construction Guide
1) Circuit Connection
-
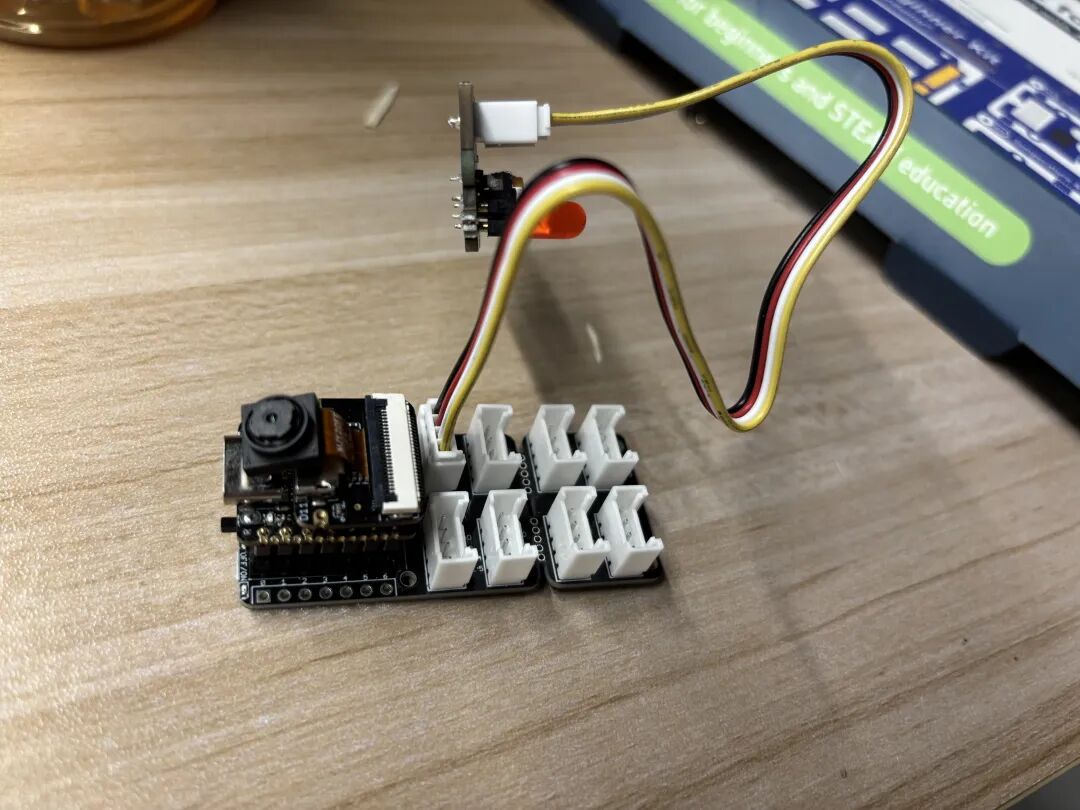
First, install the XIAO ESP32S3 onto the expansion board and connect it to the LED using Grove cables.
- Next, connect the two light sensors to the A2 and A6 ports on the Grove Beginner Kit mainboard using Grove cables; connect the OLED screen to the I2C interface.
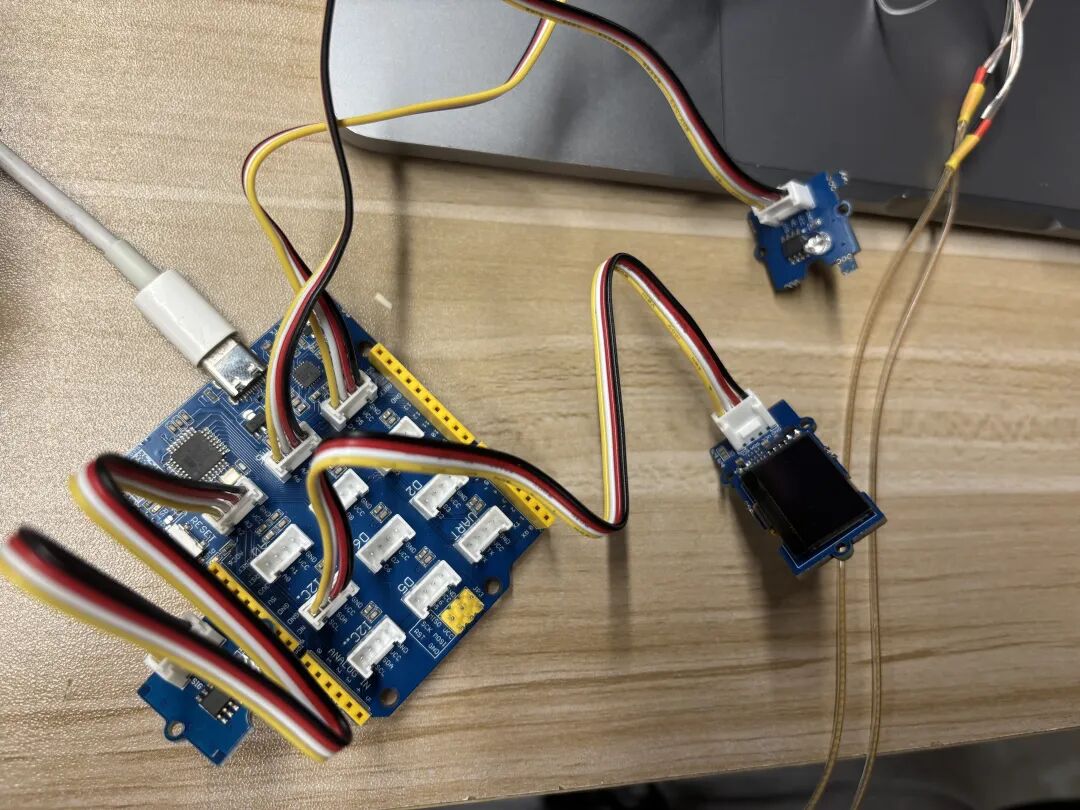
- Cut the wire at one end of the filament and twist it with the wire of the other filament. Cut one end of the Grove cable, twist the black and yellow wire ends with the wires of the two filaments, and then insulate and secure them with heat shrink tubing.
- Connect the Grove mainboard to the computer using a Type-C interface.
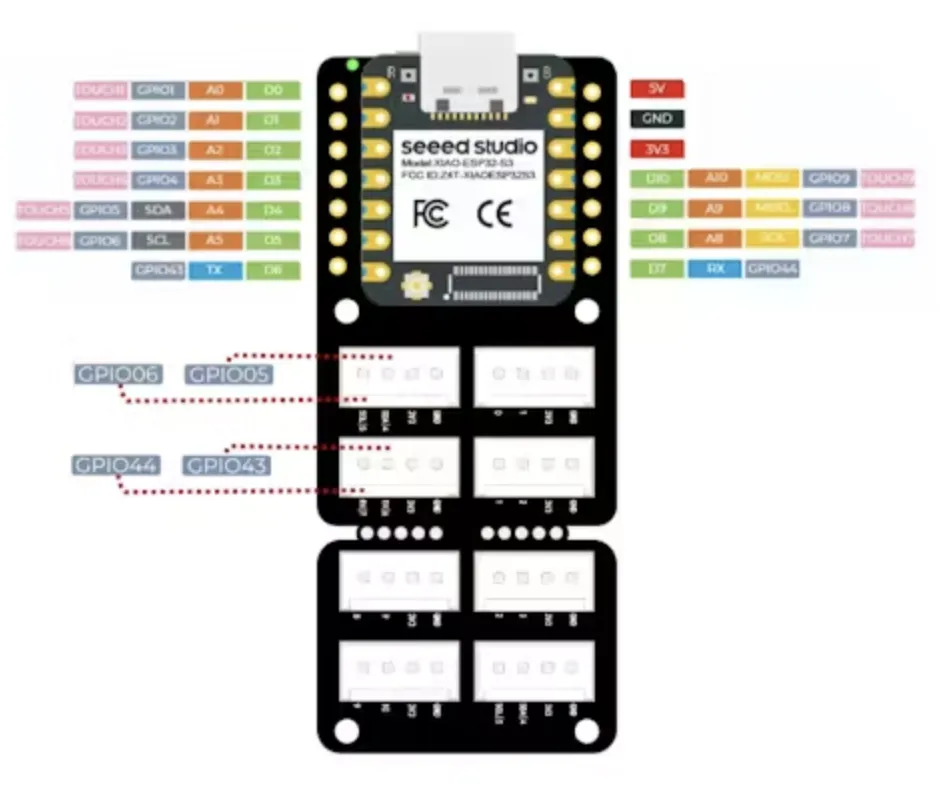
- Finally, connect the Grove cable that connects the filaments to the D4 port on the Grove mainboard (since the Xiao Grove expansion board is used, a pin mapping diagram is attached for reference):
2) Control XIAO ESP32 S3 with SenseCraft AI
-
Enter the Workspace and connect the XIAO to the computer using a Type-C data cable.
-
Click the “connect” button in the upper left corner, select XIAO, and connect.
-
Click “Select Model” in the center of the screen and choose “Face Detection”.
-
Click “GPIO” on the left side of the screen and set the parameters according to the device and preferences.
-
Functionality: When a face is detected, the LED lights up.
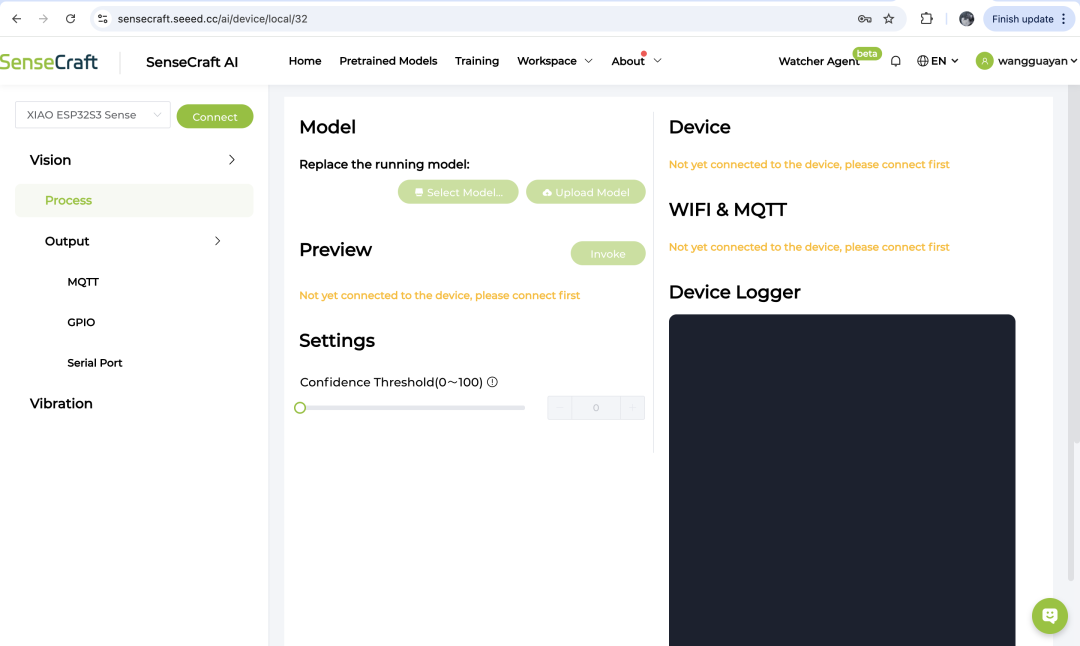
3) Appearance Design and Production
Go to the boxes.py website and find a sufficiently enclosed box. A suitably sized hole needs to be left for the wires to pass through.
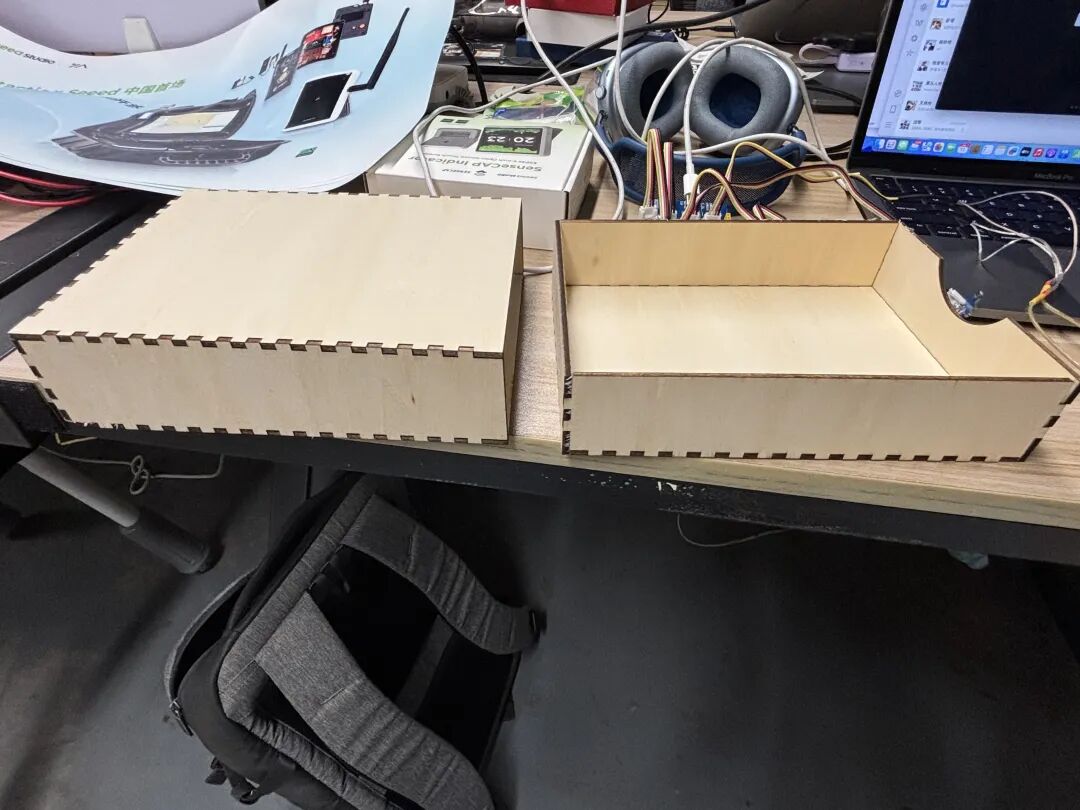
Set the box size according to the device size.
Download the box file and upload it to the laser cutter to cut the wood board.
Assemble the box.
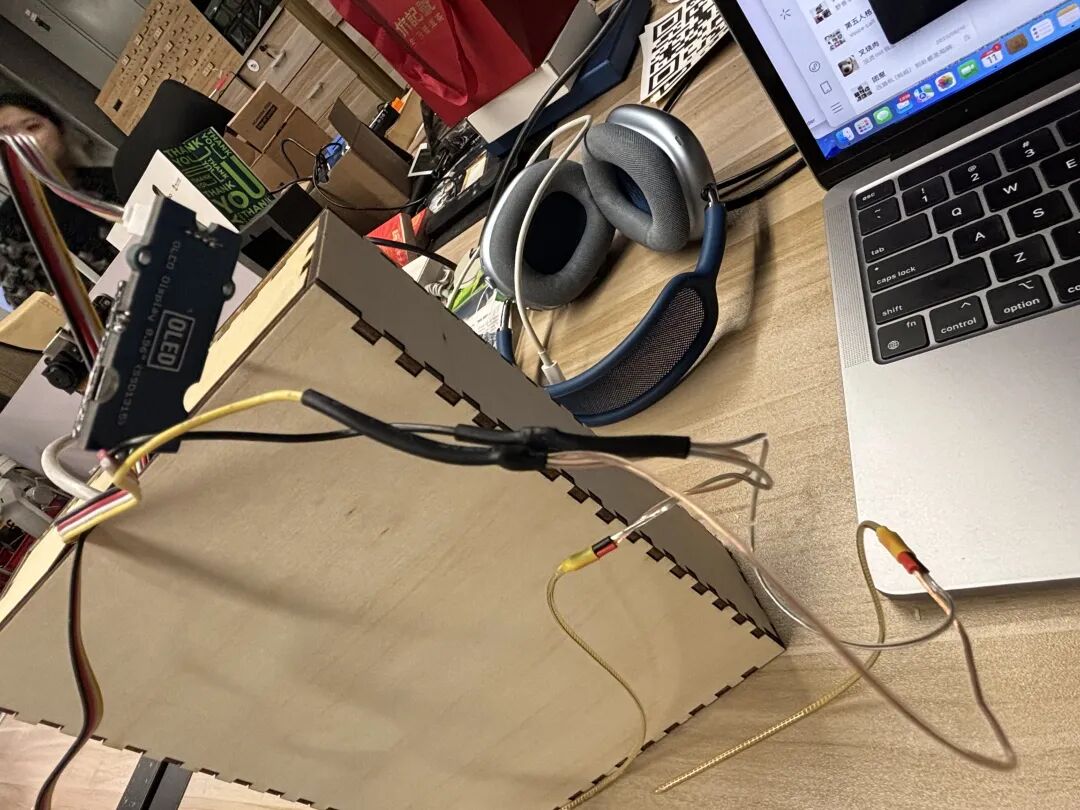
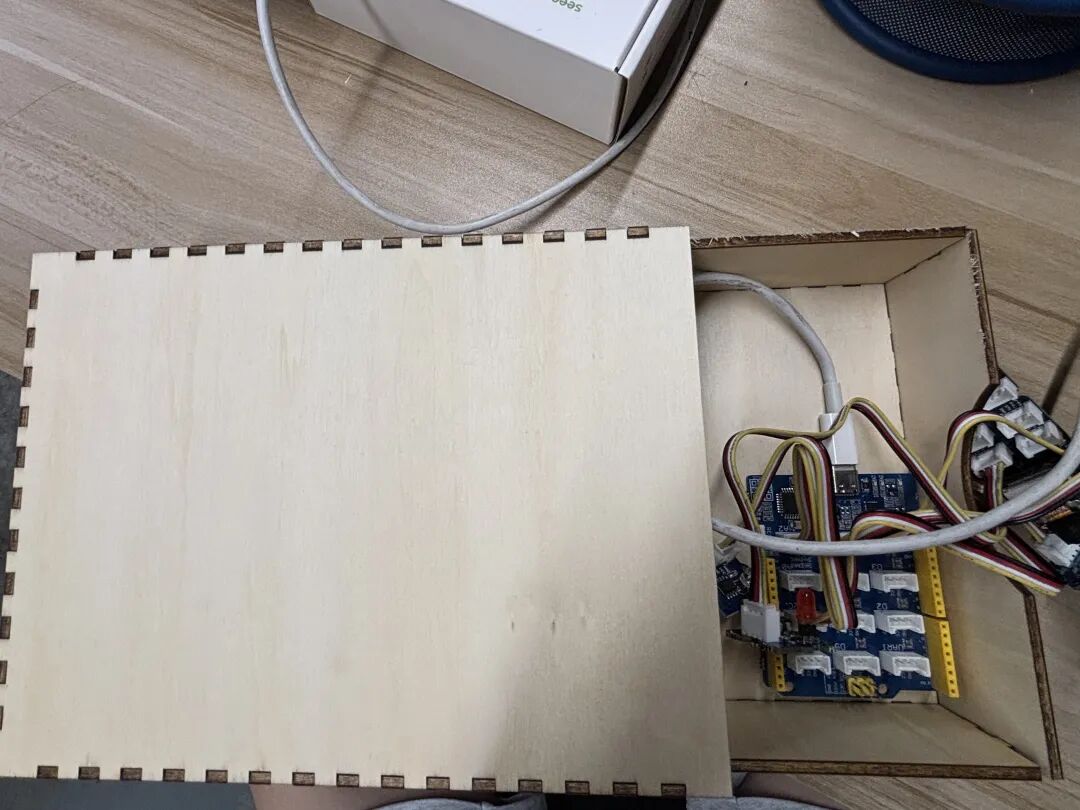
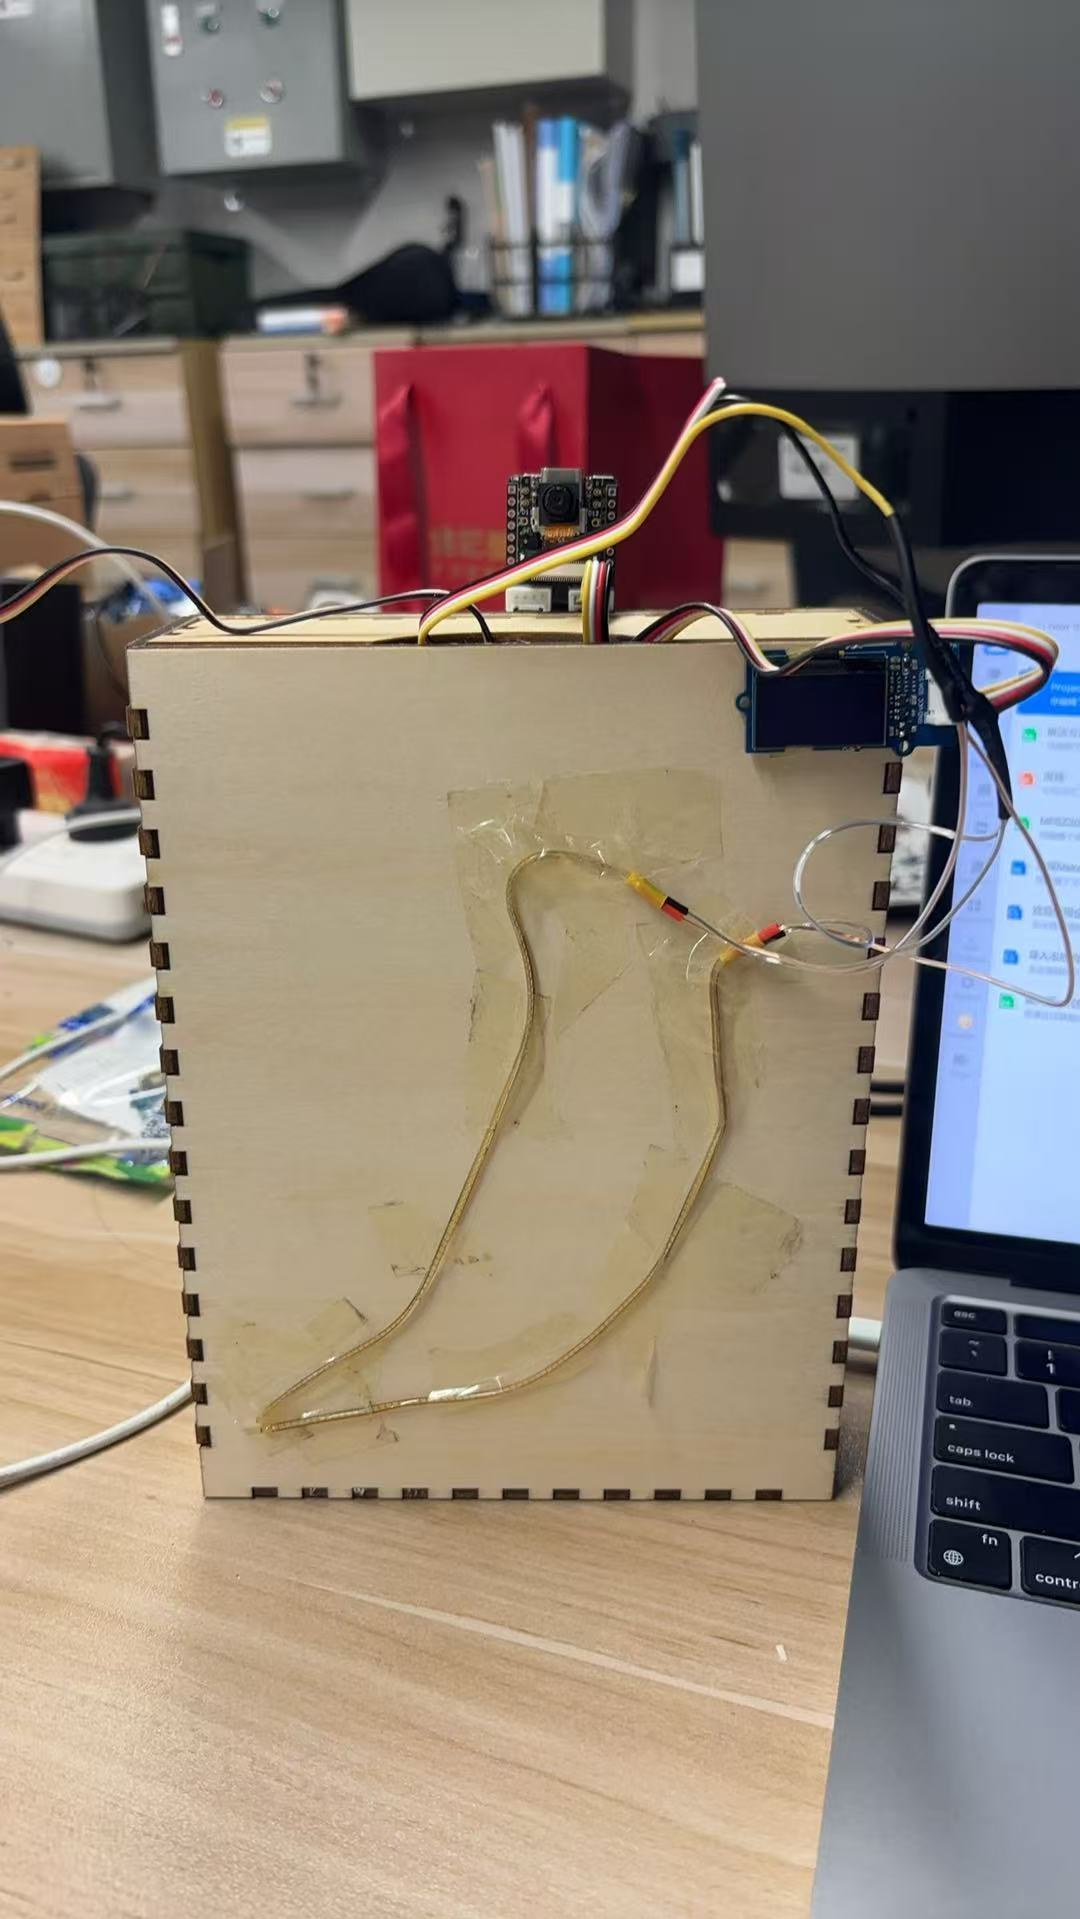
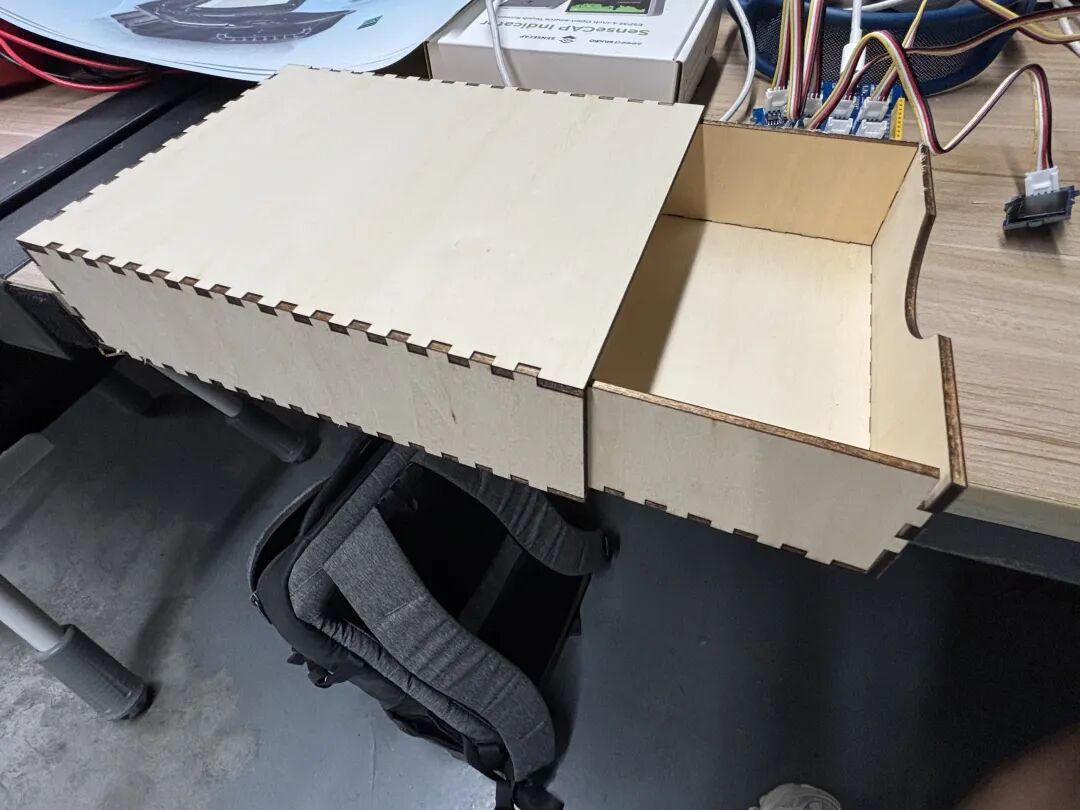 The design concept of the box: The LED connected to the XIAO needs to be placed inside the box, and the initial light inside the box should be as low as possible while allowing the wires to connect properly. Sensor 2 will be installed inside the box to detect the light from the LED connected to the XIAO (whether a face is detected). Sensor 1, the filament, XIAO, and the OLED screen will be placed outside the box.
4) Write Code for the Grove Mainboard
The functionality of the code: When sensor 1 detects a light value less than 50, and sensor 2 detects a light value greater than 5, it reminds the user that the lighting is insufficient and turns on the light.
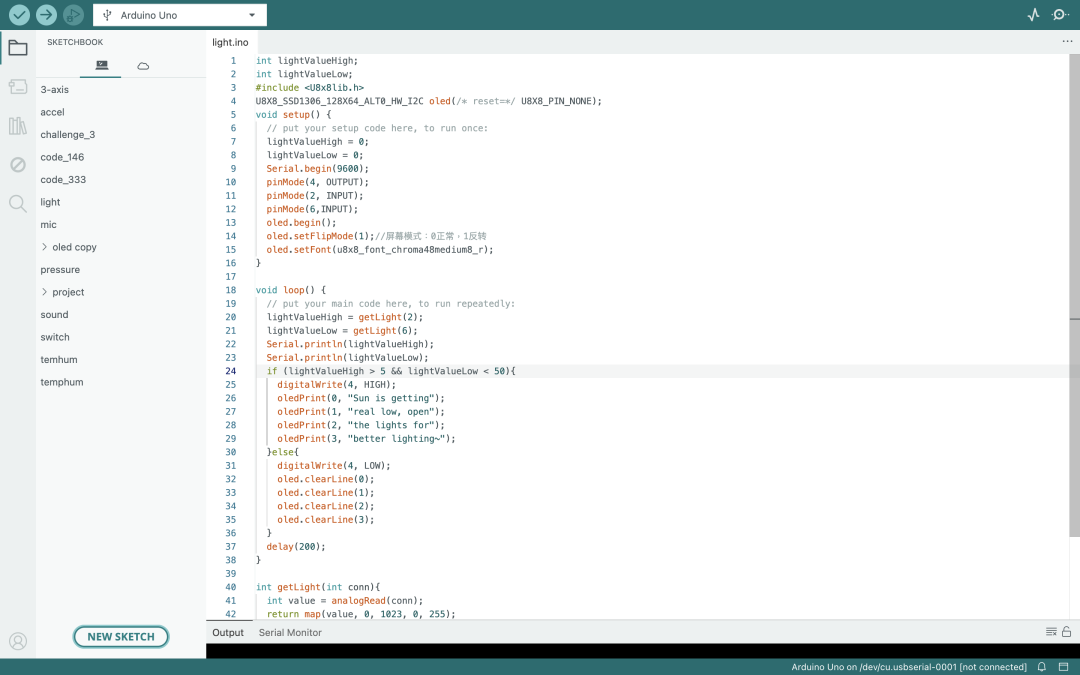
Please test the sensors and actuators one by one, and finally integrate the code.
 Code
Code
int lightValueHigh;int lightValueLow;#include <U8x8lib.h>U8X8_SSD1306_128X64_ALT0_HW_I2C oled(/* reset=*/ U8X8_PIN_NONE);void setup() { // put your setup code here, to run once: lightValueHigh = 0; lightValueLow = 0; Serial.begin(9600); pinMode(4, OUTPUT); pinMode(2, INPUT); pinMode(6,INPUT); oled.begin(); oled.setFlipMode(1);//Screen mode: 0 normal, 1 inverted oled.setFont(u8x8_font_chroma48medium8_r);}void loop() { // put your main code here, to run repeatedly: lightValueHigh = getLight(2); lightValueLow = getLight(6); Serial.println(lightValueHigh); Serial.println(lightValueLow); if (lightValueHigh > 5 && lightValueLow < 50){ digitalWrite(4, HIGH); oledPrint(0, "Sun is getting"); oledPrint(1, "real low, open"); oledPrint(2, "the lights for"); oledPrint(3, "better lighting~"); }else{ digitalWrite(4, LOW); oled.clearLine(0); oled.clearLine(1); oled.clearLine(2); oled.clearLine(3); } delay(200);}int getLight(int conn){ int value = analogRead(conn); return map(value, 0, 1023, 0, 255);}void oledPrint(int oled_line, String oled_str){ oled.clearLine(oled_line);//Clear the oled_line oled.setCursor(0, oled_line); oled.print(oled_str);}Previous Highlights:
Maker Project Showcase | Interactive Game Based on ESP32S3
Maker Project Showcase | Smart Flower Pot Based on Raspberry PiMaker Project Showcase | AI Writing System Based on SenseCAP WatcherMaker Project Showcase | Go Game System Based on XIAO RP2040 and Raspberry PiMaker Project Showcase | Mechanical Keyboard Based on XIAOMaker Project Showcase | HA Air Quality Detector Based on XIAO ESP32C6Maker Project Showcase | Smart LanternMaker Project Showcase | DeepSeeek Terminal Based on ESP32 and Wio TerminalMaker Project Showcase | Robot MeshBot Based on Meshtastic —-END—-