
If you have a Creality 3D printer, the machine modification we are going to discuss today will surely interest you. In the Instructables community, a guy named Scott loves to perform various innovative modifications and shares his works with others. This time, Scott used the Creality Ender-3 3D printer for his modification, allowing the machine to play a piece of music before starting each model. How do we do this? Let’s take a look.
Step 1: Access the Ender–3 Controller
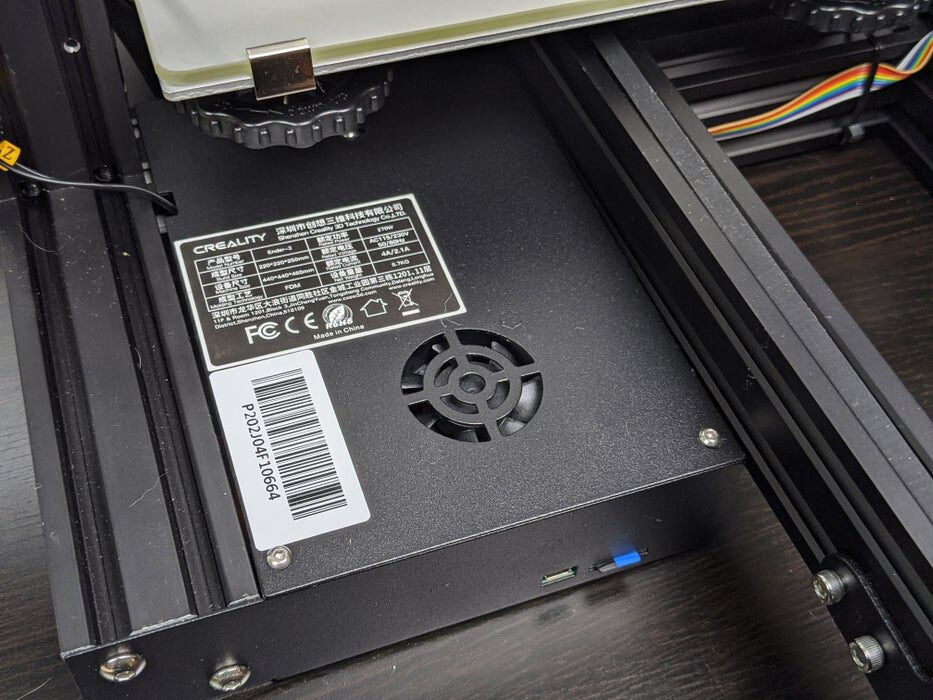
Open the Ender-3 control box to reveal the internal control panel. First, the power to the 3D printer must be turned on, followed by opening the controller box. We will need to slide the build platform back and forth to access three screws. After unplugging the printer’s power cord, use an Allen wrench to remove the two screws at the front of the cover.
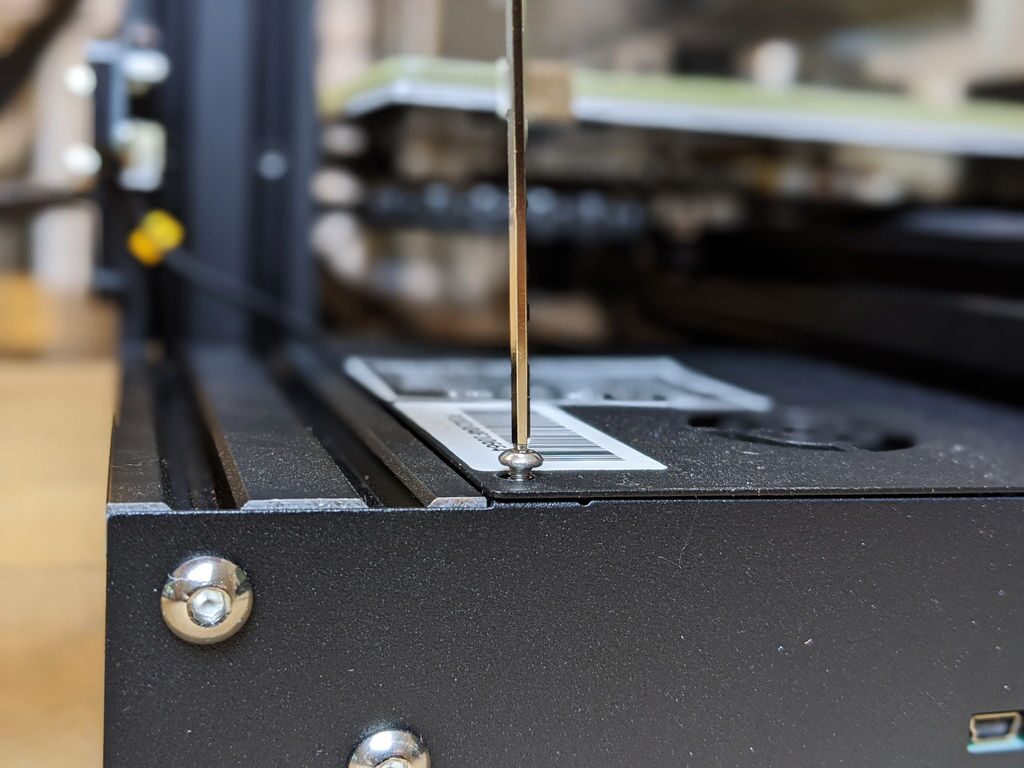
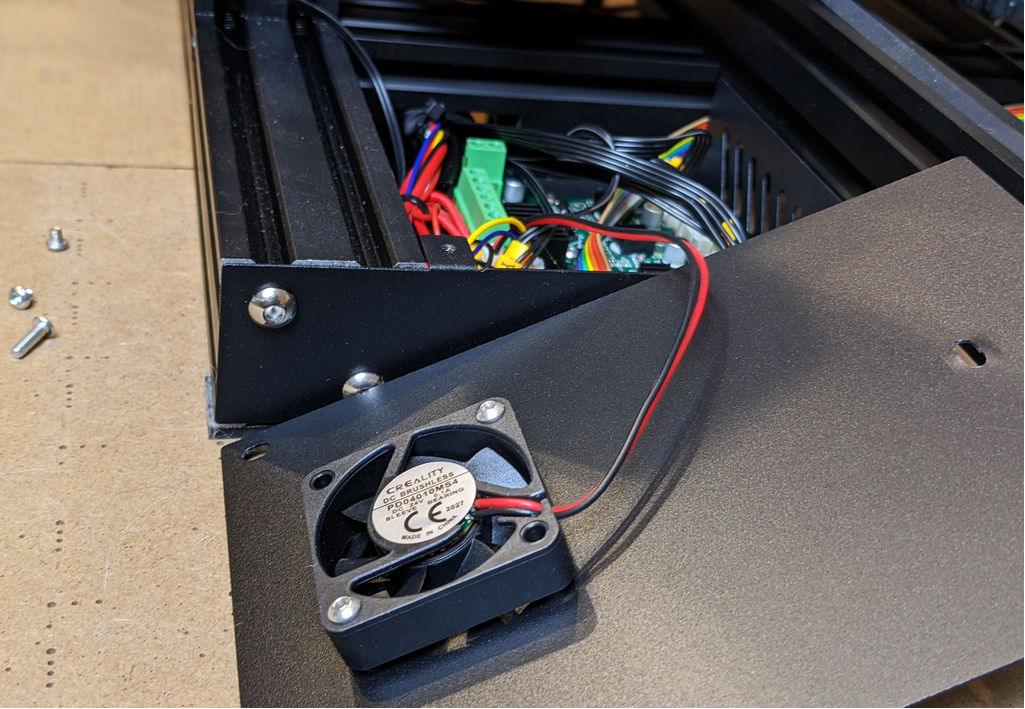
After unscrewing the last screw, remove the cover from the top of the control box and set it aside temporarily. However, do not rush to lift the cover, as there is a fan on the underside of the cover, and the wires connecting it to the control board are not very long.
Step 2: Flash the Bootloader to the Control Board
The control board inside the Creality Ender-3 does not come with a bootloader, so the Arduino IDE cannot program the board. Therefore, before using the Arduino IDE to refresh the new firmware, we need to flash the bootloader onto the board.
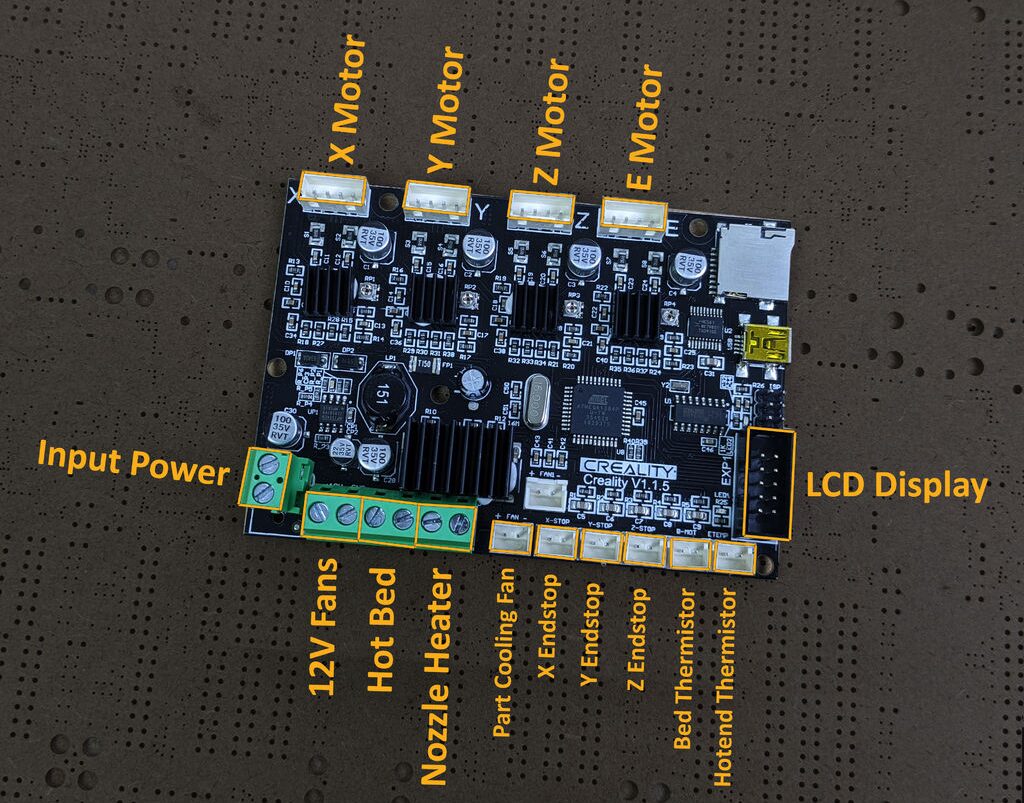
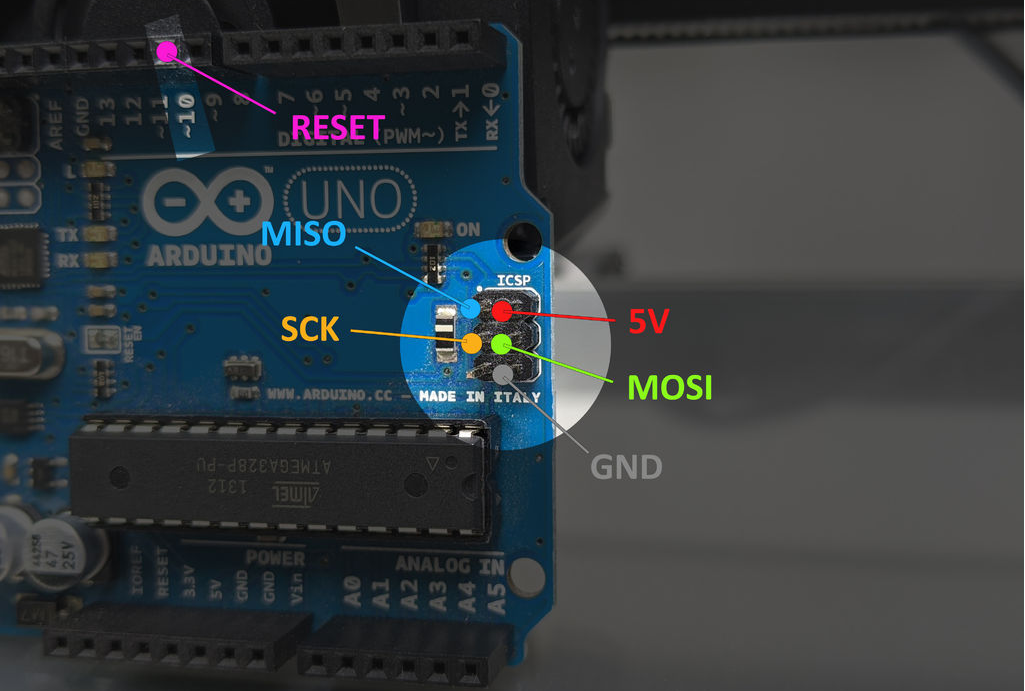
The first step is to connect the USBasp programmer to the Ender-3 controller. The Ender-3 control board has an onboard ISP header, and you will find a 2×3 pin ISP header next to the USB port.
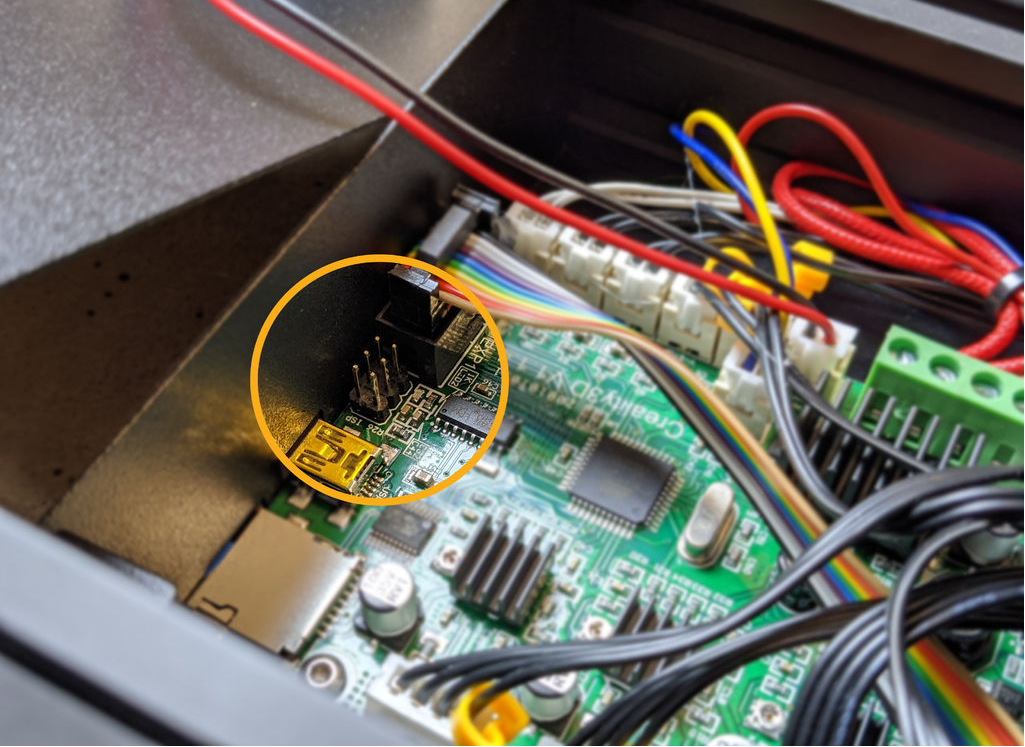
The orientation of the ISP header is important. If you connect it incorrectly, the firmware flashing operation will fail. If you look at the adapter from pin 10 to pin 6, you will notice that one of the corner pins is marked GND.

Once you understand the location of the two GND pins, use them as reference points to insert the USBasp programmer into the Ender-3 control board. After connecting the USBasp programmer, jump to the Arduino IDE. We will inform the IDE which type of programmer is currently in use.Go to Tools > Programmer and select USBasp.Next, we need to tell the Arduino IDE which type of board to process.In this case, the Ender-3 control board is based on the Sanguino board.This board is not predefined in the Arduino IDE, so we need to install it in the board manager first.First, go to File > Preferences.Then, in the Additional Board Manager URLs field, enter the following URL:
https://raw.githubusercontent.com/Lauszus/Sanguino/master/package_lauszus_sanguino_index.json
Press OK to close the preferences dialog. Then, go to Tools > Board > Board Manager.
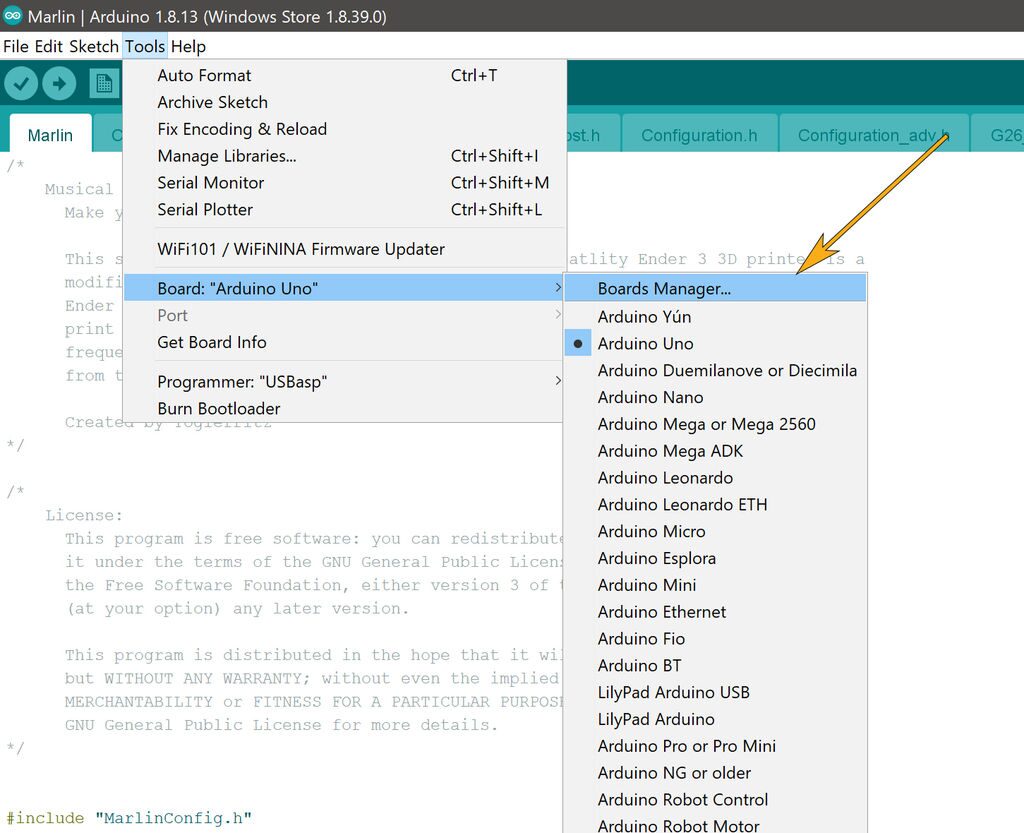
Then, search for “Sanguino” and install that board. Now that the Sanguino board is installed, return to Tools > Board and select Sanguino from the list. The last piece of information we need to provide to the Arduino IDE is the type of processor used by the Ender-3 control board. To do this, go to Tools > Processor, then select ATmega1284 or ATmega128P (16MHz). Now, we can finally flash the bootloader to the Ender-3 controller. Go to Tools > Burn Bootloader. After the process is successful, you should see a confirmation message at the bottom of the display.
Step 3: Refresh the Music Marlin Firmware
The bootloader we just flashed onto the Ender-3 controller allows us to refresh the new firmware from the Arduino IDE to the board. For this project, we are using a modified version of the Marlin firmware. You can download the firmware for this project from the GitHub repository:https://github.com/Toglefritz/Musical_Marlin. After downloading the repository from GitHub, open Marlin.ino in the Arduino IDE. The IDE will automatically open the remaining Musical_Marlin firmware files. Since we will use the USBasp programmer instead of the USB port to refresh the firmware, we need to upload the firmware slightly differently with the Arduino IDE. Go to Sketch > Upload Using Programmer. This command will tell the Arduino IDE to use the USBasp programmer to refresh the code to the controller instead of the USB port, which is what the arrow button on the toolbar is for.
After that, the code will be uploaded, and the Arduino IDE will display status updates at the bottom of the window, just like when uploading firmware via USB.
Step 4: Reattach the Cover
Now that we have programmed the Ender-3 controller, we can put the outer cover back in place by simply performing the reverse steps of Step 1.
Step 5: Play Music
Select Custom Commands→Main from the menu, then go to the custom version of Marlin on the control board to enable a set of custom commands that will play songs on the LCD display. To access the menu, simply turn the knob on the LCD controller to navigate to “Custom Commands,” and you can select your favorite song.
Step 6: Program the Ender –3 Controller with Arduino Uno
If you do not have or do not want to buy a USBasp programmer, you can also use an Arduino Uno to flash the bootloader and refresh the firmware to the USB Ender-3 controller. To flash the bootloader to the Ender-3 control board, we need to use the six-pin ISP header next to the USB port. If you look at the Arduino Uno, you will find a similar ISP header, this time on the opposite board of the USB port, next to the “Arduino.org” text. To program the Ender-3 controller with the Arduino Uno, we need to connect these two ISP headers together.
As usual, connect the Arduino Uno to the computer. The Arduino IDE comes with a sample sketch that allows the Arduino to act as an ISP programmer. To find this sample sketch, navigate to File > Examples > 11.ArduinoISP > ArduinoISP. Then upload the ArduinoISP sketch to the Arduino Uno and open the Musical Marlin firmware. Next, we need to tell the Arduino IDE that we are using the Arduino. To do this, go to Tools > Programmer: > Arduino as ISP. Finally, to burn the bootloader, go to Tools > Burn Bootloader. This will flash the bootloader to the Ender-3 controller. After that, you can follow the remaining instructions to refresh the Musical Marlin firmware to the control board.
Step 7: Write Your Own Music Translation
The repository for this project (https://github.com/Toglefritz/Musical_Marlin) contains a directory that converts comments into a spreadsheet of G-code. The easiest way to write your own G-code music is to start by copying these files.
1) Set the speed. 2) Enter the notes. 3) Enter the duration of the notes. 4) Copy the G-code into the firmware (or a separate G-code file) M350 X1: Set the microstepping resolution of the X-axis to full step. Then, copy the G-code command list into the Marlin firmware under the CUSTOM_USER_MENUs section:
/** <br> * User-defined menu items that execute custom GCode <br> */ <br > #define CUSTOM_USER_MENUS
Step 8: Appendix C: Load Music from SD Card
After adding support for G-code in VS Code, jump to the spreadsheet of songs to be converted into G-code for the 3D printer to play. Copy the G-code string from cell F5, and paste this G-code into Visual Studio Code.
To convert to Marlin firmware, the G-code contains /n line breaks. In VS Code, find and replace these line breaks to replace them with new lines (like pressing the Enter key). To input new lines into the find and replace interface, press Ctrl+ Enter. Then, somehow insert the Ender-3’s SD card into the computer and save the file with a .gcode extension from VS Code.
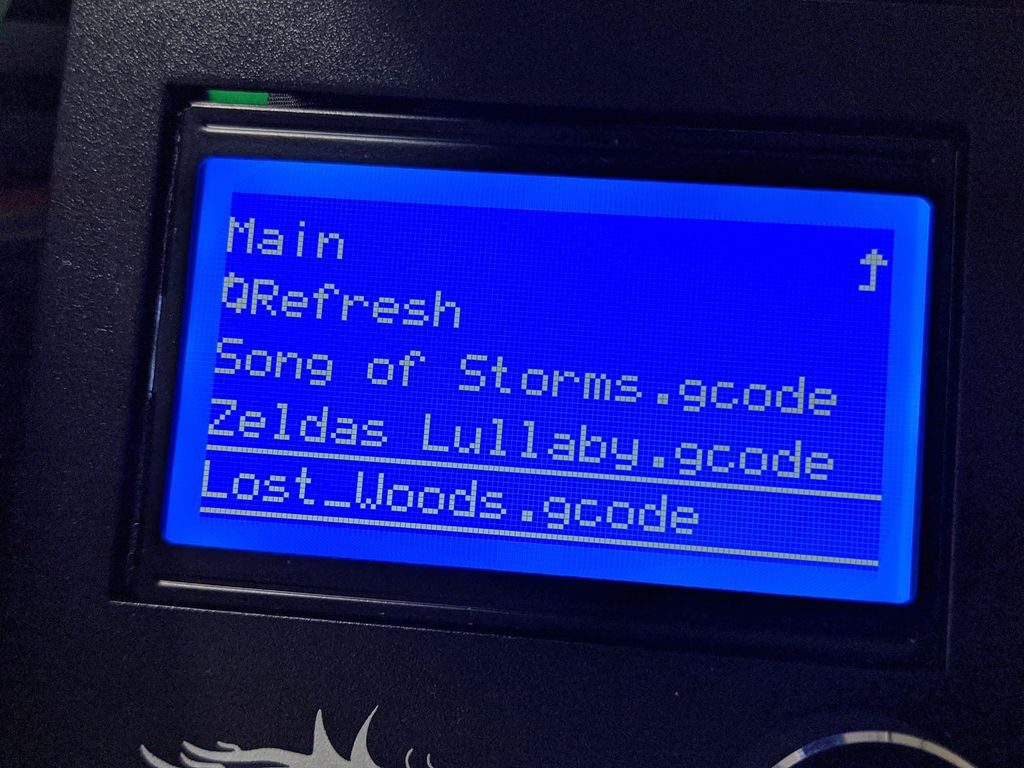
Now your music G-code is loaded onto the SD card, and you can run prints and play from the SD card (after all, print jobs are just G-code files). Finally, just select the song you want to play from the file list on the SD card.
Interested friends can get started
Not only enjoy the technological innovation brought by 3D printing
But also enjoy the fun and sense of accomplishment that machine modification brings