
Introduction

Arduino is a convenient, flexible, and easy-to-use open-source electronic prototyping platform that includes hardware (various models of Arduino boards) and software (Arduino IDE for computer programming).
By simply writing code in the computer programming environment and uploading it to the Arduino board, you can achieve your desired goals.
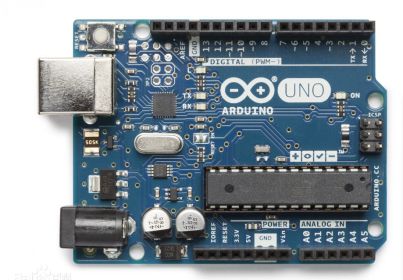
Figure 1 Arduino Board

Figure 2 Arduino Programming Software
Arduino can sense the surrounding environment through various sensors and can respond by controlling motors, lights, etc. Examples of applications include ultrasonic distance sensors, smoke detectors, and pumps. Even those who are not skilled in programming can create fun projects with Arduino.
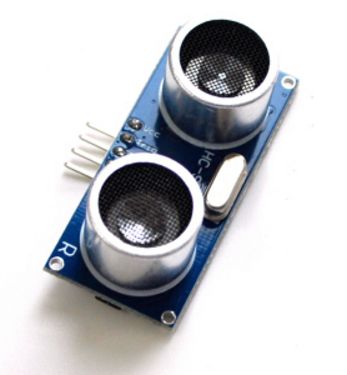
Figure 3 Ultrasonic Distance Sensor
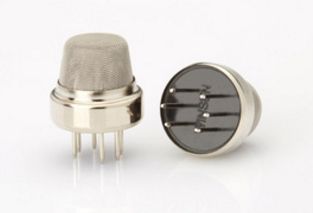
Figure 4 Smoke Detector

Related Kits

(1) Arduino Board
This is the core hardware we use, which includes many types, such as Arduino Uno, Arduino Mega ADK, etc.
(2) Breadboard
The multi-hole design of the breadboard saves a lot of circuit assembly time and is very suitable for assembling electronic circuits.
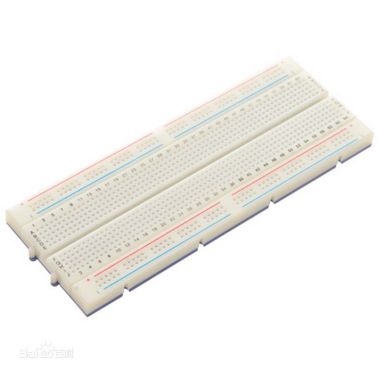
Figure 5 Breadboard
(3) Output Devices
Intuitive devices that control motors and lights, such as servos and small light bulbs; and indirect devices that respond to the environment through sensors, such as ultrasonic distance sensors, smoke detectors, and pumps.
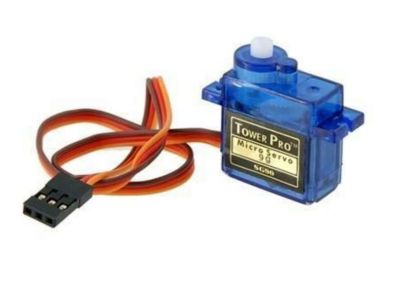
Figure 6 Servo

Code Introduction

(1) Blink
This code is the simplest and can be run with just the Arduino board, successfully making the onboard LED blink.
// the setup function runs once when you press reset or power the board
void setup() {
// initialize digital pin LED_BUILTIN as an output.
pinMode(LED_BUILTIN, OUTPUT);
}
// the loop function runs over and over again forever
void loop() {
digitalWrite(LED_BUILTIN, HIGH); // turn the LED on (HIGH is the voltage level)
delay(1000); // wait for a second
digitalWrite(LED_BUILTIN, LOW); // turn the LED off by making the voltage LOW
delay(1000); // wait for a second
}
*In this code, the symbol “//” indicates comments meant to help users understand the function of the corresponding part of the code, which will not be compiled by the compiler. At the same time, “/” can also be used for comments, but “//” can only comment one line, while “/” can comment multiple lines.
*The code needs to establish the setup function, with the function part starting from “{” to “}”. This function runs only once each time the Arduino board is powered or reset. Therefore, Arduino code must include both the setup and loop functions; otherwise, it cannot operate normally.
*Delay indicates the number of milliseconds (ms) to delay, used here to control the time the light is on and off.
(2) LED
This code can control the blinking of a small light bulb outside the board.
int ledPin = 10;
void setup() {
pinMode(ledPin, OUTPUT);
}
void loop() {
digitalWrite(ledPin, HIGH);
delay(100);
digitalWrite(ledPin, LOW);
delay(100);
}
*Due to the different requirements for control and output, the process names defined in the setup function are also different.
*Since it is an external small light bulb, the positive output hole needs to be specified, unlike the onboard light that does not require specification, as both positive and negative are connected to ground by default.
(3) Servo
Here is a piece of code without comments that only controls the operation of a servo.
#include <Servo.h>
Servo myservo;
int pos = 0;
void setup() {
myservo.attach(10);
}
void loop() {
for (pos = 0; pos <= 180; pos += 1) {
// in steps of 1 degree
myservo.write(pos);
delay(15);
}
for (pos = 180; pos >= 0; pos -= 1) {
myservo.write(pos);
delay(15);
}
}
*When connecting, pay attention to the order of the wires; the servo has three wires. One is red, connected to +5V. One is brown (some are black), connected to GND. The last one is yellow or orange, connected to the digital pin.
*This code allows the servo to sweep across a plane, where
for (pos = 0; pos <= 180; pos += 1)
means that each sweep increases by one degree between 0-180 degrees. Note that the following delay(15) indicates that the delay for each rotation of one degree is 15ms.
*It is important to set the delay reasonably to avoid rotating the servo too quickly, as this may cause the next sweeping action to start before reaching the target, resulting in confusion and preventing normal operation.
*The servo has its own safety mechanism, which includes limit settings, preventing sweeping actions beyond 180 degrees.
(4) Sensors
Sensors have many interesting applications; here we briefly introduce one.
—— Using a human infrared sensor (HC_SR051) to achieve a human-sensing light.
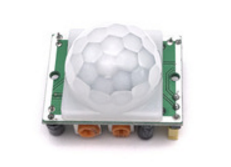
Figure 7 Human Infrared Sensor
*About the human infrared sensor: The two knobs on the front represent delay adjustment (clockwise rotation increases sensing delay, counterclockwise decreases) and distance adjustment (clockwise rotation increases sensing distance, counterclockwise decreases).
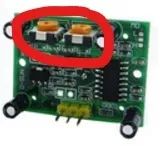
Figure 8 Adjustment Knob
*About connection issues
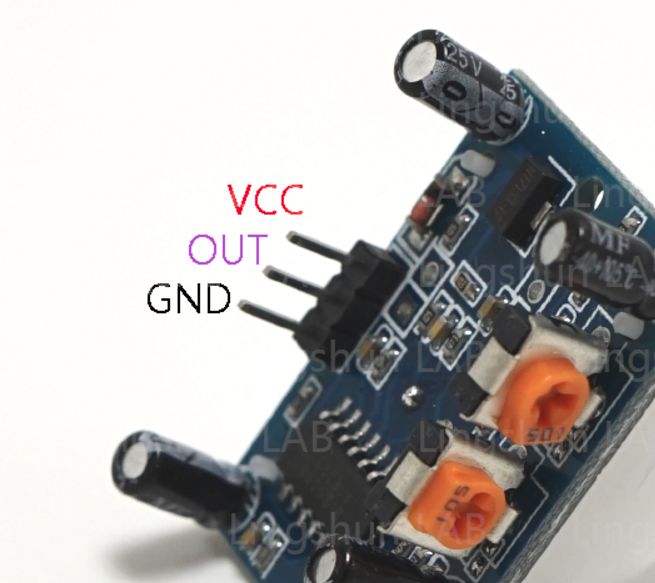
Figure 9 Interface Diagram
Code:
int PIR_sensor = A5;
int val = 0;
void setup()
{
pinMode(PIR_sensor, INPUT);
pinMode(LED_BUILTIN, OUTPUT);
Serial.begin(9600);
}
void loop()
{
val = analogRead(PIR_sensor);
Serial.println(val);
if (val > 150)/
{
digitalWrite(LED_BUILTIN, HIGH);
}
else
{
digitalWrite(LED_BUILTIN, LOW);
}
}
*The light used here is the LED on the Arduino board; if needed, you can use additional light bulbs and wires to control more lights with the breadboard.
*When someone passes in front of the sensor, the light will turn on, and when the person leaves, the light will turn off.
END
Contact Information:
Consultation and Cooperation: [email protected]
Recruitment: [email protected]
Address: South China University of Technology, Subtropical Architecture Science State Key Laboratory, Basement Level 1, Digital Construction Laboratory