 This article introduces testing methods for the CAN bus on Linux development boards, demonstrated using theHaptic Intelligence EVB3568 Harmony Development Board, which is equipped with the Rockchip RK3568, a quad-core A55 processor with a frequency of 2.0GHz and 1T computing power NPU; it supports OpenHarmony 5.0 as well as Linux and Android operating systems, with rich interfaces for faster development and evaluation!
 Method 1 – Testing CAN Node Connection on the Mainboard
1. Check if the mainboard has a CAN node
ifconfig -a 2. Connect the two CAN interfaces on the mainboard:Note that some mainboards may have CAN interfaces in their hardware specifications, but they might actually be repurposed for other default functions. Please refer to the corresponding hardware specification to locate the CAN interface. For example, on the Haptic Intelligence RK3568 development board EVB3568-V1, use J39.
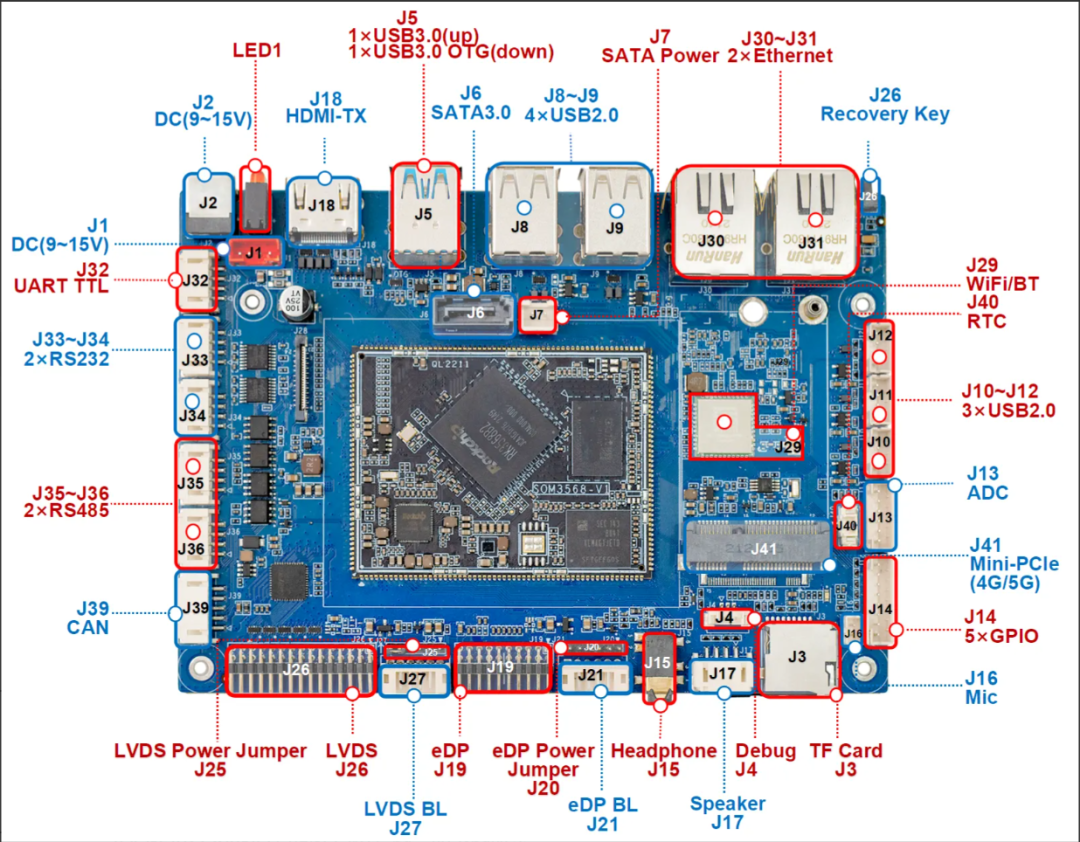 Connect the two sets of CAN signals here, H to H, L to L
 3. Configure the basic communication parameters, the commands are as follows:
ip link set can0 down  # First, bring can0 down
ip link set can0 type can bitrate 250000  # Set communication rate
ip -detail link show can0  # Check if the settings are effective
3: can0: <NOARP,ECHO> mtu 16 qdisc pfifo_fast state DOWN mode DEFAULT group default qlen 10    link/can  promiscuity 0 minmtu 0 maxmtu 0     can state STOPPED (berr-counter tx 0 rx 0) restart-ms 1      bitrate 250000 sample-point 0.868  # bitrate 250000 effective  tq 40 prop-seg 42 phase-seg1 43 phase-seg2 13 sjw 1  rockchip_canfd: tseg1 1..128 tseg2 1..128 sjw 1..128 brp 1..256 brp-inc 2  clock 148500000 numtxqueues 1 numrxqueues 1 gso_max_size 65536 gso_max_segs 65535
root@industio:~# ip link set can0 up  # Enable can0
# The settings for can1 are the same, just replace can0 with can1
4. Test verification, the commands are as follows:
cansend can0 123#DEADBEEF  # can0 sends
candump can1  # can1 receives
The results are as follows: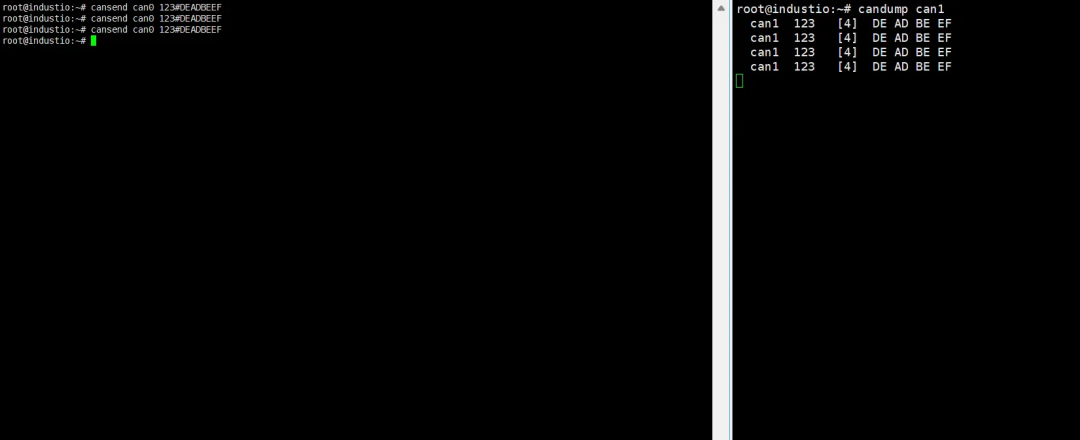
 Method 2 – Testing with USB to CAN Tool and CANTest Software.
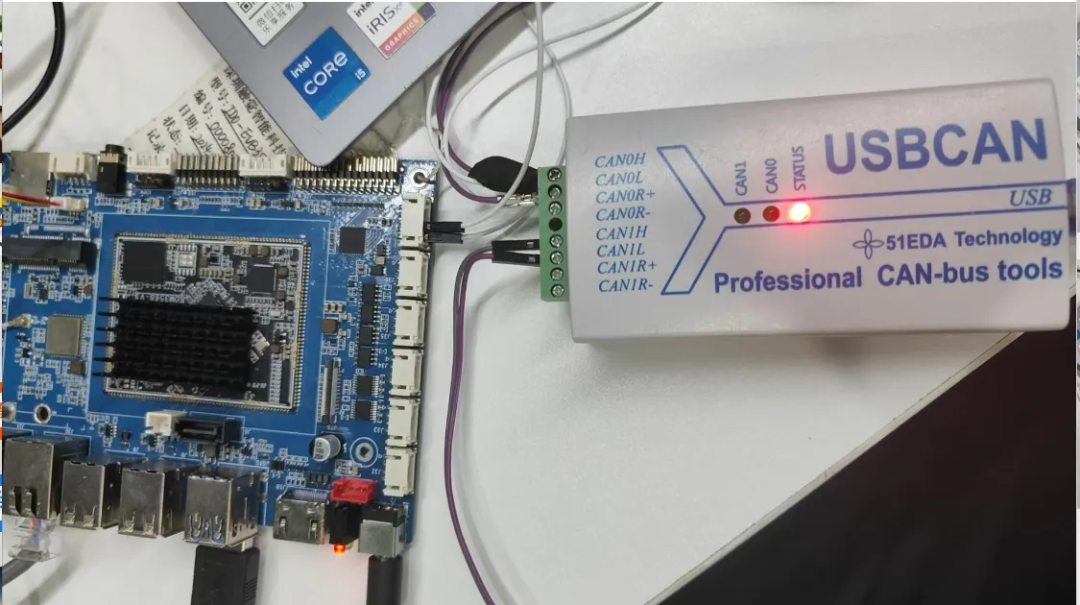
1. Connect the CAN0 interface of the capture tool to the CAN0 interface of the mainboard, H to H, L to L, and connect the other end to the USB port of the computer.
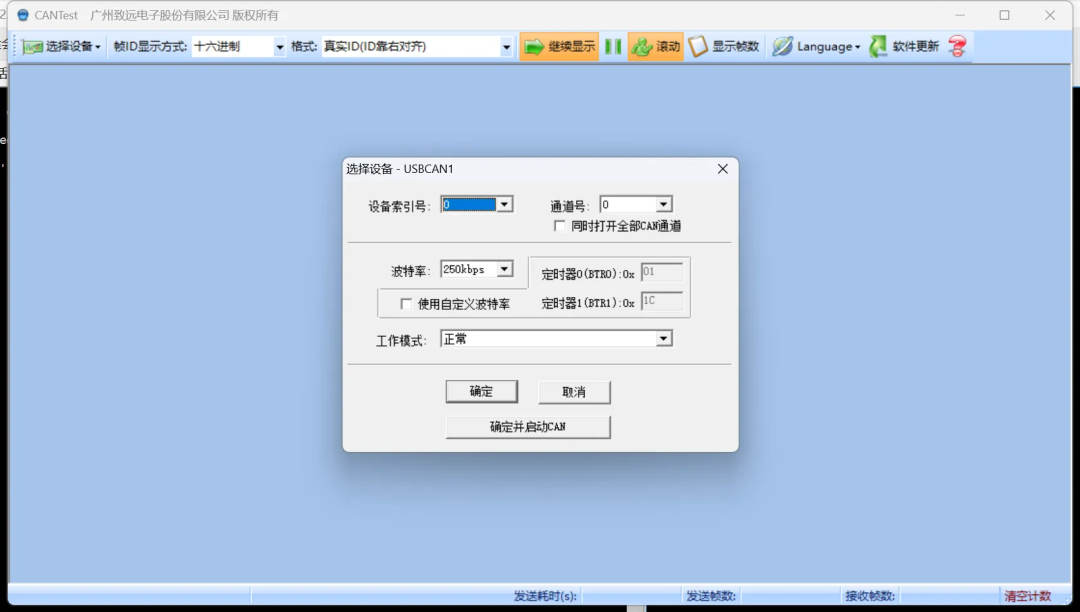
2. CANTest software parameter settings
Download the CANTest software, after installation, start the software, the interface is as follows. We close the pop-up interface and click on the device selection in the upper left corner.

Select USBCAN1 settings, set the corresponding baud rate, and keep other parameters as default.
Note: The parameter settings for the mainboard CAN interface should be configured according to the basic communication parameters set in Method 1, paragraph 3.
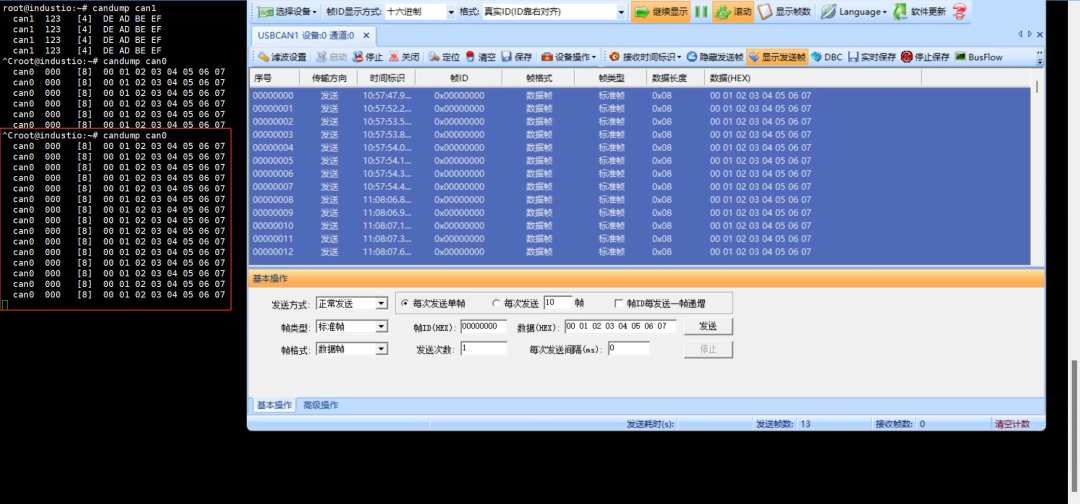
3. Test verification
Run candump can0 to enter receive mode for can0, and use the CANTest tool to send data for verification.
 Product Introduction
The Haptic Intelligence EVB3568 Harmony Development Board is a Harmony development board/industrial control mainboard based on RK3568, suitable for various smart display terminals, industrial automation terminals, and edge computing gateway products. Applications can cover edge computing, artificial intelligence, industrial HMI, industrial gateways, smart medical, self-service terminals, smart retail, energy and power industries, etc. It has the following advantages:
- Supports open-source Harmony OpenHarmony/Android/Linux multi-operating systems;
- Quad-core A55 processor, with a maximum frequency of 2.0GHz,Mali G52-2EE GPU supports 2D acceleration;
- 8M ISP performance, supports HDR;
- 1T computing power NPU, supports TensorFlow/Caffe/MXNet/PyTorch and other deep learning frameworks;
- Equipped with 2 x Gigabit Ethernet, 9 x USB expansion, industrial interconnect interfaces (2 CAN and 5 serial ports);
- Supports 4K video decoding and multi-screen display, supports HDMI/MIPI/eDP/LVDS video interfaces;
- Supports 5G/4G/WiFi Bluetooth wireless communication functions;
Taobao Purchase Link:https://item.taobao.com/item.htm?ft=t&id=658789039056END