Reminder: This article provides a detailed introduction to the structure of the Python environment, basic usage of Python virtual environments, and environment & dependency management in Python.
0. What is a Python Environment
A Python environment refers to a specific setup that contains a series of software tools and packages required to run Python code. This environment can include the Python interpreter, a set of installed packages, modules, and related configuration settings. The Python environment helps you manage dependencies, ensuring isolation between different projects and avoiding version conflicts.
Basically, Python environments can be divided into two types:
1. Global Environment:
The global environment refers to the Python environment installed on the operating system.
It is the default environment for all Python programs unless specifically instructed to use another environment.
Modifying the global environment will affect all projects on the system that use this Python interpreter.
2. Virtual Environment:
A virtual environment is an independent environment that can have its own Python interpreter and a set of packages.
It allows different projects to have different dependencies without interfering with each other.
Virtual environments are typically created using the venv module, which is part of the Python 3 standard library.
Virtual environments are located in the project folder, making them easy to manage and migrate.
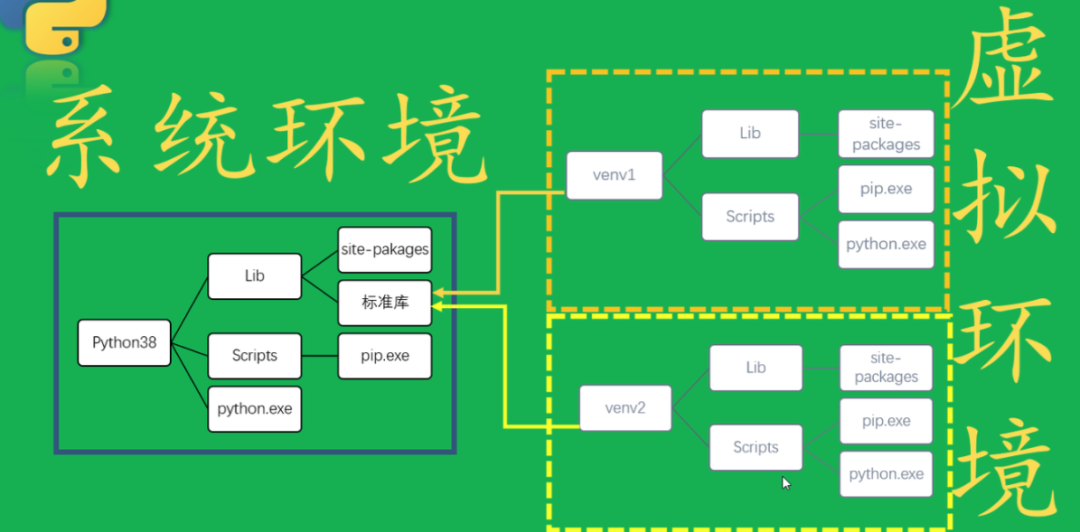
I. Structure of the Python Environment
The Python environment consists of several key components that collectively support the running and management of Python code. These components include:
1. Python Interpreter
The Python interpreter is the core component; it is a software package that can execute Python code. You can download it from the official Python website, and there are multiple versions available (for example, Python 2.x has stopped updating, while Python 3.x is currently mainstream).
2. Standard Library
The Python standard library provides a wide range of modules and functions that are built into the Python interpreter. The standard library covers many functionalities, from text processing to network communication.
3. Third-Party Libraries
In addition to the standard library, Python’s powerful capabilities are also attributed to the large number of third-party libraries provided by the community. These libraries can be installed via package management tools like pip and are used for various specific tasks and application development.
4. Package Manager
Python uses package managers to install, update, uninstall, and manage dependencies of third-party libraries. The most widely used package manager is pip, which is distributed with the Python standard library.
II. Python Virtual Environment
A Python virtual environment is an independent directory tree that contains a specific version of the Python interpreter and a set of additional packages. When you activate a virtual environment, your system path (PATH) is temporarily modified so that any calls to the Python interpreter or Python scripts will use the version in the virtual environment.
Why Use a Virtual Environment?
Dependency Management: Different projects may require different versions of libraries; virtual environments can prevent version conflicts.
Permission Issues: Installing libraries at the system level may require administrative privileges, while virtual environments can be installed at the user level.
Cleanliness and Organization: Virtual environments keep your global Python environment clean and easy to manage.
Environment Replication: Virtual environments can help you replicate and share environment configurations, facilitating collaboration and deployment.
How to Create and Use Python Virtual Environments?
Using venv (Recommended Method)
venv is the built-in tool for creating virtual environments in Python, requiring no additional installation.
1. Create a Virtual Environment:
python3 -m venv myenv# On Windows, the Python command is usually just python, not python3# So you need to use python -m venv myenvThis will create a virtual environment named myenv in the current directory.
2. Activate the Virtual Environment:
On Unix or Mac:
source myenv/bin/activateOn Windows:
myenv\Scripts\activate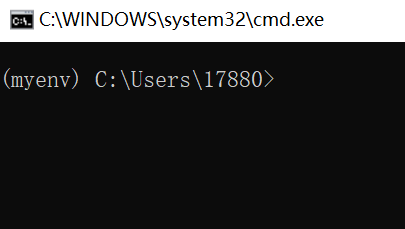
3. Install Packages:
Using pip to install packages in the activated virtual environment will only affect the current environment.
pip install requests4. Exit the Virtual Environment:
deactivateUsing virtualenv
virtualenv is a standalone third-party package that was used to create virtual environments in earlier versions of Python.
1. Install virtualenv:
pip install virtualenv2. Create a Virtual Environment:
virtualenv myenv3. Activate and Exit:
The steps to activate and exit are the same as with venv.
Using Pipenv
Pipenv automatically manages virtual environments and dependency files, combining package management with environment management.
1. Install Pipenv:
pip install pipenv2. Create and Activate the Virtual Environment:
pipenv shellThis will automatically create and activate the virtual environment.
3. Install Packages and Update Pipfile:
pipenv install requestsUsing Poetry
Poetry manages dependency management and package creation, using a pyproject.toml file to manage dependencies.
1. Install Poetry:
pip install poetry2. Initialize Project and Virtual Environment:
poetry initpoetry installDependency Management in Virtual Environments
What dependencies are included in a newly created Python environment?
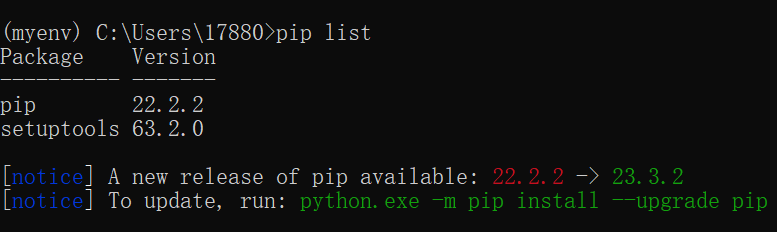
A newly created virtual environment is quite “clean” by default; it does not contain any externally installed third-party packages. It only includes modules from the Python standard library and a few necessary service modules (such as pip, setuptools, and wheel), which are the basic tools for installing and managing other packages.
The standard library is part of Python and provides many built-in modules and functions for performing common tasks such as system administration, mathematical operations, and file manipulation. The modules of the standard library are available in all Python environments without requiring additional installation.
pip is Python’s package installer, allowing you to install other Python packages from the Python Package Index (PyPI).
setuptools is an enhanced toolkit in the Python package development process that helps you build and distribute Python packages more easily, especially those that depend on other packages.
wheel is a Python distribution package format used with pip, designed for faster installation of Python packages, replacing the egg format.
When you create a new virtual environment, the standard library and these basic service modules will be installed in the virtual environment, but no other third-party libraries will be included. This approach allows you to start building your project from a clean slate, installing only the packages that your project actually needs, thus avoiding unnecessary dependencies and potential version conflicts.
To view the installed packages in the virtual environment, you can activate the virtual environment and use the command pip list or pip freeze. In a brand new virtual environment, this list is usually short and contains only the aforementioned packages.
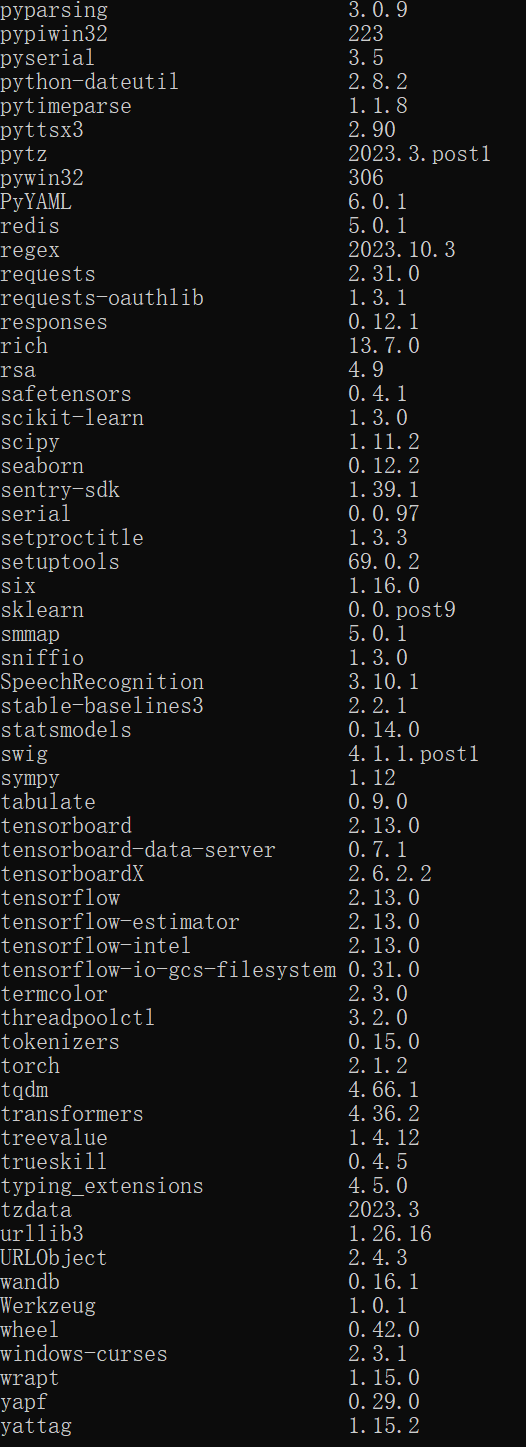
Here we compare the installed packages in the system environment and the newly created environment: (If you don’t want your environment to be as messy as mine, make good use of virtual environments.)
Pip Source for Virtual Environments
When a virtual environment is activated, pip will prioritize the configuration file within the virtual environment. You can create or modify this file to specify the pip source.
On Linux and macOS, the configuration file is usually located at $VIRTUAL_ENV/pip.conf.
On Windows, the configuration file is usually located at %VIRTUAL_ENV%\pip.ini.
By modifying the pip configuration file, you can change the pip source for the virtual environment.
Example
Below, we will demonstrate how to use a virtual environment and pip along with requirements.txt to manage dependencies in a Python project.
We will build a simple web application that uses the Flask framework and also requires the requests library to handle HTTP requests.
Step 1: Create a Virtual Environment
Create a virtual environment in the root directory of the project. Doing so ensures that the dependencies you install do not affect other Python projects on the system.
python -m venv venvThis will create a virtual environment named venv in the current directory. To activate this virtual environment, you need to run the following command:
On Unix or macOS:
source venv/bin/activateOn Windows:
venv\Scripts\activateStep 2: Install Dependencies
Now, install the required dependencies for the project.
pip install flask requestsThis will install the Flask and requests libraries, along with their dependencies.
Step 3: Generate requirements.txt
Next, you need to create a requirements.txt file that will contain the exact version numbers of all installed packages.
pip freeze > requirements.txtThis command will generate a new requirements.txt file containing all dependencies and their versions. Open this file, and you will see something like the following:
click==7.1.2Flask==1.1.2itsdangerous==1.1.0Jinja2==2.11.2MarkupSafe==1.1.1requests==2.24.0Werkzeug==1.0.1Step 4: Install Dependencies Using requirements.txt
Now, if you want to install these dependencies in another environment (perhaps on another machine or another developer’s computer), you just need to activate the virtual environment and run the following command:
pip install -r requirements.txtThis will install the exact same versions of dependencies in the new environment as in the original environment.
Of course, we can also create multiple dependency files:
If your application has development dependencies (like testing frameworks) and production dependencies, you can create two files: requirements.txt and requirements-dev.txt, to manage production and development dependencies separately.
III. Environment Containerization
Python Containerization: Simplifying Deployment and Scaling
Python is thriving in various fields, from web development to data science, from automation scripts to machine learning. However, as the complexity of Python applications increases, ensuring consistent operation across different environments becomes increasingly important. This is where containerization technology comes into play. In this blog post, we will explore how to use containerization to deploy Python applications, enhancing their portability and scalability.
Introduction to Containerization
Containerization is a lightweight, executable packaging technology that encapsulates an application along with all its dependencies, configurations, and runtime environments within a container. Compared to traditional virtual machines, containers run directly on the host operating system, reducing overhead.
Docker: The Synonym for Containerization
When we talk about containerization, the most famous tool is undoubtedly Docker. Docker leverages Linux container technologies such as Cgroups and Namespace to provide an isolated environment for running applications.
Why are Python Projects Suitable for Containerization?
Environment Consistency: Avoids the “it works on my machine” problem.
Dependency Isolation: Each container has its own environment, and dependencies between different containers do not conflict with each other.
Fast Deployment: Containers can start in seconds, making deployment quick and simple.
Easy to Scale and Manage: Containerized applications can be easily scaled horizontally to meet changing load demands.
Steps to Containerize Python Applications
Let’s illustrate how to containerize a Python web application with a simple example.
Step 1: Prepare the Python Application
Assuming you have a simple Flask application, the code is as follows:
# app.pyfrom flask import Flaskapp = Flask(__name__)@app.route('/')def hello_world(): return 'Hello, Docker!'if __name__ == '__main__': app.run(debug=True, host='0.0.0.0')Step 2: Write the Dockerfile
A Dockerfile is a text document containing all the commands used to build the image.
# Use the official Python runtime as a parent imageFROM python:3.8-slim# Set the working directory to /appWORKDIR /app# Copy the current directory contents into the container at /appCOPY . /app# Install any needed packages specified in requirements.txtRUN pip install --no-cache-dir -r requirements.txt# Make port 80 available to the world outside this containerEXPOSE 80# Define environment variableENV NAME World# Run app.py when the container launchesCMD ["python", "app.py"]This Dockerfile creates a Docker image for a simple Flask application.
Step 3: Build the Docker Image
In the root directory of the application containing the Dockerfile, run the following command to build the image:
docker build -t my-python-app .Step 4: Run the Container
Once the image is built, you can run a container:
docker run -p 4000:80 my-python-appThis command tells Docker to run the image and map port 4000 to port 80 of the container.