
Hello everyone, I am Edison.
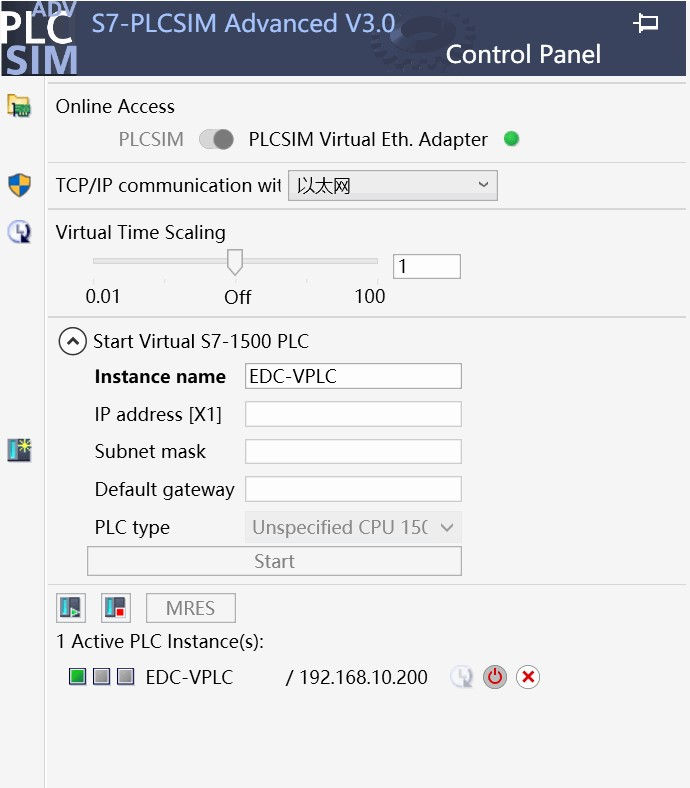
As a programmer in the field of industrial automation, it seems a bit unreasonable not to understand PLCs and HMIs. Here, I will use two short articles to quickly introduce you to the field of HMI development. In the future, I will consider publishing a series of articles to explore industrial control HMIs together.Previous article: Setting up a PLC Simulation EnvironmentLet’s review
Then, we created an automation project in TIA Portal and configured it with our virtual PLC. After compilation, the data fields in the data block we created obtained their offsets, as shown in the figure below. 0, 2, 4, 260 are the so-called offsets, which will be used later.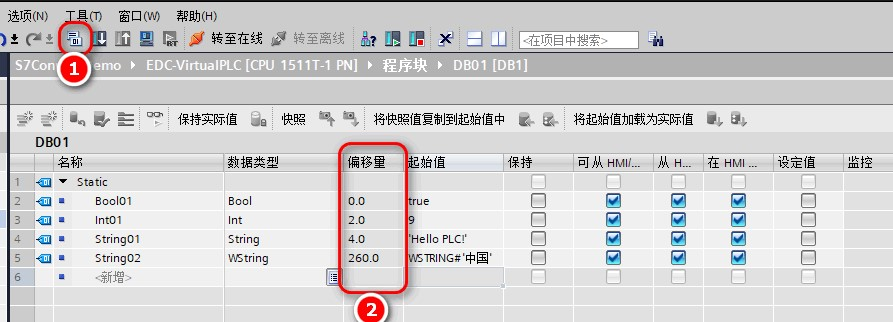
Creating a Windows Form Project
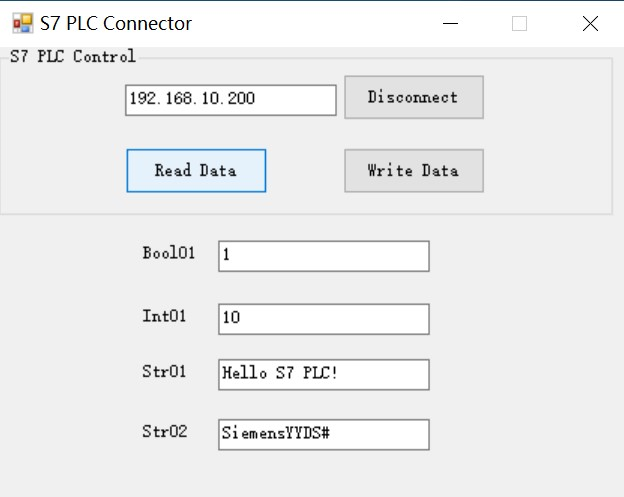
Here we will start by creating a Windows Form project in C#, and then use the S7NetPlus library to connect to the PLC and read and write data in the data block. This is a typical scenario for HMI data acquisition.We will create a Windows Form project targeting .NET Framework 4.8 and design a form application interface as shown in the figure below:
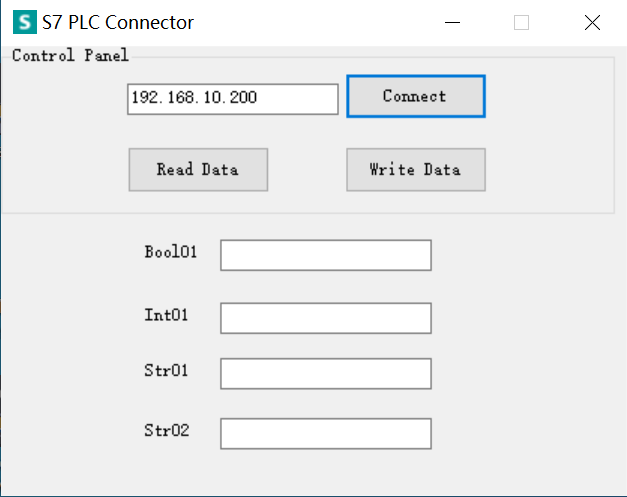
This form provides options to connect and disconnect from the PLC, as well as read and write data from the text boxes. Next, we will implement these functionalities.
Implementing PLC Connection and Disconnection
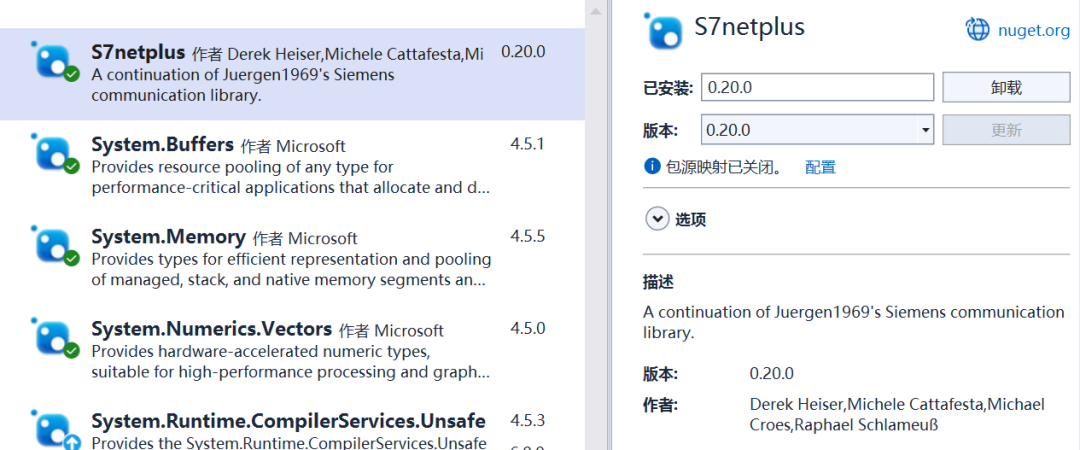
To implement the connection and operation of the S7 PLC, there are already many mature components available. Here, we will use the S7NetPlus component, which can be easily installed via NuGet.
Then, we will write the Click event for the Connect button as follows:
private static Plc s7Instance;
public MainForm(){  InitializeComponent();}
private void btnConnect_Click(object sender, System.EventArgs e){  if (btnConnect.Text == "Connect")  {    if (s7Instance == null)      s7Instance = new Plc(CpuType.S71500, txtPlcIPAddress.Text.Trim(), 0, 1);
    s7Instance.Open();    btnConnect.Text = "Disconnect";  }  else  {    s7Instance.Close();    btnConnect.Text = "Connect";    txtBool01.Clear();    txtInt01.Clear();    txtStr01.Clear();    txtStr02.Clear();  }}
Implementing Reading from PLC Data Blocks
private void btnReadData_Click(object sender, System.EventArgs e){  if (s7Instance == null || !s7Instance.IsConnected)  {    MessageBox.Show("Your PLC is not connected now!", "Error", MessageBoxButtons.OK);    return;  }
  // bool  var boolData = (bool)s7Instance.Read(DataType.DataBlock, 1, 0, VarType.Bit, 1);  txtBool01.Text = boolData ? "1" : "0";  // int  var intData = (short)s7Instance.Read(DataType.DataBlock, 1, 2, VarType.Int, 1);  txtInt01.Text = intData.ToString();  // string  var count = (byte)s7Instance.Read(DataType.DataBlock, 1, 4 + 1, VarType.Byte, 1); // +1 indicates reading the length of the offset  var str01Data = Encoding.Default.GetString(s7Instance.ReadBytes(DataType.DataBlock, 1, 4 + 2, count)); // +2 indicates reading the character length of the offset  txtStr01.Text = str01Data;  // wstring  var str02Data = (string)s7Instance.Read(DataType.DataBlock, 1, 260, VarType.S7WString, 254);  txtStr02.Text = str02Data;}
(1) For bool and int types, we can quickly read them directly using the Read method, but we need to provide the PLC with the correct read/write position and data type, especially ensuring that the offsets are correct.
The parameters of the Read method are the data block type, data block, offset, read type, and read length.
(2) For string and wstring types, it is a bit more complicated:For string,we need to first obtain the length of the string value.Then get the specific byte values.Convert to UTF-8 format ASCII code,as shown in the code.
+1 indicates obtaining the length
+2 indicates obtaining the characters that skip the offset length
var count = (byte)s7Instance.Read(DataType.DataBlock, 1, 4 + 1, VarType.Byte, 1); // +1 indicates reading the length of the offset
var str01Data = Encoding.Default.GetString(s7Instance.ReadBytes(DataType.DataBlock, 1, 4 + 2, count)); // +2 indicates reading the characters that skip the offset
Note: The string type can only store ASCII codes, so please note that it cannot store Chinese characters!
For wstring, it is slightly simpler,but it is important to note that the obtained characters must be 254 because symbols occupy 4 bytes.
Implementing Writing to PLC Data Blocks
Writing is as easy as reading, using the Write method, but for string and wstring, it is still a bit complicated. Here, I have encapsulated a static class S7DataWriter that provides two methods to obtain the bytes to be written, as it cannot directly accept string types from C# programs.
public static class S7DataWriter{  /// <summary>  /// Get Siemens PLC string array -- String type  /// </summary>  public static byte[] GetPlcStringByteArray(string str)  {    byte[] value = Encoding.Default.GetBytes(str);    byte[] head = new byte[2];    head[0] = Convert.ToByte(254);    head[1] = Convert.ToByte(str.Length);    value = head.Concat(value).ToArray();    return value;  }
  /// <summary>  /// Get Siemens PLC string array -- WString type  /// </summary>  public static byte[] GetPlcWStringByteArray(string str)  {    byte[] value = Encoding.BigEndianUnicode.GetBytes(str);    byte[] head = BitConverter.GetBytes((short)508);    byte[] length = BitConverter.GetBytes((short)str.Length);    Array.Reverse(head);    Array.Reverse(length);    head = head.Concat(length).ToArray();    value = head.Concat(value).ToArray();    return value;  }}
Then, we can write the Click event for the Write Data button:
private void btnWriteData_Click(object sender, System.EventArgs e){  if (s7Instance == null || !s7Instance.IsConnected)  {    MessageBox.Show("Your PLC is not connected now!", "Error", MessageBoxButtons.OK);    return;  }
  // bool  var boolValue = txtBool01.Text.Trim() == "1" ? true : false;  s7Instance.Write(DataType.DataBlock, 1, 0, boolValue);  // int  var intValue = Convert.ToInt16(txtInt01.Text);  s7Instance.Write(DataType.DataBlock, 1, 2, intValue);  // string  s7Instance.Write(DataType.DataBlock, 1, 4, S7DataWriter.GetPlcStringByteArray(txtStr01.Text.Trim()));  // wstring  s7Instance.Write(DataType.DataBlock, 1, 260, S7DataWriter.GetPlcWStringByteArray(txtStr02.Text.Trim()));  MessageBox.Show("Write data successfully!", "Info", MessageBoxButtons.OK);}
Demonstration of Effects
Writing is as easy as reading, using the Write method, but for string and wstring, it is still a bit complicated. Here, I have encapsulated a static class S7DataWriter that provides two methods to obtain the bytes to be written, as it cannot directly accept string types from C# programs.(1) Reading data
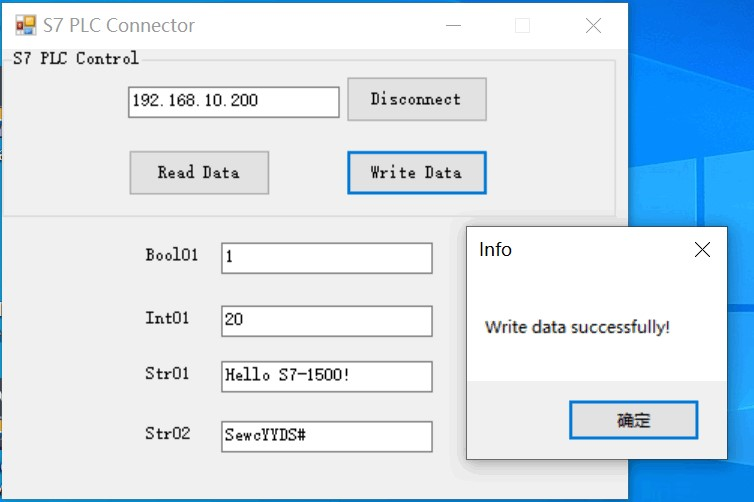
(2) Writing data
Conclusion
This article developed a simple Windows Form application using C# to achieve connection, data reading, and writing for the S7 PLC. Although it is just a simple demo, it illustrates the basic idea of HMI, which is data acquisition and monitoring of PLCs. Of course, there are other protocols besides S7 to achieve this purpose, such as ModBus, OPC UA, etc. We will leave those for future topics. If you are interested, please stay tuned!
Source Code
GitHub:https://github.com/Coder-EdisonZhou/PLC-Connectors
 Year-end summary:Edison’s 2023 Year-end SummaryDigital Transformation: My Experience in Digital Transformation in Traditional EnterprisesC# Problem Solving: Directory of C# Algorithm Problems Series.NET Interview:.NET Development Interview Knowledge System.NET Conference: 2020 China .NET Developer Conference PDF Materials