Source:https://blog.csdn.net/zh8706/article/details/97370491
This article organizes some basic skills for beginners in embedded development, based on past engineering experience, suitable for those who have not previously engaged in embedded development.
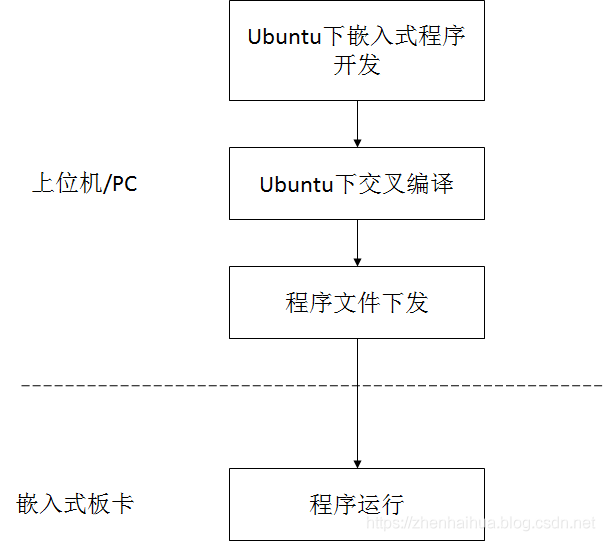
The embedded development process generally follows these steps: first, install an Ubuntu virtual machine on a Windows PC to set up the embedded development environment and cross-compilation environment. After development is complete, compile to obtain a bin file, and then transfer the bin file to the embedded board via serial port or network on Windows, where the program runs on the embedded board.
1. RS232 Serial Port Connection Diagram
The serial port, often referred to as the COM interface, has a slower transmission speed and is suitable for long-distance transmission. It is used here for data communication between the host and the embedded board, typically for command issuing. According to protocol standards, it is divided into RS-232-C, RS-422, RS485, etc. Among these, RS-232 is the most commonly used serial port, known as the standard serial port.
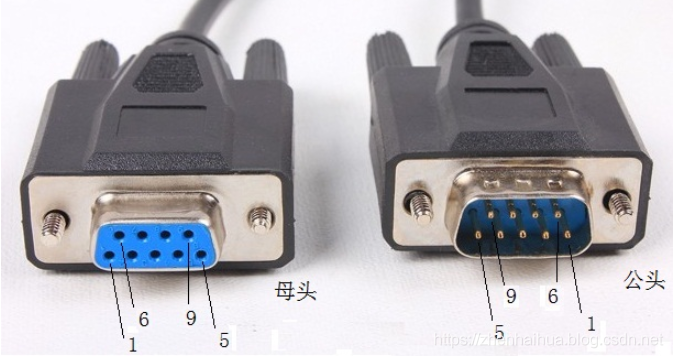
Below is the wiring diagram for RS-232. The RS232 serial port has a 9-pin interface, divided into male and female connectors, with the serial port on the PC generally being male, as shown in the figure below.
The functions of each pin are as follows:
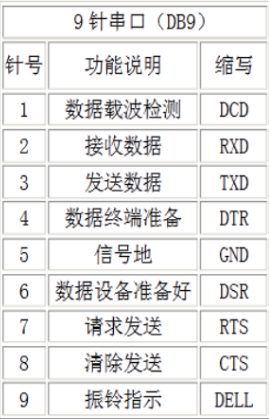
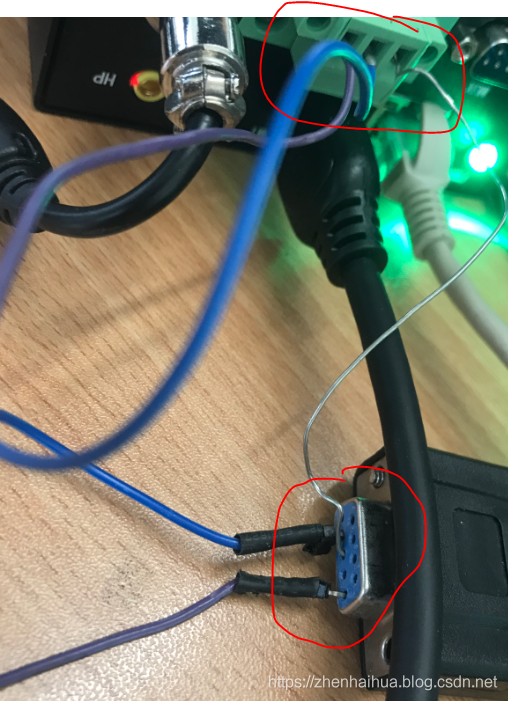
The simplest serial interface requires the signal lines 「2 Data Transmit (TxD)」, 「3 Data Receive (RxD) and 5 Signal Ground (GnD)」. Connecting these three lines is sufficient to establish communication between the host PC and the embedded board, as shown in the figure below:
2. Serial Communication Tools between Host PC and Embedded Board
Generally, the SecureCRT tool is used for communication between the host PC and the board.
(1) Serial Connection
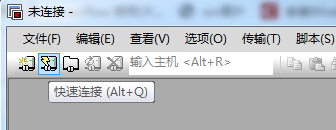
Open Quick Connect:
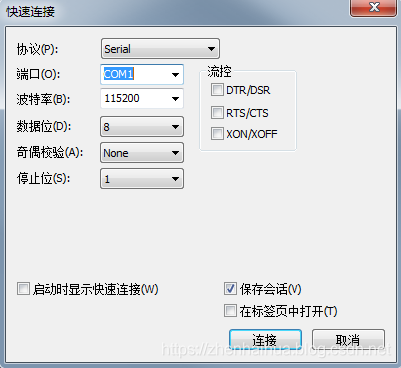
Select the Serial protocol, and set the port and baud rate according to the actual situation:
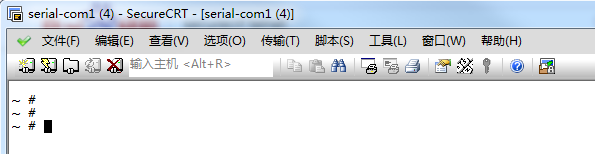
Click Connect, a new window will pop up. Press the Enter key, and if the following interface appears, it indicates that the host PC and the board are successfully connected.
(2) Using Telnet Connection
Telnet connection uses the network (i.e., network cable) to achieve communication between the PC and the board, without needing a serial port.
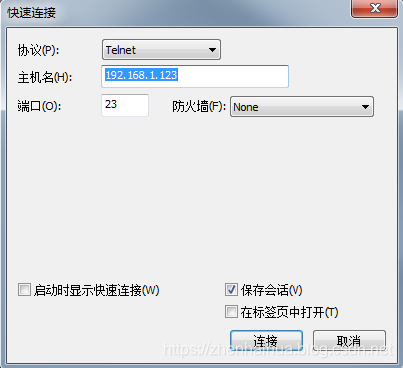
In Telnet, create a new connection, select the Telnet protocol, 「the hostname is the IP of the board.」
Click Connect, a new window will pop up, enter the username and password:

3. File Transfer between Host PC and Embedded Board
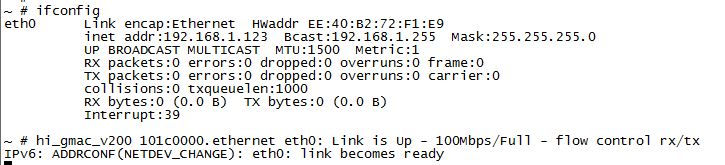
In SecureCRT, use the command ifconfig to check the IP address of the board:
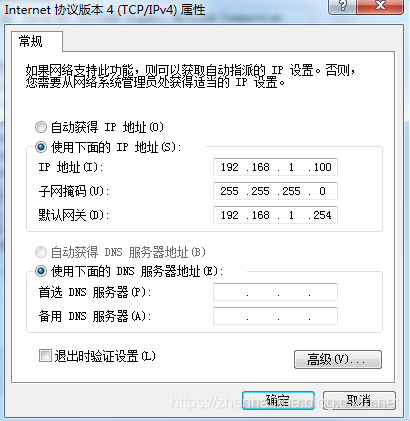
Directly connect the host PC and the embedded board with a network cable, and change the local connection IP address of the PC to be in the same subnet as the embedded board, for example:
Open the tftpd32 tool on the host PC, and select the IP in the same subnet as the embedded board in the Server interface, as shown below:
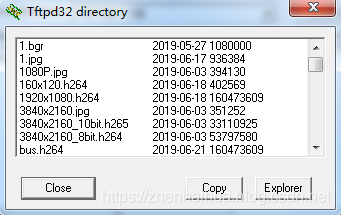
Note that the PC acts as the TFTP protocol server, while the board acts as the client.
To download a file from the host PC to the board, enter the following command in SecureCRT:
tftp -g -r 1080P.jpg 192.168.1.100
Here, -g indicates downloading a file from the PC to the board, -r indicates the remote server (i.e., the PC) file, and 1080P.jpg is the file to be transferred, with the following IP address being the IP address of the PC, for example:

After entering the above command, the board will receive the file in the current directory. If you need to receive the file in a specific directory, you must switch to that directory before entering the command.
To transfer a file from the board to the host PC, enter the following command in SecureCRT:
tftp -p -l 10801P.jpg 192.168.1.100
Here, -p means push, and -l indicates the local (board) file.
4. Common Linux Commands
- Return to the root directory: cd /
- Unzip files: tar -xvf data.tar
- Delete files: rm -f 1.txt
- Change directory read/write permissions: sudo chmod 777 /usr/share/themes
Note: Here, 777 means every user can read and write, and the path is specified afterwards. - Rename: mv aaa.h264 bbb.h264
Note: This renames aaa.h264 to bbb.h264. - View IP address: ifconfig
- View file attributes: stat sample_nnie_main
- View current path: pwd
- Create a folder: mkdir
- Change IP address: ifconfig eth0 192.168.6.111 (will be lost after reboot)
5. Converting MP4, AVI, etc. to *.h264 Format
In embedded systems, programs often cannot directly decode video files in formats like mp4 or avi, and they need to be converted to raw stream .h264 format. The method is as follows:
Download the ffmpeg tool on the PC, switch to the directory of ffmpeg.exe, and open the command line window with cmd:
Convert .mp4 to .h264:
ffmpeg -i 1920x1080.mp4 -codec copy -bsf: h264_mp4toannexb -f h264 1920x1080.h264
Convert .avi to .h264:
ffmpeg -i 160x120.avi -vcodec h264 -s 160*120 -an -f m4v test.h264
Convert .mov to .h264:
ffmpeg -i test.mov -vbsf h264_mp4toannexb -vcodec copy -an 2.h264
This will generate the required format file in the ffmpeg directory.
Friendly Reminder
Due to recent changes in the WeChat public account push rules, if you want to see our articles regularly, you can click “Like” or “View” at the bottom of the page after each reading, so that the articles pushed each time will appear in your subscription list promptly.
Disclaimer:This article is sourced from the internet, freely conveying knowledge, and the copyright belongs to the original author. If there are any copyright issues, please contact me for deletion.
Reply with1024 in the public account chat interface to obtain embedded resources; reply with m to view the article summary.