Introduction
Hello, I am Lao Wu.
Recently, I am writing a PDF: “100 Small Open Source Software Suitable for Embedded Beginners”.
If you also want to participate, you can add me on WeChat (id: es-hacker).
Today, I will introduce the open-source software c-periphery.
https://github.com/vsergeev/c-periphery
It is a hardware peripheral access library written in C.
We can use it to read and write Serial, SPI, I2C, etc., making it very suitable for use in embedded products.
Based on its excellent code framework, we can continuously expand more functional modules, ultimately forming a Linux hardware abstraction layer suitable for our products.
Source Files:
$ tree .
├── src
│   ├── gpio.c
│   ├── gpio.h
│   ├── i2c.c
│   ├── i2c.h
│   ├── led.c
│   ├── led.h
│   ├── mmio.c
│   ├── mmio.h
│   ├── pwm.c
│   ├── pwm.h
│   ├── serial.c
│   ├── serial.h
│   ├── spi.c
│   ├── spi.h
│   ├── version.c
│   └── version.h
About 4500 lines of code, with each hardware module’s code being relatively independent, making it easy to get started.
What can you gain? 1. Lower the threshold for hardware programming;
2. Understand how the Linux application layer accesses GPIO / I2C / SPI / PWM and other hardware;
3. Learn how to encapsulate hardware peripherals and provide a good API;
4. Understand how to package code into libraries;
5. Learn how to write unit tests for the code;
c-periphery demonstrates how to perform hardware programming on the Linux platform, with interfaces that are both rich and practical.
Additionally, it ultimately outputs a static library libperiphery.a, and unit test code has been written for each hardware module function, ensuring code quality.
Usage of c-periphery
Simple Example
We will take the most common serial read and write as an example:
int main(void)
{
    serial_t *serial;
    uint8_t s[] = "Hello World!";
    uint8_t buf[128];
    int ret;

    serial = serial_new();

    /* Open /dev/ttyUSB0 with baudrate 115200, and defaults of 8N1, no flow control */
    if (serial_open(serial, "/dev/ttyUSB0", 115200) < 0) {
        fprintf(stderr, "serial_open(): %s\n", serial_errmsg(serial));
        exit(1);
    }

    /* Write to the serial port */
    if (serial_write(serial, s, sizeof(s)) < 0) {
        fprintf(stderr, "serial_write(): %s\n", serial_errmsg(serial));
        exit(1);
    }

    /* Read up to buf size or 2000ms timeout */
    if ((ret = serial_read(serial, buf, sizeof(buf), 2000)) < 0) {
        fprintf(stderr, "serial_read(): %s\n", serial_errmsg(serial));
        exit(1);
    }
    printf("read %d bytes: _%s_\n", ret, buf);
    serial_close(serial);
    serial_free(serial);

    return 0;
}
serial_t is an abstraction for the serial device;
serial_new() is used to create a serial device, which only allocates data, and after use, it should be released with serial_free().
serial_open() is used to initialize the serial port, setting the device node, baud rate, etc.; correspondingly, serial_close() can be used to close the serial port.
serial_write() is used to send data to the serial port, mimicking the system call write().
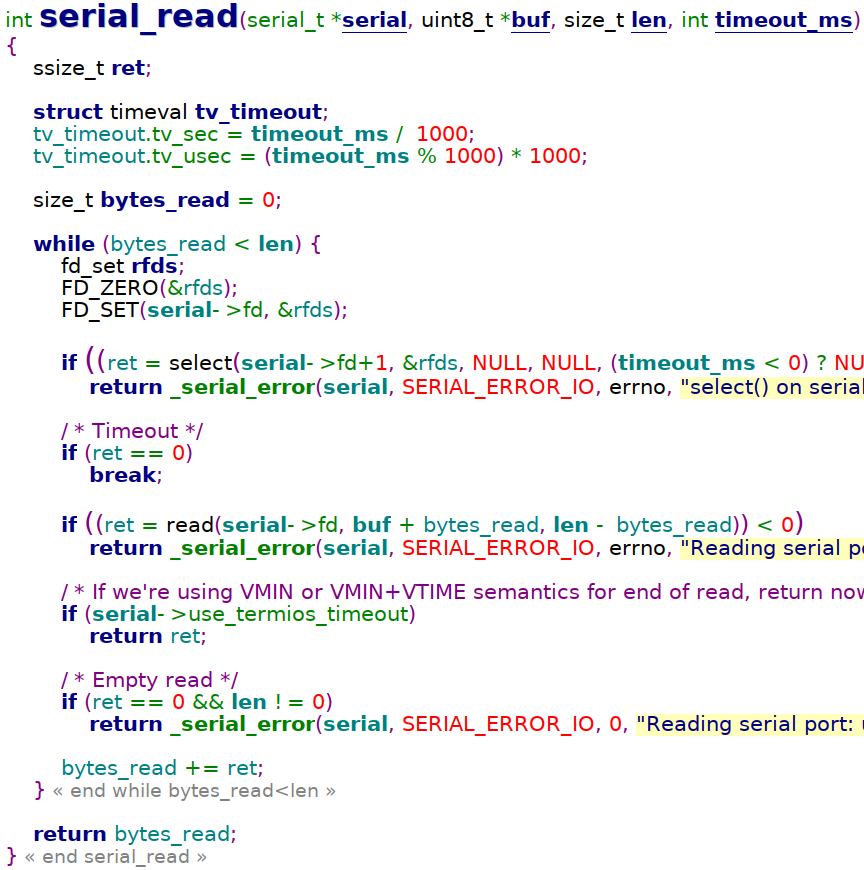
serial_read() is used to read data from the serial port, with an additional timeout_ms parameter compared to the system call read(), which avoids the program blocking indefinitely.
This is the simplest serial example based on c-periphery. Even embedded beginners can easily read and write serial ports using these interfaces.
Additionally, only the most commonly used APIs are utilized here. For the serial module, c-periphery has many practical APIs:
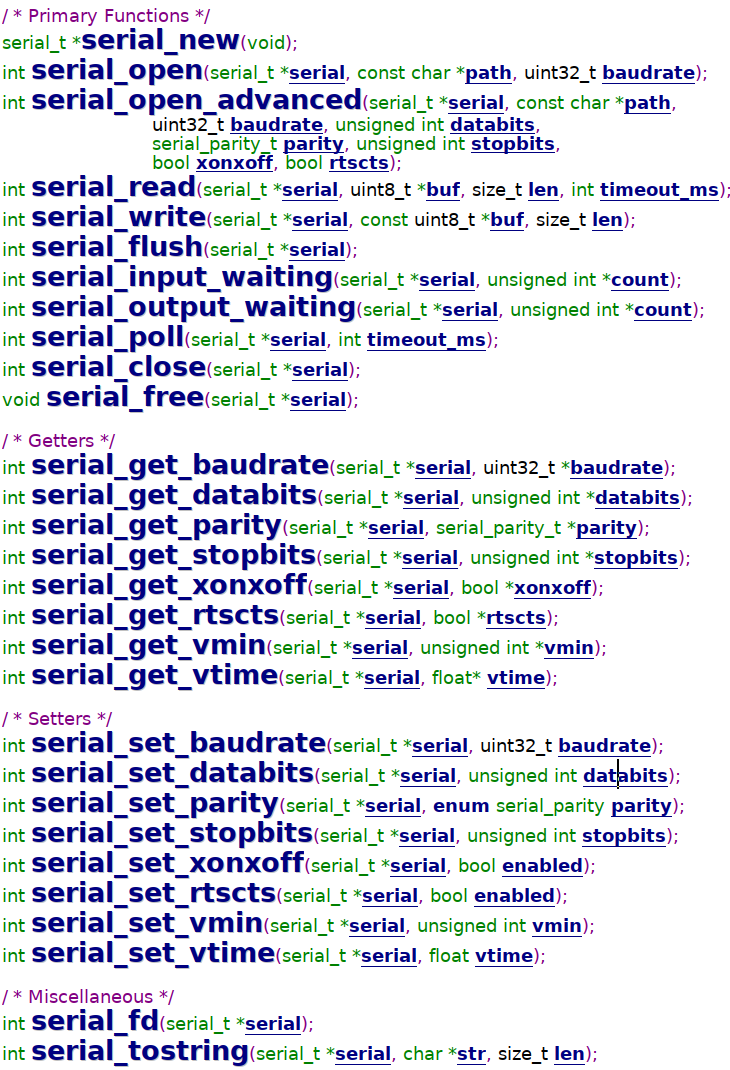
Several interesting APIs:
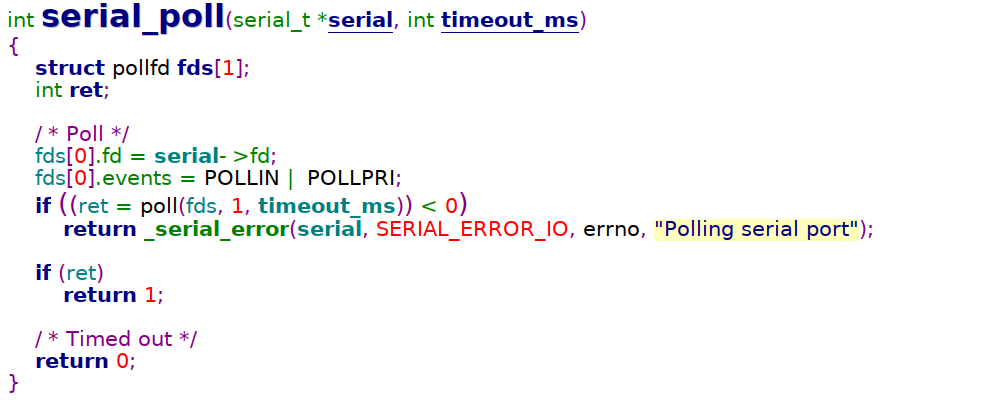
serial_poll() is similar to select(), used to monitor whether there is data on the serial port, avoiding dead waiting;
serial_get/set_xxx() is used to read and write serial port attributes;
serial_fd() is used to obtain the file descriptor, which means that all Linux application programming mechanisms can be used. For example, we can pass this fd to libev, enabling event-driven programming.
Implementation of c-periphery
Key Data
In c-periphery, the method of encapsulating each hardware module is similar, using a structure to store all relevant information about the module. See the following examples.
Serial:

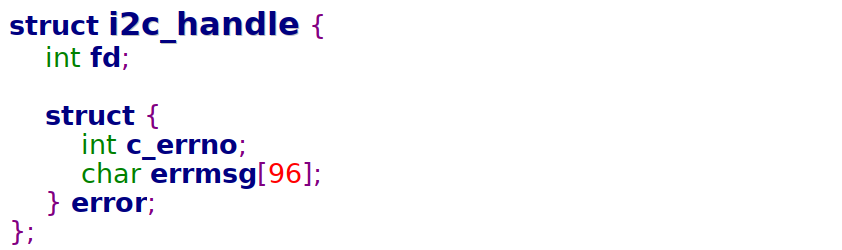
I2C:
GPIO:
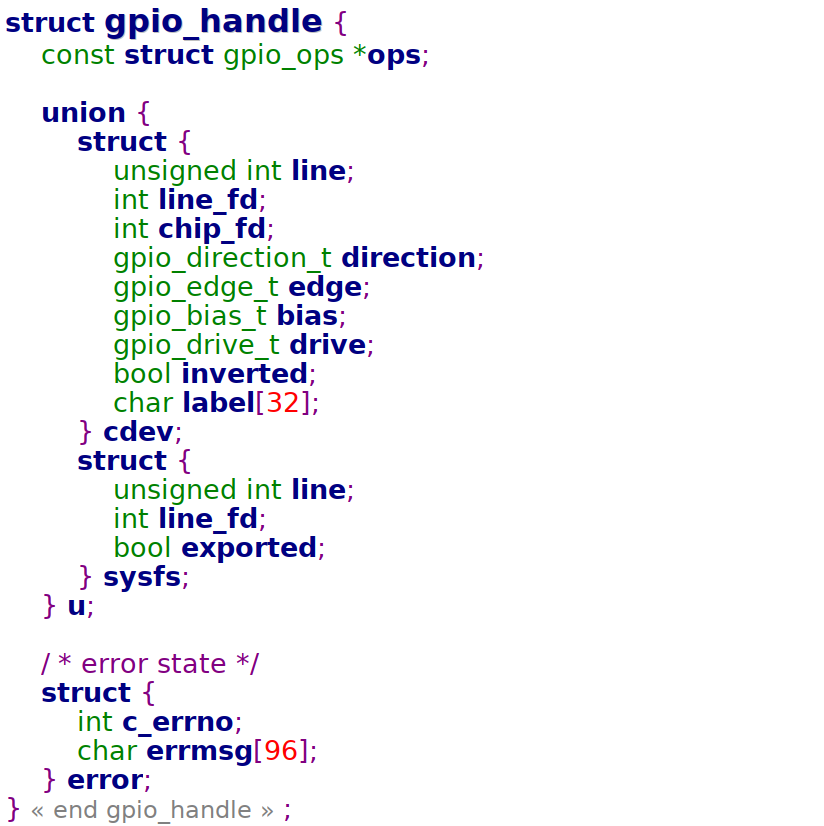
Most of their member variables include file descriptor fd, error status errno / error string, and some hardware module-specific member variables.
Ultimately, the library caller will only see data types like serial_t, i2c_t, gpio_t, and does not need to care about internal details during use.
When we want to add our own hardware module later, we can follow the example and define the xxx_t structure for that hardware, then gradually expand new functional modules for c-periphery.
Implementation of Several Key APIs
Taking Serial as an example, let’s look at the implementation of its core APIs.
Allocation and Release:
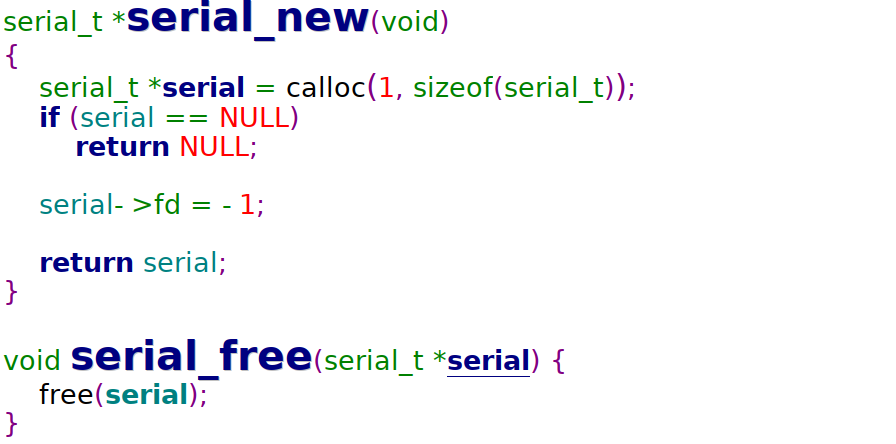
This is about allocating and releasing memory for serial_t.
Writing data serial_write() calls write(), while reading data serial_read() uses select() to implement the timeout function:
serial_poll() uses poll() to complete IO monitoring.
The implementation of other hardware modules is similar.
At this point, the core implementation code of c-periphery has been broken down.
Adding New Hardware Modules to c-periphery To put learning into practice, we will add a Backlight function according to the c-periphery framework.
The control method for Backlight can refer to this article: A Command-Line Tool for Controlling Backlight.
First, define backlight_t:

Then implement the following APIs:
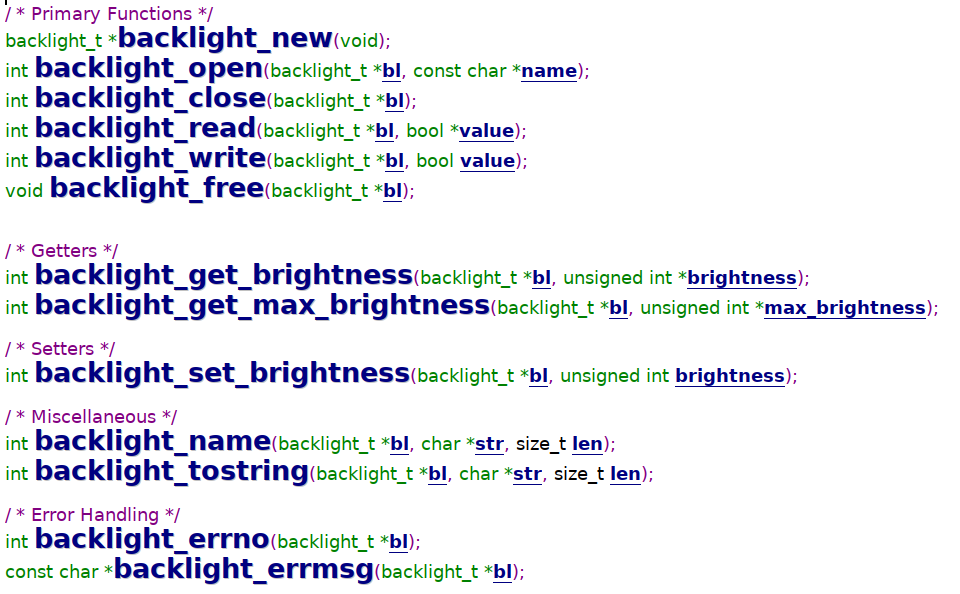
The specific implementation code for the APIs will not be displayed here, as controlling the backlight is simply reading and writing files in /sys/class/backlight/, which is not difficult.
Conclusion
c-periphery is a hardware access library written in C, supporting Serial, I2C, SPI, MMIO, PWM, GPIO, and other hardware. With about 4500 lines of code, each hardware module’s code is relatively independent, making it easy to get started, and it is very useful for use on embedded Linux platforms.
Additionally, we can continuously expand the functional modules we need based on its excellent code framework, ultimately forming a dedicated Linux hardware abstraction layer for our products, making it an absolute tool for embedded development.
—— The End ——Recommended Reading:Collection | All ArticlesThank you for reading, feel free to share!