Hello everyone, I am Xiao D. Previously, I shared a tutorial on Lora refining. Later, I realized I didn’t explain how to use Lora, so I will briefly explain it here. The main focus of this article is to share how to use Lora in Comfy UI.
Lora Refining Technique – Bonus Freshly Made Sketch Lora
In the Autumn Leaf launcher, there is model management. Select Lora, open the folder, and simply copy the downloaded or self-made Lora into it. Then we open the web UI.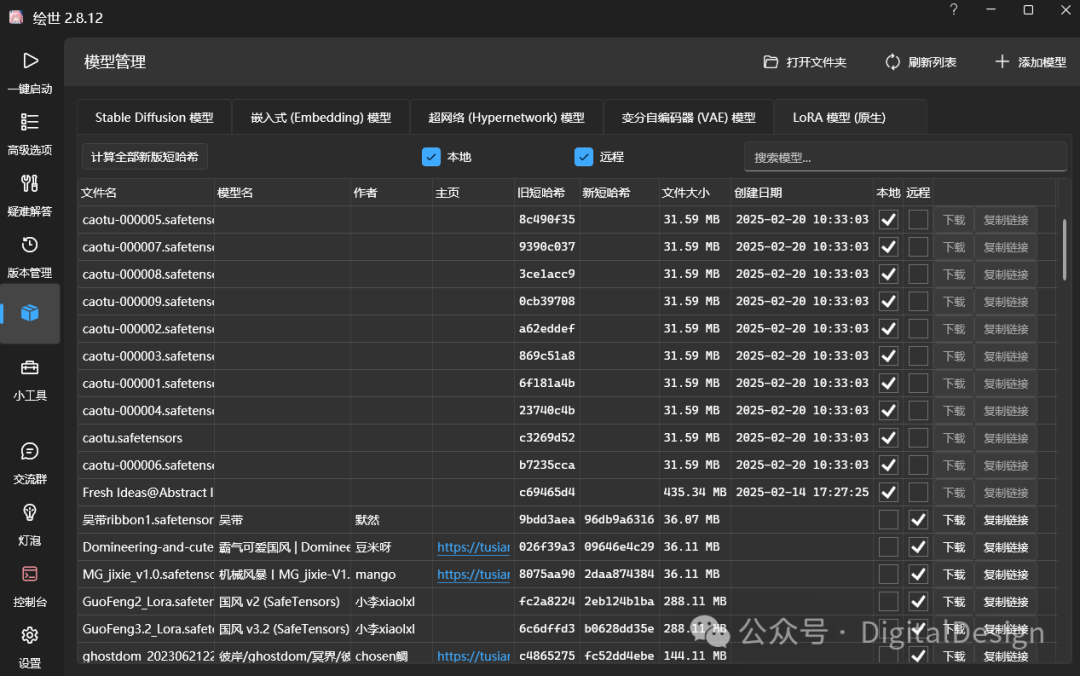 Below the prompt words, there are options for generation where you can select Lora. The sampling method I used here is Euler a.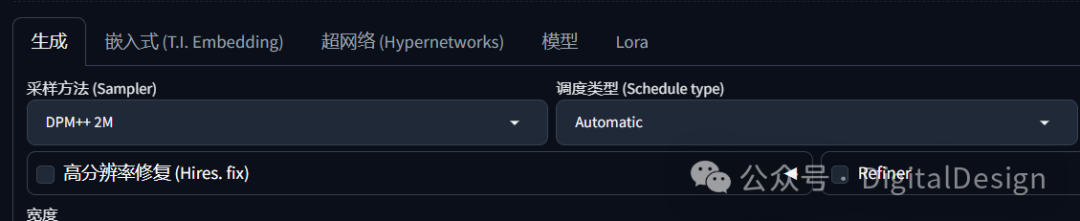
 During the refining process, a model will be exported after each round. Everyone can see which effect is good, and that will be the final version. Just click on it. You need to add a trigger word in front, I used the pinyin ‘caotu’, which differentiates it from English to avoid other ambiguities.
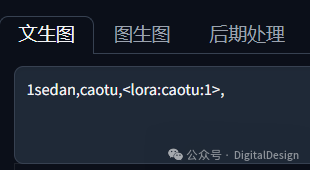 The number 1 at the back can be reduced a bit. This controls the intensity of using Lora. I used 1 here because I want a sketch.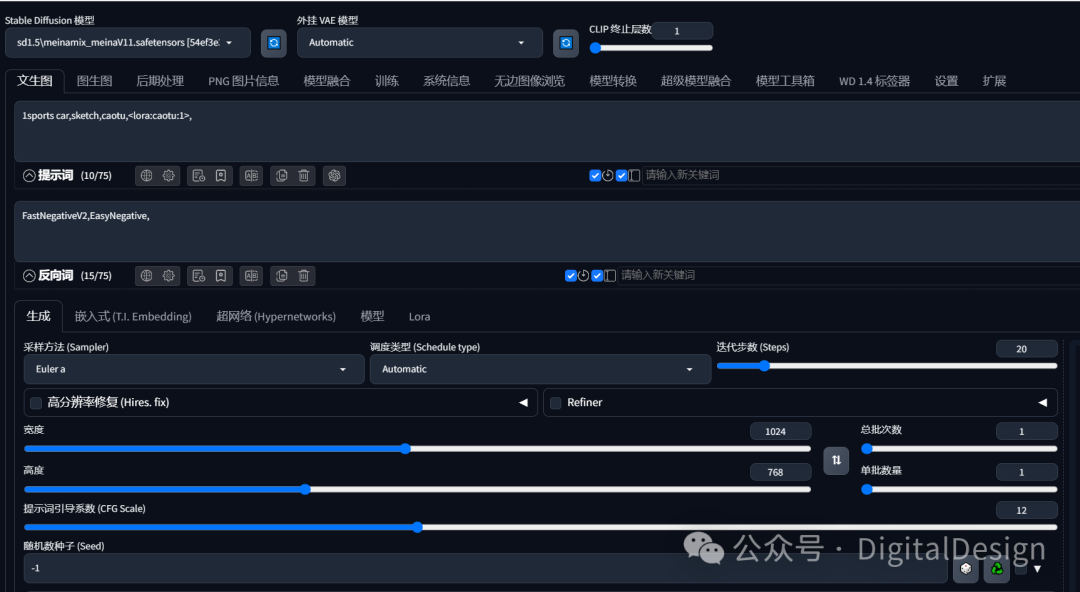
 Now let’s take a look at Comfy UI. First, open a workflow for text-to-image generation. Adjust the prompt words and dimensions. Choose the model. Naturally, the Lora model is added on this basis.
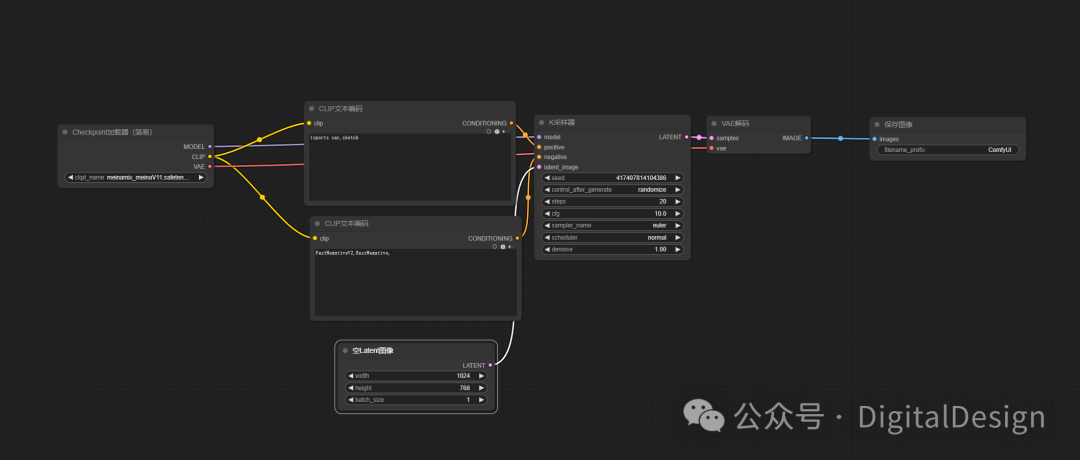 We double-click in the blank area, enter Lora, and select Load Lora. We can see the node composition before and after it, so we connect it to the corresponding model and clip nodes.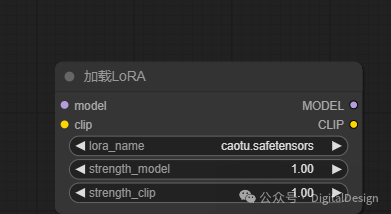
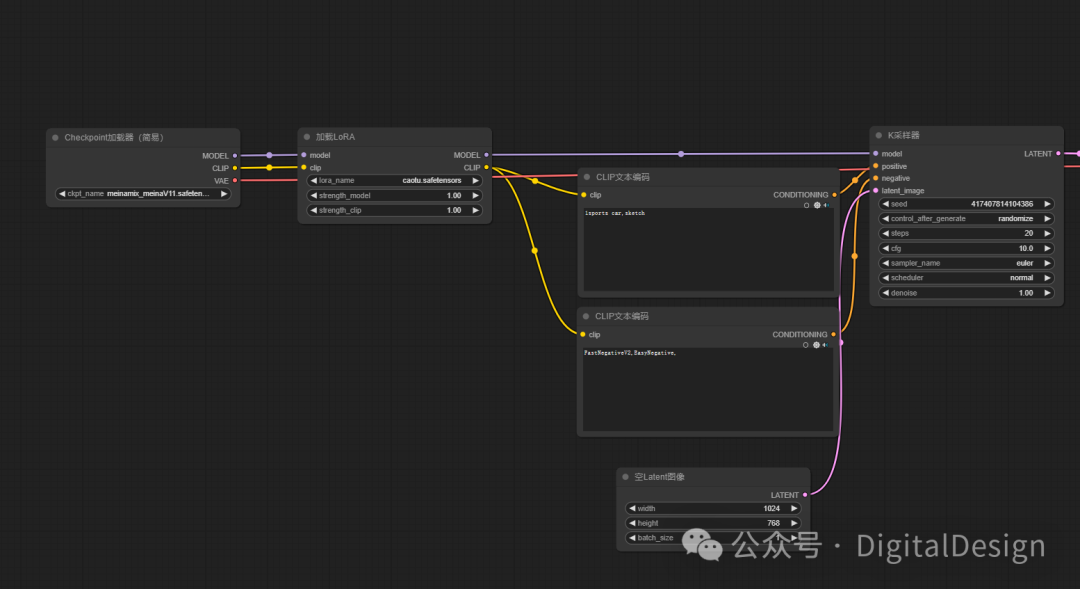 Isn’t it easy? It’s that simple. Then let’s try generating something. I changed the height to 512, and the effect is also good.
 That’s all for this sharing. If you are interested, you can give it a try. Although Xiao D shared about cars, if you want to create characters, the principles are the same. You can draw inferences from one instance to another. I look forward to you all gaining something.

Share

Collect

Like

View
Previous Recommendations:
Comfy UI Basic Introduction – Easily Build Text-to-Image and Image-to-Image Workflows

ComfyUI New Skill Unlock – ControlNet for Image Control