Recently, I have been researching how to connect various sensors to the Raspberry Pi. I have initially completed the detection functions for temperature, humidity, air pressure, and PM2.5/PM10. I thought that writing down some configurations might be quite complex, but after seeing the popularity of several original articles by the user casatift, I decided to share my experience.
First of all, I should mention that the Arduino-based solution is relatively more expensive compared to Raspberry Pi in terms of cost-performance ratio. After all, a Raspberry Pi costs around 200 yuan, while an Arduino board only costs about 10 to 20 yuan. If you just want to monitor the temperature, humidity, and air quality in the city, the Arduino board is actually more cost-effective. If you want to save money and effort, there are many merchants on Taobao selling PM2.5 detection products made with the Panteng G5+ microcontroller for around 100 to 200 yuan. This article I wrote is more suitable for those who already have or are going to buy a Raspberry Pi.
The advantage of Raspberry Pi is that it is convenient for writing code for small electronic DIY projects. You can use C, Python, or any other language, as long as there are relevant packages available on Linux. You can use whatever you know how to use. Moreover, it can also play videos on the TV and perform simple NAS or HTTP server functions. The peripherals are also basically compatible with PCs. If you get tired of it one day, you can do something else with it.
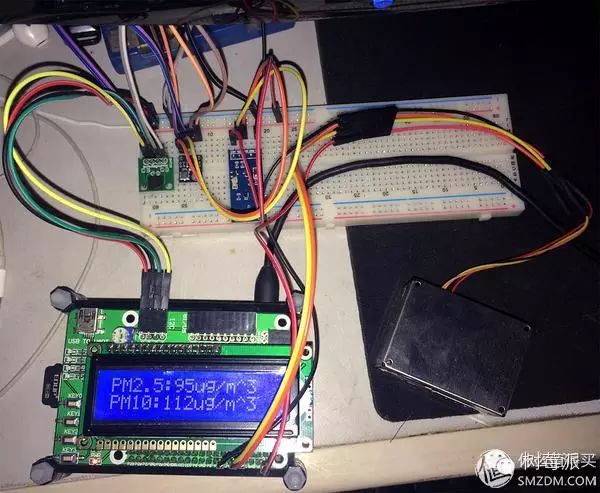
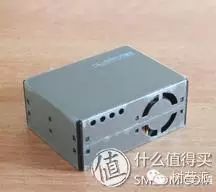
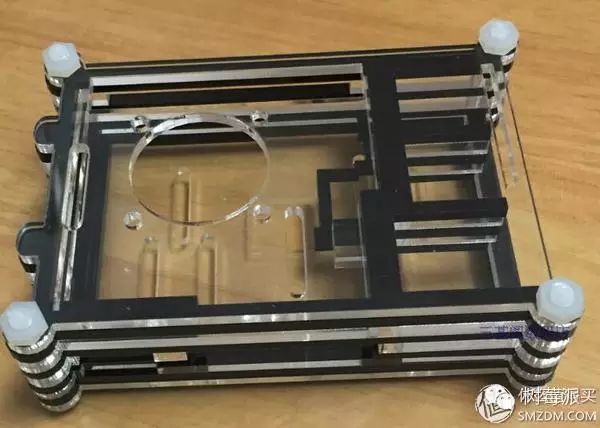
First, here is a photo of the completed project:
Purchase List
Raspberry Pi 2:
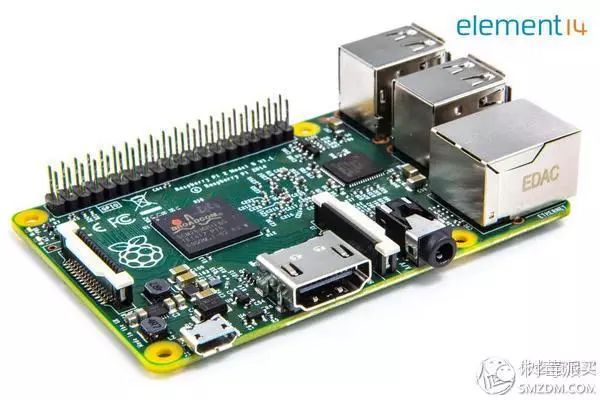
It costs around 200 yuan. If you want to save money, you can buy a second-hand Raspberry Pi 1 for a little over 100 yuan. Other products like Orange Pi also have GPIO ports and claim to be compatible with Raspberry Pi, but I don’t know how true that is, and they cost over 90 yuan.
GY-68 Module:
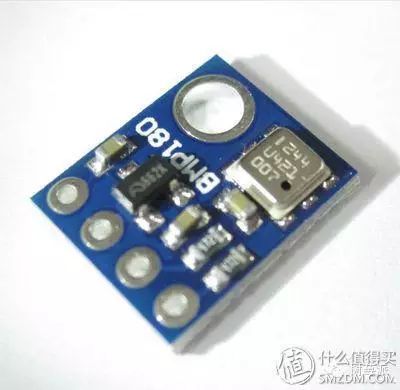
The chip is BMP180, which monitors temperature and air pressure. It costs about 7 to 13 yuan on Taobao.
SHT20:
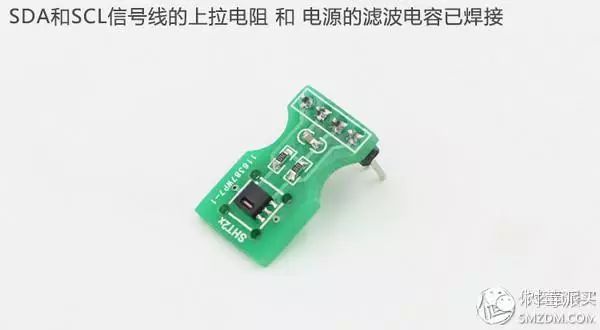
It monitors temperature and humidity and costs around 25 yuan. Remember to buy the module; SHT20 is just the name of the chip on it.
Panteng G5:
It detects PM2.5/PM10 using laser scattering, which is relatively accurate, costing around 110 to 130 yuan.
LCD1602 Module:
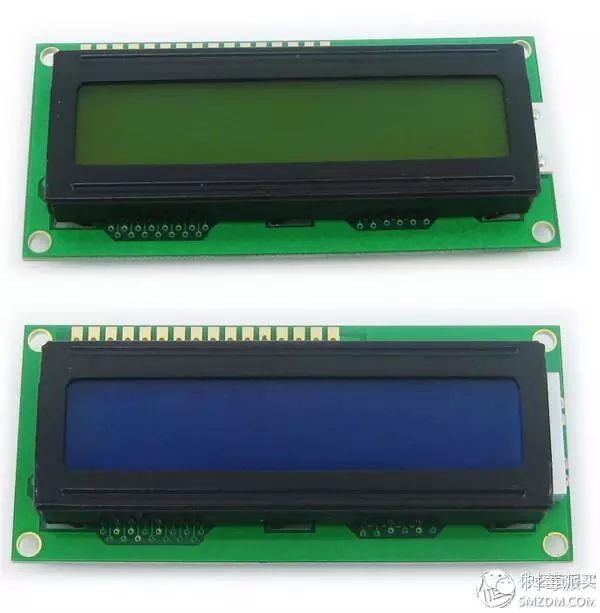
I bought it at Zhongguancun’s Zhongfa Market. It has a blue and white screen (the one below, blue background with white characters, the one above is green background with black characters) with backlight and costs 18 yuan. Later, I found it cheaper on Taobao. When buying, pay attention to whether it is 5V or 3.3V. I had to buy it because my expansion board only supports 3.3V.
Miscellaneous:
Breadboard, male-to-female, male-to-male DuPont wires, add about 10 yuan. Taobao sells kits. If you want to install the LCD1602 without an expansion board, remember to buy a 10K potentiometer.

===========================================================
The above are the essential items, and below are the optional items:
GY-30:
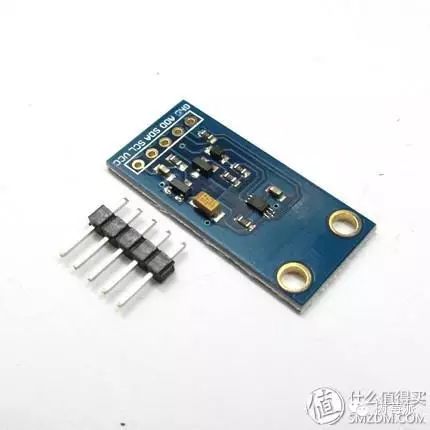
It measures light intensity. To be honest, it’s not very useful, just for fun, costing about 8 to 9 yuan.
DVK512 Expansion Board:
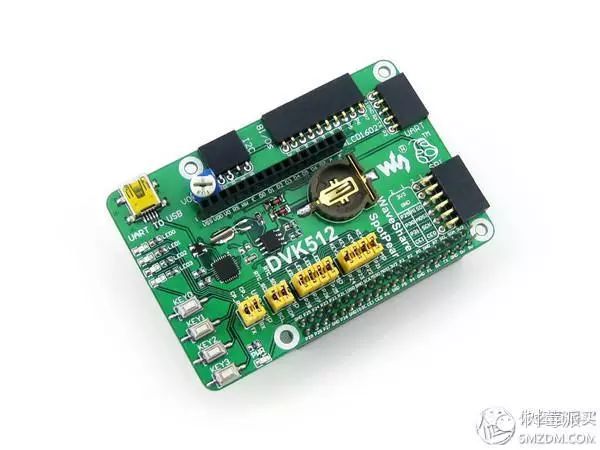
This is bought for easier wiring (especially for the LCD1602, the 3.3V LCD1602 can be plugged in directly). The I2C bus interface and UART interface are also separately led out, making wiring easier. Additionally, it integrates a clock circuit, a small diode light, and USB-to-serial functions.
Its cost-performance ratio is average at around 80 yuan. At the time, I bought it impulsively; it’s also possible to use a breadboard. Buying this just makes the final appearance a bit better. Also, Raspberry Pi 1 is not recommended because the 2 has 40 pins for GPIO, while the 1 only has 26 pins, making it impossible to plug directly without using DuPont wires.
Driver-free WiFi Adapter:
Generally, stores selling Raspberry Pi have these. After plugging it in and configuring the system, it can be used for 20+ yuan.
Raspberry Pi 2 Case:
It costs around 15 to 16 yuan, and you can add it when buying the Raspberry Pi.
===============
Wiring:
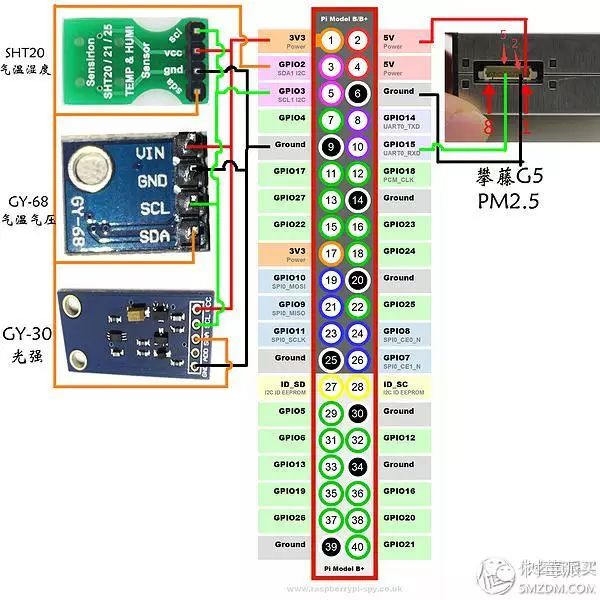
First, for the sensor part, since the sensors I chose only have two types of interfaces, I2C and serial, the wiring is relatively simple, as shown in the picture:
Then for the LCD1602, there are two situations: if you bought the expansion board, just plug it into the corresponding slot. If you didn’t buy it, refer to this (note that this is a 5V diagram; do not connect the 3.3V LCD1602 as it is):

(From CSDN link)
System:
I am using Raspbian. I won’t go into how to flash the system and configure the network; you can refer to this tutorial: link
Here are a few things to note:
1. Enable the I2C interface
After logging in, run raspi-config
Advanced Options->I2C->YES
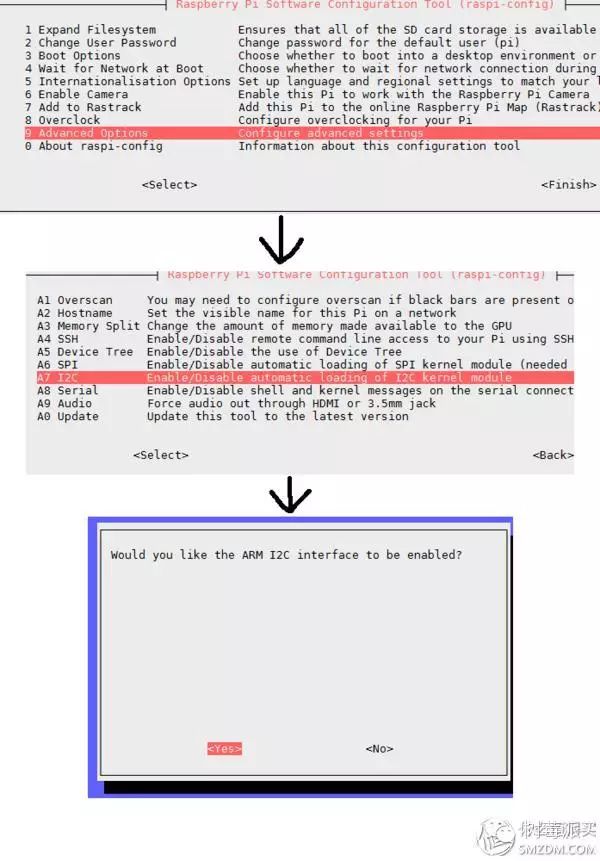
Then restart
2. Install i2c-tools
apt-get install i2c-tools
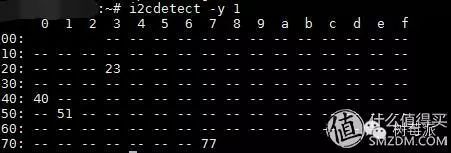
After installation, run i2cdetect -y 1 (for Raspberry Pi 1, it should be changed to 0)
There should be something similar to the content below, where 23, 40, and 77 are supposed to appear. If not, it means the wiring diagram on the left is not correctly connected. Among them, 23 is GY-30, 40 is SHT20, and 77 is GY-68:
3. Configure the serial port to facilitate reading data from the Panteng G5
Since Raspberry Pi has only one serial port, it seems that the kernel serial output is enabled by default, making it impossible to read data from the Panteng G5. Therefore, it needs to be disabled.
Modify the contents of /boot/cmdline.txt to:
dwc_otg.lpm_enable=0 rpitestmode=1 console=tty1 root=/dev/mmcblk0p2 rootfstype=ext4 elevator=deadline fsck.repair=yes rootwait
Save and restart.
After completion, enter the command cat /dev/ttyAMA0 -b -v
You should see several lines of garbled text appear:
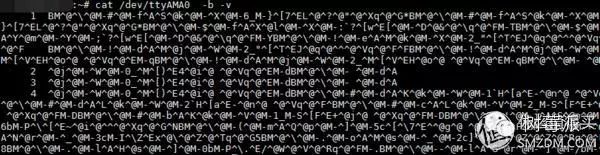
This indicates that the PM2.5 sensor is also connected properly. Now we can start coding. I will open-source the Python script I wrote for everyone’s convenience (it contains some configuration instructions for the program, which can be referenced).
Since it needs to run for a long time, you need to install a supervisor to achieve the function of automatically starting the script and keeping it running:
apt-get install supervisor
Then create a new configuration file in /etc/supervisor/conf.d/ with the following content:
[program:yeelink_poster.py]
command=python /path/to/your/script/yeelink_poster.py
autorstart=true
directory=/path/to/your/script/
autorestart=true
startsecs=10
startretries=36
redirect_stderr=true
stdout_logfile=/path/to/your/script/log.txt
stderr_logfile=/path/to/your/script/err.txt
Then register an account on this page, add the device sensor, and fill in the device ID, sensor ID, and API key into the Python code.
Thus, the work is complete.
Actually, before doing this, I was not very familiar with these things, but I found that as long as the wires are connected properly, there are plenty of open-source codes online to refer to. Most of the codes for reading sensor data in my code are modified from others’ open-source codes. Now that the internet is developed, it’s much easier to DIY things.
If conditions permit, later on, using a WiFi socket or relay module for DIY can allow you to control your humidifier and some low-end purifiers (such as FFU) relatively intelligently.