1. Accessory Information
1. USB connection cable — connects the main board and the touch screen PCBA board
2. Touch screen PCBA board — the data processing center for the touch screen
3. Touch screen data connection cable — connects the front touch screen (glass) to the PCBA board
4. Ground wire — grounds the outer frame to the touch PCBA board, preventing electric leakage
2. Required Tools and Accessories
1. Touch screen PCBA board *1
2. Phillips screwdriver *1
3. Flat head Phillips screw M3*6*1 piece
3. Precautions
1. Must wear an anti-static wrist strap while operating, and ensure the power is off before installation.
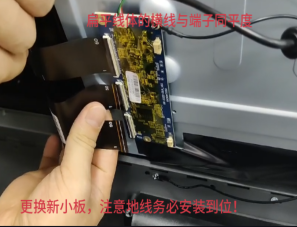
2. When assembling the wiring, be careful not to use excessive force, which may bend the data cable.
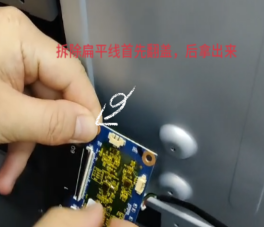
3. When inserting the data cable, ensure that the connector and port are aligned, and the horizontal line marked on the data cable should not be misaligned.
4. When assembling the terminal socket, pay attention to the direction and force.
4. Operating Steps
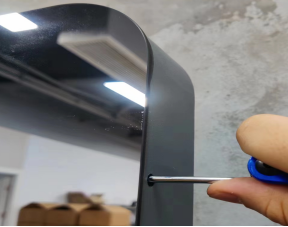
1. After powering off the machine, use a T20 star screwdriver and a 3# imperial hex wrench to open the cover.
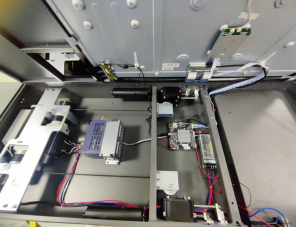
2. Locate the repair area and use the Phillips screwdriver to remove the screws.
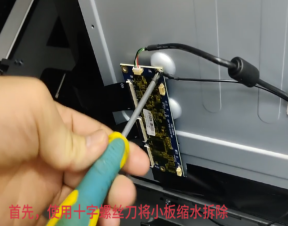
3. Remove the terminal and data cable; the data cable needs to be flipped to install and remove.
4. Replace with the new board, securing it with screws along with the ground wire.
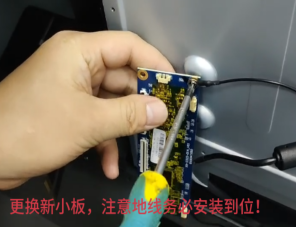
5. Ensure the horizontal line marked on the data cable is parallel to the port; do not misalign it to avoid poor contact, and be mindful of the force applied.
5. After confirming there are no issues during FQC, secure the cover.
5. Operation Video