【Click the above「Blue Text」 to follow DF Maker Community and become a tech enthusiast together】

Overall Evaluation Conclusion
The Raspberry Pi 500 is an excellent upgrade to the Raspberry Pi 400, featuring outstanding cooling performance and the ability to easily overclock it to 3 GHz.
Advantages
-
Outstanding cooling performance -
Convenient form factor -
Fast speed, and can be even faster (overclocked)!
Disadvantages
-
Inconvenient GPIO access -
Lacks NVMe storage -
No camera or touchscreen display interface
Raspberry Pi 500 vs Raspberry Pi 400
| Parameter | Raspberry Pi 500 | Raspberry Pi 400 |
|---|---|---|
| SoC | BCM2712 SoC Arm Cortex-A76 64-bit CPU, running at 2.4 GHz | BCM2711 SoC Quad-core Cortex-A72 64-bit CPU, running at 1.8 GHz |
| GPU | 800 MHz VideoCore VII GPU, supports OpenGL ES 3.1, Vulkan 1.2 | 500 MHz VideoCore VI GPU |
| Display | 2 x 4Kp60 HDMI display output, supports HDR | 2 x 4Kp60 HDMI display output |
| RAM | 8GB LPDDR4X SDRAM | 4GB LPDDR4 |
| Storage | Micro SD (SDR104 compatible) | Micro SD |
| GPIO | Compatible with 40-pin Raspberry Pi HAT via expansion board | Compatible with 40-pin Raspberry Pi HAT via expansion board |
| USB | 1 x USB 2, 2 x USB 3 | 1 x USB 2, 2 x USB 3 |
| Network | Gigabit Ethernet | Gigabit Ethernet |
| Wi-Fi / Bluetooth | Dual-band 802.11ac, Bluetooth 5 / BLE | Dual-band 802.11ac, Bluetooth 5 / BLE |
| Power Button | Soft power button on keyboard | None |
| Power | Powered via USB C, 5V 4A | Powered via USB C, 5V 3A |
| Dimensions | 286 × 122 × 23 mm | 286 × 122 × 23 mm |
Design of Raspberry Pi 500
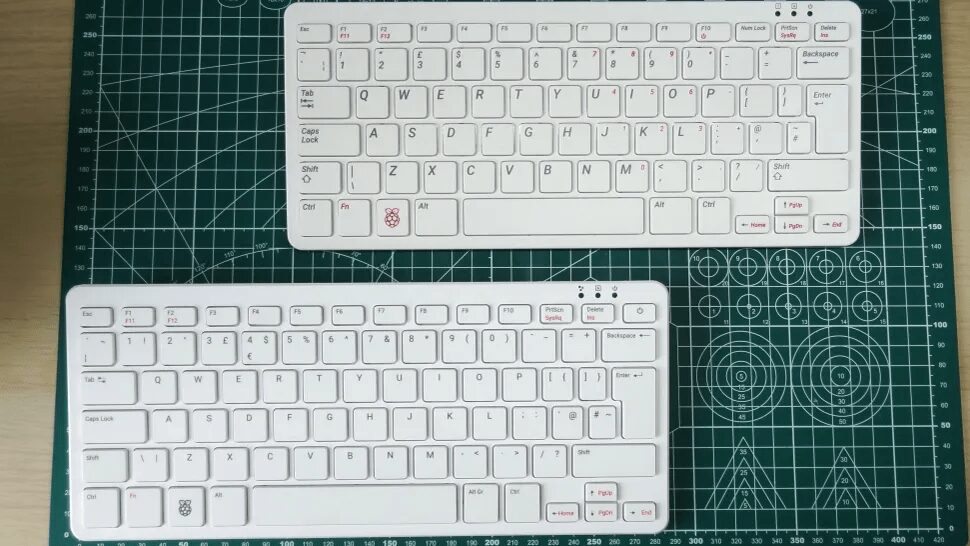
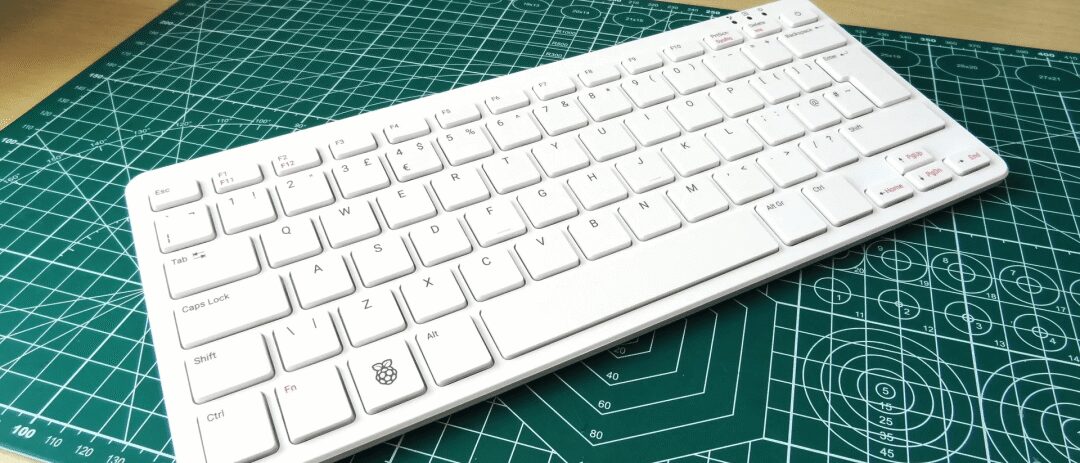
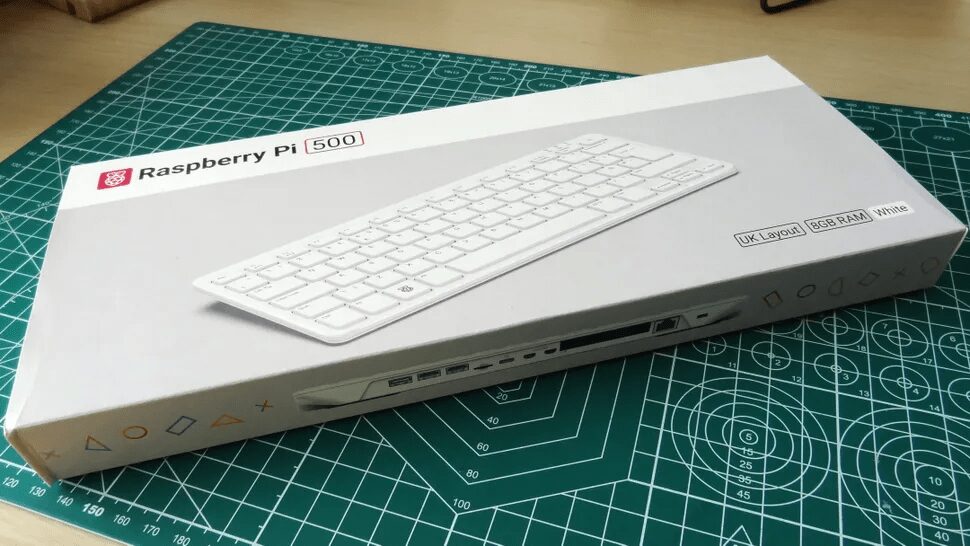
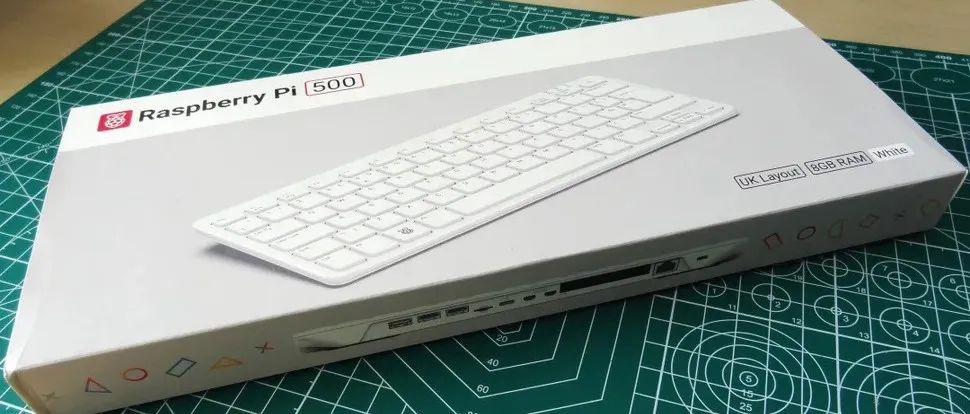
“Isn’t this just a keyboard?” That was my thought when I suddenly received the Raspberry Pi 400 in 2020. Indeed, the 400 looks like an official Raspberry Pi keyboard, but while the Raspberry Pi 500 retains a very similar appearance, its color scheme has changed to all white, unlike the red and white combination of the 400.
The Raspberry Pi 500 is essentially a keyboard with a built-in Raspberry Pi 5. Like the Raspberry Pi 400, this is a custom Pi 500 PCB, not a Compute Module 5 on a carrier board.

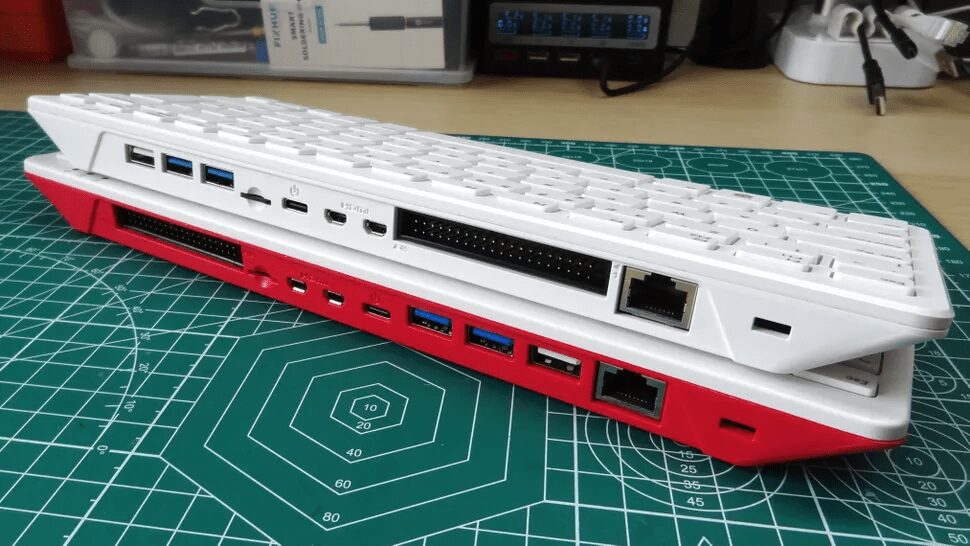
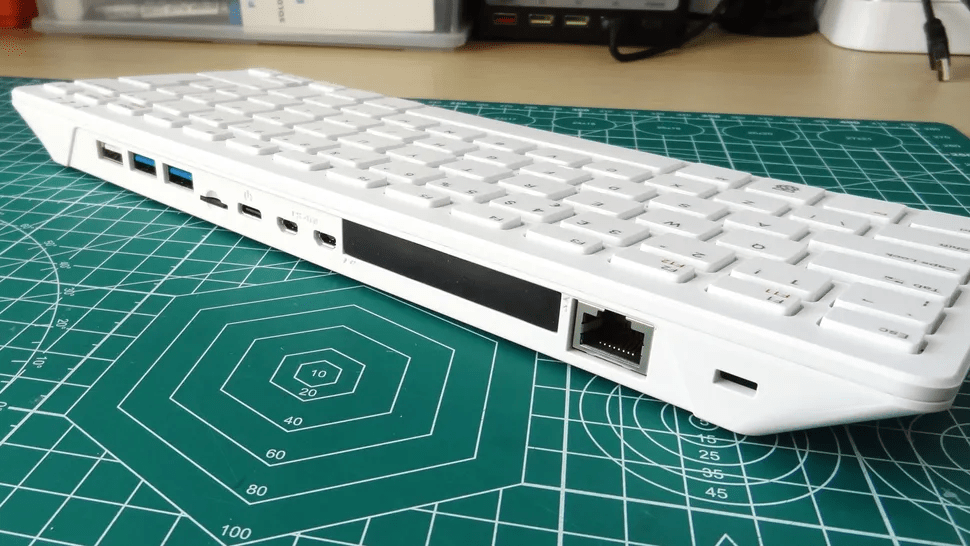
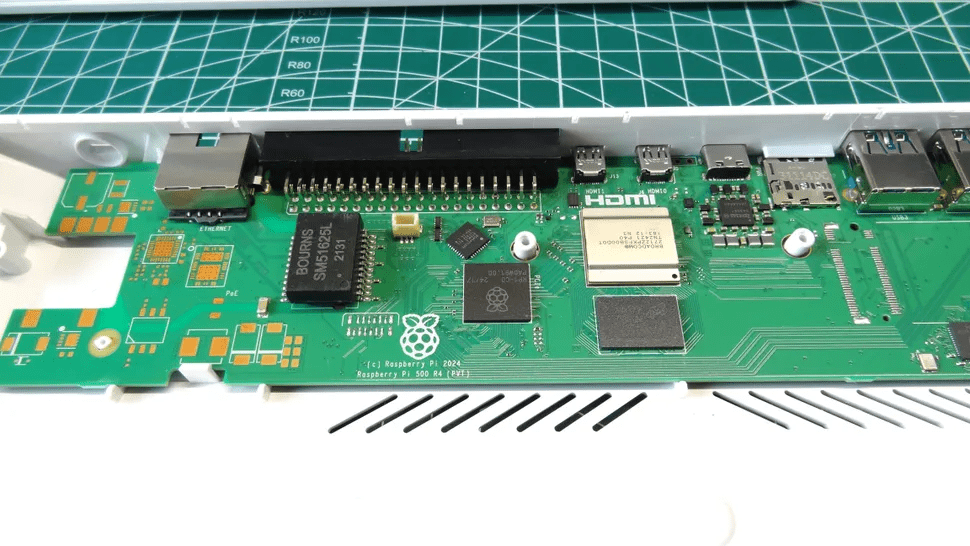
All interfaces are located on the back of the case.
We have one USB 2.0 port for connecting a mouse; two USB 3.0 ports; a micro SD card slot (the same as the Raspberry Pi 5); USB Type-C power input; dual 4K micro HDMI ports and GPIO interface; and a Gigabit Ethernet port. Finally, there is a Kensington lock hole to secure the Pi 500 to the desktop.

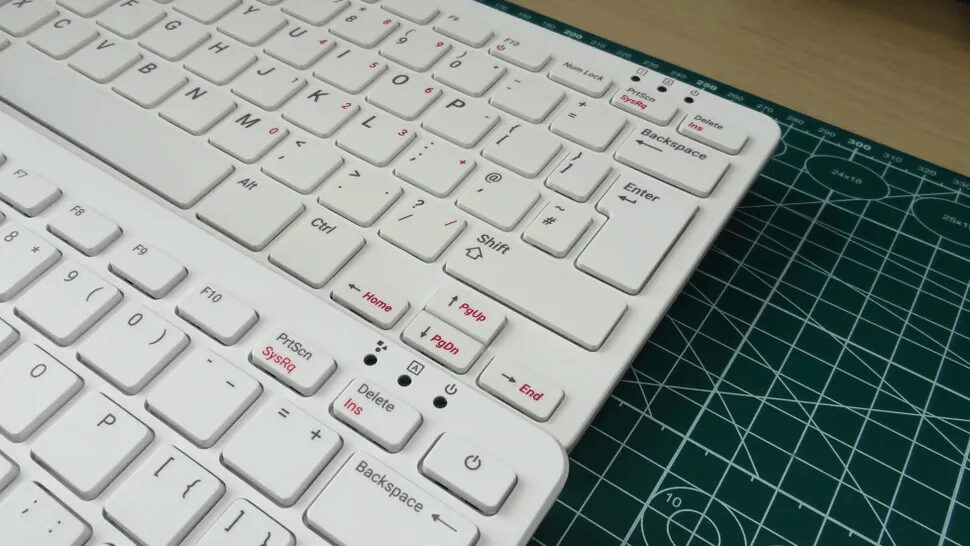
The quality of the keyboard is good. Although it is not the highest-end mechanical keyboard, the membrane chocolate keys are responsive and perform well even during fast typing.
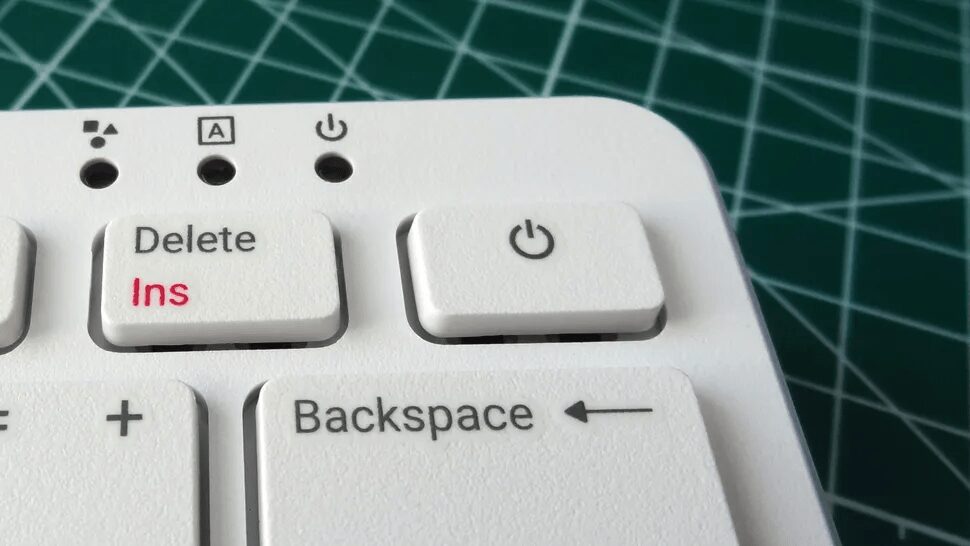
There is even a power button in the upper right corner! But don’t worry, you need to long press it to trigger shutdown.
Disassembling the Raspberry Pi 500
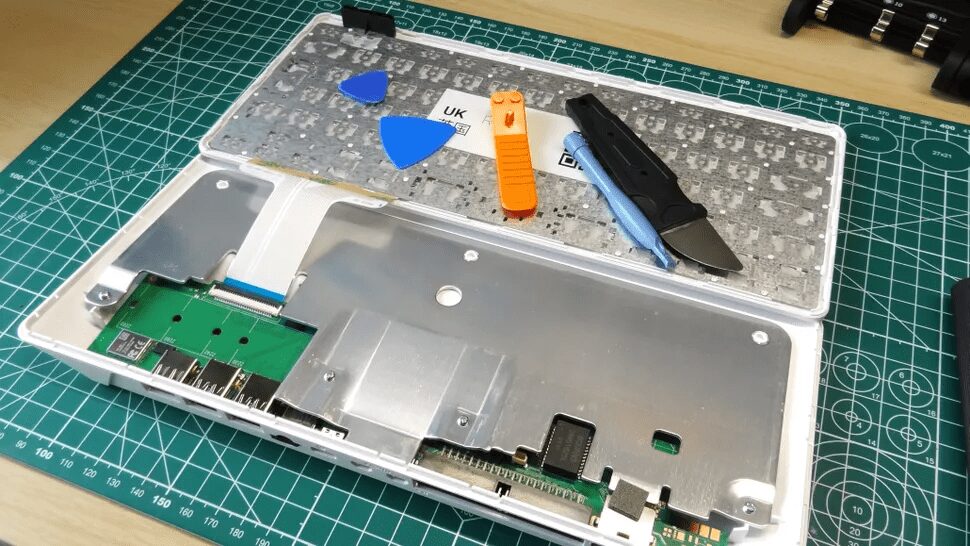
Like the Raspberry Pi 400, the Pi 500 is secured by a series of clips, making it relatively easy to open; just a little patience is needed, using a plastic pry tool and carefully applying some heat with a hairdryer or soldering iron.
Once opened, you can see a large aluminum plate covering the entire PCB and wrapping around the keyboard. This is the same as the Pi 400, and explains why the Raspberry Pi 500 has such excellent cooling performance. Removing the aluminum plate is a bit tricky; the four screws can be easily removed, but the thermal pad securing the aluminum heatsink to the SoC is very firmly attached, and it takes some effort to get it off. When reassembling, make sure the heatsink makes contact with the thermal pad; otherwise, the chip will not dissipate heat.
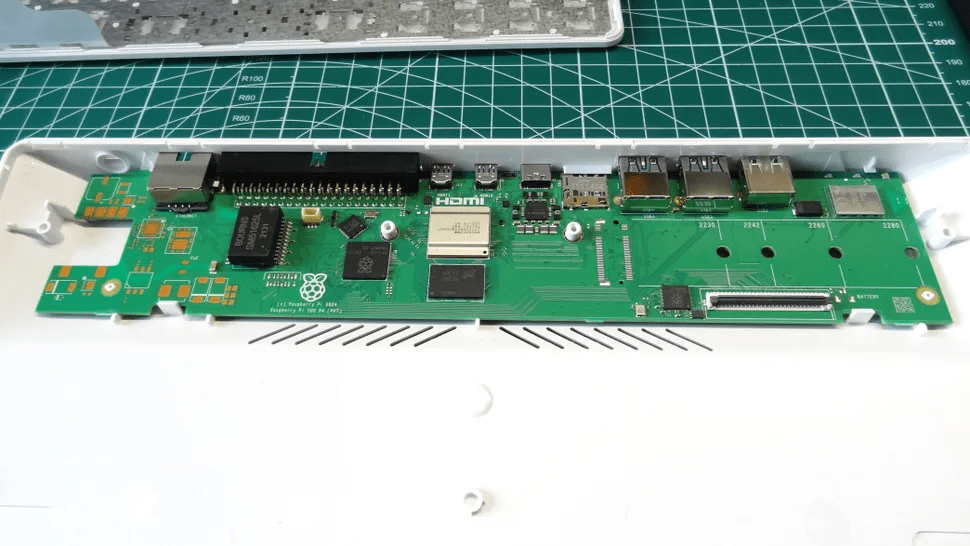

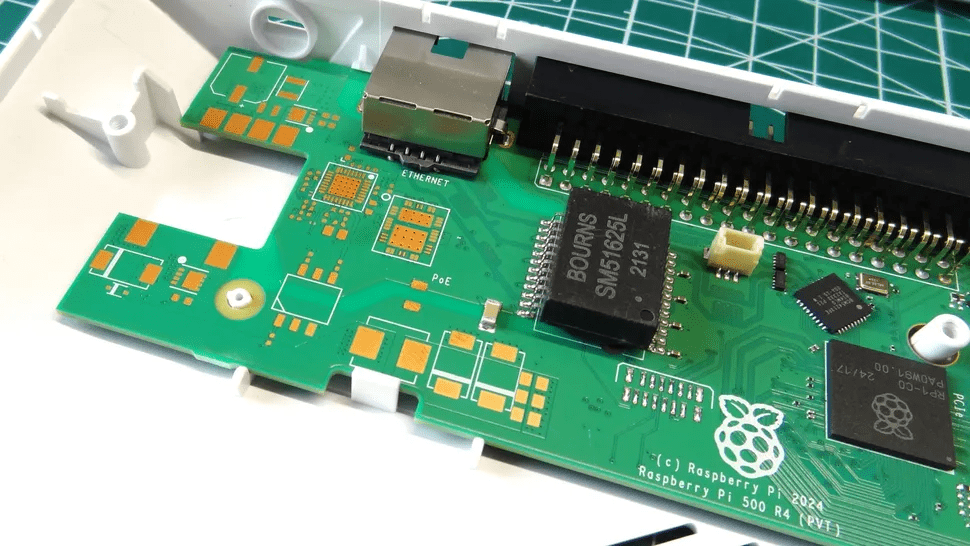
The PCB is very similar to the Pi 400 (which is a recurring theme throughout this review), but the positions of the GPIO and USB ports have swapped. Looking around the board, it’s hard not to notice a large M.2 space. This space can accommodate an NVMe SSD up to size 2280, or even an AI accelerator, but there is one issue—there’s no connector. I asked Raspberry Pi CTO Gordon Hollingworth about this, and his answer was that it was a result of balancing functionality and performance with cost/capability (to put it simply, to save costs). However, he also said that the Raspberry Pi 500 “is a great product aimed at the same market as the Raspberry Pi 400.”
Another factor for not using NVMe SSD is that opening the case is quite difficult, and the plastic can easily crack, which would damage the appearance of your Raspberry Pi 500.
I also found an RP2-B2 chip next to the keyboard FFC connector. RP2 is the RP2040, and B2 stepping is the latest. Considering its proximity to the keyboard FFC, it acts as the keyboard controller.

Finally, a large part of the PCB is not visible due to surface-mounted components. I found a spot for a surface-mounted capacitor, but other than that, there’s PoE (Power over Ethernet). This is another feature that was omitted, for the same reasons as the omission of M.2 PCIe support.
You will also notice that the connectors for the official Touch Display 2 or various Raspberry Pi cameras are missing. Both the Pi 400 and 500 lack these connectors, but we can connect a USB camera and two HDMI displays to the Pi 500.
Cooling and Power Performance of Raspberry Pi 500

In terms of cooling performance, continuing the design of the Pi 400 was a wise choice. The Pi 400 has a large metal plate under the keyboard that acts as a heatsink. The Pi 500 appears to use the same design, as it has excellent passive cooling performance even when overclocked to 3 GHz!
I conducted a routine testing procedure. After powering on, I waited a minute before starting the benchmark test script, which recorded all CPU temperatures and speeds to a CSV file.
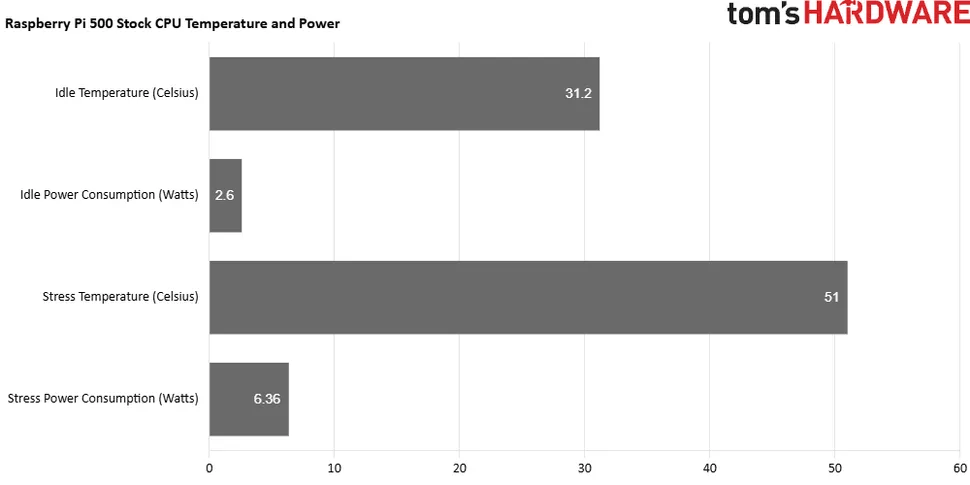
First, I conducted a standard frequency test. In idle state, the system runs at 1.5 GHz with a temperature of 31.2 degrees Celsius. Despite using only passive cooling, the Pi 500 maintained a low temperature during a five-minute full-load stress test. In contrast, the Raspberry Pi 5 had a temperature of 39.5°C in idle state (using an active cooler). The Pi 500 had a lower temperature, consuming only 2.6 watts, making it quite energy-efficient!
During the five-minute stress test, all four cores ran at the maximum speed of 2.4 GHz, causing the SoC temperature to reach 51°C, which is 8.3°C lower than the 59.3°C of the Raspberry Pi 5. Under stress testing, power consumption reached 6.36 watts, but this is nothing to worry about.
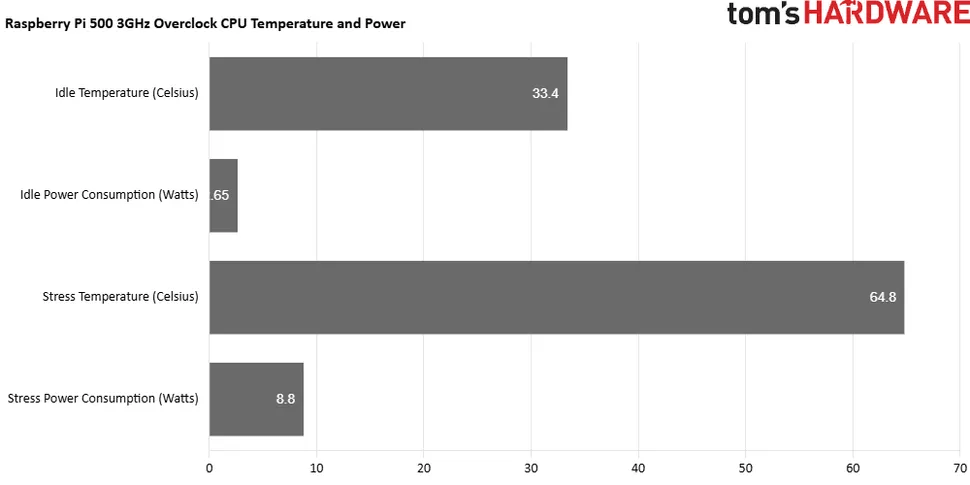
This success excited me, so I overclocked the Raspberry Pi 500 to 3 GHz, and it performed excellently! In idle state, the temperature was 33.4°C, as the CPU was still running at 1.5 GHz, with a power consumption of only 2.65 watts. During the stress test, the CPU frequency reached 3 GHz, and the temperature rose to 64.8°C, well below the thermal throttling point of 82°C. Of course, power consumption also increased to 8.8 watts, but it is still far below the 25 watts supplied by the official Raspberry Pi 5 power adapter.
The cooling performance of the Raspberry Pi 500 continues the excellent tradition of the Pi 400, proving that with good passive cooling design, even powerful chips like the BCM2712 can be “tamed”.
Can the Raspberry Pi 500 be overclocked?
Micro SD Card Performance

The boot time is impressive, taking only 19.86 seconds, which is consistent with the performance of other A2-rated micro SD cards we tested on the Raspberry Pi 5. Whether it’s a micro SD card, eMMC on the Compute Module 5, or NVMe SSD, the boot time of the Pi is relatively fixed. We see the biggest differences in read and write performance; unfortunately, the micro SD card is the slowest storage method for running the Raspberry Pi. I compared the performance of the Raspberry Pi 500 with the recently released Raspberry Pi CM 5, which offers both eMMC and NVMe storage options.
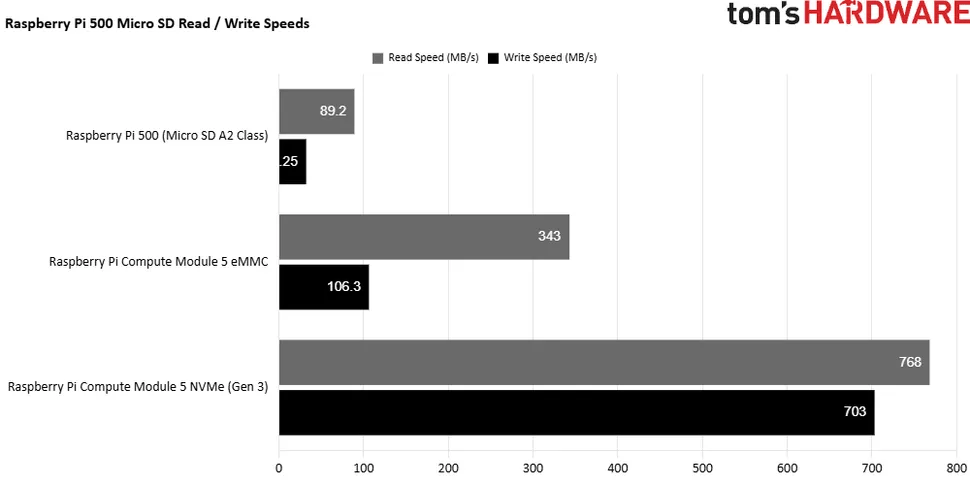
Using the dd command to read the entire contents of a 32GB micro SD card to<span>/dev/null</span>, the Raspberry Pi 500 recorded a read speed of 89.2 MB/s, which is not slow, but still much slower than the NVMe Gen 3 speed of 768 MB/s. Testing the sequential write speed using the Raspberry Pi diagnostic tool (part of the operating system), the A2-rated micro SD card reached 32.25 MB/s. In comparison, NVMe Gen 3 can achieve 703MB/s.
So does this mean running Raspberry Pi OS on the Raspberry Pi 500 is a bad experience? Not at all; we just wish for a faster storage option. The A2-rated card performs excellently, and Raspberry Pi OS runs smoothly and responsively. Honestly, it is perfectly fine to use a Raspberry Pi 500 configured this way, but deep down, we do hope for some additional improvements inside the machine.
GPIO Usage
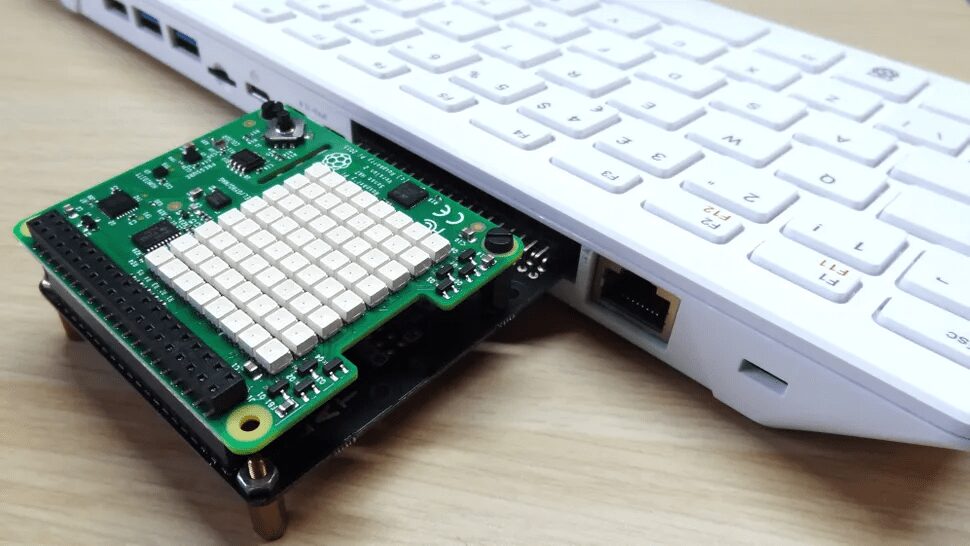
Like the Raspberry Pi 400, the Pi 500 requires an expansion board to access the GPIO interface. Fortunately, the pin arrangement remains unchanged, so you can continue to use the old expansion boards. The GPIO interface was originally covered with a rubber plug, which can be easily removed with tweezers. Essentially, you will get the same GPIO pins as the Raspberry Pi 5, and due to changes in the installation method of the Python software (PEP668) and the Raspberry Pi’s decision to use the RP1 “southbridge” to handle GPIO, you will have the same usage experience. Just use the above expansion board correctly to expose these pins for use with HAT (Hardware Attached on Top) modules.
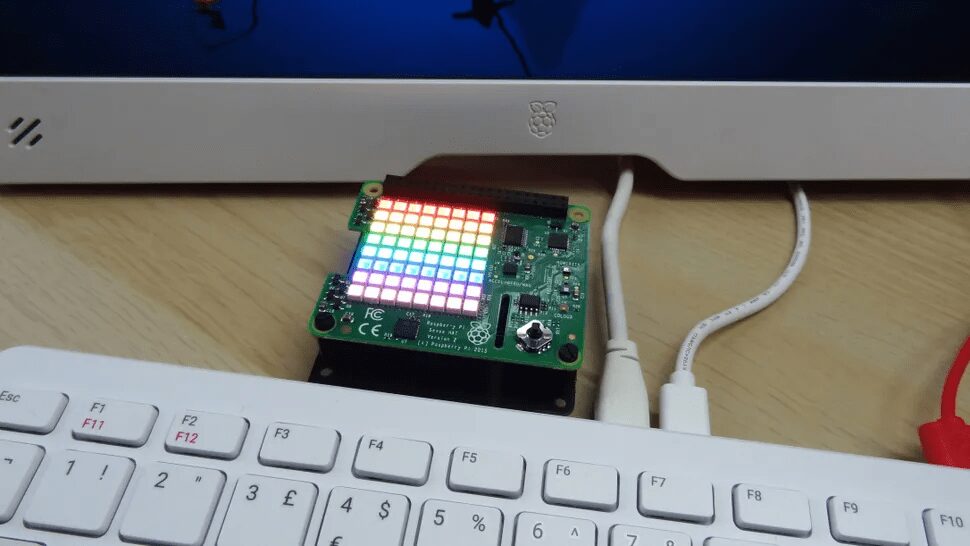
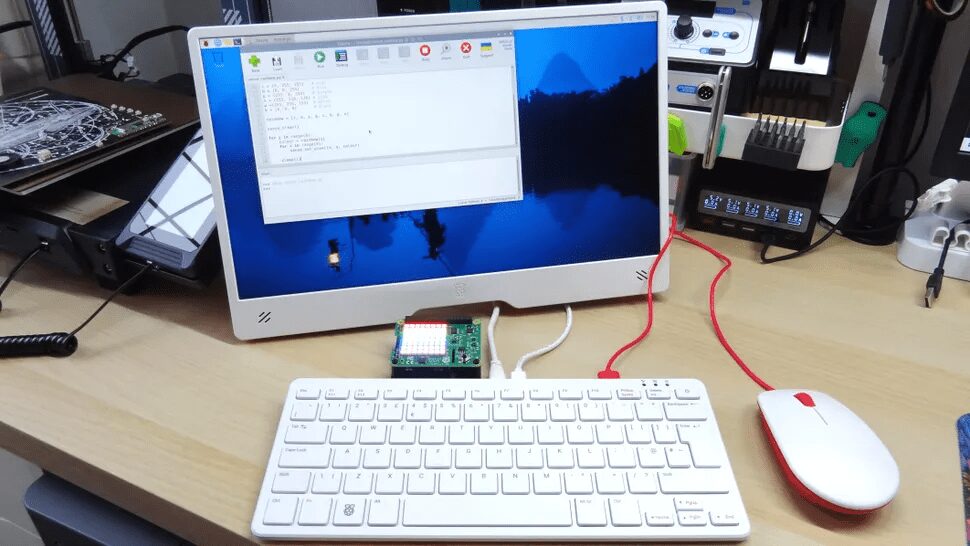
Use Cases
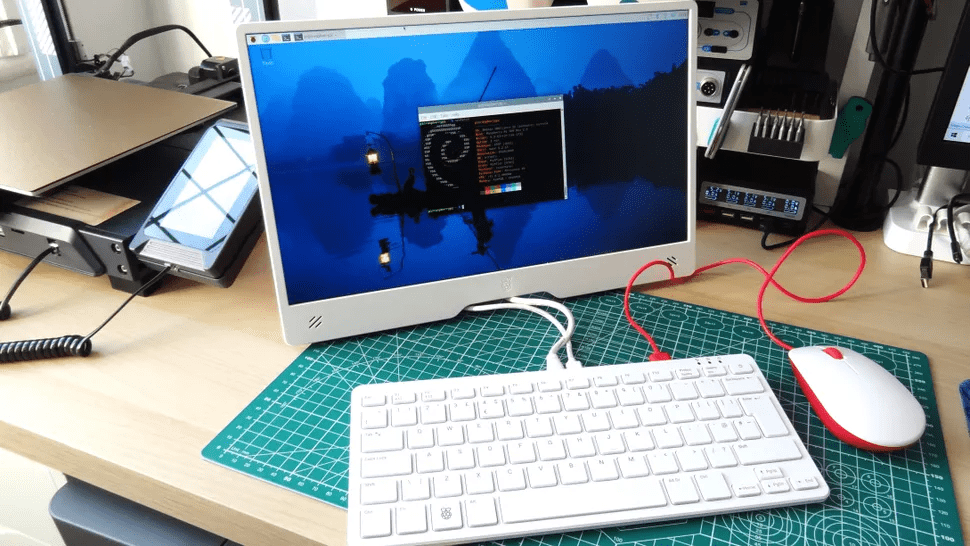
Like the Raspberry Pi 400, the Pi 500 is positioned as a 21st-century version of the 1980s home computer. You simply plug in this keyboard, connect it to a monitor, and you can start working. However, the Raspberry Pi 500 has more powerful processing capability than the Pi 400, making it a practical desktop computer, especially suitable for those who do not need an RTX 4090 graphics card or high-power CPU.
Conclusion
I really like the Raspberry Pi 500. It is a powerful machine packed in a nice shell. It makes a great gift for others or as a kit for a child’s first computer.
Original article link: https://www.tomshardware.com/raspberry-pi/raspberry-pi-500-review
Project author: Tom’s Hardware
Translated and first published on: DF Maker Community
Reprint with source information
Hardware Arsenal

Long press the code to learn more👆

DFRobot Official Brand Store https://dfrobot.taobao.com/
DFRobot Official Flagship Store https://dfrobot.jd.com/
If anyone has anything to say, feel free toleave a message!
Previous Project Review

“Let’s Grow Vegetables! Young Man”——Smart Autonomous Indoor Greenhouse Simulator
The keyboard is the computer, the Raspberry Pi 500 is here!

Raspberry Pi CM5 Review: Same Appearance, Stronger Performance
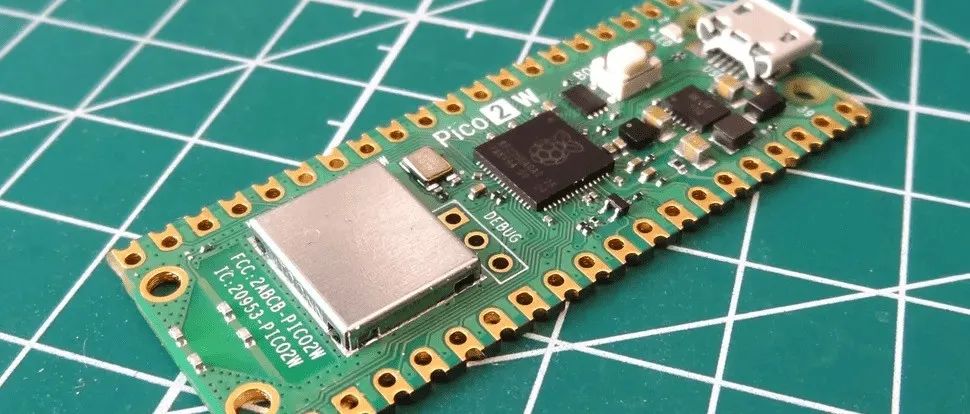
Raspberry Pi Pico 2 W Review: RP2350 Wireless Version is Here!

A robot that can jump on one leg continuously—Salto
Fully open-source! Homemade Mario Kart based on ESP32!
Click to read👆