Original link: https://blog.csdn.net/liu854046222/article/details/143136834
Situation description: The mining process is hidden (CPU usage is 50%,<span>htop/top</span> does not show any abnormal processes), and after terminating the mining process, it immediately restarts (<span>crontab -l</span> shows no scheduled tasks).
1. Symptoms of Infection
The server has 24 cores, and the CPU usage of the first 12 cores remains at 100%. Even after restarting the server, it immediately occupies 12 cores of CPU, and the system memory usage is also very high. The symptoms of infection are as follows:
- • High CPU usage without any software running (check system memory usage using top or htop).
- • Abnormal IP addresses found through
<span>netstat -natp</span>. - • Severe overheating, with the fan running at high speed.
- • The server suddenly becomes unresponsive for no apparent reason.
2. Solutions
2.1 Disconnect the Network and Change the Root Password
Upon discovering the mining virus, the first step is to disconnect the network and change the root password!!!
2.2 Identify Hidden Mining Processes
We will use two tools, sysdig and unhide, to search for hidden processes.
# Install sysdig
sudo apt install sysdig
# Install unhide
sudo apt install unhide
# Output CPU usage ranking, can display hidden processes
sudo sysdig -c topprocs_cpu
# Search for hidden processes, the proc directory contains all running program process IDs, i.e., PID
sudo unhide proc
At this point, we have found the PID of the mining virus, but directly using <span>kill -9 PID</span> will result in a new mining process appearing within a minute. Therefore, this mining process must be started by some service, and we need to find and stop that service.
2.3 Stop the Virus Startup Service
Using the hidden processes found with <span>unhide proc</span>, check the status of the service or process managed by systemd using <span>systemctl status PID</span> to see how the virus was started.
`systemctl status 3084 # 3084 is the PID of the virus`
Check the output in the CGroup section, and you will see a service with a suffix of <span>.service</span>, which is the startup service for the virus.
# Terminate the virus startup service
systemctl stop xxxxX.service
# Disable the mining service from starting at boot
systemctl disable xxxxX.service
2.4 Kill the Mining Process
After stopping the startup service of the mining virus, we can now kill the mining process. After killing it, the CPU returns to normal, and there are no hidden processes left.
`kill -9 PID`
3. Preventing Future Hacker Invasions
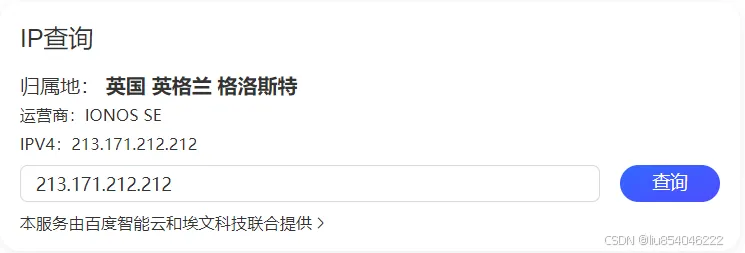
3.1 Find Abnormal IPs
# Use netstat -natp to display network-related information and check for abnormal IPs
netstat -natp
Simply input the found abnormal IP into Baidu to see some information about that IP.
3.2 Block Abnormal IPs
Use the firewall iptables to block abnormal IPs.
# Block abnormal IP
sudo iptables -I INPUT -s IP -j DROP
# Check if it has been successfully added
iptables -L INPUT -v -n
By default, rules added through <span>iptables</span> will be lost after a system reboot. If you want the rules to remain effective after a reboot, you need to save the rules to a configuration file. You can use the <span>iptables-persistent</span> tool to achieve this.
# Install iptables-persistent
sudo apt-get install iptables-persistent
# Save rules to configuration file
sudo netfilter-persistent save
# Enable on boot
systemctl enable iptables
# Start the service
systemctl start iptables
3.3 Check for Strange Public Keys
`cat ~/.ssh/authorized_keys`
If there are any strange public keys, delete them immediately.
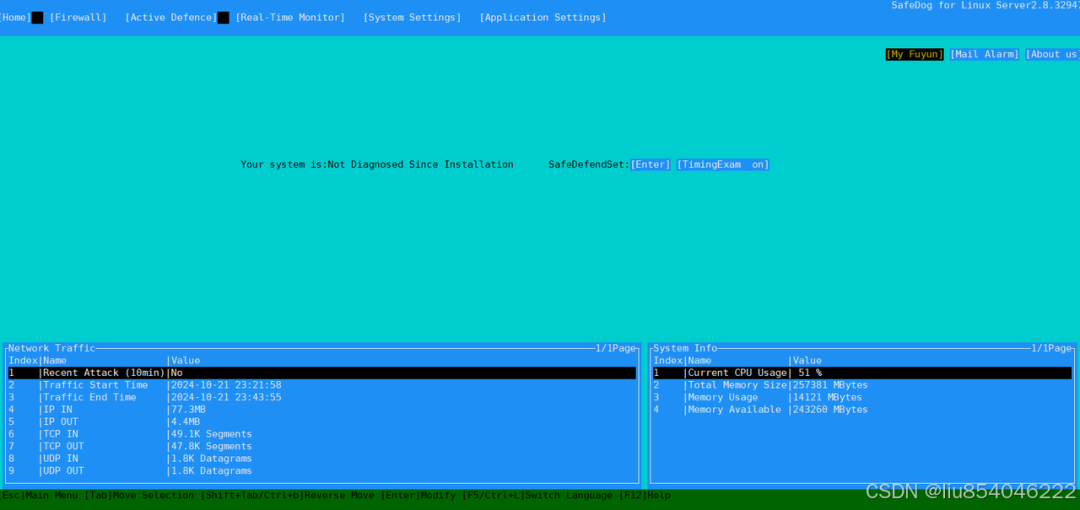
4. Install SafeDog for Protection
For installation instructions, please refer to the official website: https://www.safedog.cn/install_desc_server.html
Operation manual: https://www.safedog.cn/download/software/safedogfwq_linux_Help.pdf
Below is the UI interface after the successful installation of SafeDog.
5. Linux Virus Scanning Tool ClamAV
https://www.moewah.com/archives/5296.html
ClamAV is an open-source antivirus engine used to detect various types of malware. Its features include command-line scanning, custom virus database updates, and rapid response to new viruses. It is suitable for various systems, including Windows, Mac, and Linux. This tutorial will guide you on how to install, configure, and use the main features of ClamAV.
5.1 Installation
For Debian/Ubuntu systems, use the following command to install:
sudo apt-get update
sudo apt-get install clamav clamav-daemon
For CentOS/RHEL systems, use the following command to install:
sudo yum install epel-release
sudo yum install clamav clamav-update
5.2 Configuration
After installation, you must update ClamAV’s virus database. This will help ClamAV recognize and defend against the latest threats. You can update it using the following command:
`sudo freshclam`
5.3 Usage
Here are some common usage examples of the ClamAV <span>clamscan</span> command; for more usage, please run <span>clamscan -help</span> to view the help file:
# Scan a single file
clamscan /path/to/your/file

# Scan an entire directory
clamscan -r /path/to/directory

# Automatically delete detected viruses
clamscan --remove -r /path/to/directory

# Generate a report of scan results
clamscan -r /path/to/directory > scanreport.txt

# Display information about viruses found during the scan
clamscan -r --bell -i /path/to/directory
<span>clamdscan</span> is the client for the ClamAV antivirus server <span>clamd</span>, which interacts with the background process that continuously runs and loads the virus database to perform virus scans, making frequent or large-scale scanning tasks more efficient.
If you want to use the ClamAV daemon <span>clamdscan</span> command for scanning, first ensure the daemon is running:
`sudo systemctl start clamav-daemon`
Next, use the <span>clamdscan</span> command to perform a scan, for example:
`clamdscan /path/to/your/file`
or
`clamdscan -r /path/to/your/directory`
Multi-threaded recursive scanning of directory files while passing file descriptors:
`clamdscan --multiscan --fdpass /path/to/scan`
Additional Notes
6. Solution for Missing Command Components in SafeDog Installation
Need system command ‘locate’ to install SafeDog for Linux. Installation aborted!
This indicates that the search command component is missing; install it using the command below:
`yum -y install mlocate`
Need system command ‘lspci’ to install SafeDog for Linux. Installation aborted!
Install it using the command below:
`yum -y install pciutils`
Need system command ‘lsof’ to install SafeDog for Linux. Installation aborted!
Install it using the command below:
`yum install lsof`
Need system command ‘netstat’ to install SafeDog for Linux. Installation aborted!
Install it using the command below:
`yum install net-tools`
Need system command ‘killall’ to install SafeDog for Linux. Installation aborted!
Install it using the command below:
`yum install psmisc`
7. Linux – “No Available Packages”
On CentOS 7, when using the yum command to install packages, if you see the “No available packages” message, it usually means that the corresponding installation package is no longer available in the yum repository.
Solution: Install the epel-release package
`yum install -y epel-release`
8. Installing Sysdig on Linux Systems
Sysdig is a super system tool, more powerful than strace, tcpdump, and lsof combined. It can be used to capture system state information, save data, and perform filtering and analysis.
To install Sysdig on Linux systems, you can use a one-click installation:
`curl -s https://s3.amazonaws.com/download.draios.com/stable/install-sysdig| sudo bash`
This is an online automatic installation tool, a shell script that recognizes common Linux distributions and configures the source according to the corresponding version, ultimately installing the Sysdig package.
Test if the installation was successful:
`sysdig -pc -c topconns`
If the following information appears, the installation is correct: