Follow+Star Public Account, don’t miss the exciting content
Source | Mil Electronics Official Website
As living standards improve, people have higher demands for electronic products. Many electronic products now come with displays, such as home appliances, automobiles, and medical devices, all of which are equipped with powerful displays and beautiful UI interfaces.
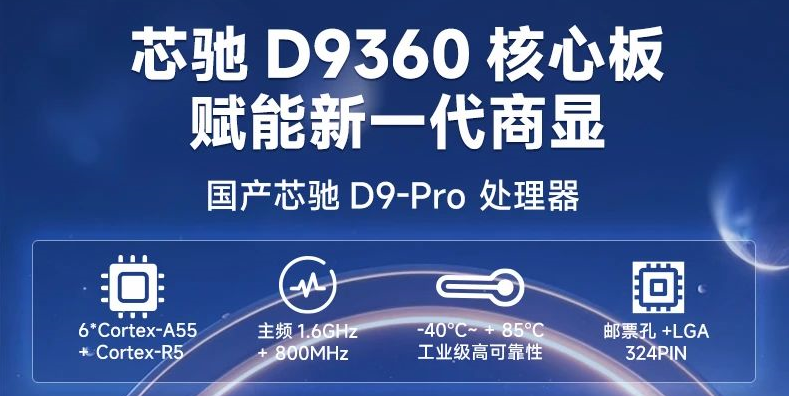
Today, I would like to introduce a high-performance, high-security six-core chip launched by a domestic manufacturer (SemiDrive Technology): the D9-Pro. This chip has extraordinary video encoding and decoding capabilities, and the core board developed by Mil Electronics based on this CPU is a ready-to-use display control board that can be directly used for commercial display solutions.
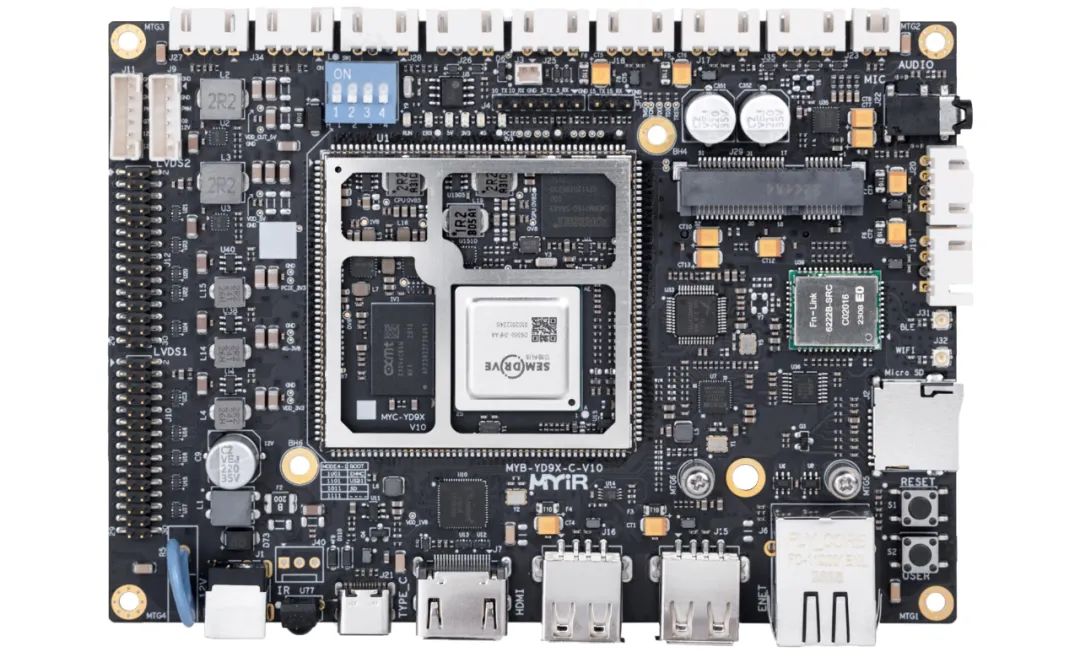
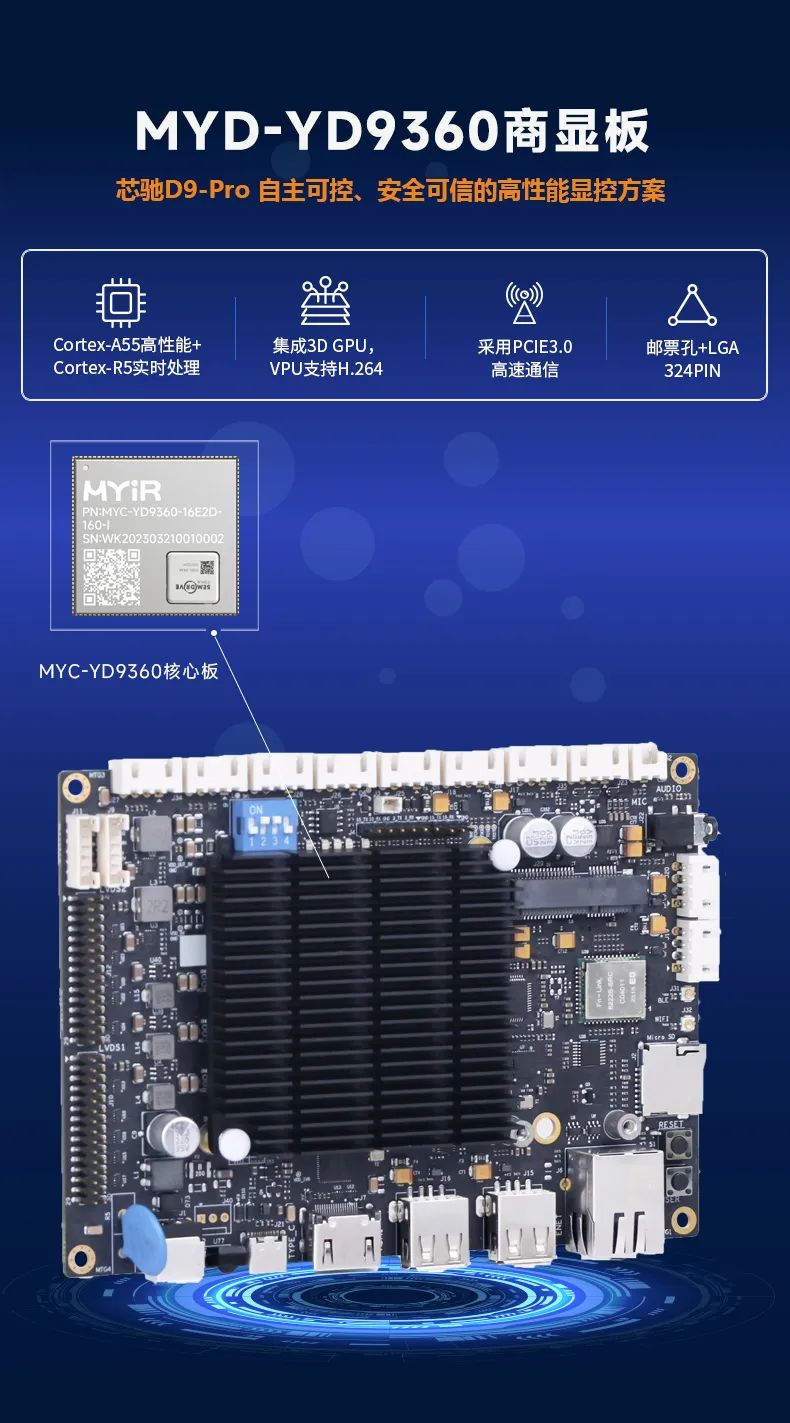
Mil MYC-YD9360 Core Board, Development Board, and Commercial Display Board
The D9360 processor is a highly integrated, low-power, high-security chip launched by SemiDrive, using AEC-Q100 automotive-grade chip technology and has passed the ISO26262 ASIL_B functional safety certification, representing a high-performance chip made in China.
Mil Electronics and SemiDrive Technology (SemiDrive) have joined forces to launch the Mil MYC-YD9360 core board, development board, and commercial display board based on the SemiDrive D9-Pro high-performance domestic industrial processor, empowering the development of new-generation in-vehicle intelligence, power intelligence, industrial control, new energy, and machine intelligence industries, meeting the display needs of multiple screens.
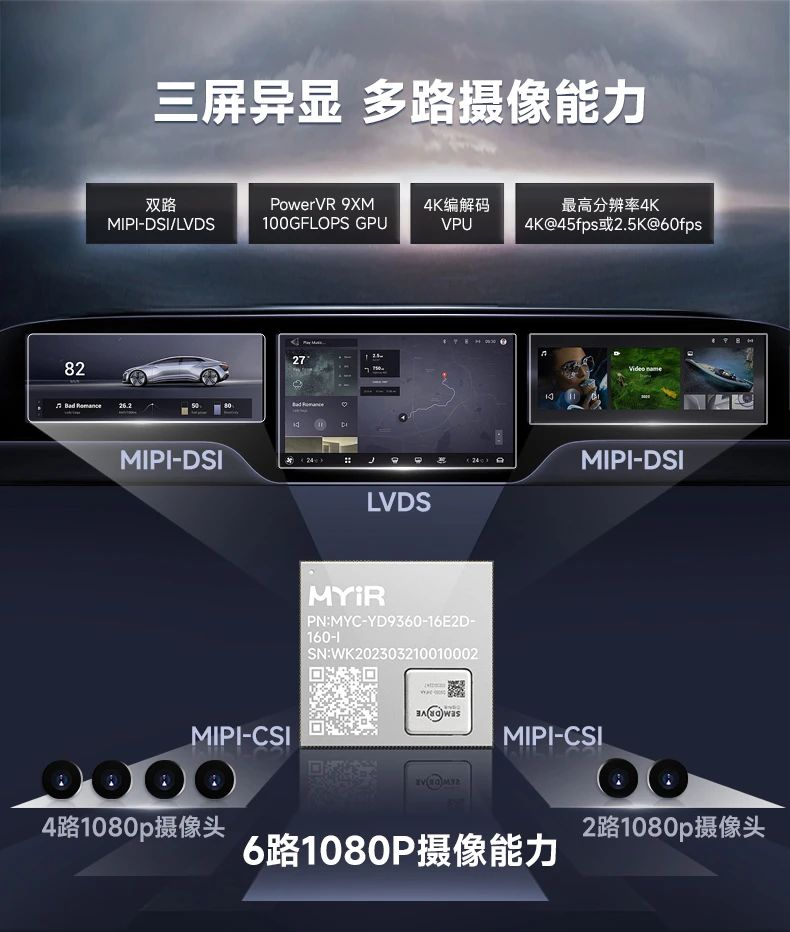
The video encoding and decoding capabilities of the D9-Pro are very impressive, supporting 4K resolution or six-channel 1080P camera capabilities.
At the same time, D9-Pro is a six-core high-performance processor that is not only fast in computing speed and high in efficiency but also supports multi-process concurrency without stuttering.
It also has strong computing power in AI calculations, with an NPU capable of reaching 0.8 Tops, suitable for lightweight edge AI intelligent analysis.

In addition to high performance, D9-Pro also offers high security, featuring built-in hardcore encryption algorithms, making it very suitable for high-security scenarios.
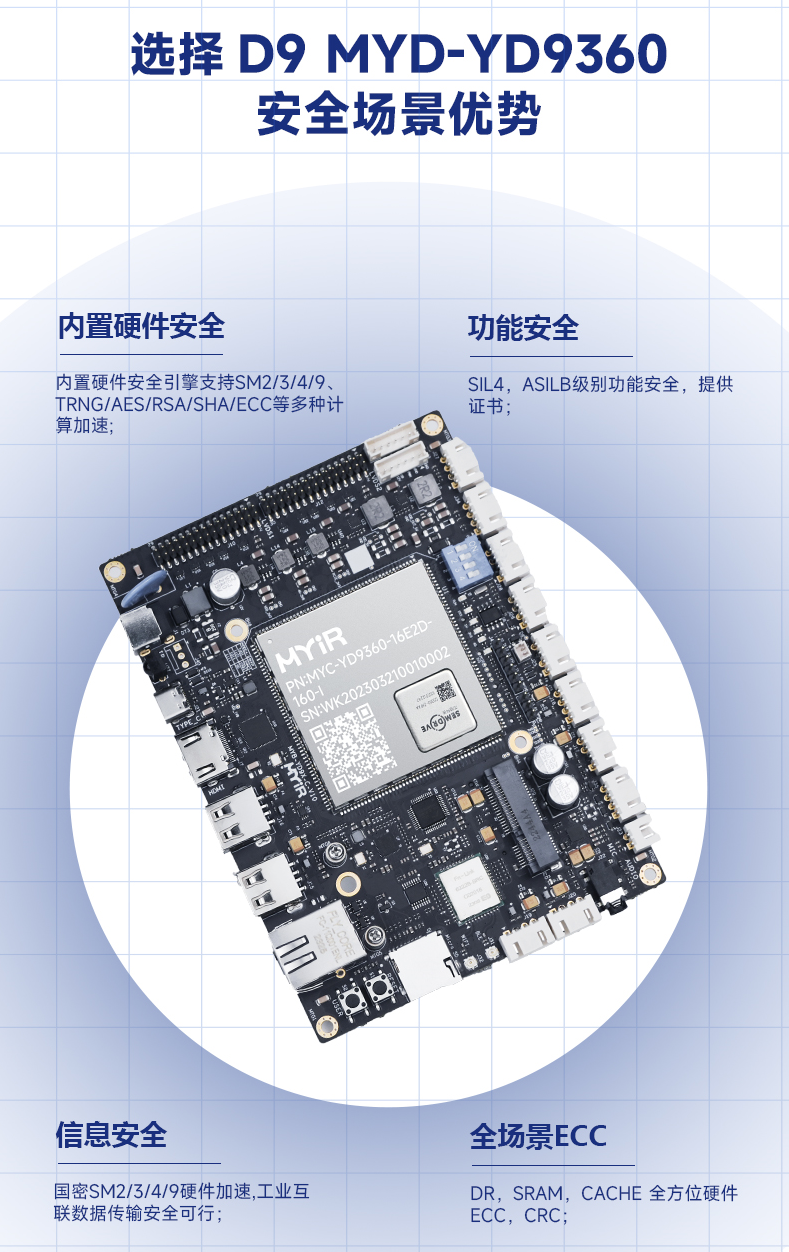
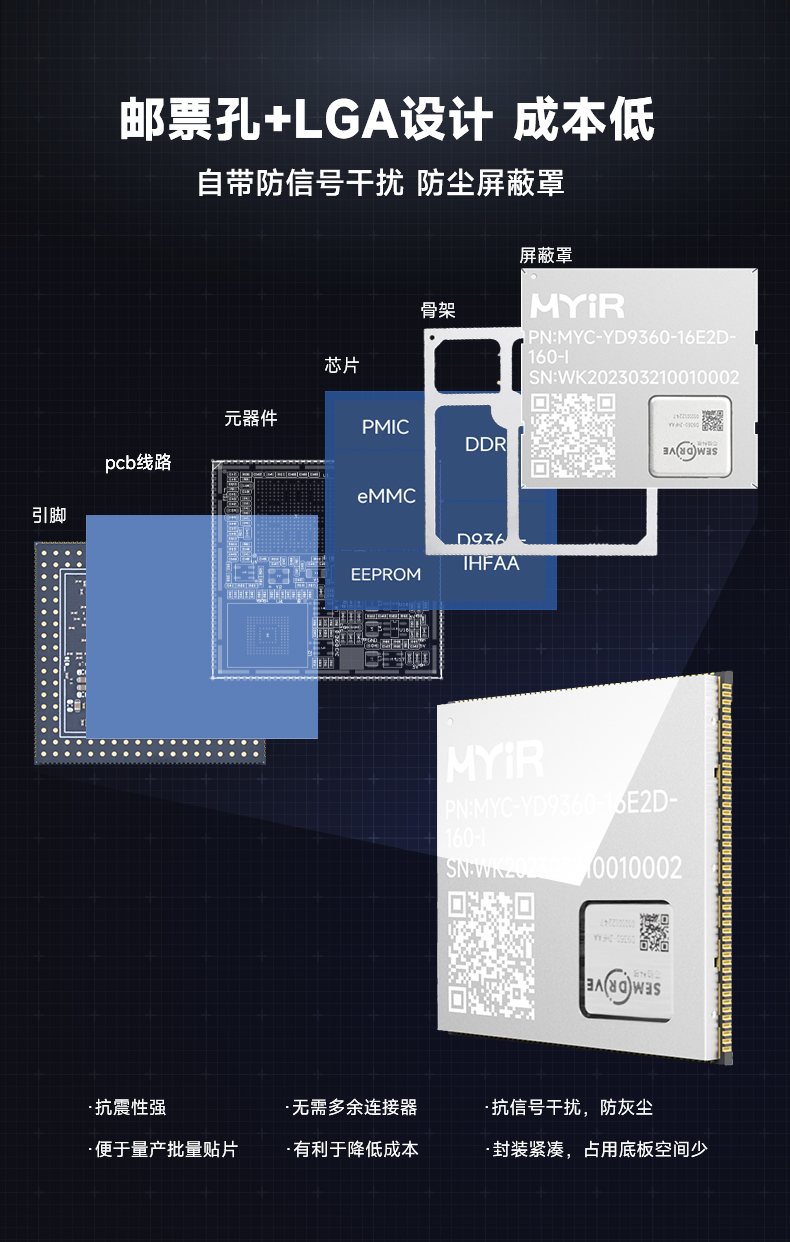
To facilitate customer use, Mil has designed a stamp hole package, which provides stronger anti-interference capability and shock resistance.
Of course, to help developers better expand functionality, Mil Electronics has also thoughtfully provided development board evaluation boards.
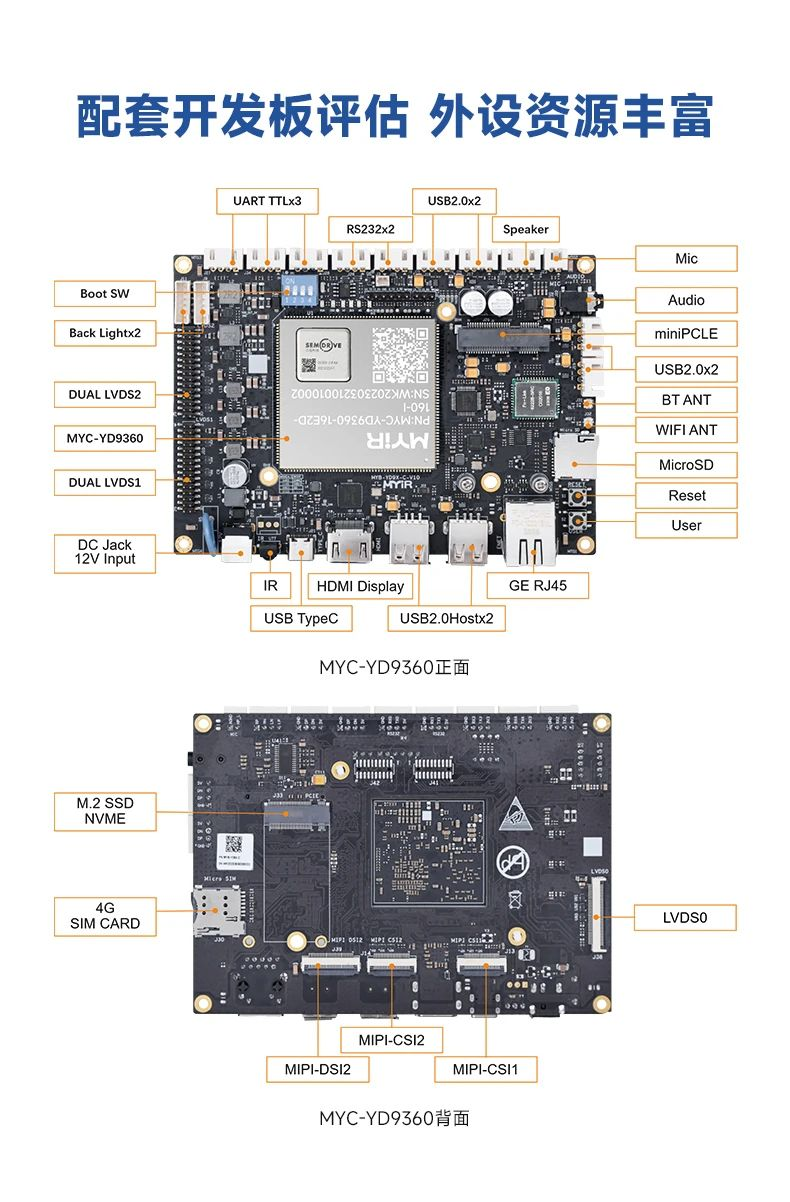
D9-Pro Processor Development Guide
To allow more customers to quickly use the D9-Pro core board, Mil Electronics has launched corresponding development materials along with the development board.
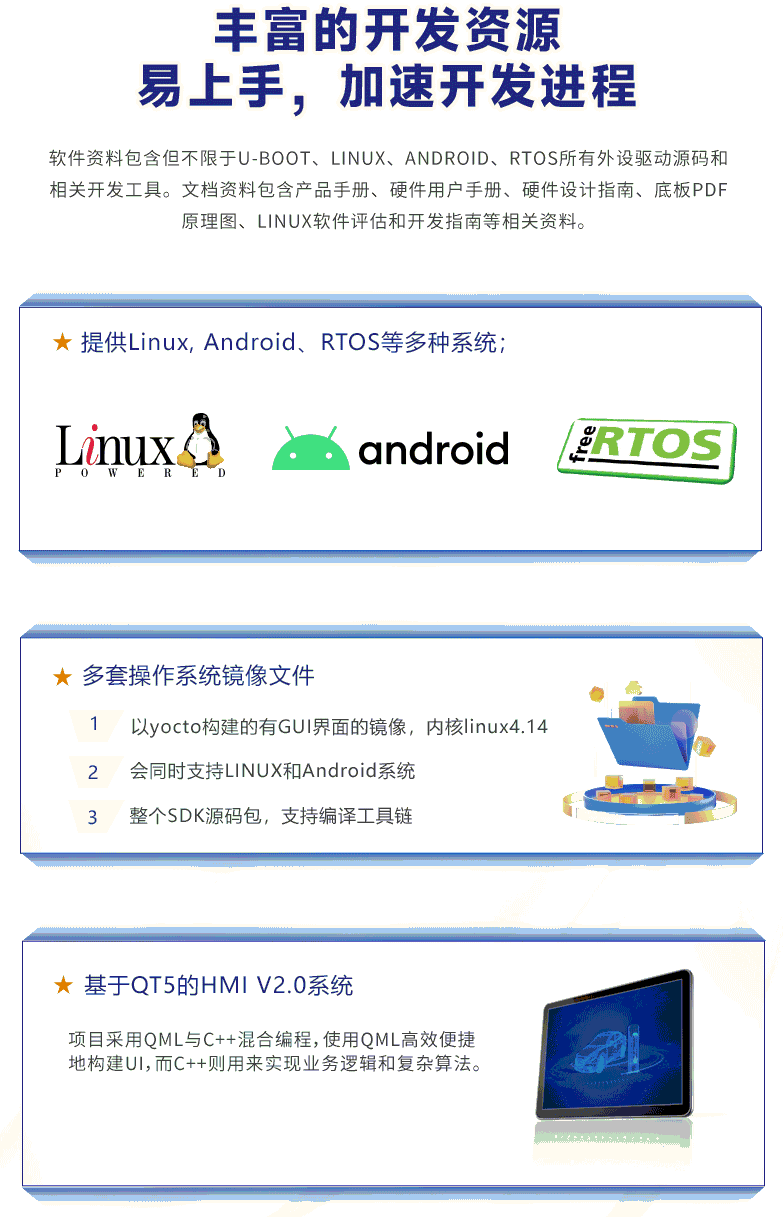
For friends with no background knowledge, it may take some time to familiarize themselves with the relevant knowledge. However, for developers with a certain foundation, developing based on the D9 platform is relatively easy.
Here, I will share the main process of D9 Linux software development combined with the official materials:
MYD-JD9X is equipped with an operating system based on the Linux 4.14.61 kernel.
The development board comes with an embedded Linux system development package that includes the cross-compilation toolchain, U-boot source code, Linux kernel, and various driver module source code, as well as various development and debugging tools suitable for Windows desktop and PC Linux systems, application development examples, etc.
1. Development Environment
-
D9 Processor:D9310, D9340, D9350, D9360, etc.
-
Linux Development Host:Debian, Ubuntu, RHEL, etc., Ubuntu 18.04 64-bit desktop system.
-
During the process of using the SDK to build this system image, you also need to install the cross-toolchain. The SDK provided by Mil not only includes various source codes but also provides the necessary cross-toolchain, which can be used directly to compile applications.
The installation steps for the SDK are as follows:
Copy SDK to Linux Directory and Unzip
Create Toolchain Directory
PC$ cd $HOME/MYD-JD9XPC$ tar -xvf gcc_linaro_7.3.tar.gz -C /tool
Install and Test Compiler Chain
To facilitate the setup of the compiler chain, they provide a setup script env.sh
2. Build Development Board Image
Step 1: Acquire Source Code
Purchasing the development board will provide the source code and accompanying tools.
Step 2: Quick Compile Image
Here we need to use the envsetup.sh script provided by Mil to set environment variables.
Enter the SDK directory, execute ./build.sh config to configure the project, select board, project, boot mode, and kernel version. Then execute ./build.sh to complete the compilation and packaging, and the image will be generated in the out directory.
Just execute build.sh to compile the image with one click:
After the image compilation is complete, the out directory will be generated in the SDK source code, which is automatically created after executing the build.sh one-click compilation script and contains all image components.
Main component introduction:
-
images_d9_ref Main directory for the board’s image
-
binary directory, contains all binary files of the components
-
build_object directory, contains compilation information of BSP and buildroot system components
-
images directory, final image directory, .pac format image burning package
Step 3: Build SD Card Burning Image
Before building the SD card burning image, the full image needs to be built first.
Prepare the full image, enter the SDK directory, and execute the build.sh config command, selecting D9 for SD card boot.
Then, compile the SD card image and update the image package.
There are various boot methods for the D9 series microprocessors, and users can choose different methods for updates based on their needs. The main update methods are as follows:
-
USB Burning: Suitable for research and debugging, testing, etc.
-
Create SD Card Bootloader: Suitable for research and debugging, quick startup, etc.
-
Create SD Card Burner: Suitable for mass production to write eMMC
The official materials provide two methods: SDFactoryTool burning and SD card burning.
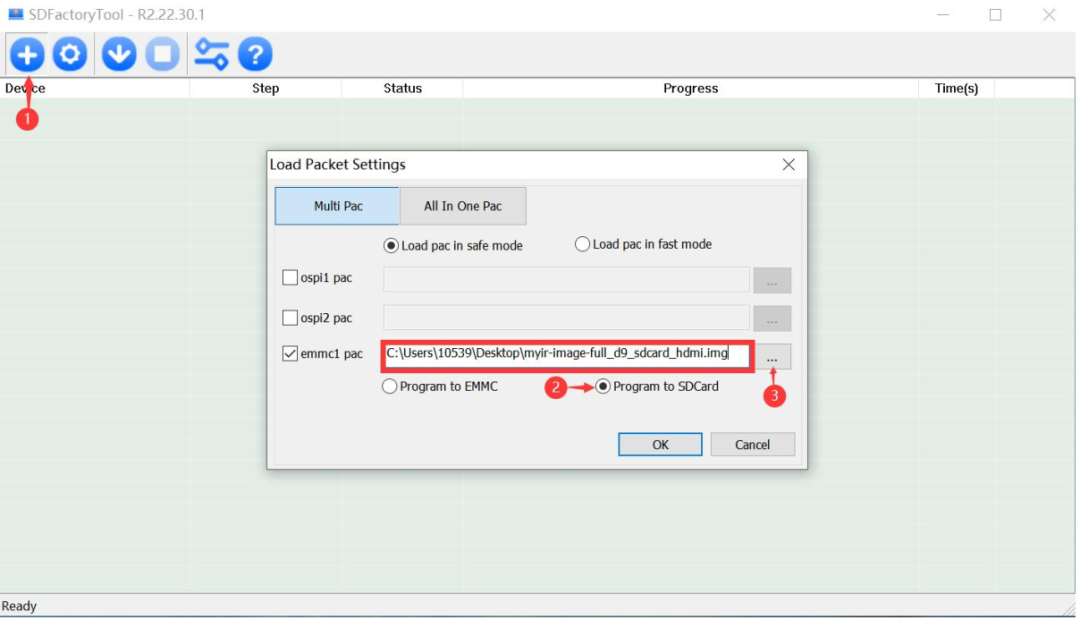
Method 1: SDFactoryTool Burning
This involves using the SDFactoryTool to burn via USB.
Connect the computer and the development board via USB, select the boot mode, and set the switch to USB download mode.
Prepare the burning image and start the SDFactoryTool to download it.
Method 2: SD Card Burning
To meet production needs for mass burning, you can also use the SD card burning method.
This method is implemented by creating a TF card burning image package. To save time, Mil has already compiled the SD card burning image package, and users only need to compile the updated image package. (For details, please refer to the development manual)
4. Modify Board Support Package
This section is relatively important and also relatively difficult, including compilation and updating of related contents such as U-boot and kernel.
a. Onboard SSDK Compilation and Update
SemiDrive MCU SDK (hereinafter referred to as SSDK) is used for MCU software development on various SemiDrive chip platforms, such as the Safety R5 software for the D9 series SOC.
wujl@system2-ubuntu1804:/media/wujl/D9/d9_ssdk$ ./build.sh ssdk
After compilation, you can find the safety.bin and secure.bin binary files in the source/ssdk/boards/d9_ref/build/ref/gcc/secure/ directory.
b. Onboard Uboot Compilation and Update
U-boot is a very rich open-source bootloader that includes kernel booting, downloading updates, and many other aspects.
wujl@system2-ubuntu1804:/media/wujl/D9/d9_ssdk$ ./build.sh uboot
After compilation, you can find the bootloader.img binary file in the out/images_d9_ref/binary/download_img/ directory.
Copy the compiled image (bootloader.img) to the development board. The corresponding partition for U-boot is /dev/mmcblk0p26. Execute the following command to update:
root@myd-jd9x:~# echo 0 > /sys/block/mmcblk0boot0/force_roroot@myd-jd9x:~# echo 0 > /sys/block/mmcblk0boot1/force_roroot@myd-jd9x:~# dd if=bootloader.img of=/dev/mmcblk0p26 bs=1M conv=sync 0+1 records in1+0 records out
c. Onboard Kernel Compilation and Update
wujl@system2-ubuntu1804:/media/wujl/D9/d9_ssdk$ ./build.sh linux
After compilation, you can find the kernel.img and dtb.img binary files in the out/images_d9_ref/binary/download_img directory.
Update kernel and device tree:
Copy the compiled image (kernel.img) to the development board. The corresponding partition for the kernel is /dev/mmcblk0p38, and for the dtb is /dev/mmcblk0p34. Execute the following command to update:
root@myd-jd9x:~# echo 0 > /sys/block/mmcblk0boot0/force_roroot@myd-jd9x:~# echo 0 > /sys/block/mmcblk0boot1/force_roroot@myd-jd9x:~# dd if=kernel.img of=/dev/mmcblk0p38 bs=1M conv=sync9+1 records in10+0 records outroot@myd-jd9x:~# dd if=dtb.img of=/dev/mmcblk0p34 bs=1k conv=sync113+1 records in114+0 records out
5. Adapt Hardware Platform
This section is related to the underlying driver content of the chip. You can quickly define the pins, attributes, power, etc. of each node using the pin configuration tool provided by SemiDrive (the official tool is provided).
For specific details of the configuration, please refer to Section 6 of the “MYD-JD9X_Linux Software Development Guide”.
Next, you can add your application. The official documentation provides an introduction to “applications based on Makefile,” which you can refer to.
Due to the trade war, choosing domestic alternatives has become a trend. If you are developing products in display control, you might want to learn more about this D9360 core board:
Here are the Mil MYC-YD9360 core board and development board:
https://www.myir.cn/shows/123/63.html
Note:The public account does not support external links. Please copy the link to your browser or click on “Read the original text” at the end to learn more.
Mil Electronics, a high-tech enterprise focusing on the design and R&D of embedded processor modules, is a leading embedded processor module manufacturer. With over 10 years of R&D experience in the embedded processor field, Mil Electronics provides CPU modules based on ARM architecture, FPGA architecture, and charging control systems, among other products and services, offering customized solutions and OEM services for customers in smart medical, smart transportation, smart security, IoT, edge computing, industrial gateways, artificial intelligence, and other industries. The company helps customers accelerate the product launch process through professional and efficient services, having served over 10,000 enterprise customers in the industry.
Leading Embedded Processor Module Manufacturer
Follow the “Mil MYiR” public account
☞ Regularly share product materials and valuable content
☞ Release the latest news from Mil first
Long press the QR code to follow us
For more information, please contact us
Shenzhen Headquarters Phone:
0755-25622735 17324413392
Address: 6th Floor, Building 2, Yunli Intelligent Park, Bantian, Shenzhen