1. Introduction
As of April 20, 2025, the latest version of MySQL is 9.2.0, which I have not specifically studied. New versions always come with some new features, and those interested can check the official website for more information. Different versions can affect the execution of certain statements; for example, there are significant differences between versions 5.7.x and 8.x, and some commands are not backward compatible.
However, this article focuses on the installation tutorial, so I won’t elaborate further.
A few days ago, while setting up the Kafka-eagle monitoring platform, I initially used MySQL 8.0.x installed on my local machine, but I encountered login failures. Upon checking the logs, I found that the MySQL table creation statements were abnormal. I later switched to MySQL 5.7.x, which worked successfully.
I found several tutorial versions online and realized that installing via Docker can be quite cumbersome due to the need to configure image sources, etc. It is much simpler to configure and install using the glibc method.
Reference blog:https://blog.csdn.net/weixin_42402597/article/details/143906773
2. Environment Description & Version Selection
2.1. Environment Description & Version Selection
Running environment: Linux, CentOS 7.x, 2GB RAM, 4 cores
For virtual machine cloning, refer to “Configuring Reusable Virtual Machines, It’s Not Difficult!”
My virtual machine directory description
All custom installation directories: /opt/apps
Service installation directory: /opt/apps/server
Installation package storage directory: /opt/apps/soft
MySQL official download address:<span>https://downloads.mysql.com/archives/community/</span>≠≠≠
Select the system and version number as needed, and the target installation package will be filtered out for you to download.
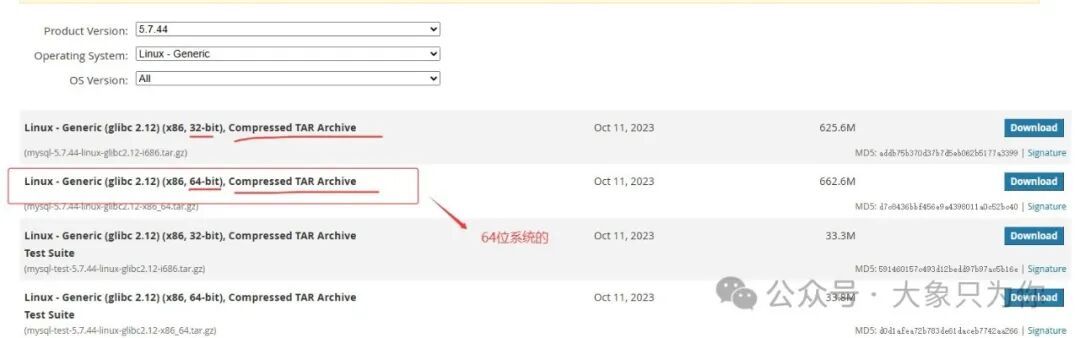
2.2. Upload and Extract Installation Package
Upload the downloaded installation package to the server and extract it.
You can use Xftp as the upload tool, and Xshell as the client connection tool. The installation package can be obtained at the end of this article, and a free personal license is available with just an email registration.
If you need a blank CentOS 7 virtual machine, which has JDK 17 and some common commands pre-configured, you can obtain it at the end of this article.
# Switch to the installation package storage directory
cd /opt/apps/soft

# Extract

tar -zxvf mysql-5.7.44-linux-glibc2.12-x86_64.tar.gz -C /opt/apps/server/

# Switch to the service installation directory
cd /opt/apps/server/

# Rename for easier identification
mv mysql-5.7.44-linux-glibc2.12-x86_64 mysql57
2.3. Create MySQL User Group and User
# Create MySQL user group
groupadd mysql
# Add MySQL user and assign to MySQL user group
useradd -r -g mysql mysql
2.4. Create Data Directory and Assign Permissions
# Enter the installation package directory
cd /opt/apps/server/mysql57

# Create data storage directory
mkdir data

# Assign permissions to the data directory
chown mysql:mysql -R data/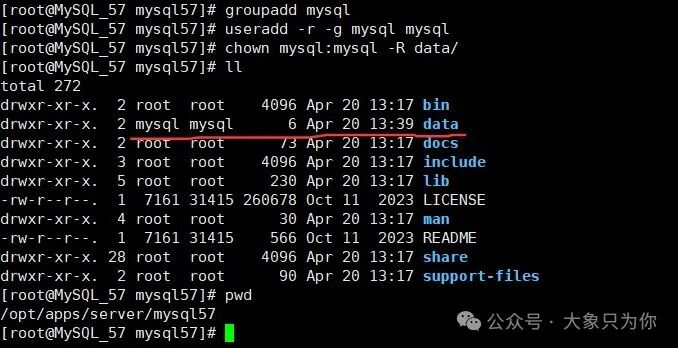
2.5. Configure my.cnf
Open or edit the my.cnf file, add the configuration content, and save and exit.
# Open or edit the my.cnf file
vim /etc/my.cnf
# After adding content, save and exit 【:wq!】
The configuration file content is as follows:
【Note: Modify basedir and datadir to your server’s address】
[mysqld]
# Set port 3306
port=3306
# Set MySQL installation directory★★
basedir=/opt/apps/server/mysql57
# Set the directory for storing MySQL database data
datadir=/opt/apps/server/mysql57/data
# Allow maximum connections
max_connections=200
# Allow the number of connection failures.
max_connect_errors=10
# Default character set for the server is utf8mb4
character-set-server=utf8mb4
# Default storage engine to use when creating new tables
default-storage-engine=INNODB
# Default authentication plugin is "mysql_native_password"
#mysql_native_password
default_authentication_plugin=mysql_native_password
[mysql]
# Set default character set for MySQL client
default-character-set=utf8mb4
[client]
# Set default port for MySQL client when connecting to the server
port=3306
default-character-set=utf8mb4
2.6. Initialize MySQL
Execute the command in the<span>/bin</span> directory, paying attention to the parameters:
–defaults-file: location of my.cnf
–datadir: value from the my.cnf file
–basedir: value from the my.cnf file
–user: user with permissions for the data directory【mysql】
# Switch to the bin directory
cd /opt/apps/server/mysql57/bin/

# MySQL initialization command
./mysqld --defaults-file=/etc/my.cnf --basedir=/opt/apps/server/mysql57 --datadir=/opt/apps/server/mysql57/data --user=mysql --initialize
After successful initialization, an initialization password will be provided.
Make sure to copy it for the next step to change the password.

2.7. Start MySQL Service and Related Operations
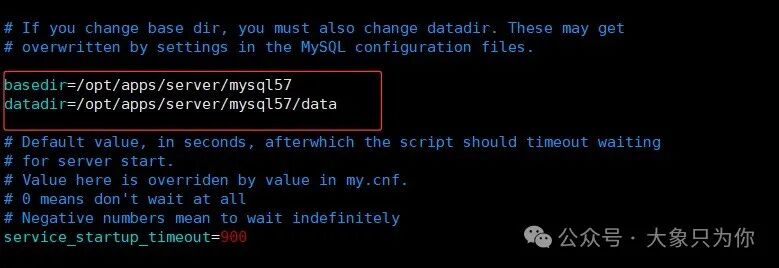
If the installation directory<span>basedir</span> is not the default<span>/usr/local/mysql</span>, then you need to modify the two parameter values of the startup script<span>mysql.server</span>.
These two parameter values are empty by default.
datadir: value from the my.cnf filebasedir: value from the my.cnf file
Start MySQL Service
# Switch to the script support directory
cd ../support-files/

# Start command
./mysql.server start
Login to MySQL
During MySQL initialization, a random password is generated by default, which is hard to remember. Therefore, we need to log into the database and change it to a value we set.
# Switch to the bin directory
cd ../bin

# Login command
./mysql -u root -p

# The interface prompts for a password, enter the initial password to connect successfully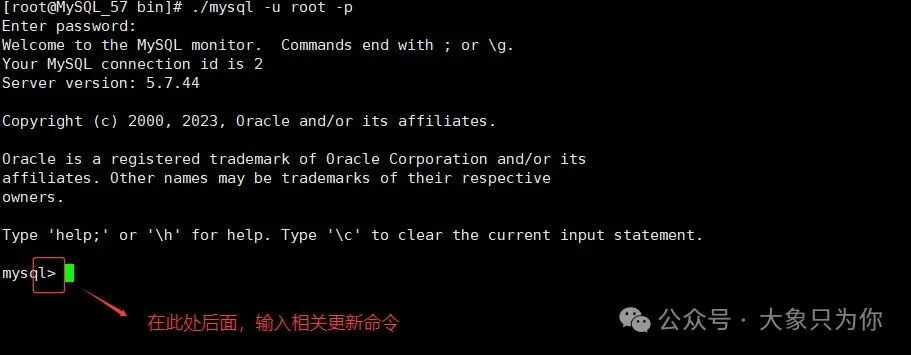
Change Login Password
# Set password
SET PASSWORD = PASSWORD('123456');
# Set user access password to never expire
ALTER USER 'root'@'localhost' PASSWORD EXPIRE NEVER;
# Refresh privileges
FLUSH PRIVILEGES;
Enable Remote Login
MySQL installation does not support remote login by default. You need to modify the<span>mysql</span> database to enable it.
# Access mysql database
use mysql
# Allow root user to access from any host
update user set host ='%' where user ='root';
# Refresh privileges
FLUSH PRIVILEGES;
2.8. Set to Start on Boot
Step 1: Add a symbolic link pointing to MySQL
【Note:<span>/opt/apps/server/mysql57</span> is the MySQL installation directory】
# Add a symbolic link pointing to the service startup script file
ln -s /opt/apps/server/mysql57/support-files/mysql.server /etc/init.d/mysql
# Add a symbolic link pointing to the database service command
ln -s /opt/apps/server/mysql57/bin/mysql /usr/bin/mysql
# Restart the database
service mysql restart
Step 2: Grant Execute Permissions
chmod +x /etc/init.d/mysqlStep 3: Add the Service
chkconfig --add mysqlStep 4: Verify Confirmation
# Display service list
chkconfig --list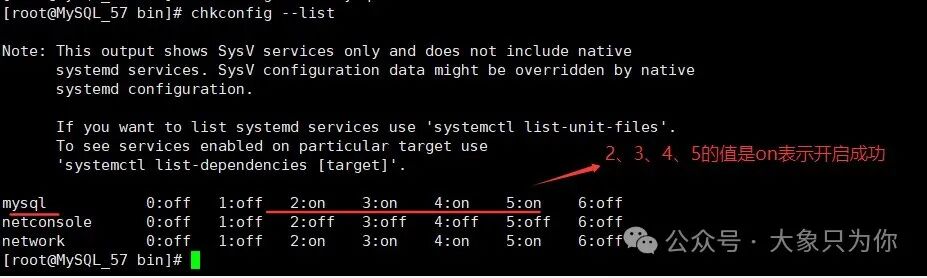
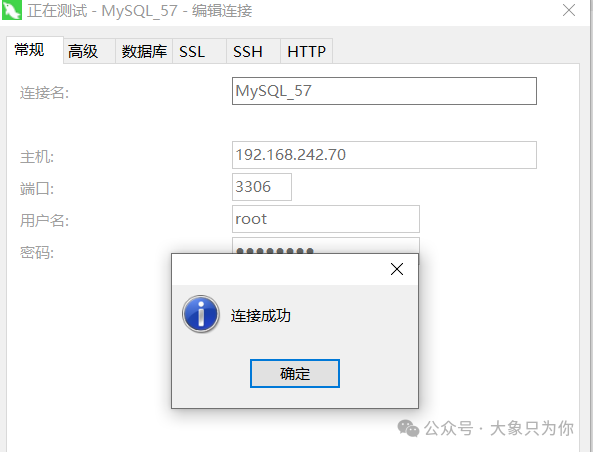
You can also verify by restarting the server and connecting through tools.
3. Follow My Public Account & Obtain Materials
Please follow my public account:The Elephant Only for You, continuously updating technical knowledge……
Related materials:
If you need a blank CentOS 7 virtual machine, please reply: blankOS.
blankOS login account password: root / 123456
If you need the client connection tool Xshell, please reply: Xshell.
If you need the upload tool Xftp, please reply: Xftp.