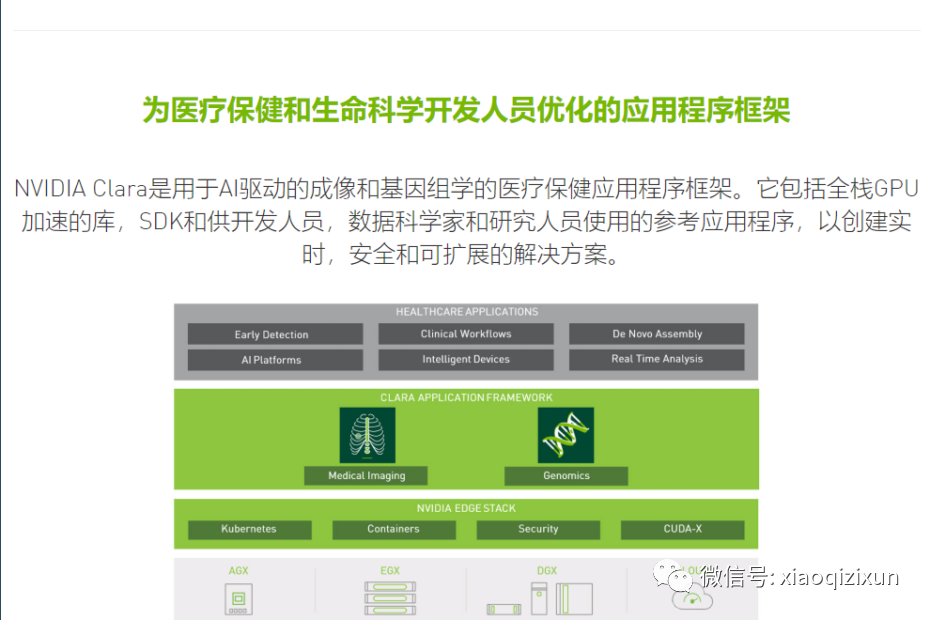
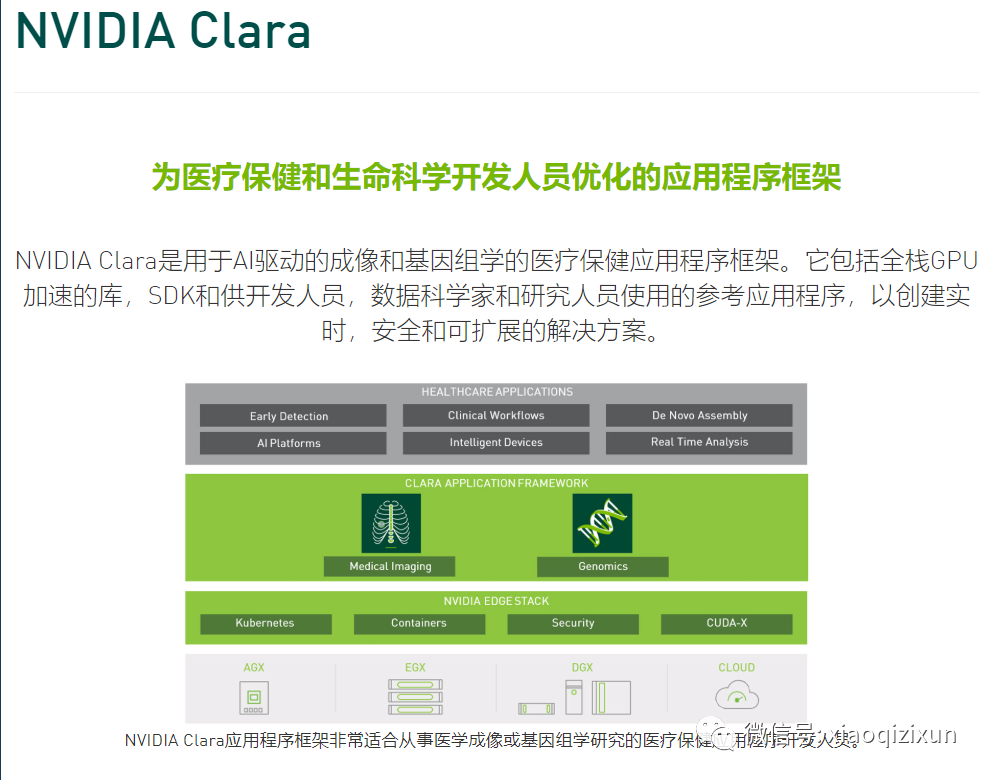
With the rise of deep learning research in medical imaging, more effective and improved methods are being developed to achieve AI-assisted workflows through GPU-supported modes. With the latest NVIDIA Clara application framework, developers have the necessary tools and APIs for AI development and for integrating AI capabilities into medical devices through embedded hardware.
How Does It Work?
The Official Demo Server Set Up by PerkLab
If Anyone Wants to Share Their AI Model for Segmentation
As long as the model is compatible with Nvidia Clara, it should be possible to install the model on the server and make it available to the Slicer community.
Nvidia AI-assisted segmentation is available in [3D Slicer], a popular free open-source medical image visualization and analysis application. The tool is available in the application’s “Segment Editor” module.
The tool has two modes:
Fully Automated Segmentation: No user input required. In the “Automatic Segmentation” section, select the model and click “Start.” The segmentation process may take a few minutes (for large datasets on computers with slower network upload speeds, this process may take about 5-10 minutes).
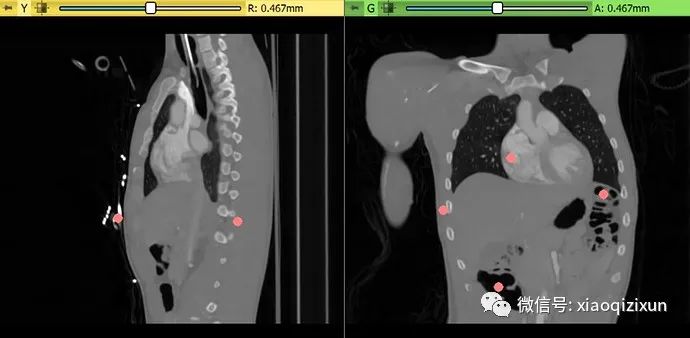
Boundary Point-Based Segmentation: Requires the user to specify input points near the edges of the structure of interest, one on each side. The segmentation usually takes less than a minute.
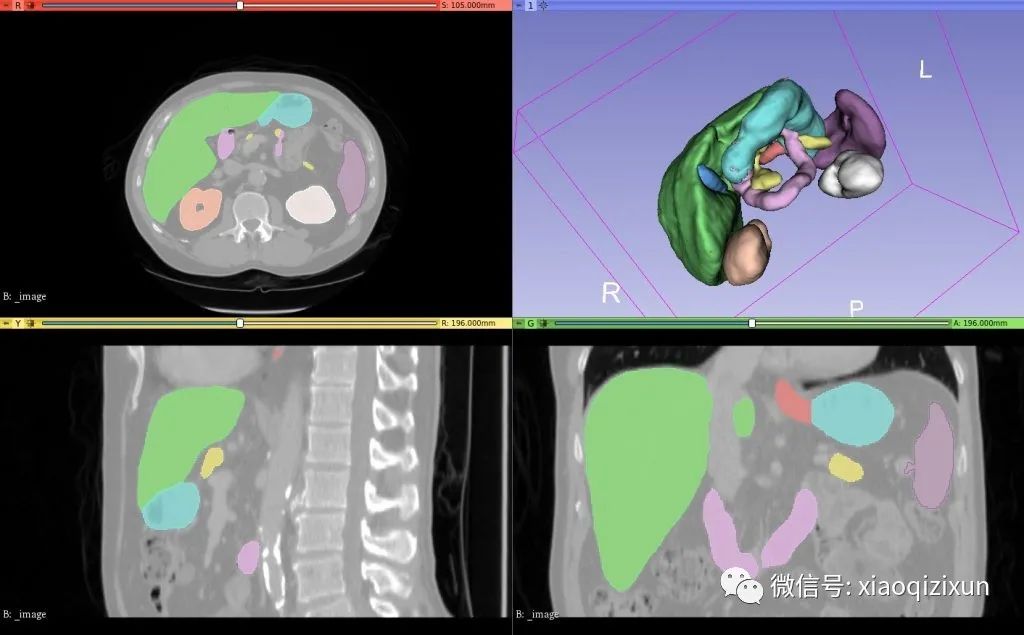
Example results of automated segmentation:
Setup
Download and install the latest 3D Slicer Preview version (4.11.x) from http://download.slicer.org/.
Launch 3D Slicer and then open the Extension Manager.
Install the NvidiaAIAssistedAnnotation extension (in the “Segmentation” category), wait for the installation to complete, and then click “Restart”.
Optional: Set the annotation server settings in the menu: Edit/Application Settings/NVidia. If the server address is empty, the default public server will be used. Availability of the server or quality of the provided models cannot be guaranteed.
To set up your own segmentation server, follow these instructions.
A mid-range desktop computer with a powerful NVidia GPU (for example, an older computer with 8GB of memory and RTX 2070 GPU) is sufficient for running pre-trained models. The server needs to run a Linux operating system.
The computer running 3D Slicer has no special requirements for running AI-assisted segmentation. For large datasets, a fast network upload speed is recommended, as segmentation usually only takes a few seconds, while image data transfer can take several minutes.
Tutorials and Examples
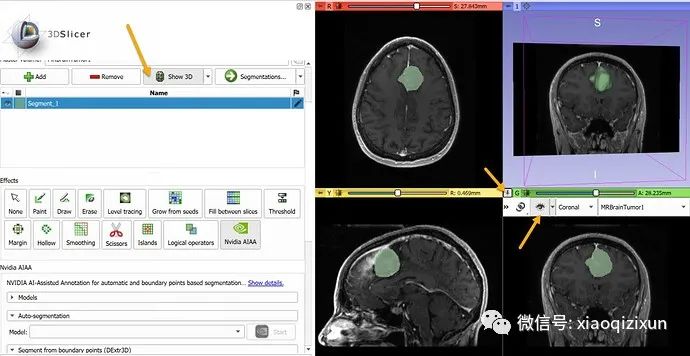
Boundary Point-Based MRI Brain Tumor Segmentation:
Go to the Sample Data module and load the “MRBrainTumor1” dataset.
Go to Segment Editor.
Create a new Segment.
Click the “Nvidia AIAA” tool.
In the “Boundary Point-Based Segmentation” section, select “annotation_mri_brain_tumors_t1ce_tc” (a model trained to segment tumors on contrast-enhanced brain MRI).

-
In about 10 seconds, the automated segmentation result will appear in the slice view. To display the result in 3D, click the “Show 3D” button above the segmentation list. To display the slice images in 3D, click the “pin” icon in the upper left corner of the slice view, then click the “eye” icon.
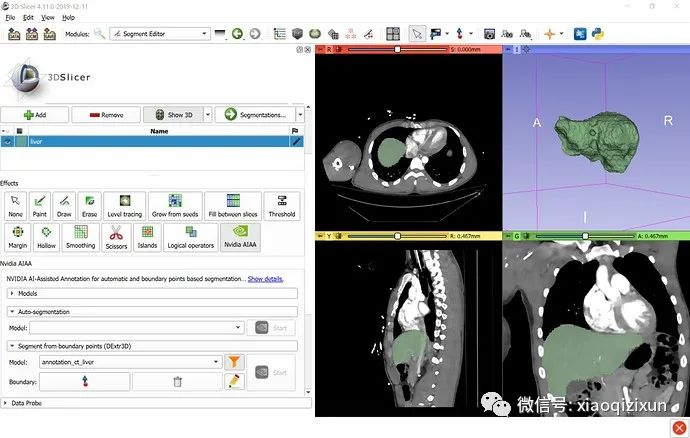
Boundary Point-Based Segmentation of the Liver on CT:
Go to the Sample Data module and load the “CTACardio” dataset.
Go to Segment Editor.
Create a new segmentation.
Double-click the segment name and enter “liver” to specify the segmentation content.
Click the “Nvidia AIAA” effect in the “Boundary Point-Based Segmentation” section.
Optional: Click the “Filter” icon to list only those models containing “liver” in their names.
Select “annotation_ct_liver” (trained to segment the liver in portal venous phase CT images).
-
-
In about 30 seconds, the automated segmentation result will appear in the slice view. To display the result in 3D, click the “Show 3D” button above the Segment Editor list. To adjust previously placed boundary points after segmentation is complete, click the “Edit” icon next to the “Start” button.
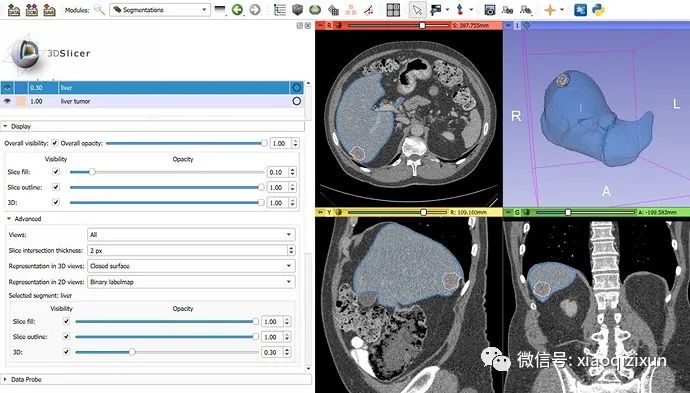
Fully Automated Segmentation of the Liver and Tumor on CT:
Download the Task03_Liver imagesTr liver_102.nii.gz dataset from http://medicaldecathlon.com/ and load it into 3D Slicer.
Go to Segment Editor.
Click the “Nvidia AIAA” effect.
In the “Automatic Segmentation” section, select the “segmentation_ct_liver_and_tumor” model and click “Start”.
The automated segmentation result should be displayed within 3-5 minutes.
Advanced
For local setups or computers with fast upload speeds, disable compression in “Application Settings” / “NVidia” (as the time spent compressing may exceed the time saved by transferring less data).
To filter models based on labels on the tags, set the label text in the “Models” section of the Nvidia AIAA effect user interface.
For Developers, This Plugin Can Be Downloaded and Installed Directly from GitHub:
git clone https://github.com/NVIDIA/ai-assisted-annotation-client.git
Open 3D Slicer: Go to Edit -> Application Settings -> Modules -> Other Module Paths
-
Add a new module path: <FULL_PATH> / slicer-plugin / NvidiaAIAA
-
Restart