This article is a beginner-friendly, step-by-step tutorial on .NET nanoFramework, providing basic introductory programs and introducing the fundamental knowledge of developing with .NET nanoFramework on the ESP32-S2-Pico.
1. Background
1.1 .NET IoT and .NET nanoFramework
.NET supports the development of Internet of Things (IoT) applications, offering .NET IoT libraries that allow us to run applications on IoT devices running Windows and Linux, utilizing GPIO, SPI, I2C, PWM, and serial ports to interface with hundreds of sensors, displays, and input devices. However, this does not apply to constrained embedded devices such as ESP32, M5Stack, STM32, etc. For these constrained embedded devices, .NET nanoFramework provides a great solution suitable for these microcontrollers, allowing managed code to be written for limited embedded devices. Developers can quickly write applications using familiar IDE Visual Studio and .NET (C#) knowledge without worrying about the low-level hardware complexities of the microcontroller. Moreover, using Visual Studio allows for writing, deploying, and debugging code directly on real hardware.
1.2 Microcontrollers
The benefits of using microcontrollers are evident, especially with prices around 20 to 50 yuan, making them very affordable for many applications, particularly those requiring mass production. Additionally, while being compact, microcontrollers offer strong programmability and extensibility, allowing their functions to be defined through programming. This makes microcontrollers applicable in many different fields and very convenient to modify when functionality needs to change.
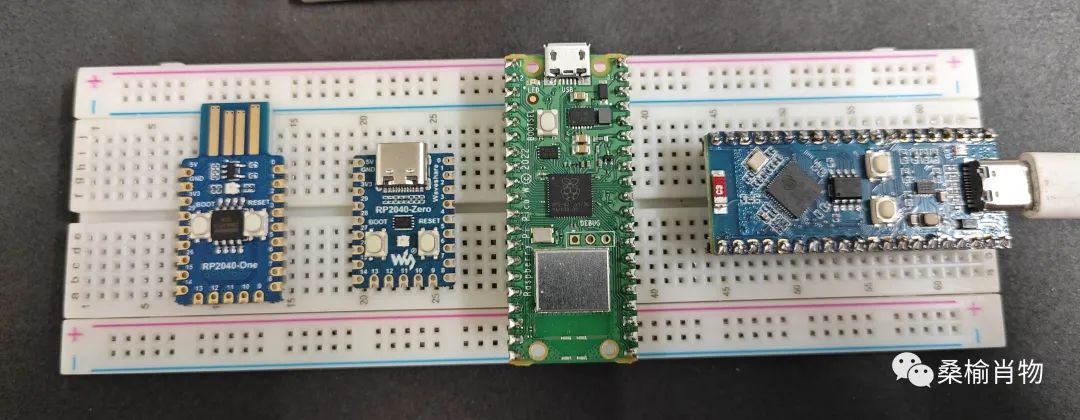
1.3 Introduction to the Development Board
Support for the Raspberry Pi Pico series in .NET nanoFramework is planned, although there have been some unofficial attempts by enthusiasts, but the project seems to have stopped updating, so we will wait for official support. However, .NET nanoFramework does support ESP32, so I recently bought an ESP32 board to try some experiments.
The ESP32-S2-Pico is compact, has a rich set of peripheral interfaces, integrates a low-power Wi-Fi system-on-chip (SoC) and large memory, and supports the development board ecosystem of Raspberry Pi Pico expansion boards. It features hardware encryption accelerators, RNG, HMAC, and digital signature modules, meeting IoT security requirements. Additionally, it has various low-power operating modes to meet the power consumption needs in applications such as IoT, mobile devices, wearable electronics, and smart homes.
2. Setting Up the .NET nanoFramework Development Environment
To set up the .NET nanoFramework development environment, you first need to install Visual Studio 2022 (also supports VS 2019), and then install the extensions and tools. Additionally, the SDK must have .NET 6.0 runtime (or .NET 6.0 SDK) installed.
2.1 Installing Extensions
Open Visual Studio, open/create any project or directly select “Continue without code” to enter the main interface. Open the “Manage Extensions” dialog by selecting the menu “Extensions” > “Manage Extensions”. Select the “Online” category on the left, then enter “nano” in the search box.
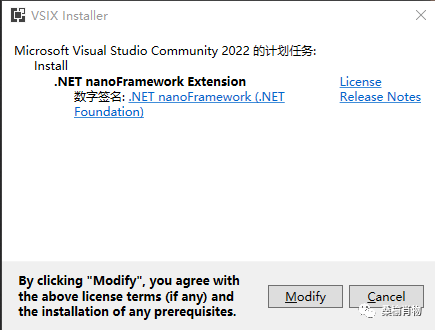
Select “.NET nanoFramework Extension” to download and install, the system will prompt you to restart Visual Studio to complete the installation of the extension, at this point, just close Visual Studio to continue the operation.
2.2 Installing the Tool Library
Next, we need to install the .NET nanoFramework firmware tool library, which will be used later. This is a .NET Core Tool that can flash firmware (nanoBooter and nanoCLR) to .NET nanoFramework targets, deploy applications (all assemblies required to run .NET applications), and restore previously saved deployment images. For more information about this toolbox, you can visit the official repository: https://github.com/nanoframework/nanoFirmwareFlasher/blob/main/README.zh-cn.md
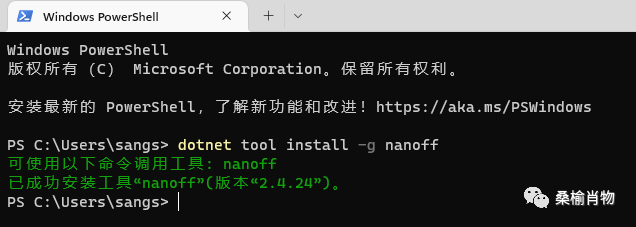
Open the console and use the following .NET Core CLI command to install the .NET nanoFramework Firmware flash tool:
dotnet tool install -g nanoffAfter successful installation, it will display the invocation instructions and the version of the installed tool.
3. Installing Firmware
In this section, we need to flash the .NET nanoFramework firmware onto the circuit board.
3.1 Device Connection
First, we need to enter the download mode of the ESP32. Different boards have different methods; here we can refer to the instruction manual of the purchased product. For the ESP32-S2-Pico to download the update, you need to press and hold the BOOT button, then press the RESET button and release or disconnect USB while holding the BOOT button to power on. At this point, the ESP32-S2’s UART0 (GPIO43, GPIO44) and USB can burn the program.
Here I connect the BOOT button while connecting to the USB port of the computer; at this point, we can see the newly inserted USB serial device in the device manager.
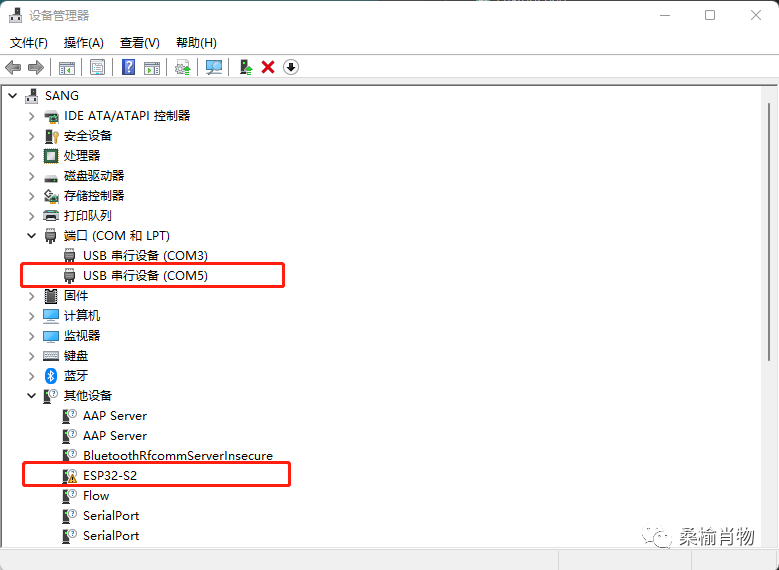
If there are multiple existing COM devices on the computer, remember to note the changes after connecting the device; you need to remember the COM port number, which will be used later.
Of course, you can also use the previously installed nanoff to list available serial ports with the following command:
nanoff --listports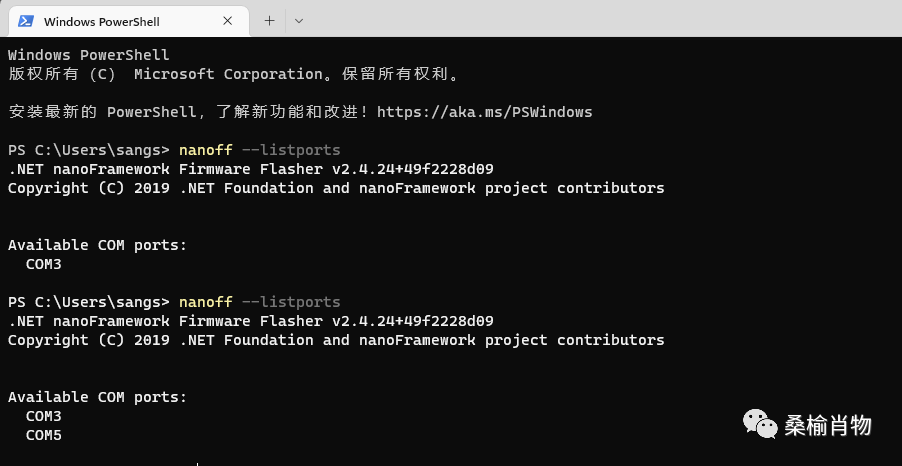
Here we can see that the newly connected ESP32-S2-Pico’s serial port is COM5.
3.2 Flashing Firmware
When flashing firmware, we need to provide the correct target name to execute the firmware flash; otherwise, the board may not work. In terms of platforms, .NET nanoFramework supports esp32, stm32, cc13x2, gg11, and you need to specify the target when flashing firmware. Although different boards use ESP32, there may be some differences in their designs. The construction list for ESP32 boards can be viewed here: https://github.com/nanoframework/nf-interpreter#esp32-modules-and-boards.
For this board, if we use the official introductory tutorial, you will encounter the following error:
For ESP32-S2 series nanoff isn't able to make an educated guess on the best target to use. Please provide a valid target name using this option '--target MY_ESP32_S2_TARGET' instead of '--platform esp32'. Error E9000: Invalid or missing arguments.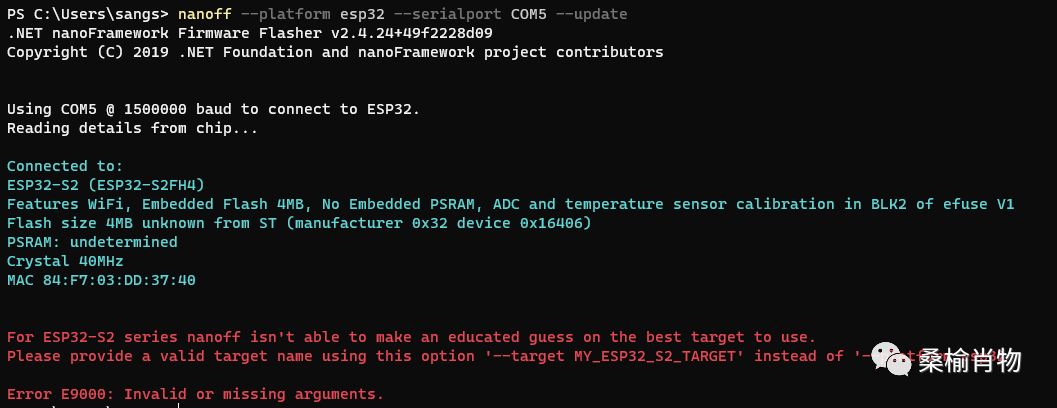
It’s not surprising to get an error, as this board is not on the official list, and it is normal to not be able to guess. Although it is designed to belong to the Pico series, using ESP32_PICO is invalid, and the device cannot start after flashing. We can directly use the following command to flash the same ESP32-S2 series FEATHER_S2, updating the firmware of the ESP32 board connected to COM5 to the latest available version:
nanoff --target FEATHER_S2 --serialport COM5 --updateWait about 30 seconds for the flashing to succeed.
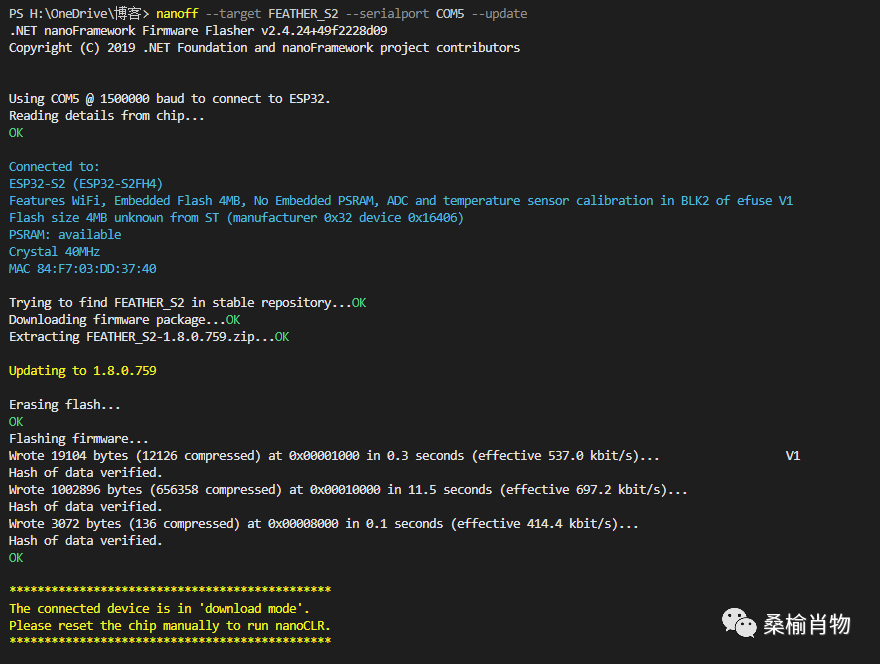
By the way, before flashing, the basic information of the board is printed. If you want to directly view board information, you can use the following command:
nanoff --platform esp32 --serialport COM5 --devicedetails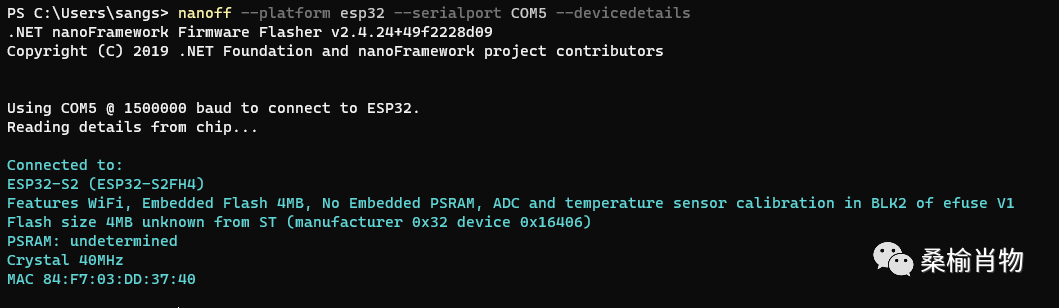
3.3 Device Firmware Check
After the firmware flashing is complete, the device is still in firmware refresh status. We need to press the RESET button to restore the device to normal status or simply unplug and replug the USB. At this point, if the computer does not respond, check if the flashing failed.
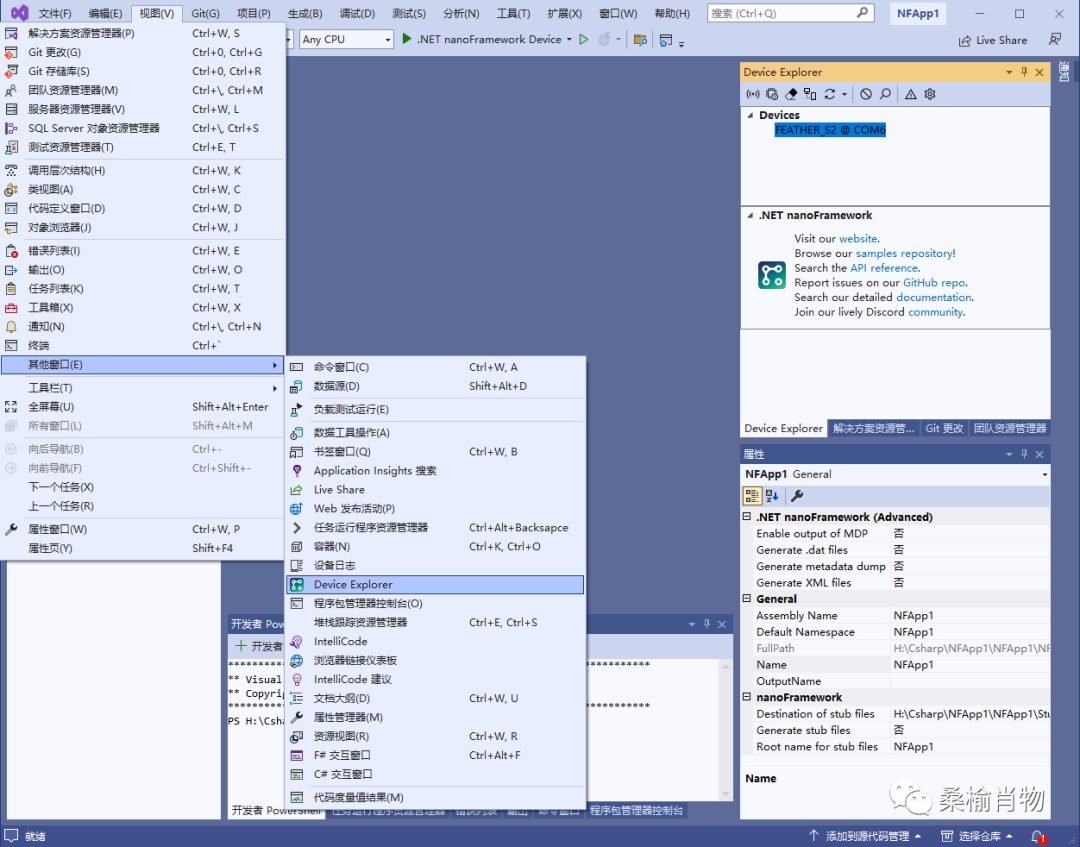
After a successful refresh, we can see the device in the device manager of Visual Studio. The Device Explorer can be opened by going to “View” > “Other Windows” > “Device Explore”.
3.4 Flashing a Specific Version
Sometimes the latest firmware may have compatibility or other issues, and we need to install another stable version. Using the following command, we can list all stable versions:
nanoff --listboards --platform esp32If you want to flash a specific version like FEATHER_S2 1.8.0.741, you can use the following command:
nanoff --target FEATHER_S2 --fwversion 1.8.0.741 --serialport COM5 --update3.5 Assembly Version Alignment
The reason for introducing the installation of specific versions is that the NuGet packages referenced between different versions need to be consistent with the flashed fixed. If they are inconsistent, the following error will occur:
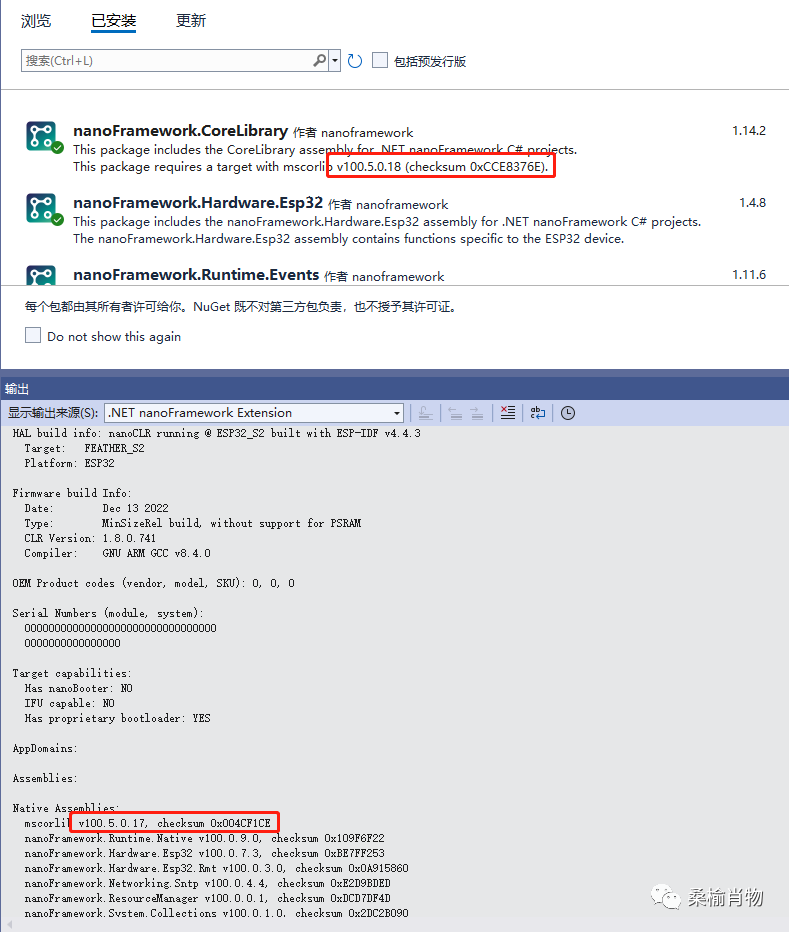
Couldn't find a valid assembly required by mscorlib...At this point, we need to adjust the version of the installed NuGet packages to match the requirements of the flashed fixed. In the device manager, click on “Device Capabilities” to view the assembly version and verification information:
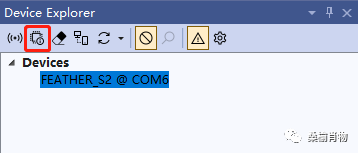
As shown in the figure, a red inconsistent package information has been marked. According to the introduction of the component package, it can be changed to be consistent.
4. Writing Programs
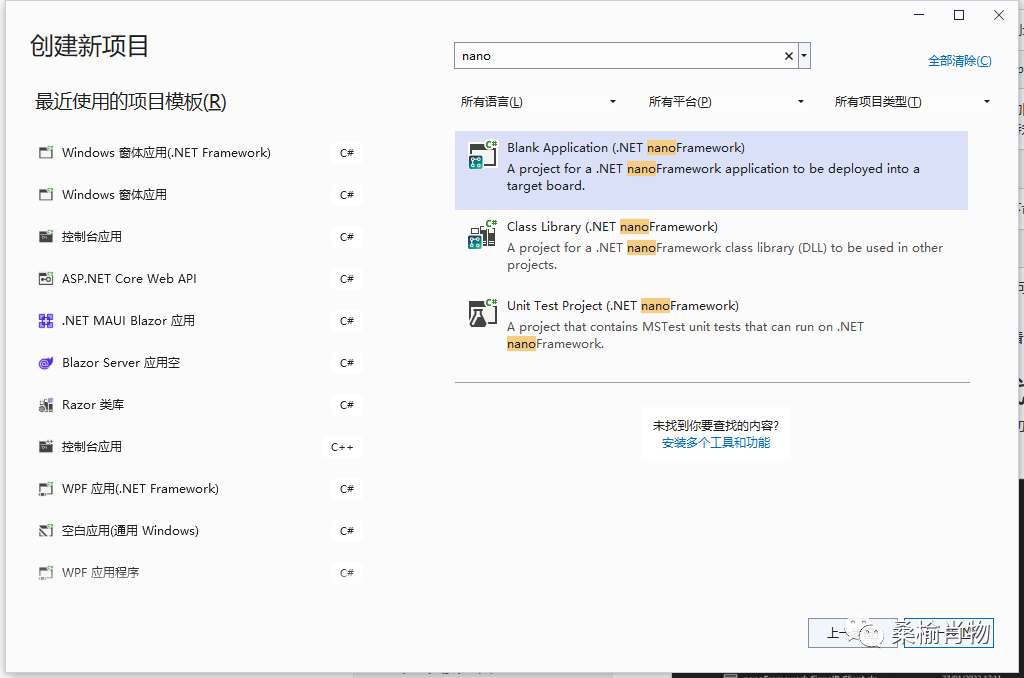
Now that we have made the necessary preparations, we can start the enjoyable coding time. One point to note is: when creating a .NET nanoFramework project, do not apply any dropdown filtering restrictions, you can search for “nano” to see the project templates. If an error occurs when creating the project for the first time, it can be ignored, just close the window and open the generated sln in the folder.
4.1 Writing a “Hello World” Application
When creating a .NET nanoFramework project for the first time, the template will be at the top since it is new; directly select the “Blank Application” template to create the project.
This template is a simple Hello World application. If an error occurs in the project, you may need to manually install the missing NuGet packages by searching for “nano” in the package manager and installing the core package “nanoFramework.CoreLibrary”.

After installing the missing NuGet packages, you can click run, and remember to select the device you want to run in “Device Explore”. The following is the information after successful execution:
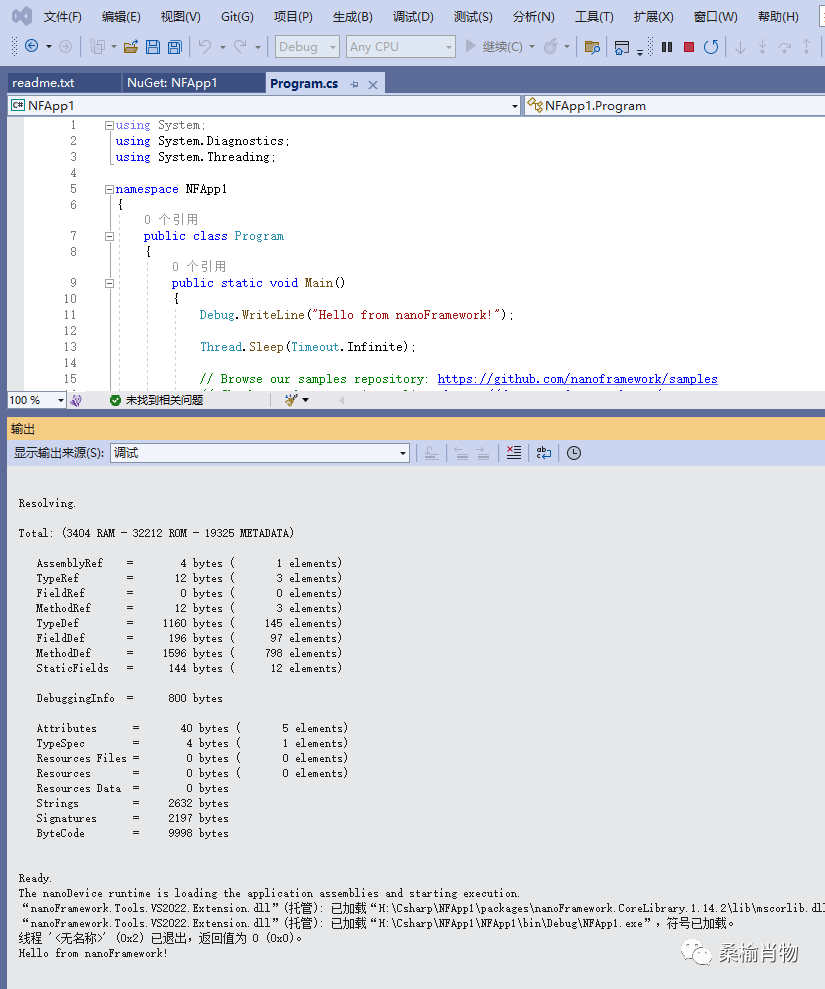
The current code only prints Hello World in the debug information, but this seems to have nothing to do with the board. Next, we will use its serial port to output Hello World information.
4.2 Serial Port Output “Hello World”
Using the serial port, we only need to slightly modify the code. Here we need to install the nanoFramework.System.IO.Ports package via NuGet:
static SerialPort _serialDevice;
public static void Main(){
Debug.WriteLine("Hello from nanoFramework!");
// Get available serial ports
var ports = SerialPort.GetPortNames();
Debug.WriteLine("Available ports: ");
foreach (string port in ports) {
Debug.WriteLine($" {port}");
}
_serialDevice = new SerialPort("COM1");
// Set parameters
_serialDevice.BaudRate = 9600;
_serialDevice.Parity = Parity.None;
_serialDevice.StopBits = StopBits.One;
_serialDevice.Handshake = Handshake.None;
_serialDevice.DataBits = 8;
// Set buffer size
_serialDevice.ReadBufferSize = 2048;
// Open the serial port with the above settings
_serialDevice.Open();
_serialDevice.WriteTimeout = 500;
for (; ; ) {
_serialDevice.WriteLine(DateTime.UtcNow + " hello from nanoFramework!");
Thread.Sleep(2000);
}
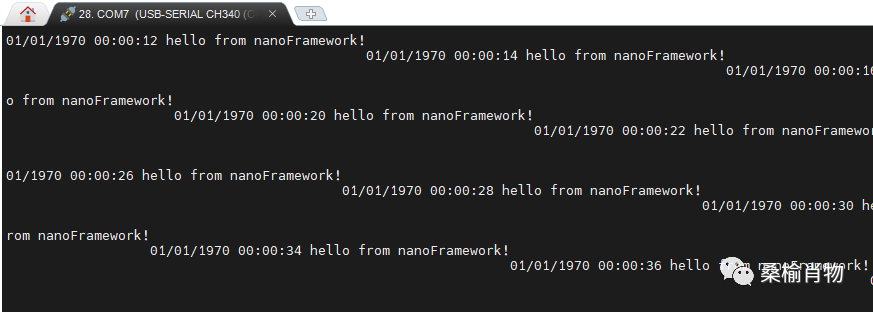
}Compile and deploy the above code to the ESP32 board, and click the RESET button to start the program. At this point, we can connect to the serial port to see the printed Hello World information.
4.3 Serial Port Connection
This section mainly introduces how to connect the serial port of the ESP32 device. In the previous section, we printed the serial port situation before outputting information. Based on the printed information, we can see that SerialPort.GetPortNames() shows two available serial ports: COM1 and COM2. Here we use COM1, and the hardware interface shows that UART0’s TX and RX are GP43 and GP44, respectively.

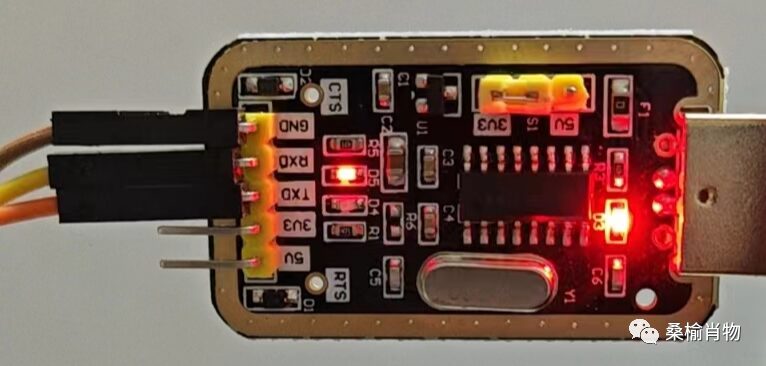
Here, we use a USB to TTL device for wiring, connecting TX to GP44, RX to GP43, and GND to any GND pin of the ESP32, such as physical pin 3. Remember to set the voltage of the USB to TTL shorting cap to 3V3.
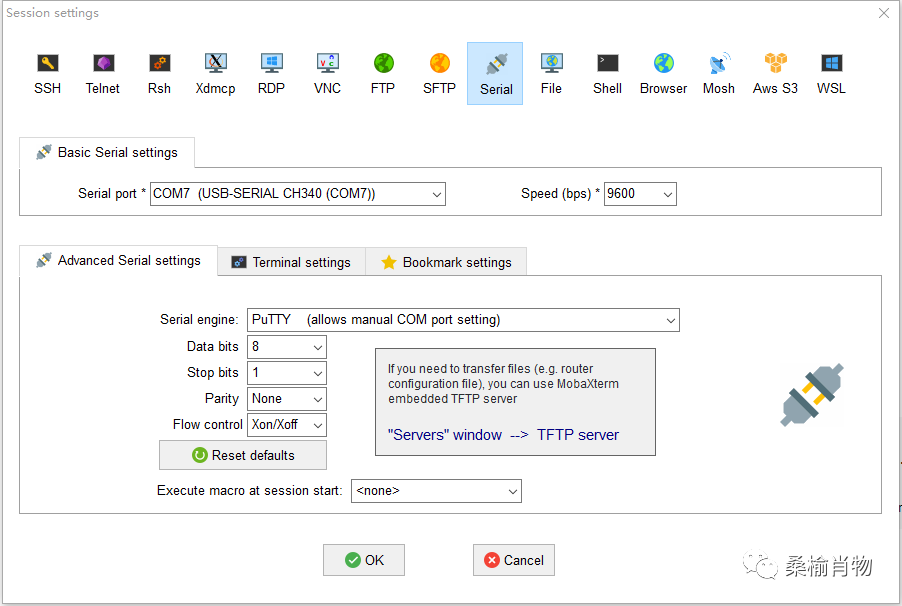
After connecting these three wires to the serial port, you can use serial port tools (such as MobaXterm) to open the serial port and view the information printed by the ESP32.
Note: Serial port baud rate is 9600, and others are default. You can refer to the following figure:
5. Conclusion
Overall, the development experience of .NET nanoFramework is very friendly to those familiar with .NET. It provides a familiar development environment that allows you to develop using Visual Studio and C#. In addition, .NET nanoFramework supports the same language features and APIs as .NET Framework, so you can easily migrate code to .NET nanoFramework.
In the future, I will continue to study .NET nanoFramework-related topics, and interested readers can follow along. Thank you!