If you don’t want to miss my updates, remember to go to the top right corner – view the official account – set it as a starred item, and take down the star to send it to me.


The well-known development board brand BeagleBone has launched their AI development board BeagleBone AI64, which is said to have very powerful computing power, but it can be difficult to use. Therefore, the second session of the AI Edge Computing Training Camp will teach you step by step how to use the BeagleBone AI64 –
34:42-38:39: Performance Logs
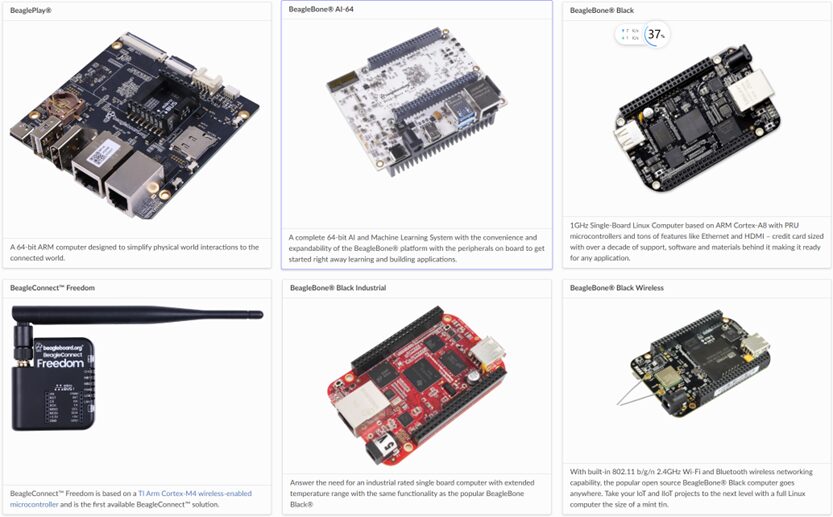
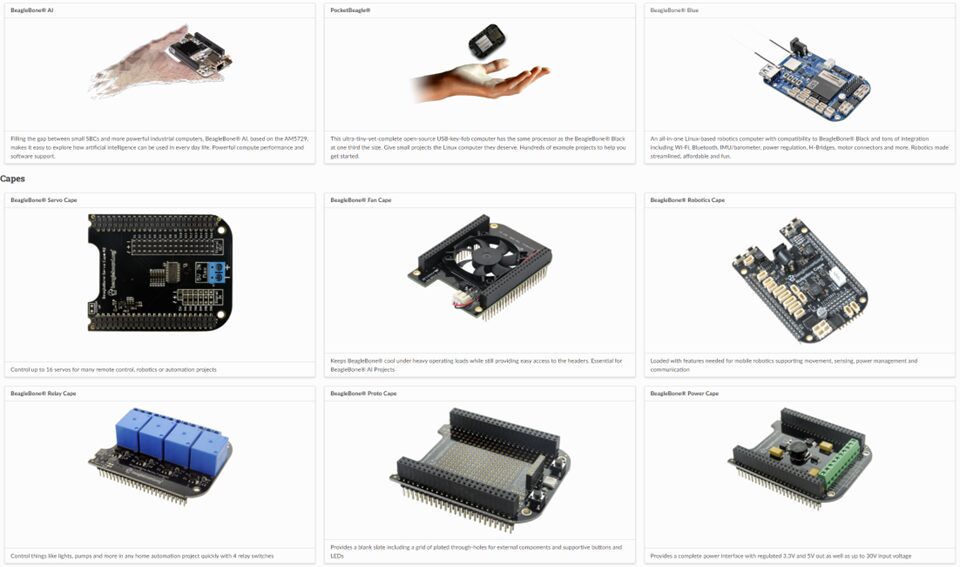
Those who play with open-source hardware should be familiar with BeagleBone. It is similar to Raspberry Pi, as both are non-profit open-source hardware aimed at makers, educators, and professionals, providing computing solutions, allowing quick prototype design, and creating real-world embedded systems without barriers. Unlike Raspberry Pi, the BeagleBone family is quite extensive:
The BeagleBone AI64 is the latest development board designed for developing artificial intelligence (AI) and machine learning solutions, featuring a TI Jacinto™ TDA4VM processor with a dual-core Arm® Cortex®-72.

Next, let’s take a step-by-step look at how to use it.
Step 1: Set the Boot Mode. The AI64 supports two Boot Modes:
1. Boot from the onboard 16GB eMMC by default, the development board comes with an image pre-burned, but it may not be the latest version.
2. Boot from a MicroSD card. Users can download the latest image, burn it onto a MicroSD card, and then switch the boot mode to boot from the MicroSD card. The method to switch is to hold down the BOOT button, then press and release the PWR button to switch the default BOOT mode.
This time we will use the MicroSD card to boot, but you need to download the latest image from the official website at: https://www.beagleboard.org/distros.
Then, use the officially recommended balenaEtcher tool to burn the image onto the SD card; this tool is very popular and easy to use.
Step 2: USB Power Supply, Start the Board:
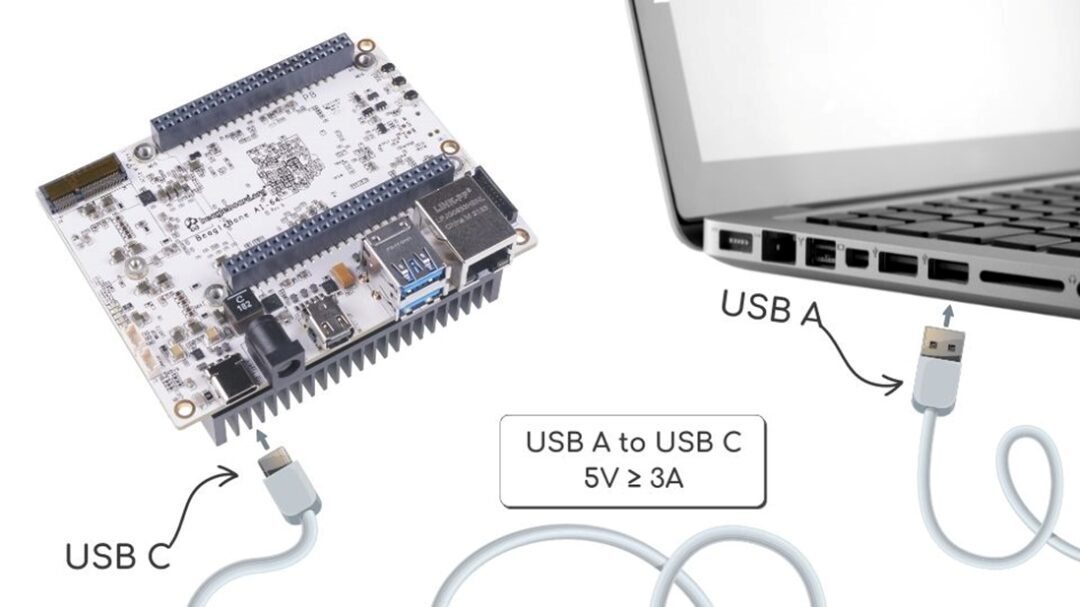
Note that if the USB-C port on the laptop can output 5V-3A power, you can use this port to achieve both power supply and communication functions. If the power supply is not sufficient, it may lead to power failure of the development board during some AI applications with high power consumption. In this case, it is recommended to configure the serial port, network port, and WiFi interfaces for communication, and use a dedicated 5V-3A power supply for power.
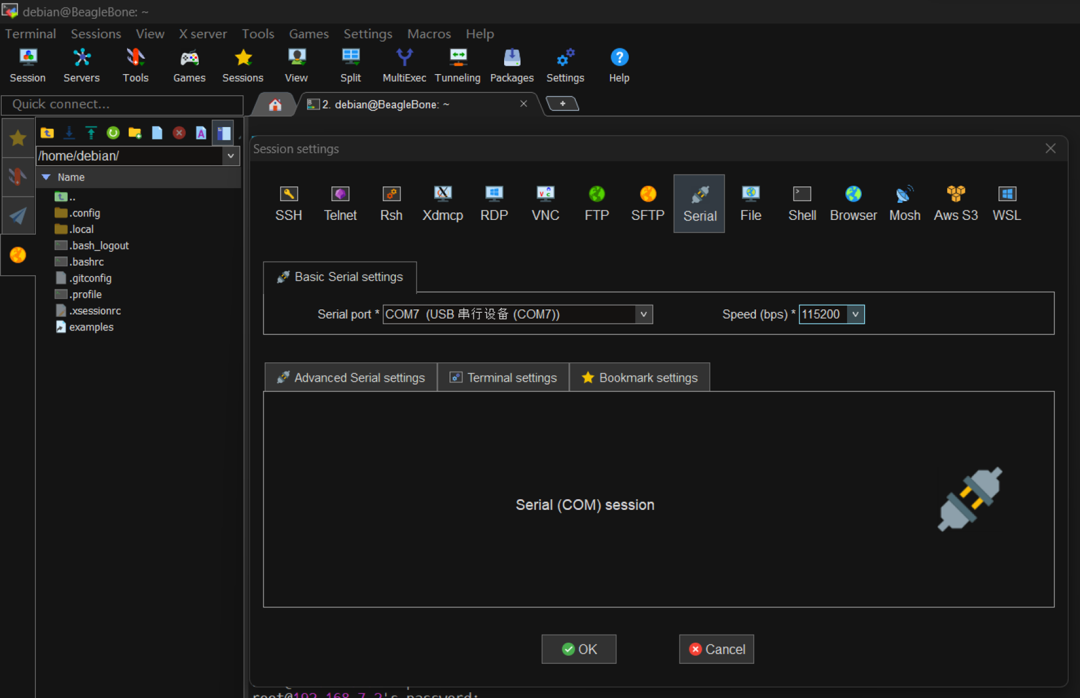
Step 3: Serial Login, Network Connection
When connecting the USB (Type-C interface) to the PC host, a virtual USB serial port and two network ports will be created.
On the Windows PC side, you can use tools like MobaXterm to create a Serial Session to log into the development board.
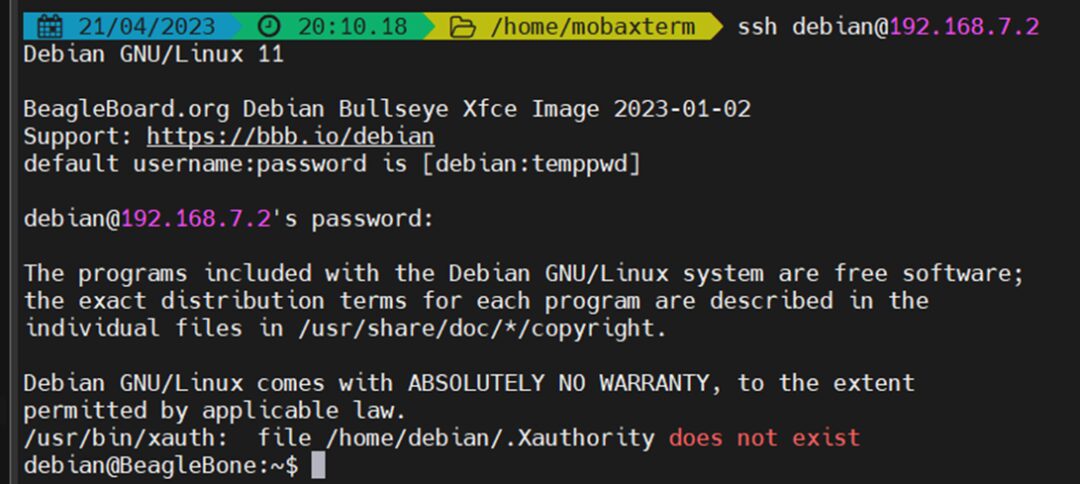
Step 4: SSH Login
Default username and password: 【debian:temppwd】 to log in, then run cat /etc/dogtag to check the Image version.
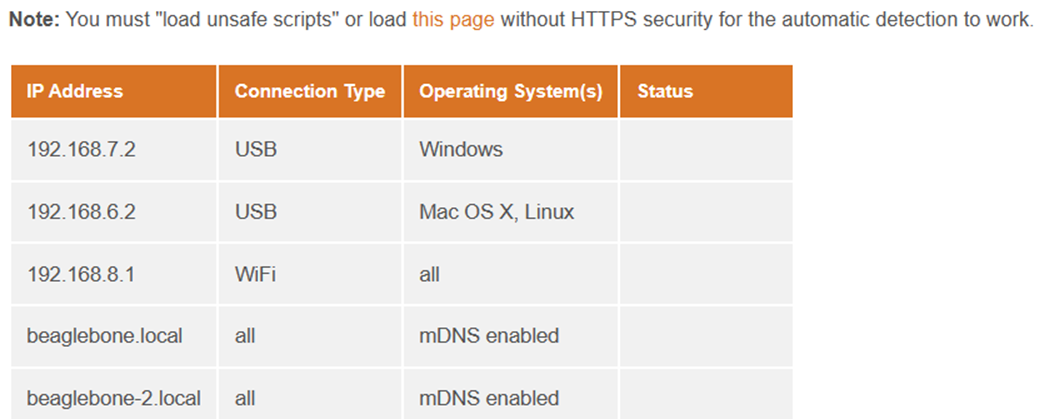
Step 5: Use HTTP to Browse the Development Board

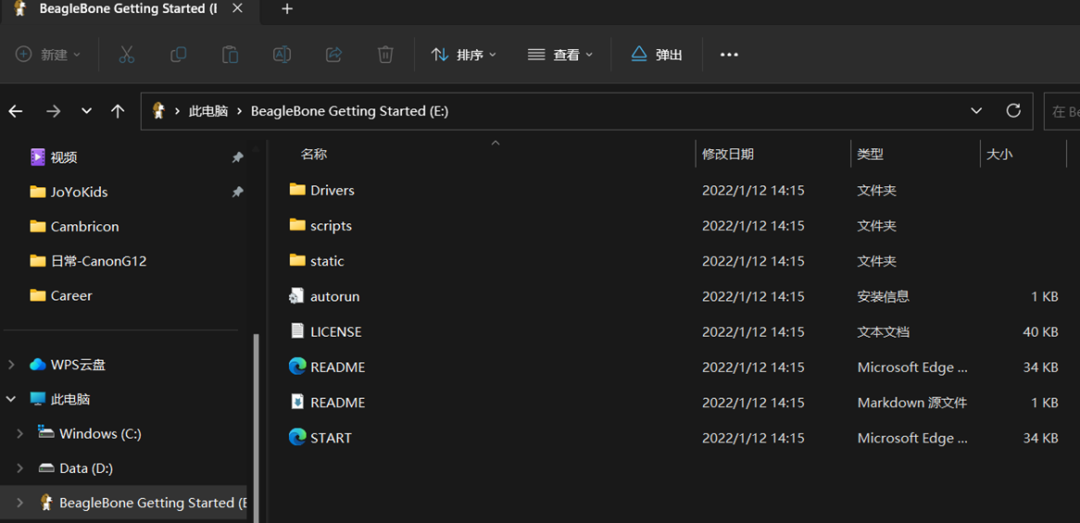
Step 6: Access in Windows via USB Storage
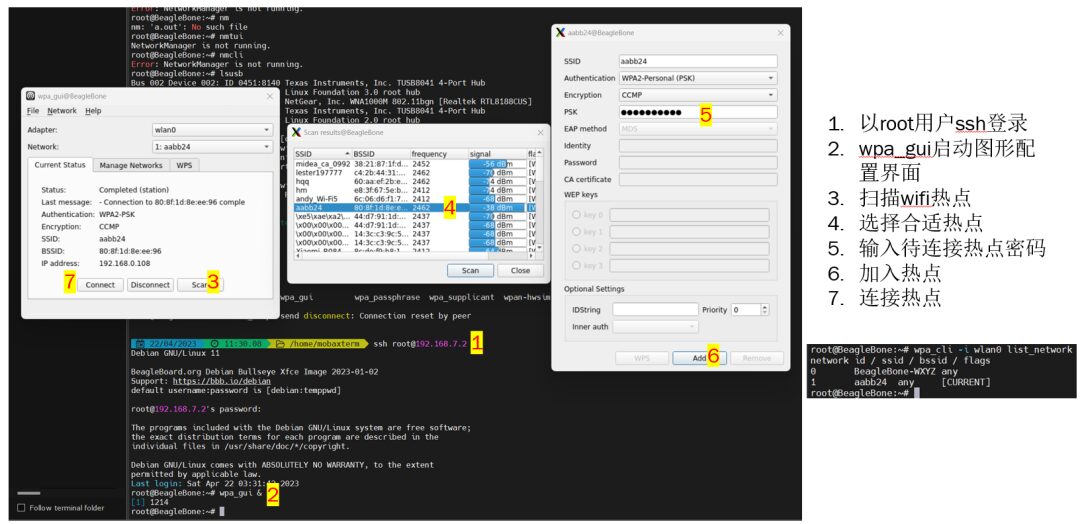
Step 7: Connect to WiFi
Log into the development board as root user via MobaXterm, using the wp_gui graphical tool to scan for WiFi hotspots and set up the connection.
Once the above settings are complete, you can start the demo presentation; I won’t introduce them one by one here, you can check them out in the video.

Project Sharing | Electric Competition Series | Artificial Intelligence | Postgraduate Entrance Examination
Essential Knowledge Points | Graduation Design | Switch Power Supply | Job Hunting
We are Nimo, the founder of Darwin, who only talks about technology and not flirting. DarwinDarwin Online Education Platform aims to serve professionals in the electronics industry, providing skill training videos covering popular topics in various subfields, such as embedded systems, FPGA, artificial intelligence, etc. It tailors layered learning content for different groups, such as common knowledge points, disassembly assessments, electric competitions/smart cars/postgraduate entrance examinations, etc. Welcome to follow.