
Click the blue text to follow us
Exploring the Picamera Library: How to Easily Control the Raspberry Pi Camera with Python!
Friends who play with Raspberry Pi all know that this mini computer paired with a camera is simply magical. But how to use the camera? Don’t worry, today we will clarify the Picamera library, allowing you to easily control the Raspberry Pi camera with Python, taking photos and recording videos with ease.
1.
Installation Preparation
Before we start coding, we need to prepare everything. Open the terminal and type this command:
sudo apt-get update
sudo apt-get install python3-picamera
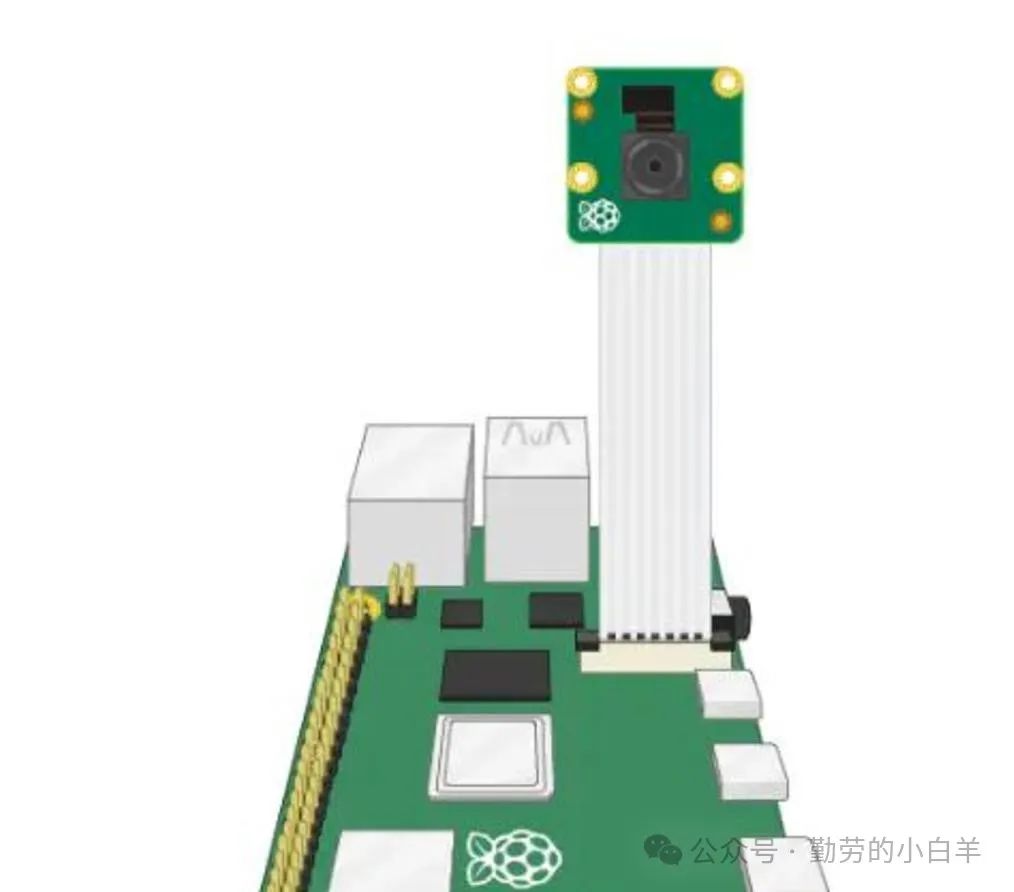
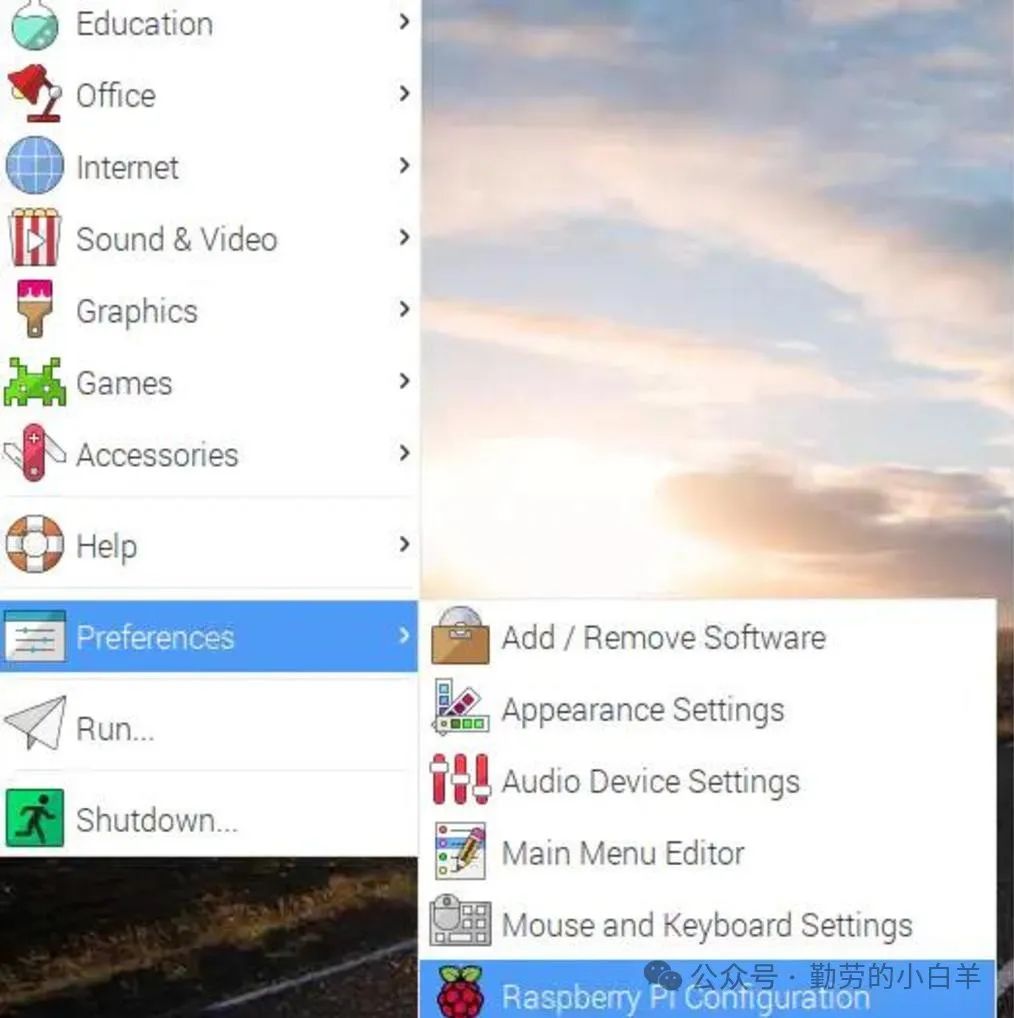
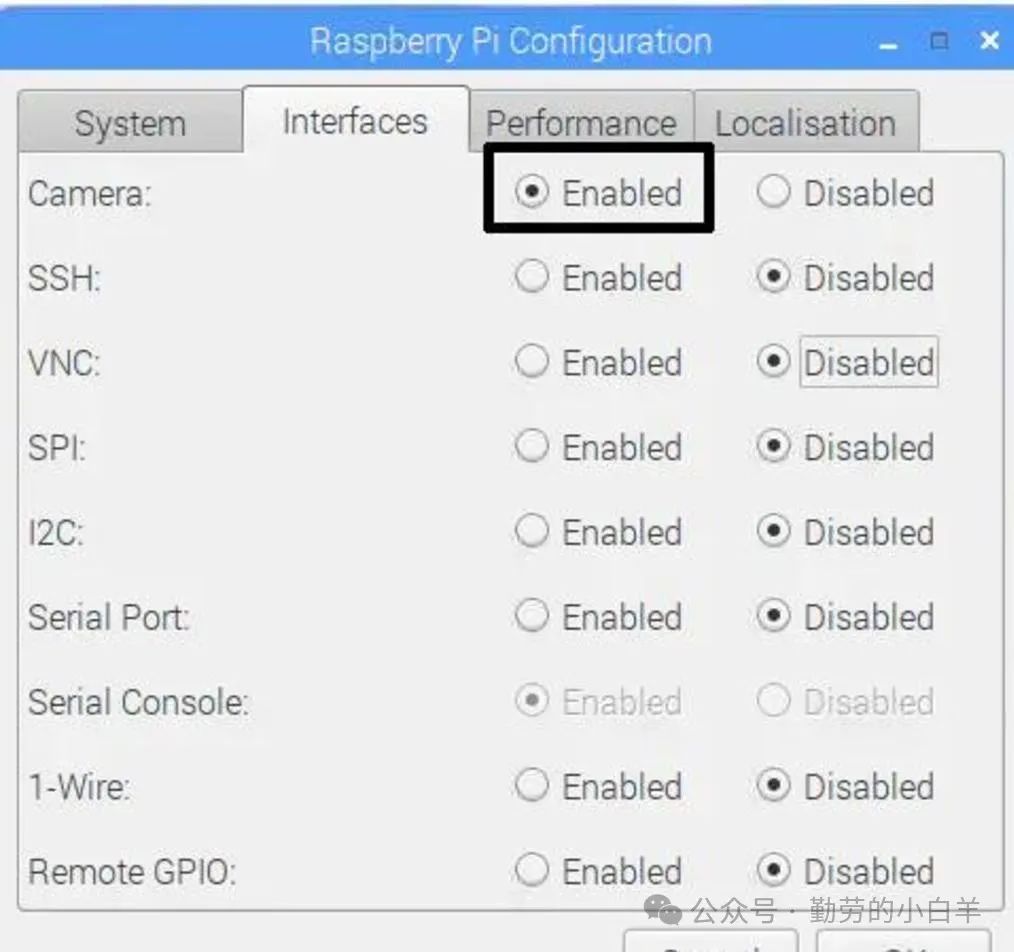
After installing the library, remember to check if the camera is enabled. In the Raspberry Pi settings, find Interface Options and turn on the Camera.
2.
Take a Photo
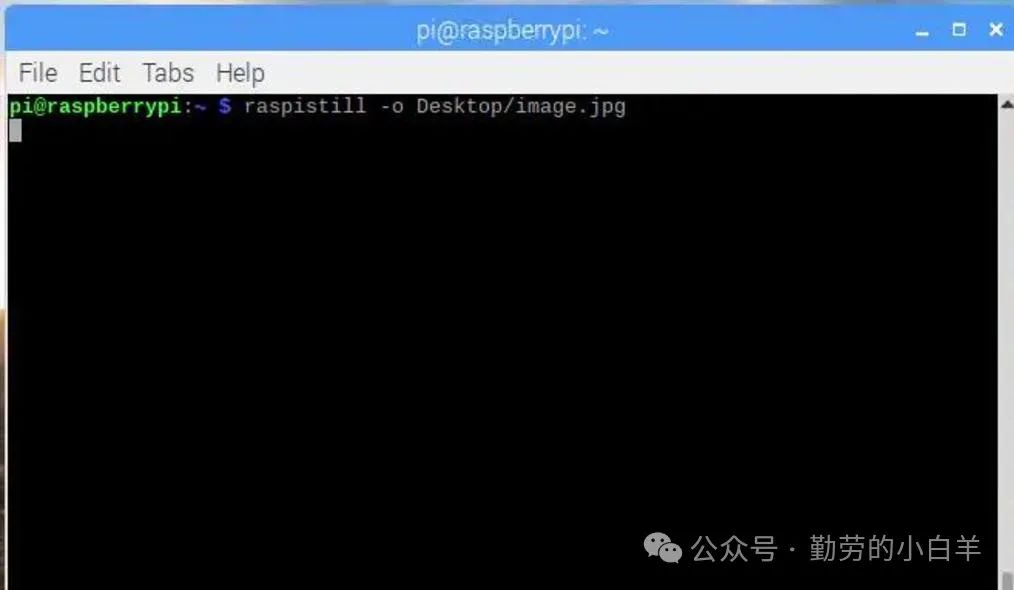
Now, let’s do the simplest thing, take a photo:
from picamera import PiCamera
from time import sleep
camera = PiCamera()
camera.start_preview()
sleep(2)  # Give the camera some warm-up time
camera.capture('selfie.jpg')
camera.stop_preview()
Tip: The warm-up time is not just for show! The camera needs time to adjust the light, otherwise the photo may be blurry.
3.
Camera Parameter Adjustments
Is the camera too bright or too dark? Need to flip the direction? None of these are issues:
camera = PiCamera()
camera.brightness = 70  # Brightness adjustment (0-100)
camera.rotation = 180   # Rotation angle
camera.resolution = (1920, 1080)  # Resolution setting
If the photos are not clear enough, you can also adjust the ISO and shutter speed:
camera.iso = 400
camera.shutter_speed = 6000  # Unit is microseconds
4.
Recording Video

Recording videos is also a piece of cake:
camera.start_recording('my_video.h264')
sleep(5)  # Record for 5 seconds
camera.stop_recording()
Want to add some effects? Add a filter to the video:
camera.image_effect = 'negative'  # Negative effect
# You can also try: washedout, sketch, posterise
5.
Advanced Features: Continuous Shooting
Let’s do a continuous shooting function, such as time-lapse photography:
for i in range(5):
    camera.capture(f'image{i}.jpg')
    sleep(1)  # Take a picture every second
Tip: Remember to use
<span>camera.close()</span>to release the camera after shooting, otherwise other programs may not be able to use it.
6.
Real-time Image Processing
Want to process the video stream in real-time? You can use it with OpenCV:
import numpy as np
from picamera.array import PiRGBArray
with PiCamera() as camera:
    rawCapture = PiRGBArray(camera)
    for frame in camera.capture_continuous(rawCapture, format='rgb',
                                         use_video_port=True):
        image = frame.array
        # You can process the image here
        rawCapture.truncate(0)
Wow, after all this, these are the basic operations of the Raspberry Pi camera. Remember to turn off the camera when you are done, otherwise it may freeze. Don’t panic if the code doesn’t work right, just fix the errors and try a few more times to get familiar.
If you want to play around, you need to ponder over parameters like ISO, shutter speed, etc., and slowly adjust to get the best effect. Be prepared, it may take a while to get it right. Both photography skills and programming skills need to be accumulated gradually, so take your time and make steady progress.
Previous Reviews
01
02
03

Share

Collect

View

Like