How to Build a Pedestrian Counter Program Using OpenCV, Python, and Ubidots

Author:Jose Garcia Translated by: Wu Zhendong Proofread by: Zhang Yihao
This article is approximately4000 words, and it is recommended to read14 minutes.

This article will use OpenCV, Python, and Ubidots to write a pedestrian counting program, and the code will be explained in detail.

Digital Image Processing (DIP) technology is developing rapidly, largely due to developers’ access to the cloud to utilize machine learning technology. Processing digital images in the cloud can bypass the need for dedicated hardware, making DIP the preferred choice for many. As the most economical and versatile method of image processing, DIP has been widely applied. The most common applications include pedestrian detection and counting, which are very useful metrics for airports, train stations, retail stores, sports venues, public events, and museums.
Existing traditional pedestrian counting technologies are not only expensive, but the data they generate is often associated with proprietary systems, which limit data extraction and optimization options for KPIs. In contrast, using your personal camera and SBC’s embedded DIP can save time and money while allowing you to customize applications based on the KPIs you care about and gain unique insights from the cloud.
Using the cloud to enable DIP IoT applications can enhance overall functionality. With features such as visualization, reporting, alerts, and cross-referencing external data sources (like weather, real-time vendor pricing, or business management systems), DIP provides developers with the freedom they need.
Imagine a grocery store with an ice cream freezer: they want to track the number of people passing by the store, the products chosen by customers, the number of times the door is opened, and the internal temperature of the freezer. From these data points, retailers can run correlation analyses to better understand and optimize their product pricing and the overall energy consumption of the freezer.
To kickstart your digital image processing application development, Ubidots has created a tutorial for building a people counting system using OpenCV and Python to analyze and count the number of people in a given area. It is not just about counting people; adding resources from the Ubidots IoT development platform can also expand your application. Here, you will see how to implement a real-time people counting dashboard built using Ubidots.
In this article, we will demonstrate how to use OpenCV and Ubidots to implement simple DIP overlays and create a pedestrian counter. This example is best suited for any Linux-based distribution system and is also applicable to Raspberry Pi, Orange Pi, or similar embedded systems.
For inquiries about other integrations, please contact the Ubidots support center to learn how your business can utilize this value-added technology.
Table of Contents:
  1. Application Requirements

  2. Coding – 8 Sections

  3. Testing

  4. Create Your Own Dashboard

  5. Results Display

1. Application Requirements
  • Any embedded Linux with an Ubuntu derivative

  • Python 3 or higher installed in the operating system

  • OpenCV 3.0 or higher installed in the OS. If using Ubuntu or its derivatives, please follow the official installation tutorial or run the following command:

pip install opencv-contrib-python

Once you have successfully installed Python 3 and OpenCV, you can verify this with the following simple code (first enter ‘python’ in your terminal)
import cv2 cv2.__version__
You should see the installed OpenCV version displayed on the screen:

How to Build a Pedestrian Counter Program Using OpenCV, Python, and Ubidots

  • Install Numpy according to the official operating guide, or run the command below

pip install numpy
  • Install imutils

pip install imutils
  • Install requests

pip install requests

2. Coding

This section contains the entire routine for detection and data sending. To better explain this code, we will divide it into eight parts to clarify each aspect of the code, making it easier to understand.
Section 1:

from imutils.object_detection

import non_max_suppression

import numpy as np

import imutils

import cv2

import requests

import time

import argparse

URL_EDUCATIONAL = “http://things.ubidots.com”

URL_INDUSTRIAL = “http://industrial.api.ubidots.com”

INDUSTRIAL_USER = True # Set this to False if you are an educational user

TOKEN = “….” # Put your Ubidots TOKEN here

DEVICE = “detector” # Device where the result will be stored

VARIABLE = “people” # Variable where the result will be stored

# OpenCV pre-trained SVM with HOG people features

HOGCV = cv2.HOGDescriptor()

HOGCV.setSVMDetector(cv2.HOGDescriptor_getDefaultPeopleDetector())

In Section 1, we import the necessary libraries to implement our detector, imutils is a useful DIP library tool that allows us to perform different transformations from the results, cv2 is our OpenCV Python wrapper, requests can send data/results to Ubidots via HTTP, and argparse lets us read commands from the terminal in the script.
Important: Don’t forget to replace this code with your own Ubidots account TOKEN, and if you are a student user, be sure to set INDUSTRIAL_USER to FALSE.
After importing the libraries, we will initialize the Histogram of Oriented Gradients (Histogram of Oriented Gradient) method. The abbreviation for Histogram of Oriented Gradients is HOG, which is one of the most popular object detection techniques that has been successfully implemented in multiple applications. OpenCV has efficiently combined the HOG algorithm with the classic machine learning technique of Support Vector Machines (SVM), which is a wealth we can leverage.
This statement:

cv2.HOGDescriptor_getDefaultPeopleDetector() calls a pre-trained model for pedestrian detection in OpenCV and provides the evaluation capability of SVM features.

Section 2:

def detector(image):

”’

@image is a numpy array

”’

image = imutils.resize(image, width=min(400, image.shape[1]))

clone = image.copy()

(rects, weights) = HOGCV.detectMultiScale(image, winStride=(8, 8),

padding=(32, 32), scale=1.05)

# Applies non-max suppression from imutils package to kick-off overlapped

# boxes

rects = np.array([[x, y, x + w, y + h] for (x, y, w, h) in rects])

result = non_max_suppression(rects, probs=None, overlapThresh=0.65)

return result

The detector() function is where the magic happens; it can receive an RGB image divided into three color channels. To avoid performance issues, we resize the image with imutils and then call the detectMultiScale() method from the HOG object. Then, the multi-scale detection method allows us to analyze the image using the classification results from the SVM to determine whether a person is present. An introduction to the parameters of this method is beyond the scope of this tutorial, but if you want to learn more, please refer to the official OpenCV documentation or check out Adrian Rosebrock’s excellent explanation.
The HOG analysis will generate some bounding boxes (for detected objects), but sometimes these boxes overlap, leading to false positives or detection errors. To avoid this confusion, we will use the non-maximum suppression utility from the imutils library to remove overlapping boxes, as shown below:

How to Build a Pedestrian Counter Program Using OpenCV, Python, and Ubidots

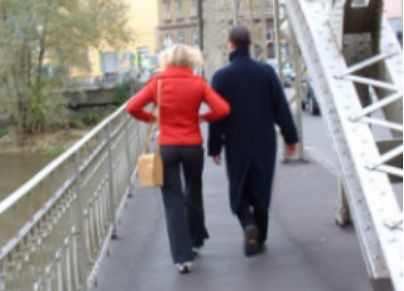
Image credit: https://www.pyimagesearch.com

Section 3:

def localDetect(image_path):

result = []

image = cv2.imread(image_path)

if len(image) <= 0:

print(“[ERROR] could not read your local image”)

return result

print(“[INFO] Detecting people”)

result = detector(image)

# shows the result

for (xA, yA, xB, yB) in result:

cv2.rectangle(image, (xA, yA), (xB, yB), (0, 255, 0), 2)

cv2.imshow(“result”, image)

cv2.waitKey(0)

cv2.destroyAllWindows()

return (result, image)

Now, in this part of the code, we must define a function to read an image from a local file and detect whether there are people present. To achieve this, I simply called the detector() function and added a simple loop to draw the detector’s bounding boxes. It will return the number of detected boxes and the image with the drawn detections. Then, we simply recreate the result in a new OS window.
Section 4:

def cameraDetect(token, device, variable, sample_time=5):

cap = cv2.VideoCapture(0)

init = time.time()

# Allowed sample time for Ubidots is 1 dot/second

if sample_time < 1:

sample_time = 1

while(True):

# Capture frame-by-frame

ret, frame = cap.read()

frame = imutils.resize(frame, width=min(400, frame.shape[1]))

result = detector(frame.copy())

# shows the result

for (xA, yA, xB, yB) in result:

cv2.rectangle(frame, (xA, yA), (xB, yB), (0, 255, 0), 2)

cv2.imshow(‘frame’, frame)

# Sends results

if time.time() – init >= sample_time:

print(“[INFO] Sending actual frame results”)

# Converts the image to base 64 and adds it to the context

b64 = convert_to_base64(frame)

context = {“image”: b64}

sendToUbidots(token, device, variable,

len(result), context=context)

init = time.time()

if cv2.waitKey(1) & 0xFF == ord(‘q’):

break

# When everything done, release the capture

cap.release()

cv2.destroyAllWindows()

def convert_to_base64(image):

image = imutils.resize(image, width=400)

img_str = cv2.imencode(‘.png’, image)[1].tostring()

b64 = base64.b64encode(img_str)

return b64.decode(‘utf-8’)

Similar to the function in Section 3, the function in Section 4 will call the detector() method and draw bounding boxes, retrieving images directly from the webcam using OpenCV’s VideoCapture() method. We also slightly modified the official OpenCV to obtain images from the camera, and every ‘n’ seconds, send the results to a Ubidots account (sendToUbidots() function will be reviewed later in this tutorial). The function convert_to_base64() converts the image into a base64 string, which is crucial for viewing results in the Ubidots using JavaScript code in the HTML Canvas widget.
Section 5:

def detectPeople(args):

image_path = args[“image”]

camera = True if str(args[“camera”]) == ‘true’ else False

# Routine to read local image

if image_path != None and not camera:

print(“[INFO] Image path provided, attempting to read image”)

(result, image) = localDetect(image_path)

print(“[INFO] sending results”)

# Converts the image to base 64 and adds it to the context

b64 = convert_to_base64(image)

context = {“image”: b64}

# Sends the result

req = sendToUbidots(TOKEN, DEVICE, VARIABLE,

len(result), context=context)

if req.status_code >= 400:

print(“[ERROR] Could not send data to Ubidots”)

return req

# Routine to read images from webcam

if camera:

print(“[INFO] reading camera images”)

cameraDetect(TOKEN, DEVICE, VARIABLE)

This method is designed to trigger the routine for searching pedestrians through a locally stored image file or via webcam by inserting parameters through the terminal.
Section 6:

def buildPayload(variable, value, context):

return {variable: {“value”: value, “context”: context}}

def sendToUbidots(token, device, variable, value, context={}, industrial=True):

# Builds the endpoint

url = URL_INDUSTRIAL if industrial else URL_EDUCATIONAL

url = “{}/api/v1.6/devices/{}”.format(url, device)

payload = buildPayload(variable, value, context)

headers = {“X-Auth-Token”: token, “Content-Type”: “application/json”}

attempts = 0

status = 400

while status >= 400 and attempts <= 5:

req = requests.post(url=url, headers=headers, json=payload)

status = req.status_code

attempts += 1

time.sleep(1)

return req

These two functions in Section 6 are the main pathways for sending results to Ubidots for understanding and visualizing data. The first function def buildPayload constructs a valid payload for the request, while the second function def sendToUbidots receives your Ubidots parameters (TOKEN, variable, and device label) to store results. In this case, OpenCV can detect the length of the bounding boxes. Optionally, you can send context to store the results as a base64 image for later retrieval.
Section 7:

def argsParser():

ap = argparse.ArgumentParser()

ap.add_argument(“-i”, “–image”, default=None,

help=”path to image test file directory”)

ap.add_argument(“-c”, “–camera”, default=False,

help=”Set as true if you wish to use the camera”)

args = vars(ap.parse_args())

return args

For Section 7, we are about to complete the analysis of the code. The function argsParser() simply parses and returns the script’s parameters in a dictionary format through the terminal. There are two parameters in the parser:

· image: the path of the image file in your system

· camera: this variable will call the cameraDetect() method if set to ‘true’

Section 8:

def main():

args = argsParser()

detectPeople(args)

if __name__ == ‘__main__’:

main()

Section 8 is the final part of our main function code, which is just to obtain parameters from the console and initiate the specified program.
Don’t forget, the complete code can be downloaded from Github.

3. Testing

Open your favorite code editor (sublime-text, notepad, nano, etc.), then copy and paste the complete code provided here. Use your specific Ubidots TOKEN to update the code and save the file as peopleCounter.py.
Once the code is saved correctly, let’s test it using four images randomly selected from the Caltech Dataset and Pexels public datasets:
How to Build a Pedestrian Counter Program Using OpenCV, Python, and Ubidots

How to Build a Pedestrian Counter Program Using OpenCV, Python, and Ubidots

How to Build a Pedestrian Counter Program Using OpenCV, Python, and Ubidots

How to Build a Pedestrian Counter Program Using OpenCV, Python, and Ubidots

To analyze these images, you first need to store the images on your laptop or PC, and note the path where the images are stored.

python peopleCounter.py PATH_TO_IMAGE_FILE

In my case, I stored the images in a path labeled “dataset”. To execute an effective command, run the following command, but replace it with your personal file storage path.

python peopleCounter.py -i dataset/image_1.png

If you want to capture images from the camera instead of a local file, simply run the following command:

python peopleCounter.py -c true

Testing Results:

How to Build a Pedestrian Counter Program Using OpenCV, Python, and Ubidots

In addition to viewing the testing results in this way, you can also see the real-time results stored in your Ubidots account:

4. Create Your Own Dashboard

We will use HTML Canvas to observe the results in real-time, this tutorial does not cover HTML canvas widgets, if you are not familiar with how to use them, please refer to the following articles:
  • Canvas Widget Examples

  • Canvas Widget Introductory Demo

  • Canvas Creating a Real Time Widget

We will use a basic real-time example with slight modifications for viewing our images. You can see the code for the widget below

HTML

<img id=”img” width=”400px” height=”auto”/>

JS

var socket;

var srv = “industrial.ubidots.com:443”;

// var srv = “app.ubidots.com:443” // Uncomment this line if you are an educational user

var VAR_ID = “5ab402dabbddbd3476d85967”; // Put your var Id here

var TOKEN = “” // Put your token here

$( document ).ready(function() {

function renderImage(imageBase64){

if (!imageBase64) return;

$(‘#img’).attr(‘src’, ‘data:image/png;base64, ‘ + imageBase64);

}

// Function to retrieve the last value, it runs only once

function getDataFromVariable(variable, token, callback) {

var url = ‘https://things.ubidots.com/api/v1.6/variables/’ + variable + ‘/values’;

var headers = {

‘X-Auth-Token’: token,

‘Content-Type’: ‘application/json’

};

$.ajax({

url: url,

method: ‘GET’,

headers: headers,

data : {

page_size: 1

},

success: function (res) {

if (res.results.length > 0){

renderImage(res.results[0].context.image);

}

callback();

}

});

}

// Implements the connection to the server

socket = io.connect(“https://”+ srv, {path: ‘/notifications’});

var subscribedVars = [];

// Function to publish the variable ID

var subscribeVariable = function (variable, callback) {

// Publishes the variable ID that wishes to listen

socket.emit(‘rt/variables/id/last_value’, {

variable: variable

});

// Listens for changes

socket.on(‘rt/variables/’ + variable + ‘/last_value’, callback);

subscribedVars.push(variable);

};

// Function to unsubscribed for listening

var unSubscribeVariable = function (variable) {

socket.emit(‘unsub/rt/variables/id/last_value’, {

variable: variable

});

var pst = subscribedVars.indexOf(variable);

if (pst !== -1){

subscribedVars.splice(pst, 1);

}

};

var connectSocket = function (){

// Implements the socket connection

socket.on(‘connect’, function(){

console.log(‘connect’);

socket.emit(‘authentication’, {token: TOKEN});

});

window.addEventListener(‘online’, function () {

console.log(‘online’);

socket.emit(‘authentication’, {token: TOKEN});

});

socket.on(‘authenticated’, function () {

console.log(‘authenticated’);

subscribedVars.forEach(function (variable_id) {

socket.emit(‘rt/variables/id/last_value’, { variable: variable_id });

});

});

}

/* Main Routine */

getDataFromVariable(VAR_ID, TOKEN, function(){

connectSocket();

});

connectSocket();

//connectSocket();

// Subscribe Variable with your own code.

subscribeVariable(VAR_ID, function(value){

var parsedValue = JSON.parse(value);

console.log(parsedValue);

//$(‘#img’).attr(‘src’, ‘data:image/png;base64, ‘ + parsedValue.context.image);

renderImage(parsedValue.context.image);

})

});

Don’t forget to put your account TOKEN and variable ID at the beginning of the code snippet.
Third Part Libraries
Add the following libraries for the third part:
  • https://ajax.googleapis.com/ajax/libs/jquery/3.2.1/jquery.min.js

  • https://iot.cdnedge.bluemix.net/ind/static/js/libs/socket.io/socket.io.min.js

  • When you save your widget, you can get results similar to the one below:

How to Build a Pedestrian Counter Program Using OpenCV, Python, and Ubidots

5. Results Display

How to Build a Pedestrian Counter Program Using OpenCV, Python, and Ubidots

In this link, you can see the dashboard with results.
In this article, we explored how to create an IoT people counter using DIP (image processing), OpenCV, and Ubidots. With these services, your DIP applications will be more accurate than PIR or other optical sensors when it comes to detecting and recognizing people, scenes, or objects – this program provides an efficient pedestrian counter without requiring any static manipulation of previous data.
Leave your comments about Ubidots in the community forum, or connect with us via Facebook, Twitter, or Hackster to let us know your thoughts.
Happy coding!

About the Author Jose García

UIS Electronic Engineer, Ubuntu user, Bucaramanga native, programmer, sometimes bored, wants to travel the world but has little hope of achieving this dream. Hardware and software developer @Ubidots

Original Title:

People Counting with OpenCV, Python & Ubidots

Original Link:

https://ubidots.com/blog/people-counting-with-opencv-python-and-ubidots/

Translator Profile: Wu Zhendong, Master’s degree in Computer Science and Decision from the University of Lorraine, France. Currently engaged in artificial intelligence and big data-related work, striving to become a data scientist for life. From Jinan, Shandong, can’t operate an excavator, but can write Java, Python, and PPT.

END
Copyright Notice: Some content from this account comes from the Internet, please indicate the original link and author when reprinting. If there is any infringement or incorrect source, please contact us.
Course Recommendation:

Beijing Foreign Studies University has officially opened

Business Data Analysis” direction for working graduate students

After graduation

You can obtain a master’s degree recognized by the state from a double first-class university

Exclusive benefits for data analysis fans, scan to listen to the course for free👇

How to Build a Pedestrian Counter Program Using OpenCV, Python, and Ubidots

Leave a Comment

×