The tools and techniques introduced in this article have a certain level of aggressiveness. Please use them responsibly and legally.
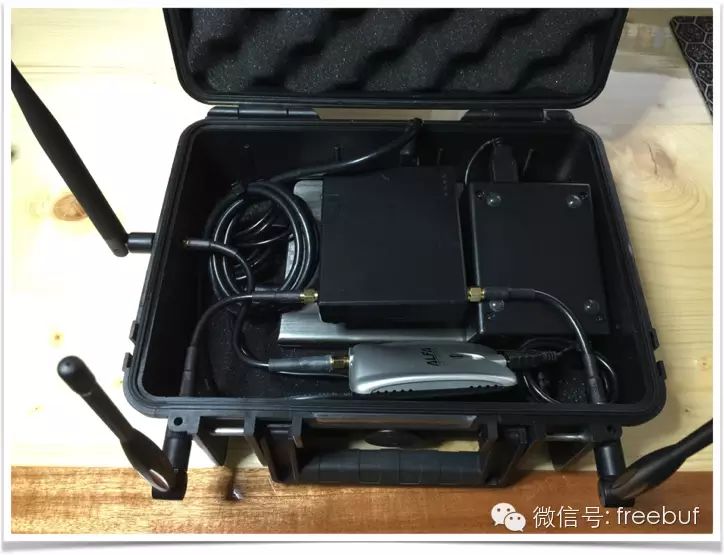
Do you want to have your own mobile wireless penetration testing box? If you are interested, the devices introduced below will be very helpful. This box is called the “MiTM (Man-in-the-Middle) WiFi Box”. Using this box, you can perform some wireless auditing tasks and also create fake access points to conduct man-in-the-middle attacks.
Tool Requirements
If you really want to make this box, you will need the following tools:
5 or 6mm wood/metal drill bits
Open-end wrench (size 8)
Pliers
Scalpel/craft knife
Nylon zip ties (commonly known as: dog collars)
Choosing the Box
Here are some suggestions: it’s best if the box you choose has been used at least once, and be sure not to choose an empty box left over after throwing away the equipment.
Box Requirements
It should preferably be black.
Dimensions should be approximately 230 x 150 x 100mm.
It must be waterproof (able to withstand wind and sun exposure).
Price is optional.
The box should preferably have foam lining inside and a latch lock outside.
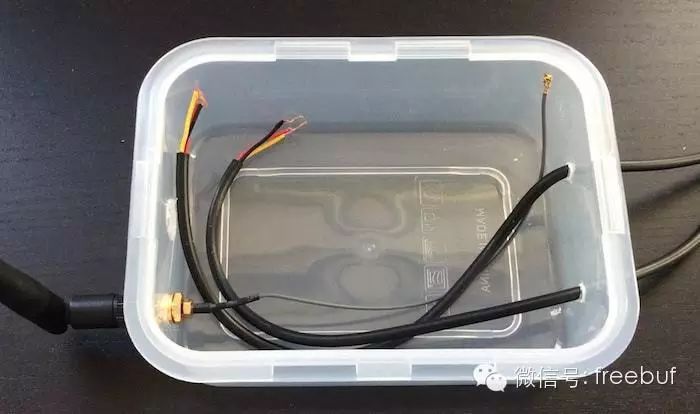
Suggestion: If this is your first time doing this project, you can try using some duct tape (a type of silver wide tape used to seal heating or air conditioning ducts) or hot glue to practice inside a plastic packaging box first. The walls of the plastic packaging box are very thin, so you may use different methods and materials to fix components and connectors’ lengths, for example (images sourced from other projects) the example below:
Anyway, I found a box, the B&W type 1000 outdoor case, which meets all the requirements of this project. It currently costs about 40 euros, and the dimensions of the box are 250 x 180 x 95mm.
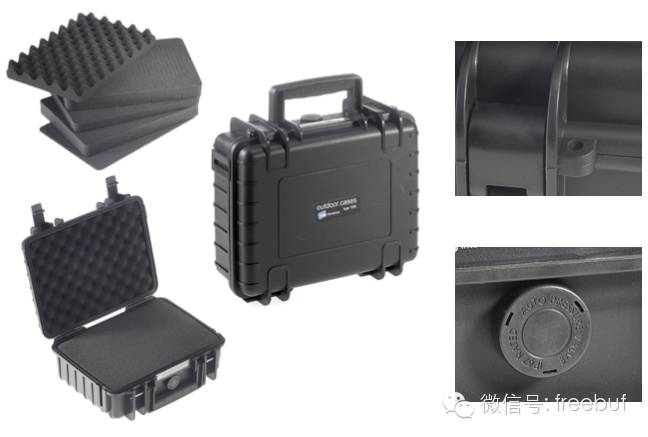
So far, I have tested this box in many environments, such as placing it on rooftops or in dusty or damp places (where it has rained or snowed), and I have not found any issues with the box or the equipment inside it, so the author
recommends this box. Of course, you can choose a box that suits you, and it is not advisable to place the box directly under sunlight, not because of the box itself, but because if you do, the batteries inside the box may have problems.
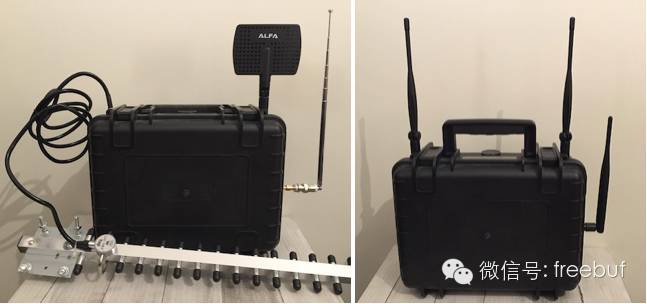
Antenna Issues
At first, I placed the antenna inside the box, but this is not ideal. However, for the sake of concealment, I thought it was more appropriate to place the antenna inside the box, but I found that this weakened the strength of the antenna signal and the quality of the received signal.
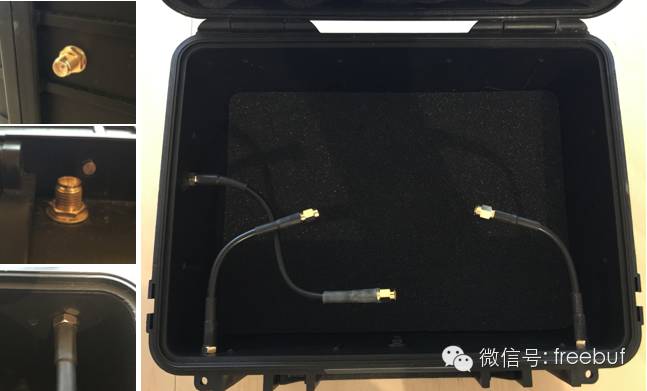
Eventually, I placed the antenna outside the box, but this created another problem. To achieve this, I needed to make my own cable connections because the plastic shell of the box is about 4.5 mm thick (this may vary slightly depending on the box you choose).
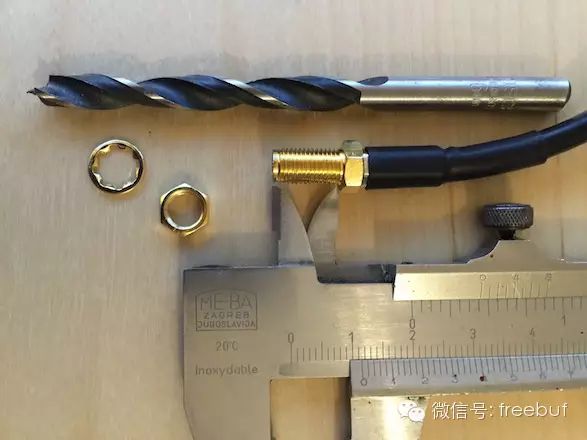
Drill three holes with a 5mm (6mm is also fine) wood drill bit, which are reserved for the antennas. If you use a 5mm drill bit, it will make it difficult to connect the SMA connector, but it will hold the connector in the box better, preventing it from wobbling.
For the hole reserved for the antenna, you should drill two on the top of the box and one on the side. This idea was mainly inspired by the “Hak5 Pineapple Mark V” and I added some other devices according to my needs.
This approach has more advantages than the original one. When I started using this box, I needed additional connectors to connect the antennas, and with these devices, I could directly connect WiFi, SDR, and GSM signals, which is also a good method.
Installation:
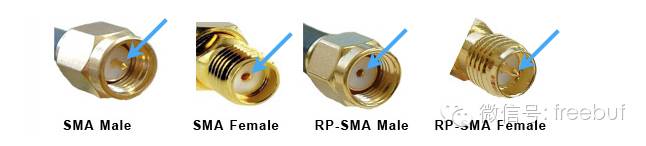
The SMA connector is a widely used small threaded coaxial connector with a characteristic impedance of 50Ω. The frequency range is from DC to 18 GHz, but it is most commonly used in wireless antenna systems and software-defined radio transceivers.
Here is a suggestion: the installer should carefully check each antenna and additional devices connected to the connectors. If you use too many cables and devices in the box, you will degrade the quality of signal transmission and reception. Therefore, you should try to shorten the length of the cables and use as few devices as possible.
Since the wall thickness of the box is about 4.5mm, when fixing the devices inside the box, you have to use extension connectors. This way, you can connect the antennas with cables and ensure the quality of the signal. You can find these cables online, or you can customize cables suitable for your SMA connector heads. When making this box, I used the SI-195 195 model (50Ω) low-loss braided coaxial cable.
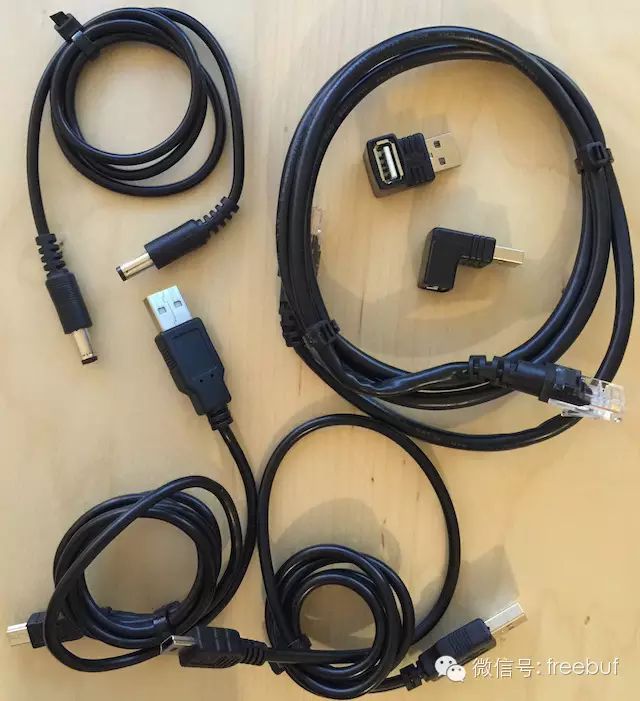
Wiring
Wiring should be done according to your actual situation. You will need USB cables, power cables, and network cables. It’s best to connect the cables to the USB adapter in an “L” shape. When you add more USB cables or USB adapters inside the box, this can
save a lot of space. This is not a mandatory requirement, but it can indeed save a lot of space. When I made version 1.0, I used many long USB cables, but later to save space, I made many short USB cables myself.
Batteries
After completing the above installation, you will have more space to place devices and batteries. When using version 1.0, I chose the Tenergy 51097 battery, which has a capacity of 16000 mAh / 59.2Wh, with DC output of 12V/16V/19V (60W max) and supports USB output of 5V (2.1A max). This battery is a polymer lithium-ion battery. If you want to use this device in high-temperature areas or use other models of batteries, please pay attention to controlling the temperature inside the box.
If the battery inside the box is overcharged, overloaded, or overheated, or if the battery is punctured or short-circuited, it will lead to catastrophic failures, such as battery rupture, electrolyte leakage, or fire.
I think this model of battery should have some protective measures, as I did not test this box in extreme environments, so I did not check the battery specifications. Additionally, implementing an RPi temperature monitoring system is easy, and I believe you wouldn’t want a fire to occur in your client’s company during your testing project.
This battery’s size is also very suitable for me, with dimensions of 185mm (length) x 124mm (width) x 14mm (height). This idea also comes from Pineapple, so a 5-12V /2A power supply port was adopted, and Beaglebone and RPi also used a 5V USB power supply interface.
You can choose the power capacity of the battery based on the number of devices you actually use, and you can also select the battery based on the actual working condition of 16~48 hours in the box. This choice may not be the best, but it works well for me.

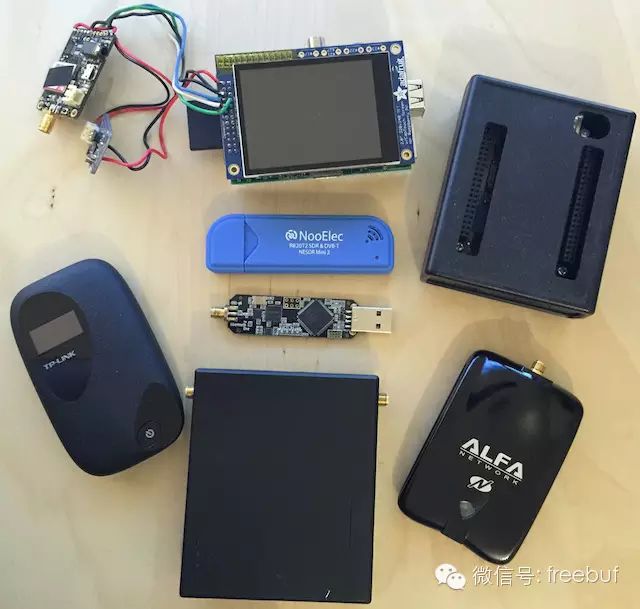
Device Selection
The selection of devices depends on the scenarios in your actual testing, your own ideas, and your penetration direction. If you do not have a Hak5 Pineapple, you can completely create a device with the same functionality and combine it with other devices to achieve this purpose. The following devices were used in my version 1.0.
RPi TFT display and FONA GSM module
NooElec DVB-T SDR (R820T2)
Beaglebone Black or RPi2
Ubertooth One (open-source wireless Bluetooth development platform)
Hak5 Pineapple Mark V (currently discontinued)
ALFA AWUS036NHA (AR9271) network card or others
TP-Link M5350
Antenna Selection
This depends on your actual situation, but for the sake of concealment, I do not recommend antennas longer than 300mm. Whether to use fixed antennas is not very important, and this mainly depends on your own ideas.

Device Installation and Configuration
How to configure and use this device is beyond the scope of this blog. The above introduction only provides feasible solutions; there are many good guiding websites online that can help you complete the configuration and usage.
Conclusion
Building such a box is a very interesting process, and I hope this blog post can help you build your own box.
*Reference source:gerzic, FB editor dear rabbit translation, please indicate the source from FreeBuf hackers and geeks (FreeBuf.COM)