
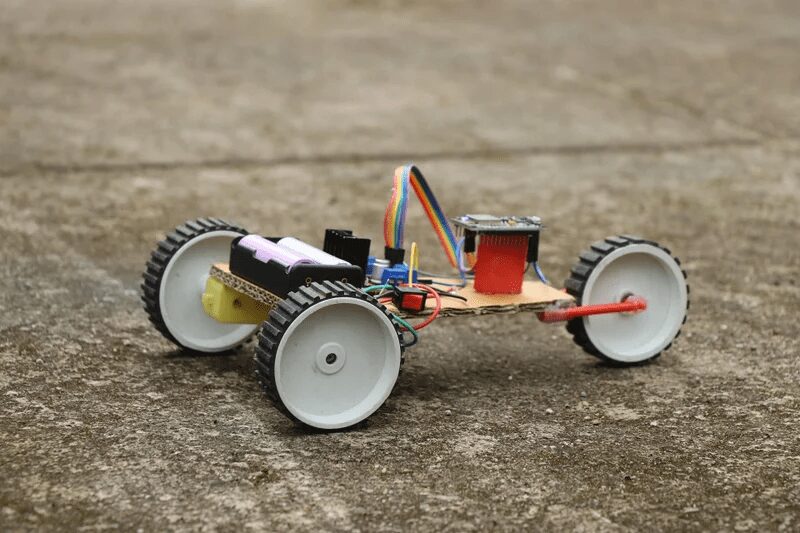
This tutorial will show you how to make a simple robot car at home using basic electronic components.
The car can be controlled by a smartphone, and it is not limited to four directions. This is a very interesting project for beginners, and it won’t take much time to complete. Through it, you can learn how to build a vehicle, understand the role of motors in vehicle operation, and gain some basic electronic knowledge, programming practice, and even some physics knowledge.
Required Materials

-
NodeMCU or ESP8266 board -
L298N motor driver -
BO motor (reduction motor) -
Wheels -
Cardboard -
Hot glue and strong adhesive -
Jumper wires -
Lithium-ion battery and battery holder -
Switch
Below is how to make a cool version alternative
-
3D printer -
PLA filament -
Tinkercad application -
Cura slicing software
Production Steps
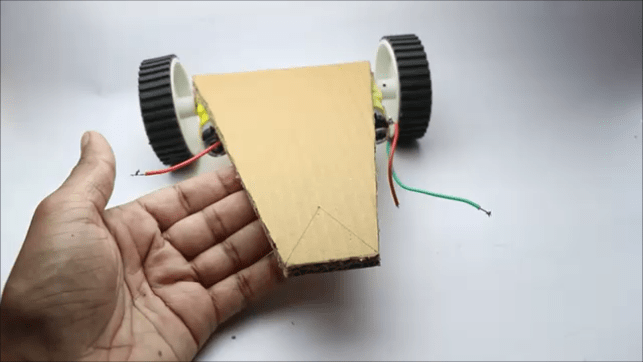
Prepare the Base Plate
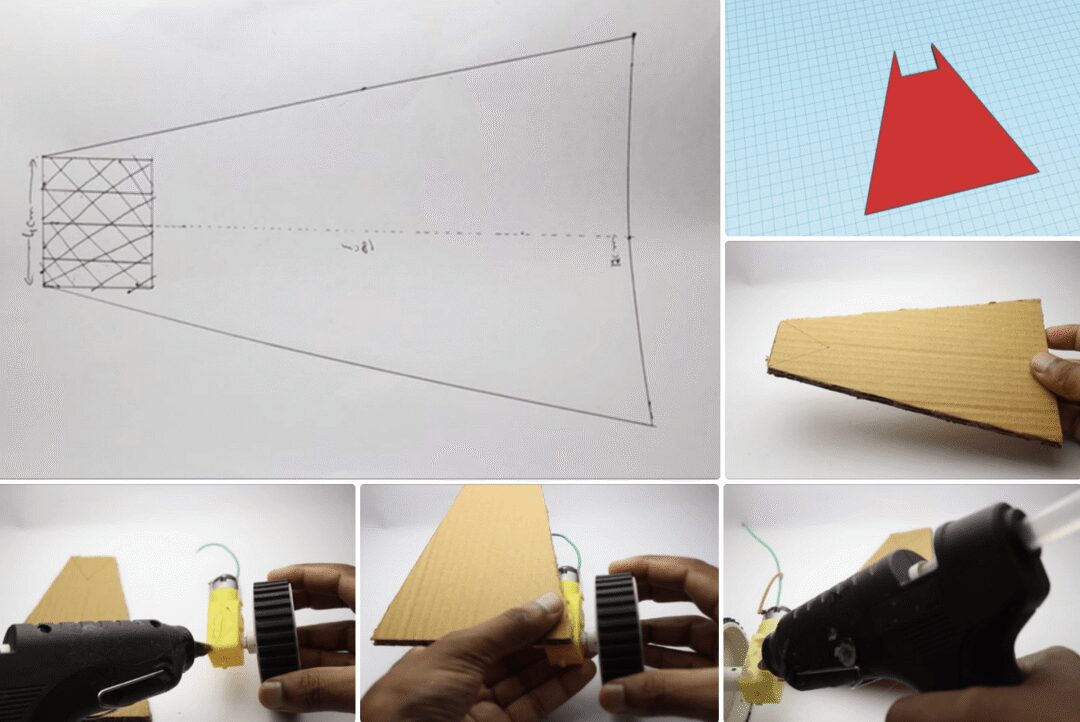
This project provides two ways to make the base plate: you can choose to 3D print it or make it out of cardboard. (The STL file can be downloaded at the end)
If you choose to 3D print the base plate, you need to use the Tinkercad application for design and then print it. If you choose cardboard, you need to make a template based on the design reference standard of the BO motor, then draw the template outline on the cardboard and cut out the base plate.
Create the Circuit Diagram
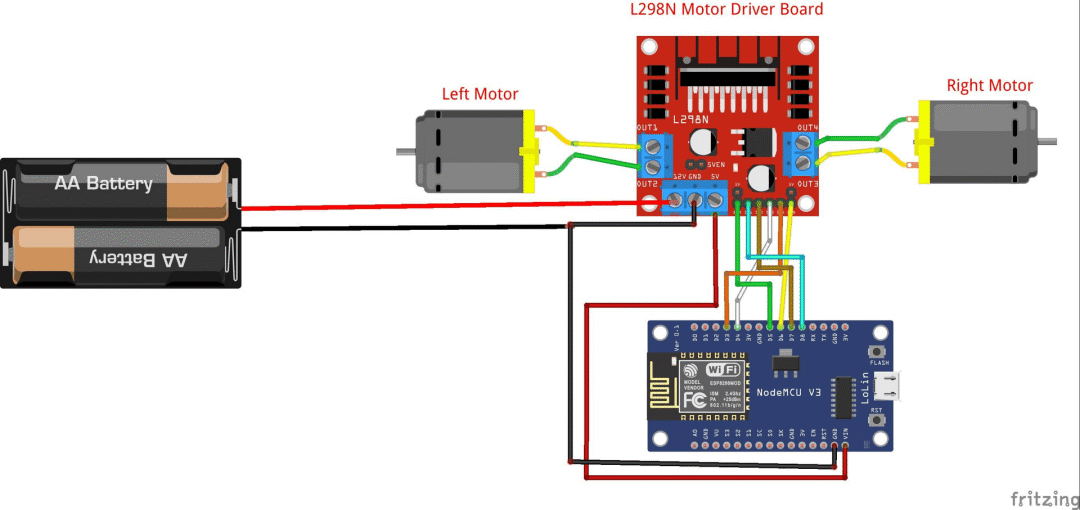
The circuit diagram of the entire robot car is shown in the tutorial. Instead of using a breadboard, jumper wires are used to connect the components directly.
Before establishing connections, make sure to connect the battery’s ground to the motor driver and the Nodemcu’s GND. The positive terminal of the battery holder connects to the 12v slot of the motor driver, and the 5v of the motor driver connects to the Vin of the Nodemcu board. Now, the communication connections between the motor driver and Nodemcu are as follows:
-
ENA to GPIO14 (D5) -
ENB to GPIO12 (D6) -
IN_1 to GPIO15 (D8) -
IN_2 to GPIO13 (D7) -
IN_3 to GPIO2 (D4) -
IN_4 to GPIO0 (D3)
Finally, connect the BO motor’s wiring interface to the motor connection slot on the motor driver. This way, the motor driver can control the operation of the BO motor.
Write Arduino Code
Connect the development board to the computer, open the Arduino IDE, and then copy and paste the code provided in the tutorial into the IDE.(The code can be downloaded at the end)
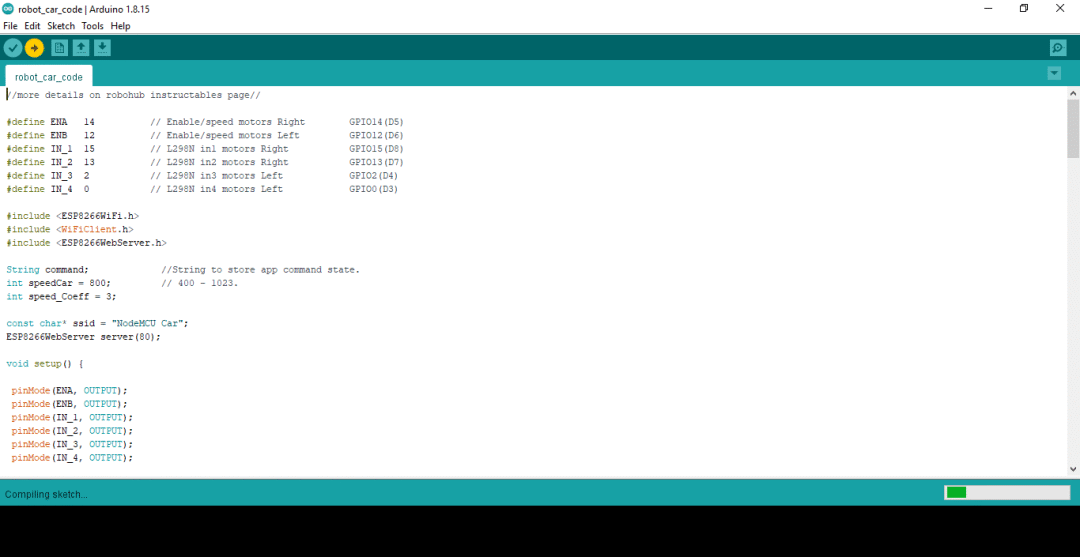
If you want to set a custom name for WiFi, you can edit it in the code. If you are not completely clear about this, it is recommended not to make any changes.
Click on the board, select the esp8266 module board, now check the correct serial port (COM) number, and then click the upload code button.
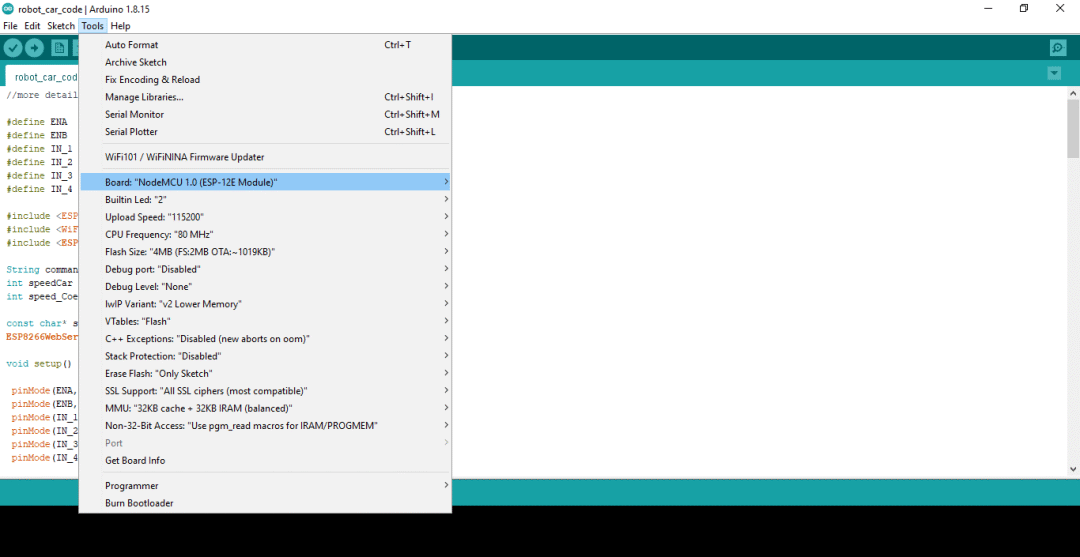
After a while, the code will be uploaded to the board, and now the board has the code.
After completing this step, test the project with the power supply from the battery. When you turn on the switch, if everything is normal, the LED indicator on the Nodemcu will light up, and you will see the Wi-Fi name on your phone.
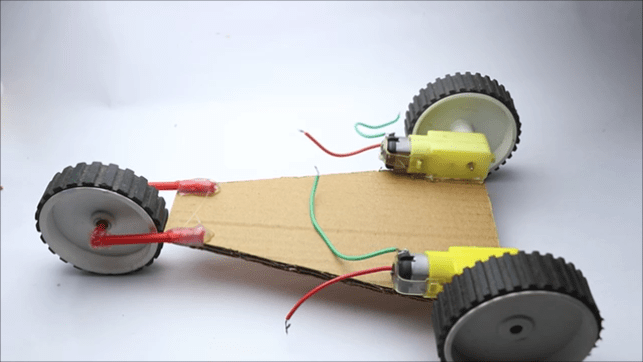
Add Front Wheel
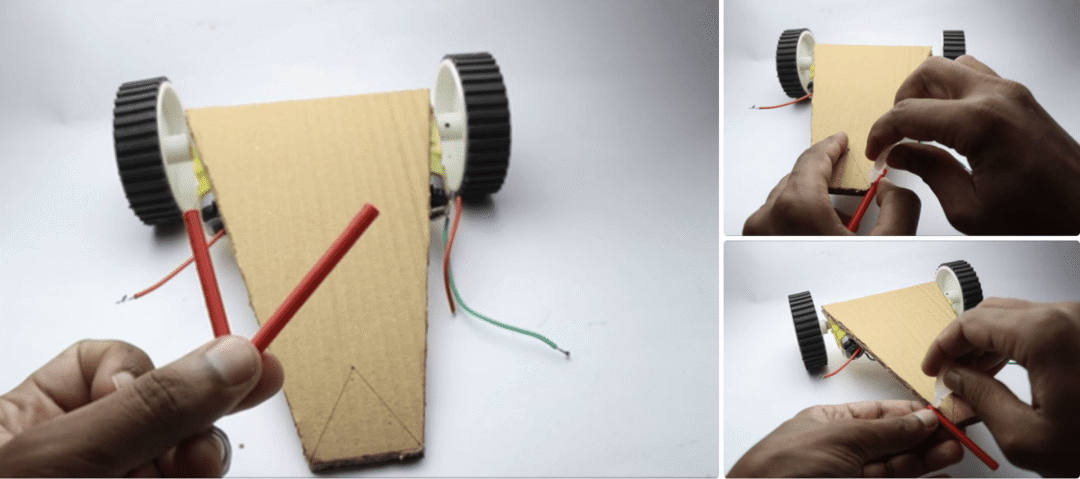
The robot car is a three-wheeled vehicle, with one front wheel that rolls freely, while the other two wheels are controlled by the motor shaft.
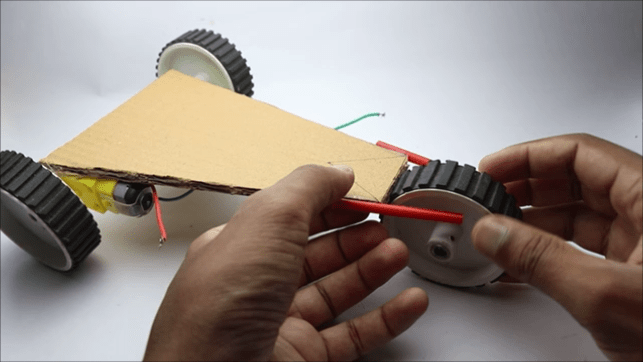
Now for this we use a simple mechanism. What we need to do is use a straw or a piece of tube. If you can’t find any tube, you can make one yourself by rolling a piece of paper into a tube shape and securing it with strong adhesive.
Place it on the small tip of the cardboard and secure it with strong adhesive.
Then you can add the wheels and lock it from the center with the tube or homemade paper tube!
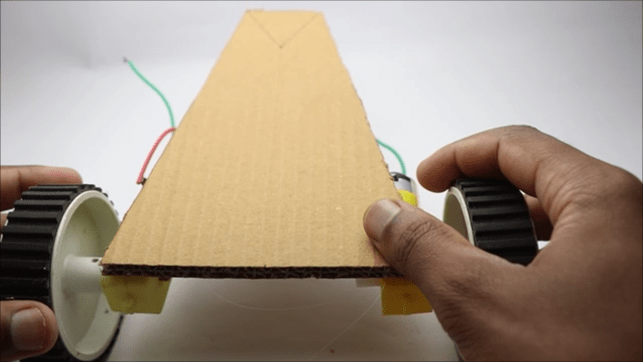
The basic model is ready, and now we just need to add the electronic components, which is not a complicated task.
Complete Assembly
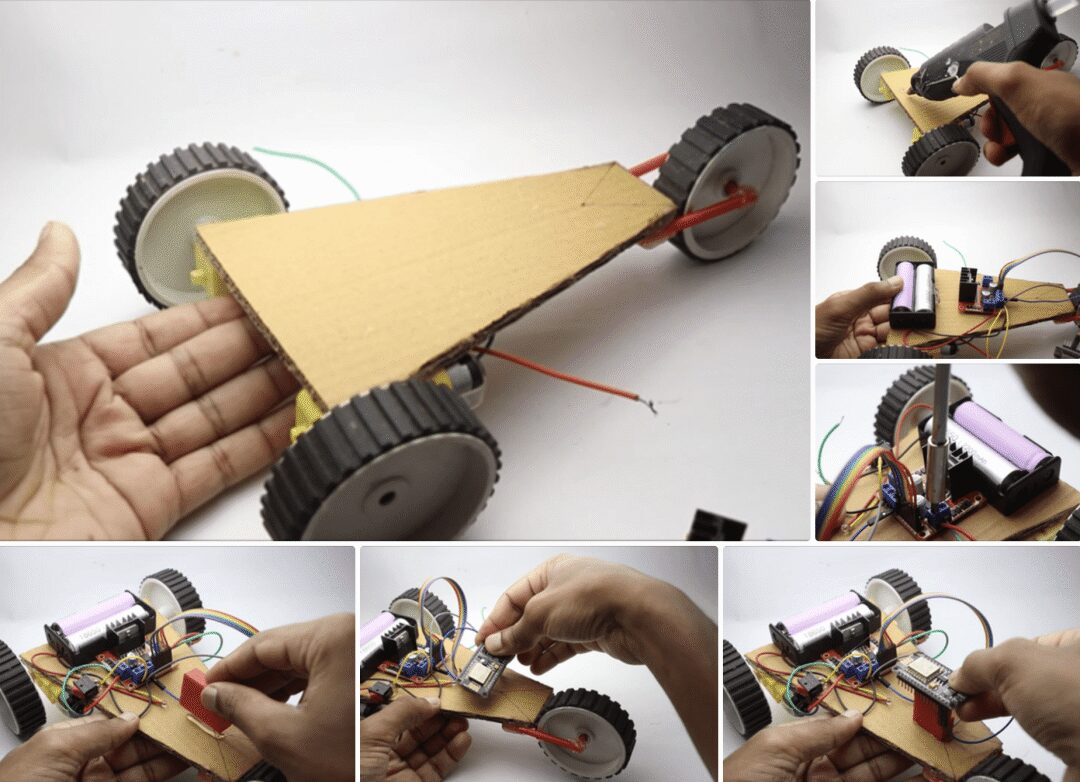
Place a drop of hot glue on the cardboard, then place the lithium-ion battery holder with the battery. Next, secure the motor driver to the cardboard, and connect the BO motor wires to the slots on the driver. Finally, place the Nodemcu board.
Usage
Setting up the connection between the robot car and the smartphone (control device) is very simple. Use Wi-Fi access hotspot, first turn on Wi-Fi on the phone, then turn on the robot car, and you will see the Wi-Fi name you set for the vehicle on your phone; connect to the network. Then, you can open the app pre-installed on your phone, so you can control the robot car with a digital screen remote control.
Source: https://www.instructables.com/Make-Very-Easy-Robot-Car-That-Is-Smartphone-Contro/
Project Author: ROBO HUB
Translated and first published in: DF Maker Community
Please indicate the source information when reprinting
Hardware Arsenal
Click to learn more👆

DFRobot Official Brand Store https://dfrobot.taobao.com/
DFRobot Official Flagship Store https://dfrobot.jd.com/
If you have anything to say, feel free toleave a message!
The code and STL files involved in the project can be downloaded by replying “Three-Wheeled Car” in the public account!
Previous Project Review
Understand the entire series of Raspberry Pi in one article!
Learn these 20 Linux commands to master your Raspberry Pi!
Raspberry Pi Cyberdeck with 6 screens, check it out!
Light up the Christmas tree with Raspberry Pi
DIY cloud server with Raspberry Pi, carry it in your pocket!
Make a “digital microscope” with Raspberry Pi
Spring is here, you need a retro-style Raspberry Pi camera
3D printed Raspberry Pi spider robot
Make a handheld computer with Raspberry Pi and ESP32!
Make a retro gaming console based on Raspberry Pi Zero
The most comprehensive! How to choose Raspberry Pi expansion boards? A video to solve it!
Click to read👆