Author: AMD Engineer Aravind Babu
This article introduces the prerequisites for using PetaLinux on any platform. PetaLinux is an embedded Linux software development kit (SDK) primarily used for FPGA-based system-on-chip (SoC) designs or FPGA designs.
Installation Requirements
Minimum workstation requirements:
-
8 GB RAM (minimum recommended for AMD tools)
-
2 GHz CPU clock or equivalent frequency (at least 8 cores)
-
100 GB of available HDD space
Supported Operating Systems:
-
Fully remove RHEL and CENTOS to align with upstream Yocto
-
Ubuntu Desktop/Server 20.04.2 LTS, 20.04.3 LTS, 20.04.4 LTS, 20.04.5 LTS (64-bit), 20.04.6 LTS, 22.04 LTS, 22.04.1 LTS, 22.04.2 LTS, and 22.04.3 LTS
-
OpenSuse Leap 15.3 and 15.4
-
AlmaLinux 8.7 and 9.1
Host Package List
PetaLinux requires standard development tools and libraries to be installed on the Linux host workstation, as listed in the version documentation.
The following is a list of packages that need to be installed on the host before installing PetaLinux:
https://adaptivesupport.amd.com/s/article/000036178?language=zh_CN
PetaLinux Installation Steps
-
The PetaLinux tools require your host system’s /bin/sh to be “bash”. If you are using an Ubuntu distribution and your /bin/sh is “dash”, please consult your system administrator on how to change your default system shell /bin/sh using the sudo dpkg-reconfigure dash command.
-
You must have the appropriate access rights to install the required packages as described in the version documentation. PetaLinux tools need to be installed as a non-root user.
PetaLinux installer can be downloaded from the PetaLinux download page:
https://china.xilinx.com/support/download/index.html/content/xilinx/zh/downloadNav/embedded-design-tools.html
If you do not specify any options when running the installer, the PetaLinux tools will be installed by default in the current working directory.

Alternatively, you can specify the installation path.

For example, to install the PetaLinux tools to /home//petalinux/, execute the following:

Note:
-
You cannot install PetaLinux as the root user. If you attempt to run PetaLinux commands as the root user, the BitBake integrity check may fail, preventing the build from continuing. This check is performed because running builds as the root user is very dangerous; if any build scripts mistakenly install files to the root path (/) instead of where they should be installed, the installation must fail immediately to avoid (in the worst case) overwriting critical files necessary for the operation of the Linux system, such as files in /bin or /etc. Therefore, running builds as the root user is not supported.
-
Once the installation is complete, you cannot move or copy the installed directory. In the aforementioned example, you cannot move or copy /home//petalinux/ because the full path is stored in the Yocto e-SDK environment file.
-
During the installation of the software, ensure you have write permissions for /home//petalinux. After installation, you can change the permissions to global read-execute (0755). Installing the tools in the /home//petalinux directory is not mandatory. You can install the tools anywhere with 755 permissions.
-
PetaLinux 2024.1 is only applicable to hardware designs exported from the AMD Vivado™ Design Suite 2024.1.
Your PetaLinux and Vivado designs should always use the same version.
PetaLinux Working Environment Setup
After installation, run the provided setup script using the source command to complete the remaining setup.
PetaLinux Working Environment Setup Steps
Use the source command to run the appropriate setup script. PetaLinux can be used with any interactive shell, as shown below:
Using Bash as the user shell:

settings.sh:
https://www.godaddy.com/forsale/settings.sh?utm_source=TDFS_BINNS2&utm_medium=parkedpages&utm_campaign=x_corp_tdfs-binns2_base&traffic_type=TDFS_BINNS2&traffic_id=binns2&
Using C shell as the user shell:

Note:Starting from 2024.2, support for PetaLinux settings.csh will be deprecated. It is recommended to use settings.sh in bash:
https://www.godaddy.com/forsale/settings.sh?utm_source=TDFS_BINNS2&utm_medium=parkedpages&utm_campaign=x_corp_tdfs-binns2_base&traffic_type=TDFS_BINNS2&traffic_id=binns2&
The following is an example output when running the setup script for the first time using the source command:
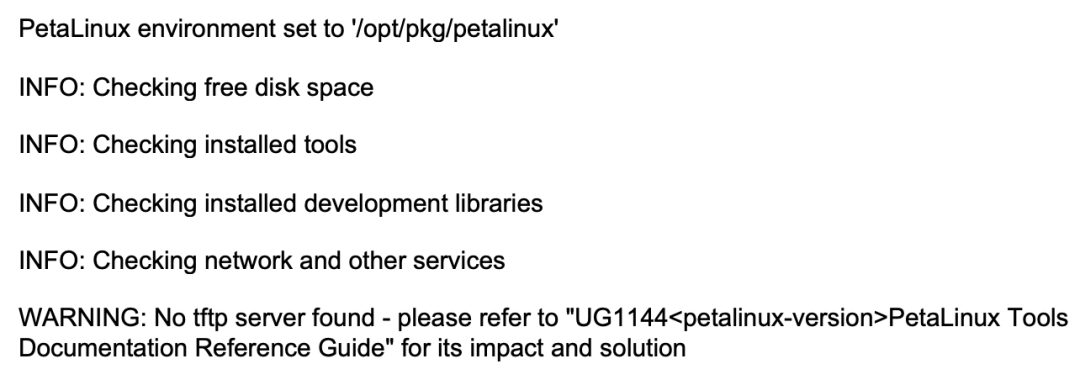
Verify that the working environment is set up:
echo $PETALINUX
Example output: /opt/pkg/petalinux
The environment variable $PETALINUX should point to the installation path of PetaLinux. The output may differ from this example based on the PetaLinux installation path.
Create PetaLinux Project
Create a project using PetaLinux BSP
1. Change to the directory where you want to create the PetaLinux project. For example, if you want to create the project under /home/user, run the following command:
cd /home/user
2. Run the petalinux-create command in the command console:
petalinux-create project -s<path-to-bsp>
This references the development board based on the installed BSP. The output is as follows:
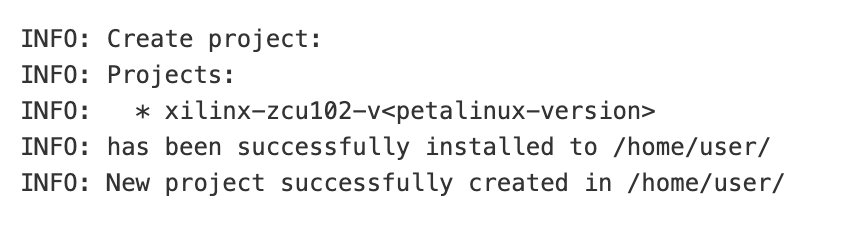
In the aforementioned example, when the command is run, it will inform you that the project is being extracted and installed from the BSP. If the specified location is on a network file system (NFS), the TMPDIR for the project will be changed to /tmp/<projname-timestamp-id>. Otherwise, the specified location will be $PROOT/build/tmp.
Do not create symbolic links from the local file system to the NFS file system. You cannot locate the “tmp” directory in the build using NFS, and this operation will fail.。
Note:When creating a project on NFS, PetaLinux requires at least 50 GB (up to 100 GB) of space on TMPDIR for a successful build.
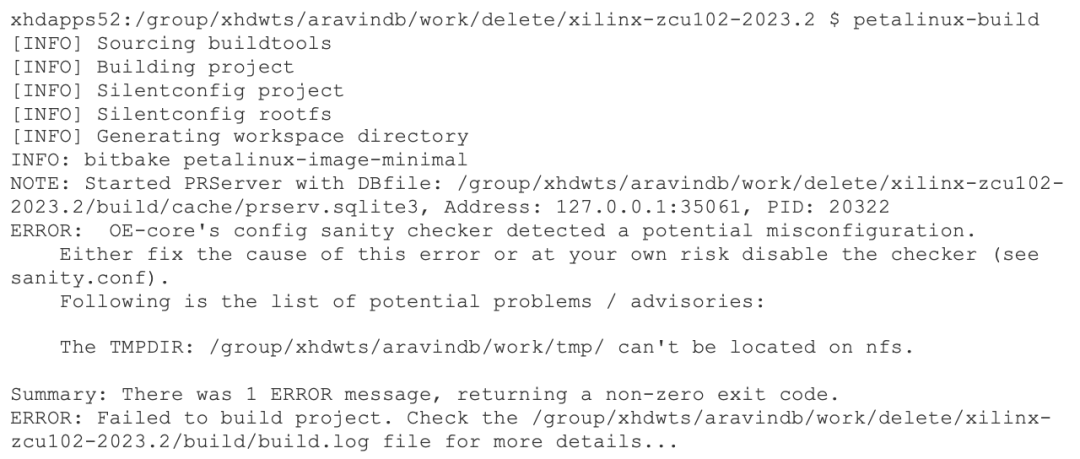
If /tmp/<projname_timestamp-id> is also on NFS, an error will be thrown. You can change TMPDIR when creating the PetaLinux project using the following command:

Alternatively, you can create or modify TMPDIR at any time using petalinux-config > Yocto-settings.
Never configure TMPDIR for two different PetaLinux projects to the same location, as this may cause build errors. Never create a PetaLinux project in the tool installation area, nor use the tool installation area as a temporary build area.
If TMPDIR is located in /tmp/.., deleting the project will not delete TMPDIR. To delete TMPDIR, run petalinux-build -x mrproper.
Error Log:
Configure Hardware Platform Using AMD Vivado™ Design Suite
You can create a hardware platform using the AMD Vivado™ Design Suite. Regardless of how you create and configure the hardware platform, a small amount of hardware IP and software platform configuration is required to ensure the hardware platform can run Linux at any time.Specific instructions are as follows:
AMD Zynq™ UltraScale+™ MPSoC and AMD Versal™ Adaptive SoC
The following lists the hardware requirements for the AMD Zynq UltraScale+ MPSoC and AMD Versal Adaptive SoC hardware project to boot Linux:
-
At least 2 GB of external memory (required).
-
Serial console UART (required).
-
Non-volatile memory, such as QSPI flash and SD/MMC. This memory is optional; if this memory is not available, only JTAG boot will work.
-
Ethernet (optional, essential for network access).
Note:If using soft IP with interrupts or external PHY devices with interrupts, ensure that the interrupt signals are connected.
AMD Zynq 7000 Devices
The following lists the hardware requirements for the Zynq 7000 hardware project to boot Linux:
-
A triple timer counter (TTC) (required).
Note:If multiple TTCs are enabled, the Zynq 7000 Linux kernel will use the first TTC block from the device tree. Ensure that other kernels do not use that TTC.
-
At least 512 MB of external memory controller (required).
-
Serial console UART (required).
-
Non-volatile memory, such as QSPI flash and SD/MMC. This memory is optional, but if not provided, only JTAG boot will work.
-
Ethernet (optional, essential for network access).
Note:If using soft IP, ensure that the interrupt signals are connected. If using soft IP with interrupts or external PHY devices with interrupts, ensure that the interrupt signals are connected.
AMD MicroBlaze™ Processor (AXI)
The following lists the requirements for the MicroBlaze hardware project to boot Linux:
IP Core Checklist:
-
External memory controller with at least 512 MB of storage (required)
-
Dual-channel timer with interrupt connection (required)
-
Serial console with interrupt connection UART (required)
-
Non-volatile memory, such as linear flash or SPI flash (required)
-
Ethernet with interrupt connection (optional, but necessary for network access)
MicroBlaze Processor Configuration:
When the system boots from non-volatile memory, the MicroBlaze processor’s initial boot loader fs-boot requires at least 4 KB of block RAM (for parallel flash) and at least 8 KB of block RAM (for SPI flash).
Note:PetaLinux only supports 32-bit MicroBlaze processors.
Import Hardware Configuration
Steps to import hardware configuration:
1. Navigate to your PetaLinux project directory using cd.
cd<plnx-proj-root>
2. Use either of the following methods to import the hardware description via the petalinux-config command:
-
Using the directory path containing the XSA file:
petalinux-config –get-hw-description<PATH-TO-XSA Directory>
-
Using the XSA file path:
If you have multiple XSA files in the specified folder, petalinux-config will throw an error.
-
To avoid such errors, you can provide the full XSA file path as follows:
petalinux-config –get-hw-description<PATH-TO-XSA-FILE>
Note:If you later change the XSA files in <PATH-TO-XSA directory>, it will cause a warning when executing petalinux-config/petalinux-build commands stating “INFO: Seems like your hardware design:<PATH-TO-XSA Directory>/system.xsa has changed”.This means your XSA has changed. To use the latest XSA, run petalinux-config –get-hw-description again.This will launch the top-level system configuration menu. When running the petalinux-config –get-hw-description command for the PetaLinux project, the tool will detect changes in the imported hardware design and launch that menu.
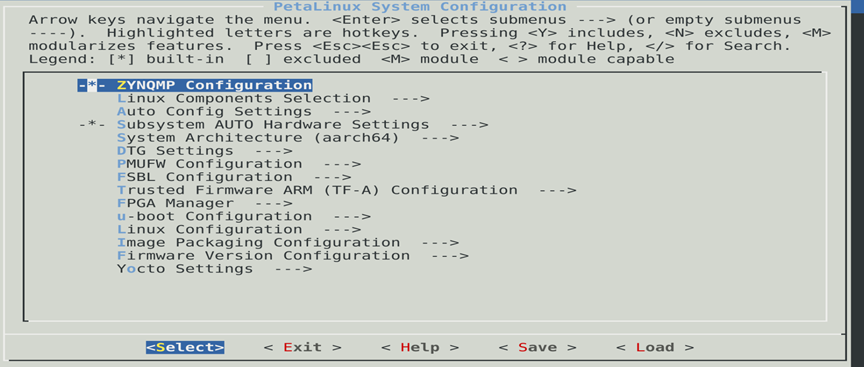
Figure: System Configuration Menu
Ensure that “DTG Settings > (template) MACHINE_NAME” is selected (DTG settings > (template) MACHINE_NAME), and use the following options:
-
When using AMD evaluation boards with default BSP/hardware projects, keep the BSP setting as AUTO. This will automatically determine the DTG machine configuration based on your specific design.
-
For custom development boards, keep the default values.
-
For custom hardware designs implemented on AMD evaluation boards, use the values in the table below.
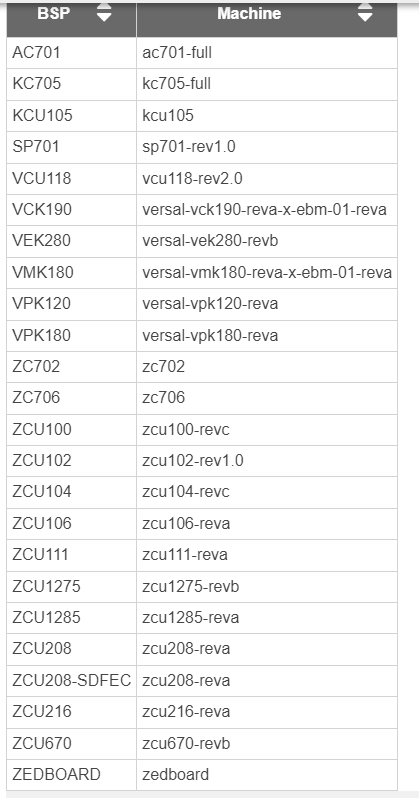
Table: BSP and Machine Names
Ensure that “Subsystem AUTO Hardware Settings” is checked, and then enter the menu shown in the following figure:
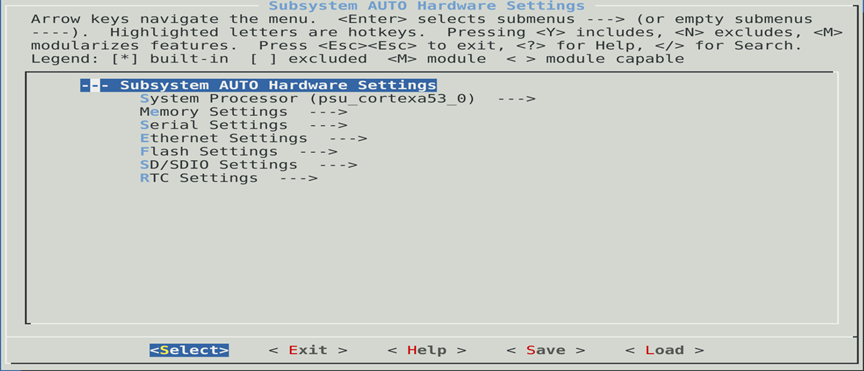
Figure: Subsystem AUTO Hardware Settings
The “Subsystem AUTO Hardware Settings →” menu supports custom system-level hardware settings. You can select processors, storage, serial console, or flash memory.
Build PetaLinux System Image
Use cd to navigate to your PetaLinux project directory.
cd<plnx-proj-root>
petalinux-build
This step will generate device tree DTB files, first-stage boot loaders (for AMD Zynq™ 7000 devices, AMD Zynq UltraScale+™ MPSoC, and AMD MicroBlaze™), PLM (for AMD Versal™ Adaptive SoC), PSM (for Versal Adaptive SoC), and TF-A (for Zynq UltraScale+ MPSoC and Versal Adaptive SoC), U-Boot, Linux kernel, root filesystem image, and U-Boot boot script (boot.scr).
Finally, it will generate the necessary boot images.
AMD Adaptive SoC and FPGA Chinese Technical Support Community
Welcome to visit our community forum:
[https://support.xilinx.com/s/?language=zh_CN]
We hope to help you quickly find what you need. This site is the login page for AMD Adaptive SoC and FPGA support resources, including our knowledge base, community forum, and links to more content. Search and explore the content of your chosen topics, then log in to see more support options.