We have adapted the Yocto file system on our I.MX6UL Elite and All-in-One boards early on. Next, let’s see how to build the Yocto file system and migrate it to the I.MX6ULL Terminator development board.
Reference Documents:
NXP Official Documentation:
《i.MX_Yocto_Project_User’s_Guide.pdf》
Notes:
Ubuntu 14.04 and above versions (the author’s Ubuntu environment is Ubuntu 16.04), recommended Ubuntu 14 64bits or the tutorial’s Ubuntu 16.04 64bits. Both versions have been tested without issues by the author. Ensure that the Ubuntu system has more than 8GB of RAM, the more the better; the author’s environment has 8GB. Ensure at least 80GB of free disk space. The Yocto build will download many files online, so we need to ensure a good network environment on Ubuntu. All operations should be executed under a non-root user.
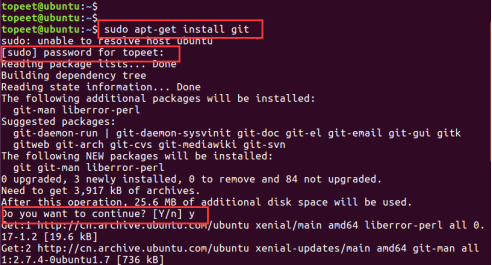
1. Install Git
Install the necessary software packages to set up the Yocto environment.
Use the command “sudo apt-get install git”, enter your password, and during the installation, press “y” to continue installing Git, as shown in the figure below:
Set Up Git
Execute the following commands to set your name and email.
git config –global user.name “Your Name”
git config –global user.email “Your Email”
git config –list
As shown in the figure below:

Install Other Packages
Use the command
"sudo apt-get install gawk wget git-core diffstat unzip texinfo gcc-multilib build-essential chrpath socat libsdl1.2-dev" "sudo apt-get install libsdl1.2-dev xterm sed cvs subversion coreutils texi2html docbook-utils python-pysqlite2 help2man make gcc g++ desktop-file-utils libgl1-mesa-dev libglu1-mesa-dev mercurial autoconf automake groff curl lzop asciidoc"2. Get the Yocto Project
Repo is a script written in Python by Google that calls Git. It is mainly used to download multiple Git repositories.
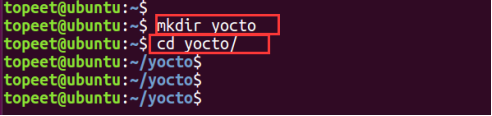
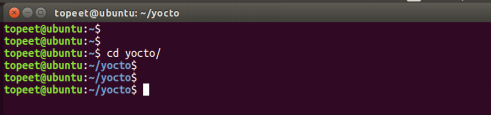
(1) First, we use the command “mkdir yocto” to create the yocto folder, and all subsequent steps will be carried out in this folder. Then use the command “cd yocto/”, as shown in the figure below:
(2) Obtain Repo
There are two methods.
Method 1: The official download link,
http://commondatastorage.googleapis.com/git-repo-downloads/repoMethod 2: The author found a download link online, using Tsinghua source for download.
First, use the command
git clone https://gerrit-googlesource.lug.ustc.edu.cn/git-repoAs shown in the figure below:

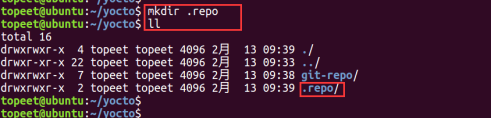
Then use the command “mkdir .repo” to create a hidden folder, and we can check it using the command “ll”.
Next, use “mv git-repo .repo/repo” to move “git-repo” into the newly created “.repo” folder and rename it to “repo”, as shown in the figure:

Then use the command “cp .repo/repo/repo ./” to copy repo to the current directory. As shown in the figure:

Finally, use the command “chmod u+x repo” to change the repo permissions. As shown in the figure:

3. Repo Sync
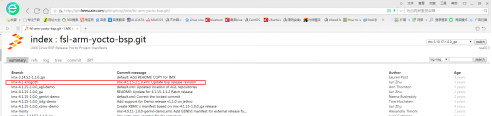
Here we select the Yocto branch, which can be viewed by opening the URL
http://git.freescale.com/git/cgit.cgi/imx/fsl-arm-yocto-bsp.git/to check the branches of the Freescale Yocto project. From the figure, we can see that the imx-4.1-krogoth branch corresponds to kernel version 4.1.15-2.1.0, so we select the imx-4.1-krogoth branch.
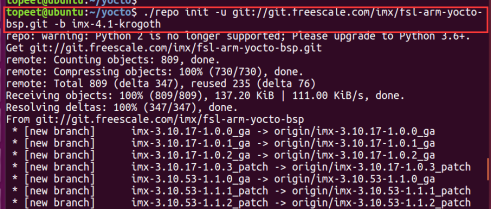
First, execute the command
./repo init -u git://git.freescale.com/imx/fsl-arm-yocto-bsp.git -b imx-4.1-krogothAs shown in the figure:
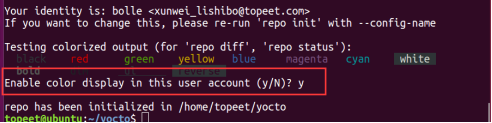
When asked whether to display colors, just input “y”.
Then use the command “./repo sync” to sync the source code and create the NXP official fsl-arm-yocto-bsp.git project’s imx-4.1-krogoth branch. As shown in the figure:
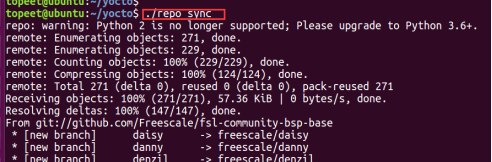
Syncing the source code may take a while and is heavily dependent on the network, so please be patient.
After synchronization is complete, use the command “ls” to check. As shown in the figure:

4. Build the File System
We refer to the relevant content in the NXP official documentation, which provides the following information.
DISTRO has the following four settings:
fsl-imx-x11 — Supports onlyX11 graphics
fsl-imx-wayland — Wayland weston graphics
fsl-imx-xwayland — Wayland graphics andX11, does not support X11 applications usingEGL
fsl-imx-fb — Framebuffer graphics, noX11 orWayland
There are many supported machines, all listed in the “sources/meta-fsl-arm/conf/machine/” folder. Below are a few listed in the official documentation.
imx6qpsabreauto
imx6qpsabresd
imx6ulevk
imx6ull14x14evk
imx6ull9x9evk
imx6dlsabreauto
imx6dlsabresd
imx6qsabreauto
imx6qsabresd
imx6slevk
imx6solosabreauto
imx6solosabresd
imx6sxsabresd
imx6sxsabreauto
imx7dsabresd
Similarly, the official provides various images:
core-image-minimal — Only allows the device to boot with a small image
core-image-base — Pure console image for target device hardware
core-image-sato — Image supportsX11 with the Sato theme and usesPimlico applications
fsl-image-machine-test — With console, no graphical interface,FSL Community core image
fsl-image-gui — With graphical interface, does not supportqt
fsl-image-qt5 — Supportsqt5
More content can be found in the official documentation.
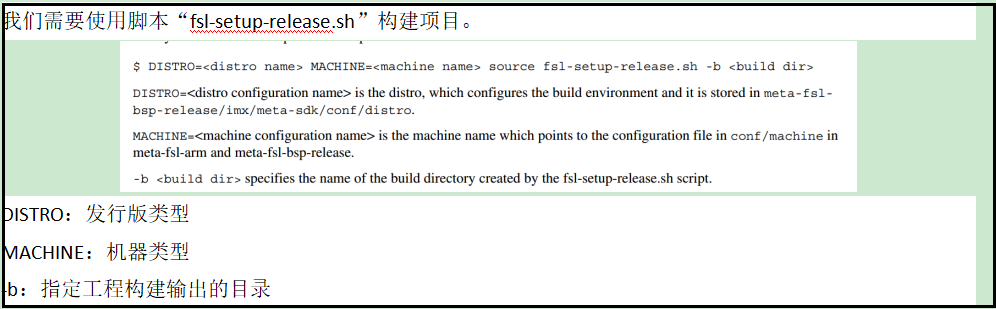
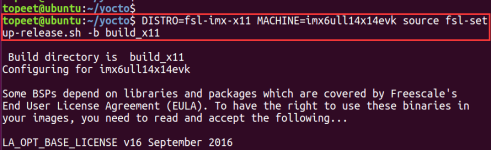
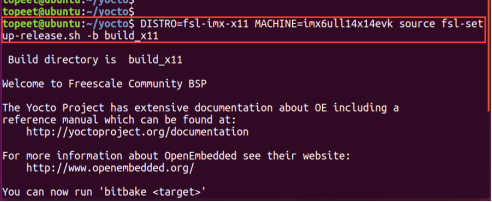
We choose the fsl-imx-x11 distribution and fsl-image-qt5 to build a file system supporting qt. The development board uses the IMX6ULL chip, so the MACHINE choice is imx6ull14x14evk. The fsl-setup-release.sh script will explain the parameters configured by the user.
We use the following command to build the file system:
DISTRO=fsl-imx-x11 MACHINE=imx6ull14x14evk source fsl-setup-release.sh -b build_x11
As shown in the figure:
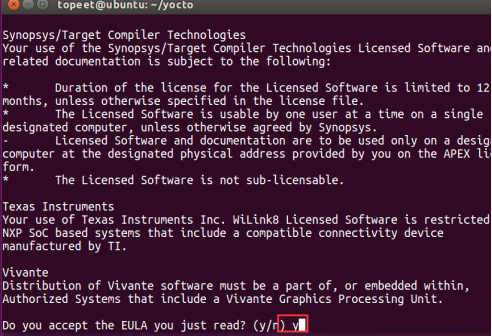
Then read the EULA content in the middle, press space to continue, and after reading, press y+enter to confirm. As shown in the figure:
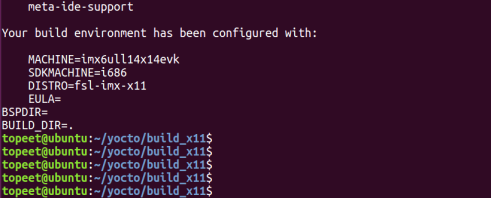
After configuration, it will directly enter the specified “build_x11” directory, as shown in the figure:
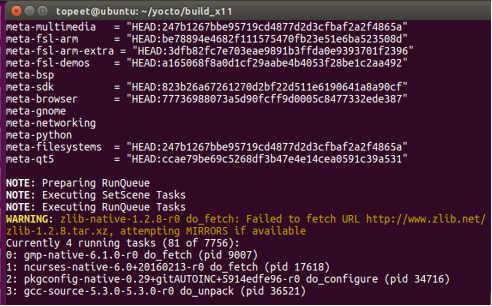
Then use the command “bitbake fsl-image-qt5” to start building the root file system. As shown in the figure:

Below are screenshots from the build process.
In the tmp/deploy/images/imx6ull14x14evk directory, you can find the generated images, as shown in the figure:
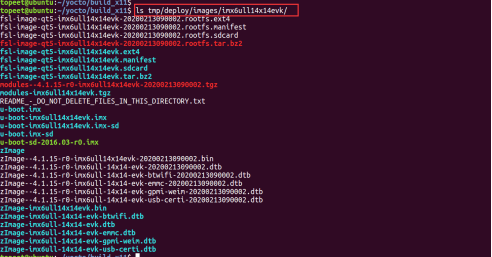
This contains different formats of uboot, kernel, device tree, and file system images. We only need to use the “tar.bz2” format.
We will copy the fsl-image-qt5-imx6ull14x14evk-*********.rootfs.tar.bz2 file to the flashing tool directory and rename it to rootfs.tar.bz2.
It is important to note that the compiled file system is quite large, about 300MB, and can be flashed to the emmc version core board. To flash it to the nandflash version, the file system needs to be trimmed.
The required uboot, kernel, and device tree for this file system are all previously compiled or provided in the materials, just flash them. As shown in the figure: the flashing time is relatively long, this is the screen after we flash it to the development board and start it up.
5. Build SDK Tools
This section mainly explains the steps to build the SDK tools. The SDK tools include cross-compilation tools, which will be used later for developing qt programs and c programs using Yocto.
We will open a new terminal interface and log in as a regular user. As shown in the figure:
Then we use the command “cd yocto/” to enter the folder where we previously operated the Yocto project. As shown in the figure:
Next, we use the command
"DISTRO=fsl-imx-x11 MACHINE=imx6ull14x14evk source fsl-setup-release.sh -b build_x11"to add project configuration information (the generated directory is still the previous build_x11). As shown in the figure:
Then use the command “bitbake meta-toolchain-qt5” to build the SDK tool. As shown in the figure:
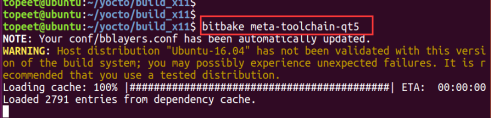
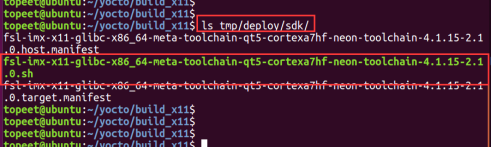
Please be patient while the build completes; the tool will be generated in the “tmp/deploy/sdk” folder. The file name will be
"fsl-imx-x11-glibc-x86_64-meta-toolchain-qt5-cortexa7hf-neon-toolchain-4.1.15-2.1.0.sh "Use the command “ls tmp/deploy/sdk/” to view it. As shown in the figure:
After executing this script file, the compiler will be automatically installed in the “/opt” directory. This cross-compiler can be used to compile uboot, kernel, file systems, as well as c programs and qt programs. This will be discussed in future Yocto program development.
I.MX6ULL Terminator – During the development board event: Original price 398, order in the Taobao store to receive a coupon for a 100 yuan discount, first come first served Actual price: 298 yuan, no value is more valuable~ Taobao link:
https://item.taobao.com/item.htm?id=614020183147&qq-pf-to=pcqq.c2cAll materials are free, manuals can be downloaded for free, videos are being updated… Manual download link: https://pan.baidu.com/s/1O_fXb0JAxCnztTiLYqmZqw Extraction code: yd3g https://pan.baidu.com/s/1BzlKeb-RvtDAoMcpLSCW4Q Extraction code: jnpm
■ Follow the “Xunwei Electronics” WeChat public account for tutorials, materials, and industry insights and product information.
■ For more information about Xunwei, please contact us:
Sales Engineer: 0312–6796610 extension 8001
Technical Support: 0312-6796610 extension 8003, 8004
Customized Solutions: 0312-6796610 extension 8003
■ Real-time Technical Support:
AM 9:00—12:00, PM 13:30—17:30 (Monday to Saturday)
END
Long press to recognize the QR code to follow

Xunwei Electronics
Making Learning Easier, Making Development Simpler
