Teacher Zhu, this tutorial is based on notes I整理ed from a recent competition. I remember that there was very little information online about the KEA128 application in smart car competitions. I have graduated but couldn’t bear to delete these materials.
If you think this article might be useful for everyone (especially those just starting with cars), please feel free to share it so more people can see it.

This is a note I made two years ago during a competition. At that time, due to lack of experience in establishing IAR projects, the KEA128 chip was introduced to the college student market along with new rules from the competition organizers, so there was no related information online. It took me a week of exploration to complete the establishment of the project.
Nowadays, if there are no rule restrictions, no one would choose this chip. However, regardless of the chip, the process of establishing a project is quite similar. The establishment of this project was also based on a tutorial for creating a K60 project, so I decided to share this to avoid keeping a document on my computer that I can’t throw away!
1. Tools Required
1. IAR Compiler Software
The version used in this article is 7.8. Due to the underlying library it comes with, it is recommended to use a compiler version above 7.4.
2. External KEA128 Underlying Library
Find an existing KEA128 project in the root directory of this document.
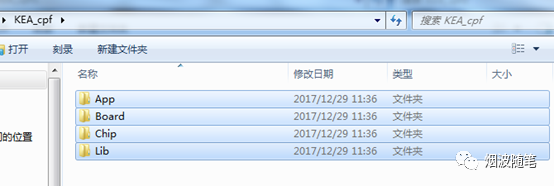
The external project framework generally includes:
Board Development board driver program
Lib Ready-made library code
Subfolders generally place header files in inc and programs in src.
2. Creating a New Project
1. Copy the underlying library framework to the root directory where you want to establish the project
Or copy these items from an existing project
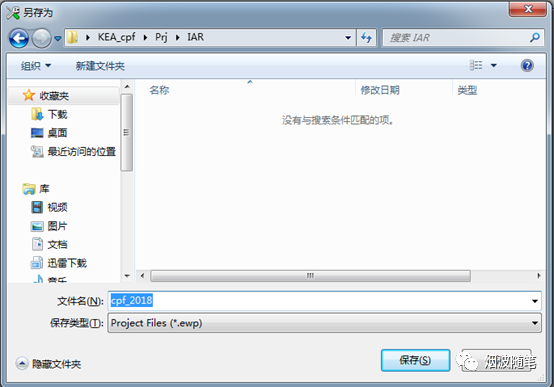
2. Create a folder named PrjIAR in this directory to save the project configuration information
3. Open IAR software and create a new workspace
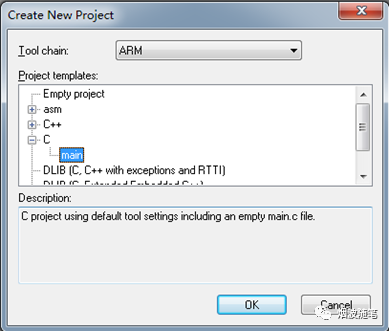
4. Create a new project
ProjectaCreate New Project, in the pop-up window click to expand C, select main, and click OK
Save the project file ewP to the newly created IAR folder
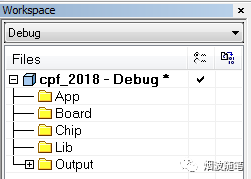
5. Establish the project framework
Remove the main function from the project in the left list (if there is one)
Create the root directory according to the external underlying library framework by right-clicking in the project workspace area and selecting AddaAdd Group… , then create the root directory in the pop-up dialog
Then, add the respective c files in their respective directories by right-clicking on the directory and selecting Add Files… . It should be noted that: in App, all header files except include.h need to be added; in Chip, include common.h from its subfolder inc, startup_SKEAZ1284.s from src\IAR, and statem_SKEAZ1284.c.
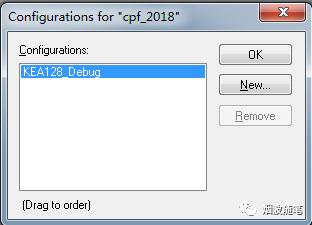
6. Edit Configurations
Open the Configurations window in Project, create a KEA128_Debug configuration option, select it and enter the window again to delete the previous two items.
3. Project Configuration
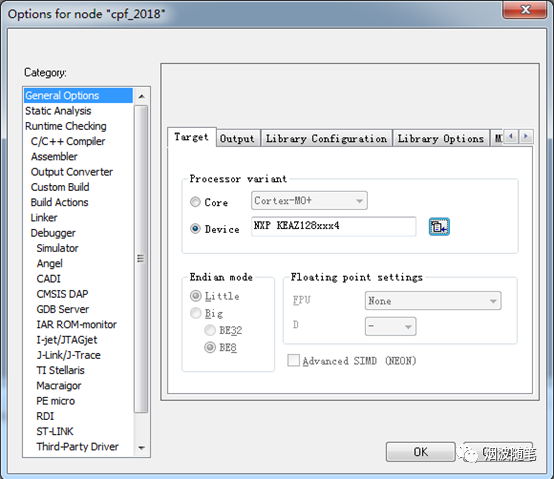
1. Open Project Configuration
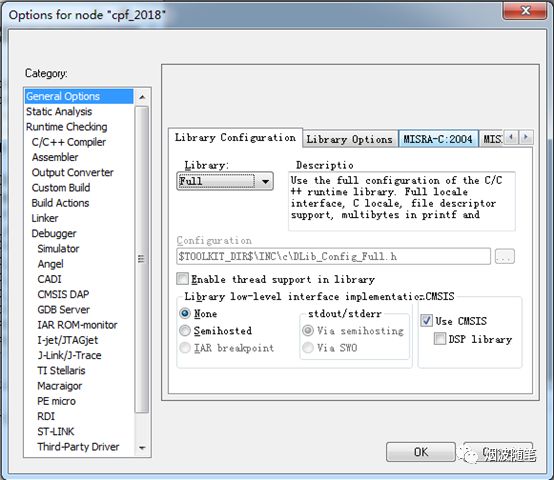
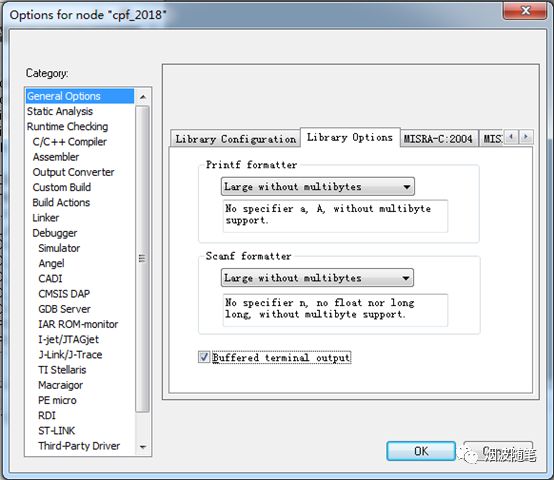
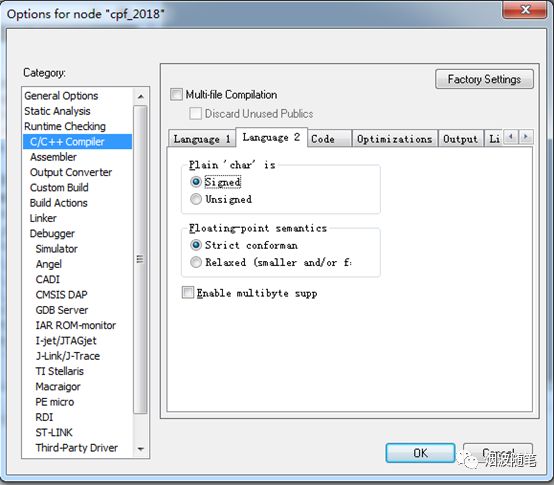
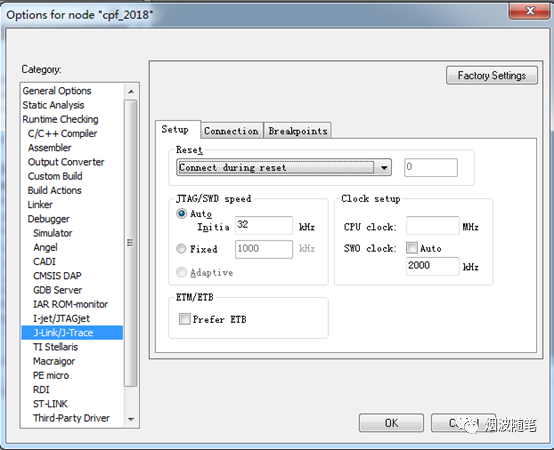
Right-click on the project name in the root directory and select Options…
2. Configuration Content

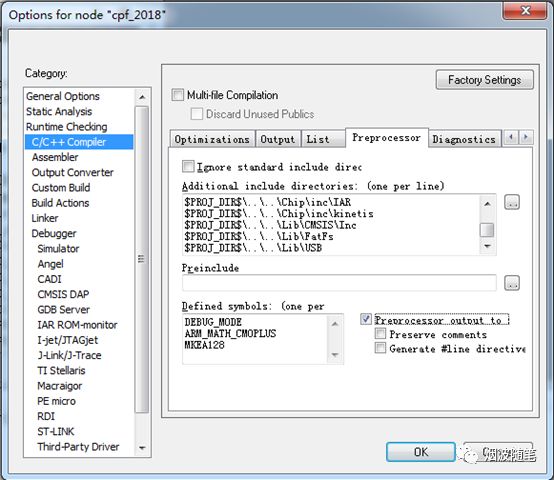
$PROJ_DIR$\..\..\App
$PROJ_DIR$\..\..\App\Inc
$PROJ_DIR$\..\..\Board\Inc
$PROJ_DIR$\..\..\Chip\inc
$PROJ_DIR$\..\..\Chip\inc\IAR
$PROJ_DIR$\..\..\Chip\inc\kinetis
$PROJ_DIR$\..\..\Lib\CMSIS\Inc
$PROJ_DIR$\..\..\Lib\FatFs
$PROJ_DIR$\..\..\Lib\USB
DEBUG_MODE
ARM_MATH_CM0PLUS
MKEA128
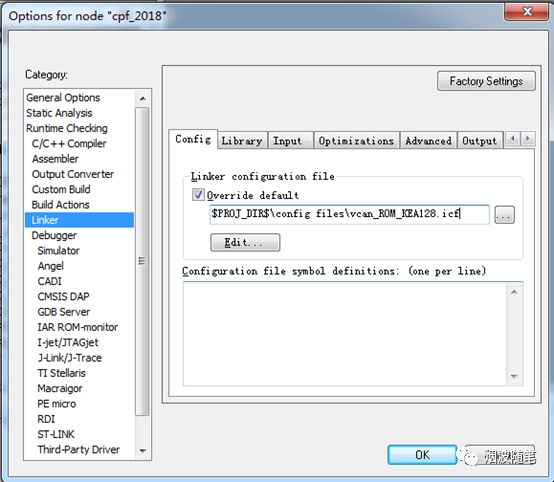
Copy the config files folder from this document or other projects to Prj\IAR
$PROJ_DIR$\config files\vcan_ROM_KEA128.icf
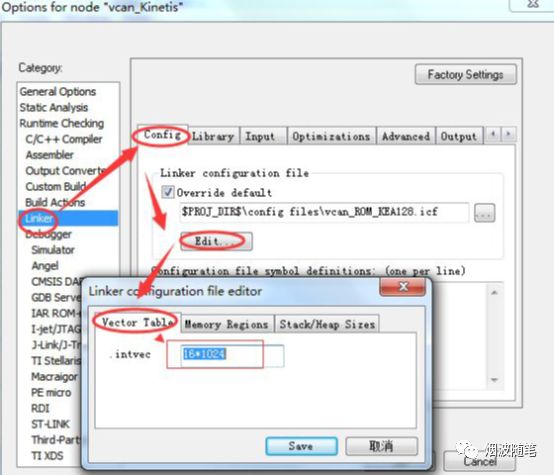
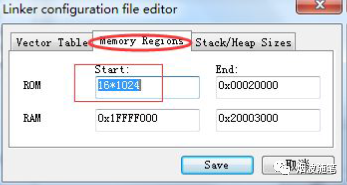
The external KEA core board, the startup address is16K
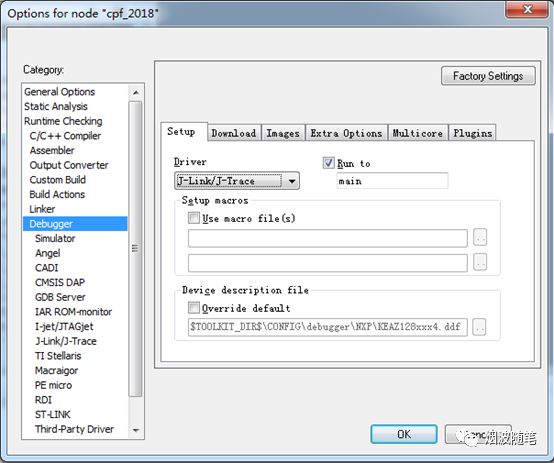
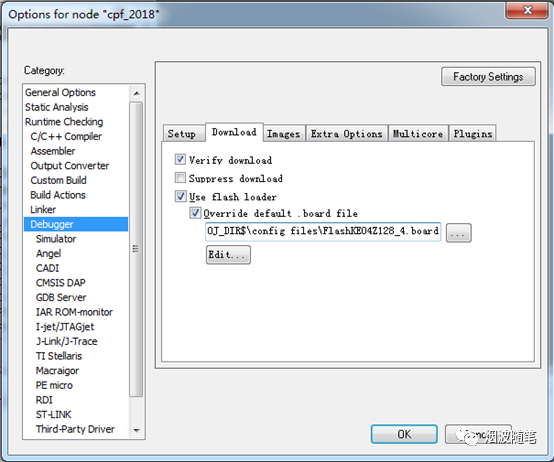
$PROJ_DIR$\config files\FlashKE04Z128_4.board
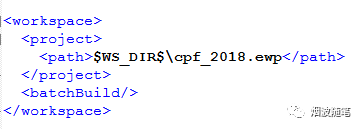
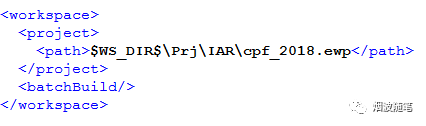
3. Save the project (creation of eww)
Click OK to save the project configuration, then save the project. Since the eww file is located in the folder Prj\App, it is inconvenient to open it every time. You can copy it to the root directory:
Copy the eww file to the root directory, then open it with Notepad and fill in the relative path with Prj\App