Tutorial Introduction: This post is derived from a popular thread by forum fan 【Chococraft】.
Everyone has their own birthday, and for children, celebrating a birthday is especially joyful, as it often comes with various surprises, delicious food, fun activities, and long-awaited birthday gifts. Today, I present a special birthday gift: a DIY birthday music atmosphere light that is super easy to make.
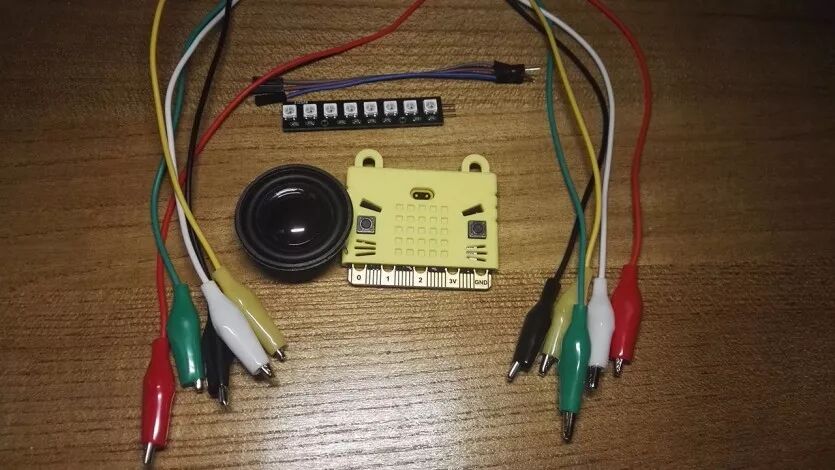
Materials Required
✎Materials Required
1 Microbit development board
1 LED strip with 8 lights
1 silicone case for Microbit
1 small speaker
3 jumper wires
5 alligator clips

DIY Practice

⒈ Install the Speaker
The speaker is quite simple; you don’t need to worry about polarity, just connect it directly since it is mono. If it were stereo, you would need to pay attention to the wiring.
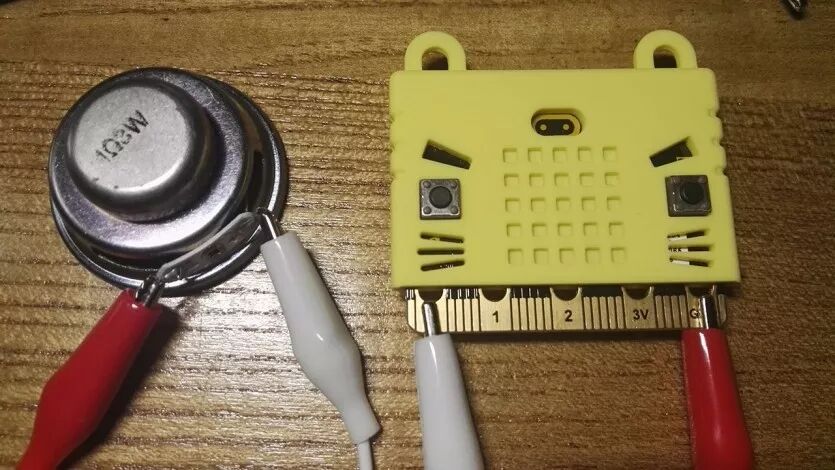
The two wires correspond to the copper interface 0 and GND of the Micro:bit; port 0 refers to P0, which is the default audio interface on the bit.
⒉ Connect the LED Strip
Here, we are using an LED strip with 8 lights, with interfaces DI, VCC, and GND.
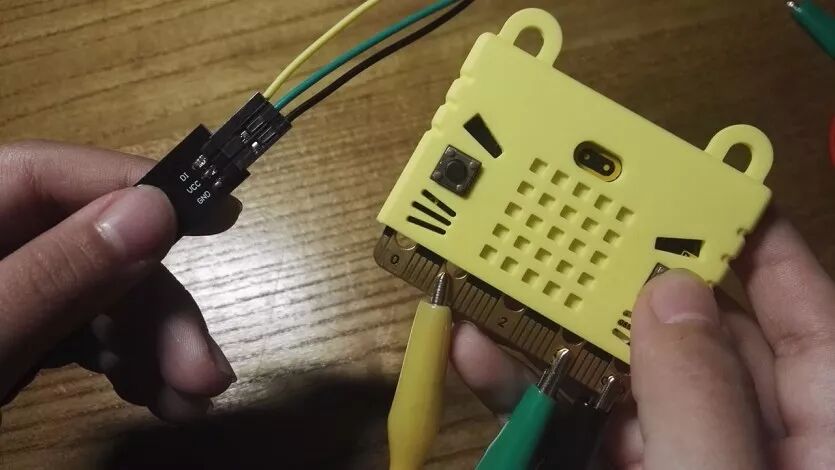
✎ Detailed Interface Guide
DI (short for digital in, meaning data input)
VCC (short for voltage circuit, meaning current input)
GND (short for ground, meaning reference ground for power)
VCC is the positive terminal, while GND refers to the common terminal, which is assumed to be a ground for the application. For power, it is the negative terminal. It is different from the earth; sometimes it needs to be connected to the earth, and sometimes it does not, depending on the specific situation. (The explanation may not be correct; corrections are welcome. )
)

▲ Note: The black and white alligator clips in the picture share the GND interface, so they are clamped together.
⒊ Write the Program
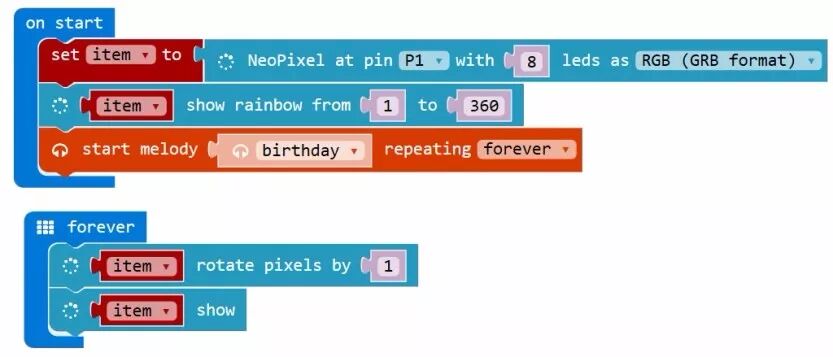
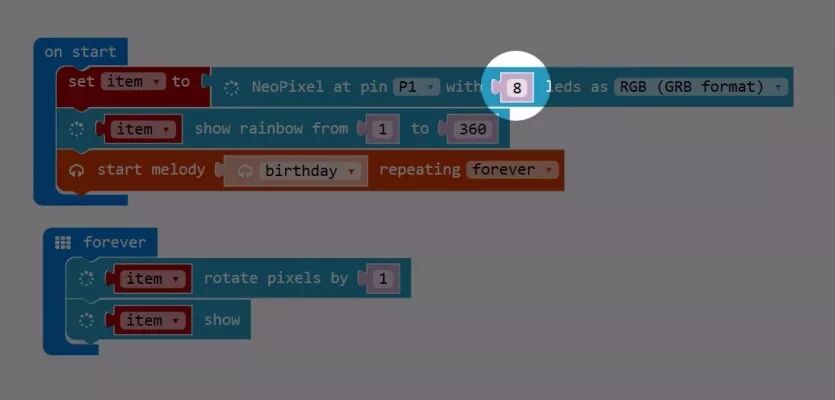
✎ Program Explanation 1
-
The first line sets a project variable for the 8 LED lights connected to port P1 (RGB display mode);
-
The second line displays the rainbow mode for the variable project, divided into 360 color levels;
-
The third line plays the birthday song, which rolls and repeats.
All three are placed in the start option (on start), meaning they will execute as soon as the Micro:bit is powered on.
✎ Program Explanation 2
-
The fourth line loops the variable project starting from the first color level.
-
The fifth line starts displaying the variable project…
The last two lines are placed in the repeat execution (forever) section.
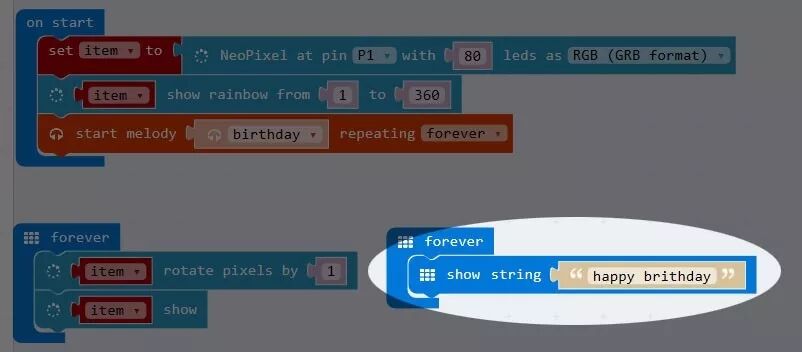
After starting execution, I noticed a problem: the song played at a good speed, but the LED strip color change was too fast; I thought about slowing it down but couldn’t find the command to control the speed.
Later, I remembered the first and second program modules; the second one divides the rainbow colors into 360 levels, and the first one loops the levels among the 8 lights, which was too fast. So, I tried to trick the Micro:bit by changing 8 to 80, meaning this LED strip has 80 lights… Would the 360 color levels loop slower?
Well… the Micro:bit fell for it, and the loop indeed slowed down a lot, making the color changes much smoother. The child felt something was missing after watching for a while, as the 5×5 screen on the Micro:bit was idle, so the child added a program at the end, which was…
The final effect is quite good! You should try it too; it’s simple to learn, visually appealing, and the kids are very interested. Here’s a video;
Feel free to click “Read the original text” for more!