Follow+Star Public Account, Stay Tuned for Exciting Content

Author | strongerHuang
WeChat Public Account | Embedded Column
Embedded Column
1
How much do you understand about procedural and object-oriented programming?
C language is a procedural language, while C++ is an object-oriented programming language. In this context, procedural programming tends to have less code and higher execution efficiency compared to object-oriented programming.
Thus, C language has a smaller code size and faster execution speed compared to C++. Of course, this is in comparison to C++. In fact, assembly language has even smaller code size and faster execution speed compared to C. You can refer to the article: What are the Differences Between Writing LED Blinking Programs in Assembly and C Language?
Because the RAM and Flash resources of microcontrollers are relatively small, and their execution speeds are also lower, you will find that very few people use C++ for microcontroller projects.
However, as the storage resources and execution speeds of microcontrollers have increased, some engineers are starting to use C++ for microcontroller projects.
Embedded Column
2
In the Keil MDK development environment, it is quite common to develop STM32 using C language. This article will not cover the steps such as installing the development environment or creating a project. Please refer to my articles:
This is the basic tutorial for Keil. If anyone has questions, you can reply with the keyword “Keil Series Tutorial” in my public account to read more about using Keil.
Next, you need to understand some basic syntax of C++. The content discussed in this article is quite basic and only involves fundamental knowledge of C++, such as classes and objects.
If you haven’t learned C++, that’s okay. As long as you understand C language, you can easily learn basic C++ knowledge online.
Embedded Column
3
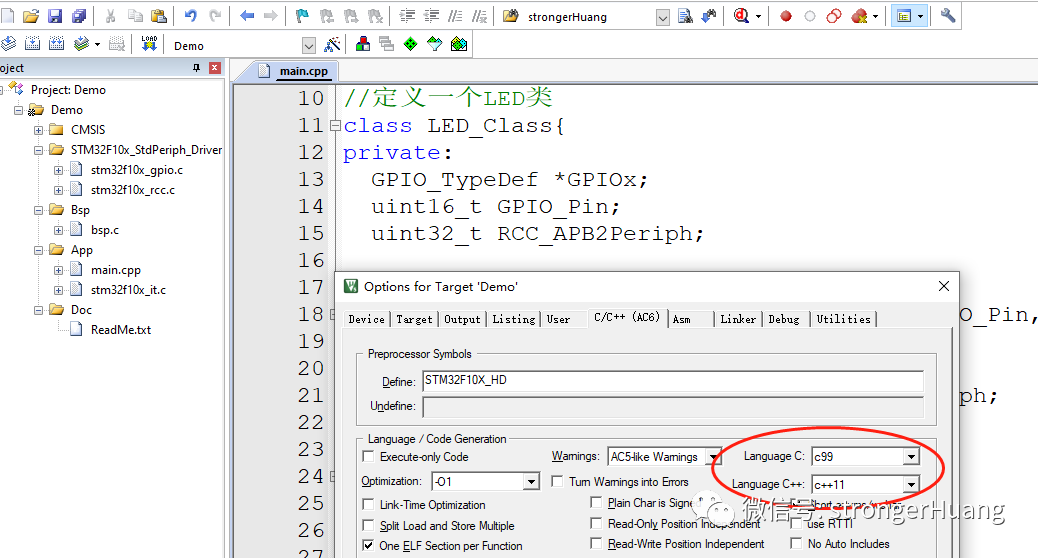
In the Keil MDK environment, the ARM compiler (Arm Compiler) is used. Many online tutorials use V6 compiler, but actually both V5 and V6 versions support the C++ programming language.
Add C++ source code to the project (for example: main.cpp)
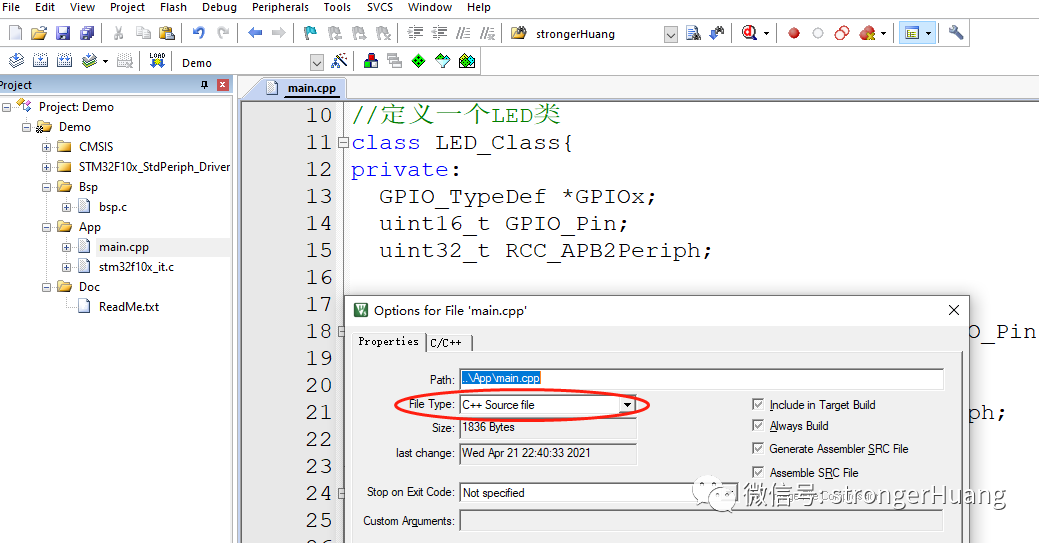
Using V5 and V6, there are some differences in project configuration options:
The development library from ST has already provided support, and you will see a piece of code like this:
#ifdef __cplusplus extern "C" {#endif
// C source code here
#ifdef __cplusplus}#endif
What does this mean?
This is a preprocessor directive, and it indicates that: support for mixed programming in C and C++.
Embedded Column
4
This article assumes that everyone is familiar with using C language to develop STM32 LED blinking knowledge and will directly describe the C++ code content.
This article presents a very basic example “LED Light”, for example, creating a main.cpp source code file.
First, define an LED class:
class LED_Class{}Then define private members (public can also be used):
class LED_Class{private: GPIO_TypeDef *GPIOx; uint16_t GPIO_Pin; uint32_t RCC_APB2Periph;}Next, the functions used: initializing GPIO, turning on and off the LED, etc.
class LED_Class{private:  GPIO_TypeDef *GPIOx;  uint16_t GPIO_Pin;  uint32_t RCC_APB2Periph;
public:  LED_Class(GPIO_TypeDef *GPIOx,uint16_t GPIO_Pin, uint32_t RCC_APB2Periph){    LED_Class::GPIOx = GPIOx;    LED_Class::GPIO_Pin = GPIO_Pin;    LED_Class::RCC_APB2Periph = RCC_APB2Periph;  }
  void Init(void){      GPIO_InitTypeDef GPIO_InitStruct;
      GPIO_InitStruct.GPIO_Pin   = GPIO_Pin;      GPIO_InitStruct.GPIO_Speed = GPIO_Speed_50MHz;      GPIO_InitStruct.GPIO_Mode  = GPIO_Mode_Out_PP;      GPIO_Init(GPIOx, &GPIO_InitStruct);
      RCC_APB2PeriphClockCmd(RCC_APB2Periph, ENABLE);  }
  void Open(void){    GPIO_SetBits(GPIOx, GPIO_Pin);  }
void Close(void){ GPIO_ResetBits(GPIOx, GPIO_Pin); }};Embedded Column
5
The thought process in C++ is similar to that in C language: first initialize, then implement:
int main(void){  LED_Class LED1(GPIOF, GPIO_Pin_7, RCC_APB2Periph_GPIOF);  LED_Class LED2(GPIOF, GPIO_Pin_8, RCC_APB2Periph_GPIOF);
  LED1.Init();  LED2.Init();
  while(1)  {    LED1.Open();    LED2.Open();    Delay(10);
    LED1.Close();    LED2.Close();    Delay(10);  }}
There is also another way to initialize:
int main(void){  LED_Class *LED1 = new LED_Class(GPIOF, GPIO_Pin_7, RCC_APB2Periph_GPIOF);  LED_Class *LED2 = new LED_Class(GPIOF, GPIO_Pin_8, RCC_APB2Periph_GPIOF);
  LED1->Init();  LED2->Init();
  while(1)  {    LED1->Open();    LED2->Open();    Delay(50);
    LED1->Close();    LED2->Close();    Delay(50);  }}
The compiled code size is relatively larger:
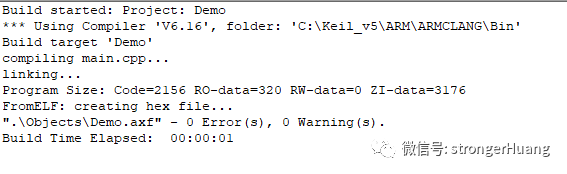
Then, if you have a development board, you can directly download and run to see the LED blinking phenomenon.
Isn’t it simple? By now, have you learned it?
Reply with ‘single-chip microcontroller’ or ’embedded software design and development’ to read more related articles.

Click “Read the Original” to see more shares. Feel free to share, collect, like, and view.