
There are many reasons for writing this post, the biggest reason being that the Renesas development environment is indeed a bit troublesome. Developing with Renesas MCUs can be quite challenging, and I encountered many pitfalls while exploring on my own, so I need to document this.I got in touch with Renesas because it has become really difficult to find MCUs to replace in our products. Initially, we started with STM32, and after some bumps, we completed the development, only to find that ST raised prices and ran out of stock. We switched to GD32, transferred the functionality, and after passing the tests, GD also fell into delivery difficulties. Fortunately, I had previously posted about GD’s development, but it was still not mass-produced before it went under. Everyone knows about the chip shortages that followed. Now, there is no stock for anything we switch to. Finally, we found Renesas’s R7FA2E1, which is newly released, not being speculated on, and has a sufficient supply. However, I actually find it quite difficult to use, especially for those familiar with ST or GD and other domestic chips.So we decided to start developing and testing it out, first setting up the environment to see if we could light up an LED. As of the time I posted, I still hadn’t received the sample chips because the distributor needed time to procure them. To save time, we decided to buy a few samples from a materials platform, but this morning I received news that due to U.S. export controls, the shipment couldn’t go out. The higher-ups informed me that we might have to switch chips again, which feels like a pointless endeavor.
1. Obtaining Relevant Information for RA
I am using the RAE1, and I will take this as an example. Open the Renesas official website, search for RA2E1 – 48MHz Arm® Cortex®-M23 Entry-Level General-Purpose Microcontroller, and select the chip.

Once on the page, scroll down to find relevant materials. Here you can download the data sheets and other documents.
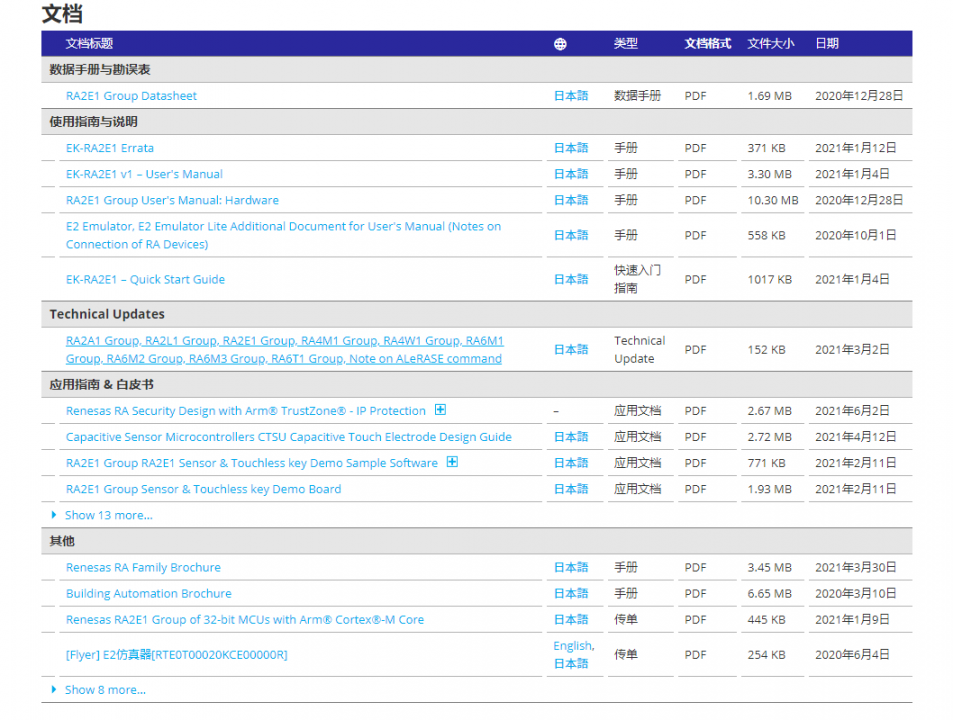
Continue scrolling down to find software and tools:
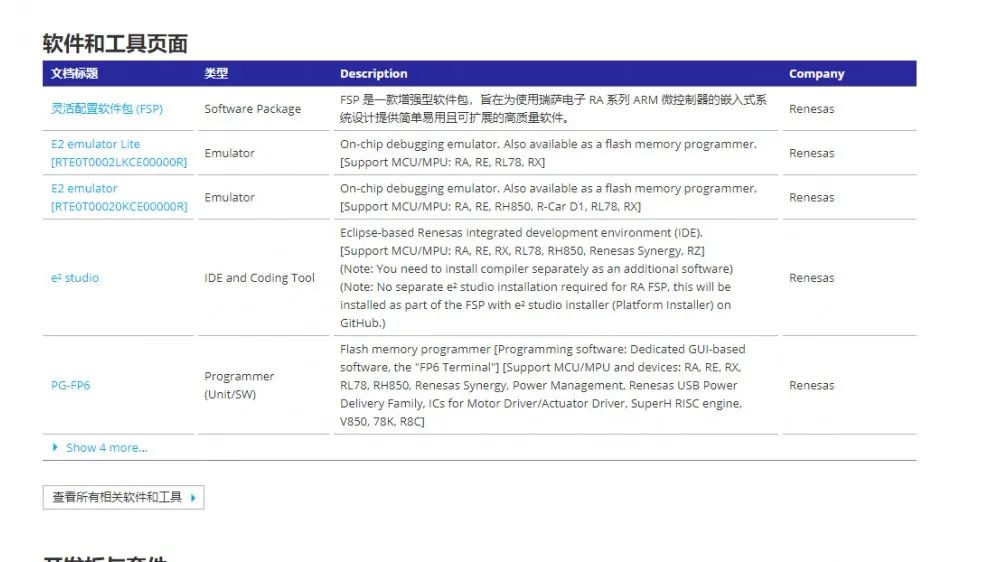
Download the Flexible Software Package (FSP) and e² studio. The first file is essential, similar to STM32CubeMX, for quickly configuring a project, including clock configuration, GPIO configuration, peripherals, interrupts, RTOS, etc. e² studio is Renesas’s own compilation environment for compiling code, which can replace Keil. The latest version is bundled with FSP and allows for quick configuration of clocks and peripherals within the software.
1. If the PC is running a Windows 10, 64-bit environment, this is the ideal situation. Directly install the latest version of the “E2 studio + FSP bundled environment.” It is strongly recommended not to debug in a 32-bit Windows environment, as there will be compiler compatibility issues.
2. When installing e2 studio, there will be a prompt asking whether to install the QE plugin; please choose to install it. It may not be used, but installing the QE plugin separately is very troublesome and requires many steps, which is inconvenient.
FSP and e2 studio can be installed directly without any notable points; just follow the installation prompts.
2. Selection and Considerations for the Debugger
1. If you choose J-Link, be particularly careful when it is plugged in.
A. If it is the J-Link that comes with the development board, it is a genuine J-Link registered by Renesas. When e2 studio prompts for an upgrade, you can choose to automatically update the firmware on the J-Link of the EVK.
B. If the J-Link is a third-party version purchased online, please be particularly careful; when e2 prompts for an update, do not click on automatic update, as it may lock the J-Link. —- This issue does not occur 100% of the time, as we at Renesas do not understand the operational principles of J-Link and cannot provide specific advice.
C. Since the RA series uses the latest ARM Cortex-M23 and M33 cores, there is a certain probability that the version of J-Link on your computer may not be high enough. Please download the latest version of the J-Link PC driver from Segger’s official website. As of around December 2020, the latest version is V688.
2. If you choose E2 Lite, be sure to pay attention.
A. Please strictly follow the EVK’s instructions and reserve the UART9 interface to the E2. This is not a debugging reserved port; it is a programming port. When using E2, UART9 must be available; otherwise, programming will not succeed.
Note: The subsequent quick programming of empty chips will also use this UART9, so it is strongly recommended to reserve it.
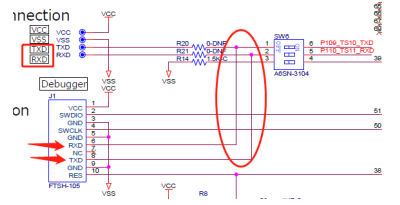
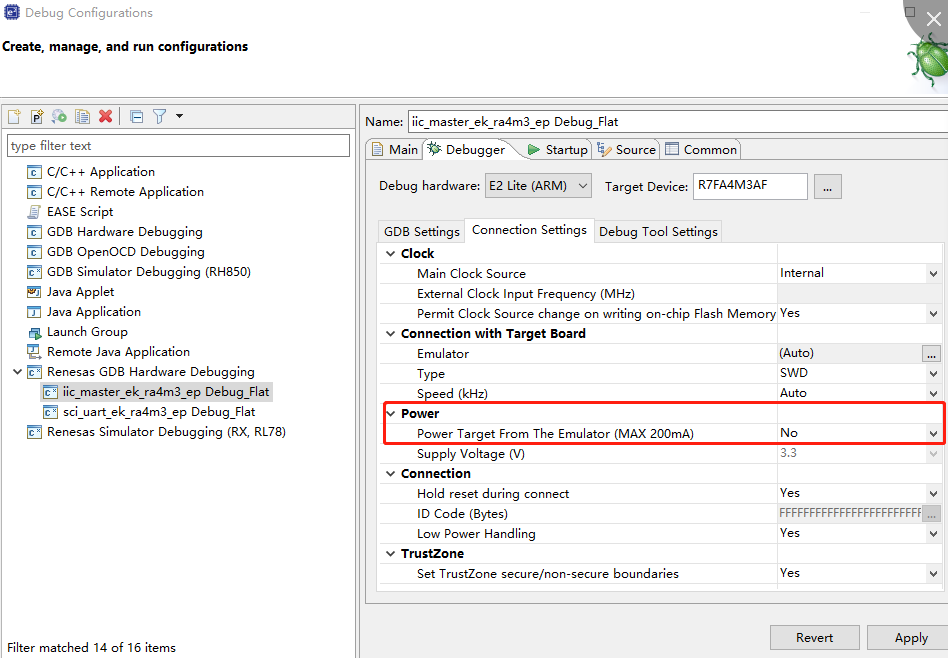
B. E2 Lite allows the debugger to power the target board, but this operation is not recommended. It is strongly advised that the target board powers itself, and the VCC of E2 Lite should not be connected to the VCC of the target board. You also need to set in e2 studio that E2 Lite does not provide power.
3. The First Project
In Renesas’s own e² studio, I will only introduce how to import an existing project, as I am not familiar with it and prefer to use Keil 5 for development.
1. It is generally not recommended to create a new project from a completely independent environment, as the project configuration file has many settings, and if any setting is incorrect, it can lead to compilation errors and other issues. Therefore, it is recommended to use the import method to avoid errors due to project settings.
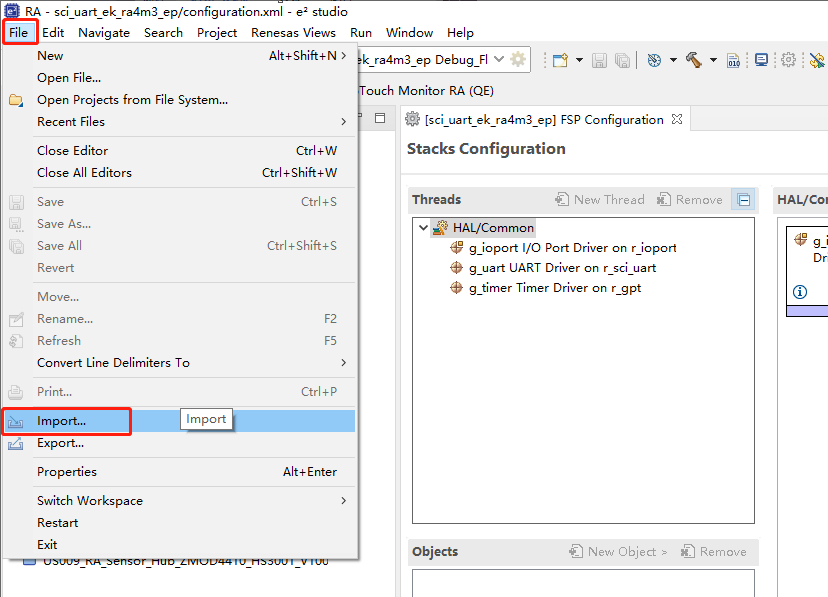
First, in the e2 compilation environment, find the File menu, open the drop-down menu, and select import.
Select General, then choose the submenu existing project into workspace.
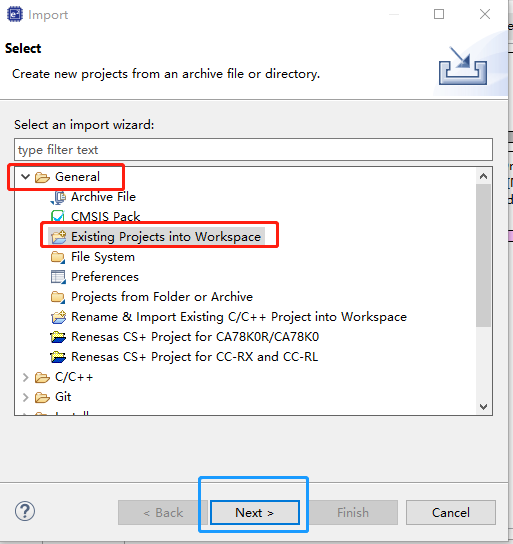
Next, proceed to the next interface.
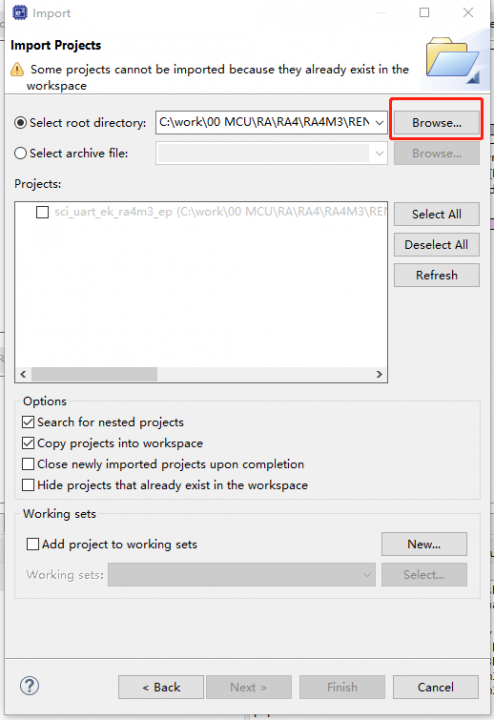
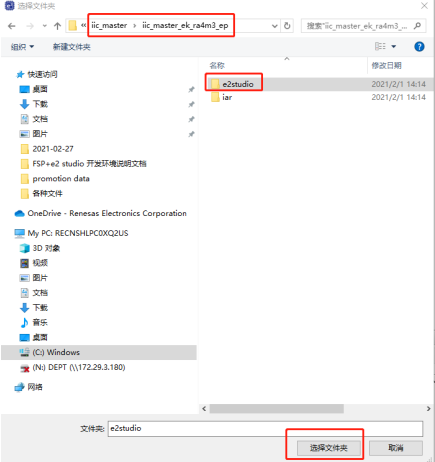
Select browser and navigate to the directory of the driver package you just extracted. Then directly select any driver example in this directory.
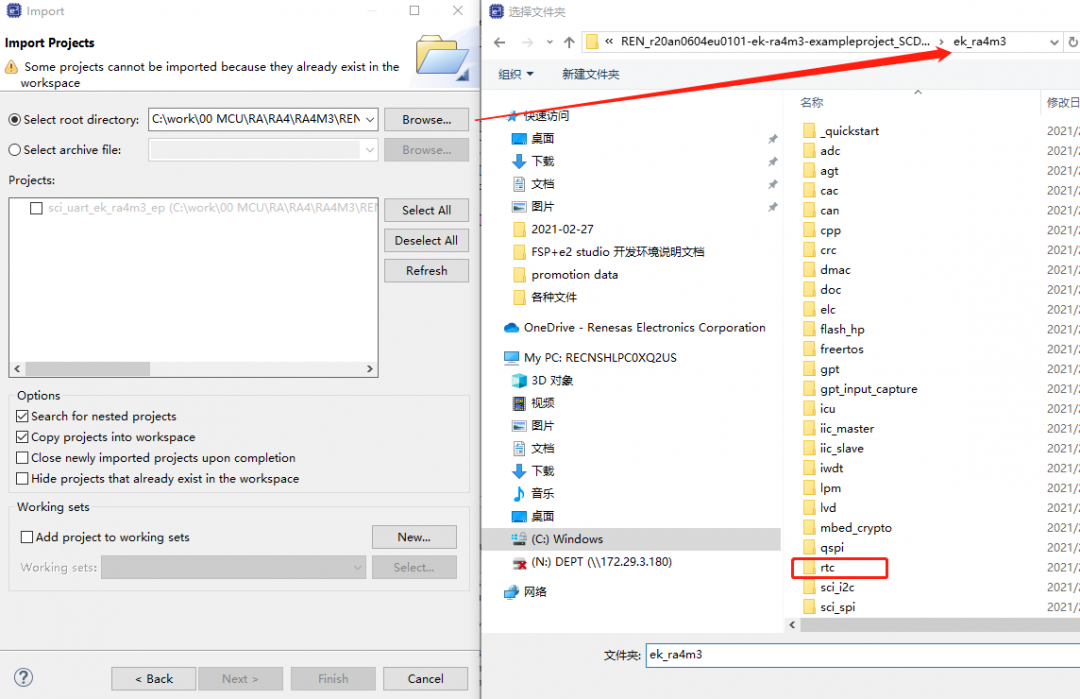
Enter the example directory, find the e2 studio level, select it, and click “Select Folder”.
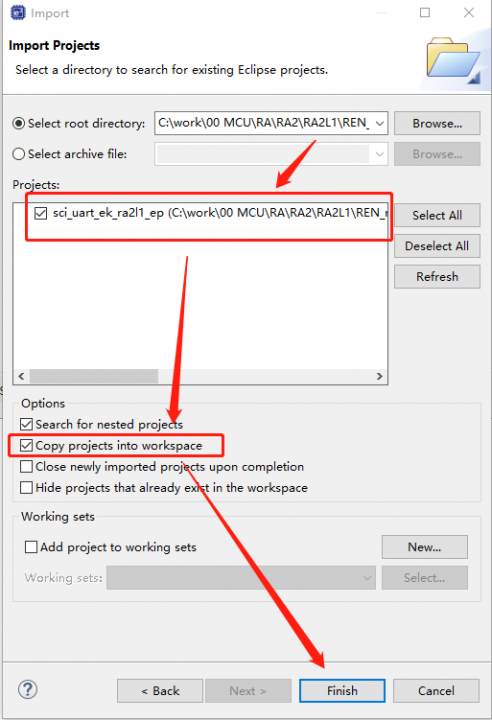
Then you will find that the import menu will automatically search for a project file.
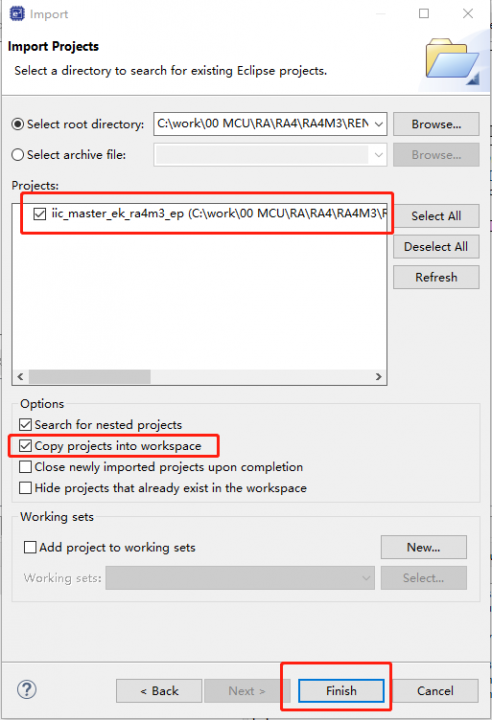
Be sure to note that after selecting the imported project, it is strongly recommended to check the “Copy to workspace” option. This will prevent issues with Chinese path names, as the workspace is generally created under the computer’s English path name. If you do not check this option, the path will be directly in the original code package’s release path, which is likely to be in Chinese, leading to many inexplicable issues.
After importing the empty project from the development board for the first time, be sure to click on the configuration.xml file to let the project file automatically match the FSP version file installed locally in the compiler.
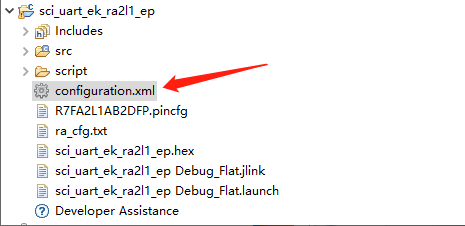
If recognized correctly, a dialog box displaying the project information details corresponding to smart config will appear.

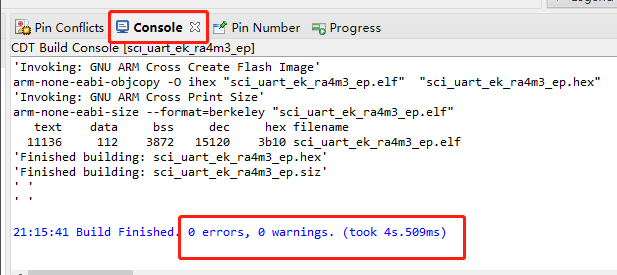
Click the hammer icon button to compile. Generally, as long as the FSP version matches, the compilation will succeed.
KEIL Development
This is an old topic; using Keil 5 for development definitely requires installing the pack. The RA2 pack will be provided at the end of the article.
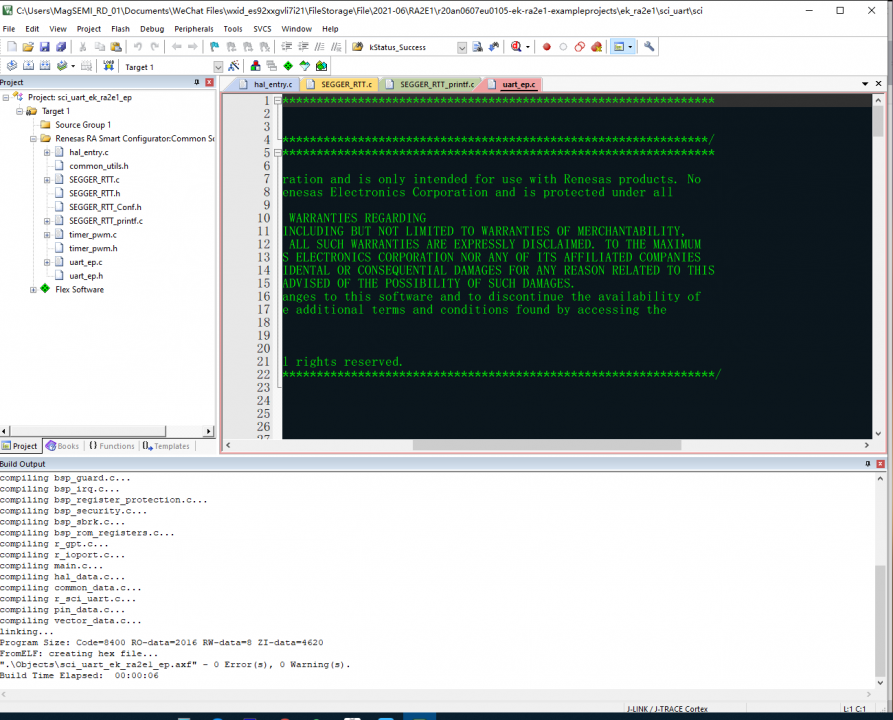
After extracting the downloaded example, randomly find a Keil example, open the Keil project, and compilation will report errors, indicating that many files cannot be found.
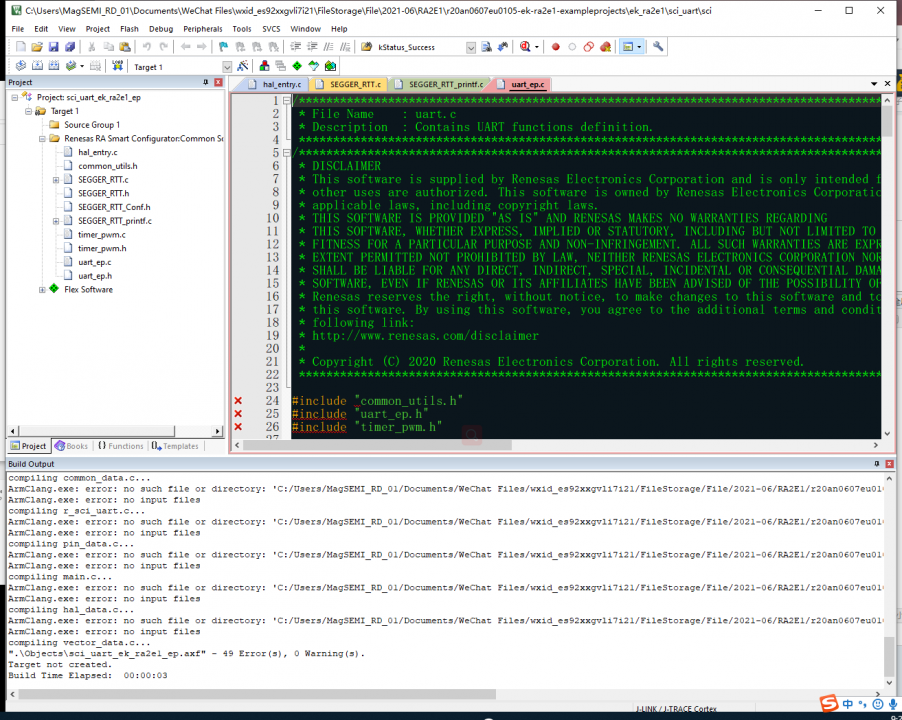
Solution: Click to open RA configuration in sequence.
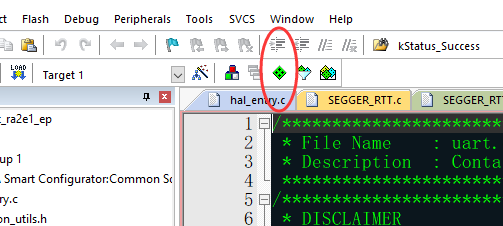
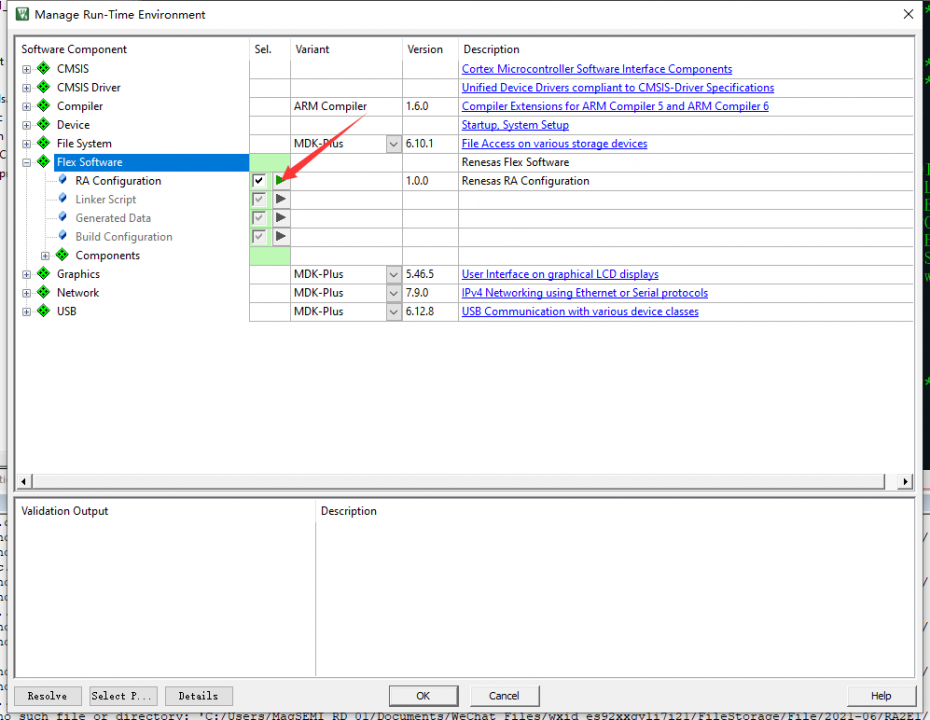
Click generate project content to regenerate the code.
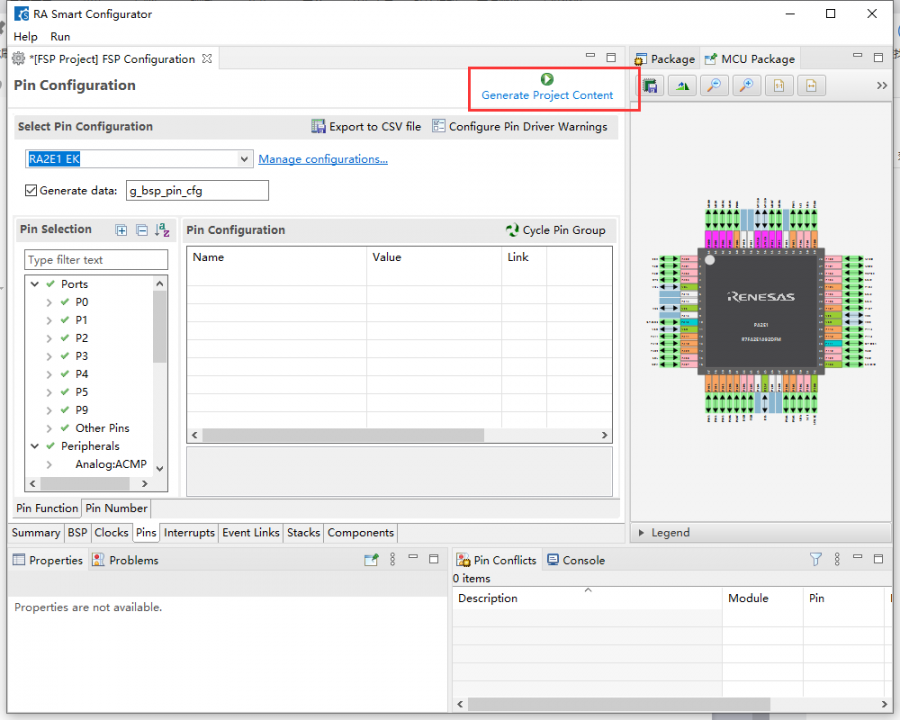
Close RA configuration and compile again to pass;
Smart Config for RA Tips: If using E2 studio for the compiler/simulator, note: If you are developing a project using e2 studio, you need to download and install setup_fsp_v2_3_0_e2s_v2021-01.exe from FSP (which includes Smart Configurator); if using IAR or Keil MDK for development, download setup_fsp_v2_3_0_rasc_v2021-01.exe (independent Smart Configurator), which can be used to generate IAR and Keil MDK low-level configuration programs. Note: After installing Smart Configurator, the software shortcut will not appear on the desktop; look for it in the following directory: C:\Renesas\RA\sc_v2021-01_fsp_v2.3.0\eclipse.

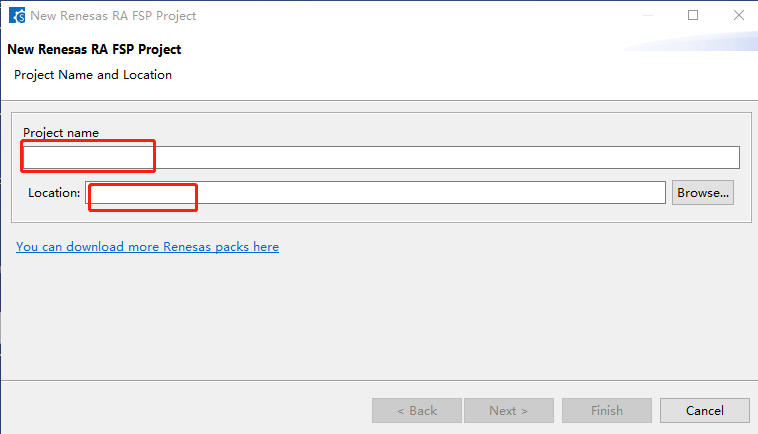
Creating a Basic Keil Project:
Name the new project and select the folder where the project will be stored.
Here, select the chip and IDE: Keil 5
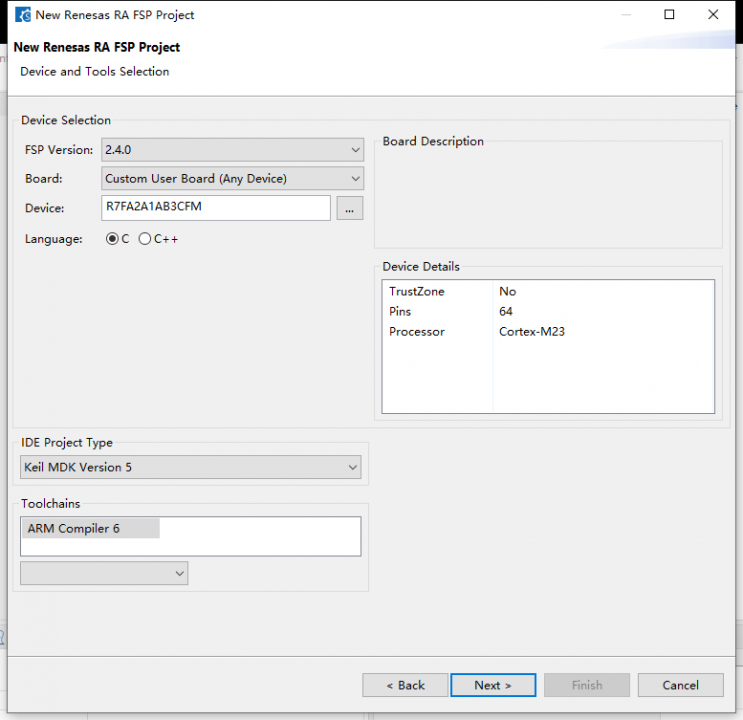
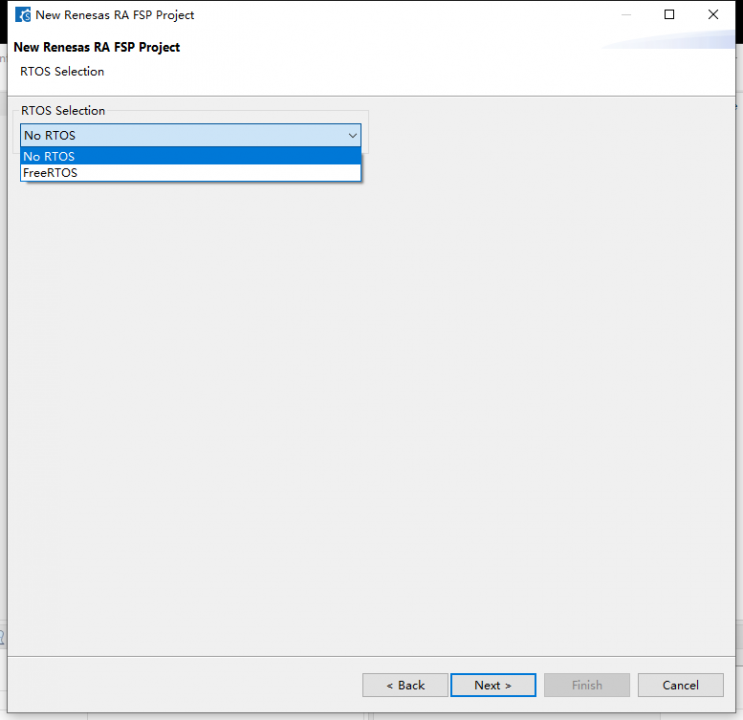
I do not need RTOS, so I select No RTOS.
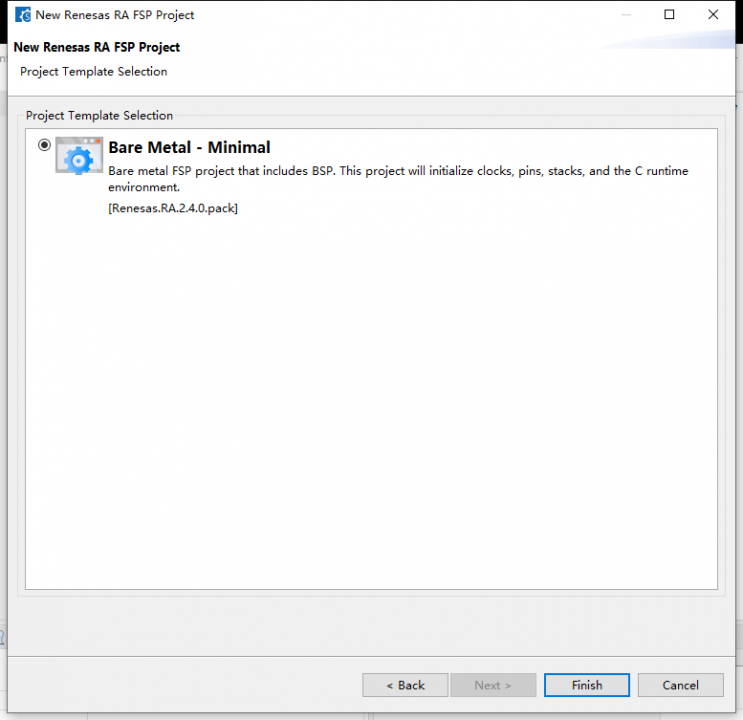
Thus, an empty project has been established, and we can set the clock, pins, interrupts, etc. in this software. The design will vary based on different needs, so I will not elaborate further.
Finally, I will upload the KEIL PACK. The software is constantly being updated, so I will not upload it here.
ENDArticle written by 21ic author Na Luo Mi Mi▍Recommended ReadingUsing GD32 to Replace STM32: Insights on Humidity and Temperature Sensor DevelopmentStep-by-Step Guide: Using STM32F103 to Drive ST7567 LCDMicrocontroller Experience: Insights on Using the STC15W4 Series 6-Channel Dedicated PWM Module→ Follow for more updates ←