
In this article, we will demonstrate how to simulate the firmware of a given IoT device.
Firmware simulation can be used for various purposes, such as providing a better way to analyze firmware, testing exploits, and completing remote debugging. Based on this technology, you can simulate firmware of different architectures and interact with it without having a physical IoT device. In the past, completing a firmware simulation required creating a Qemu image and copying it into the firmware’s file system to start the firmware. Now, there is a simpler alternative that makes simulating firmware easier and results in fewer issues. Let’s explore this.
Required Tools
-
AttifyOS VM or any Linux-based image
-
Firmware Analysis Toolkit (https://github.com/attify/firmware-analysis-toolkit)
-
The firmware to be simulated (e.g., Netgear WNAP320)
Configuration
After preparing the three tools above, the first step we need to take is to set up the Firmware Analysis Toolkit.
The Firmware Analysis Toolkit is actually a simple wrapper around Firmadyne, automating the process of simulating new firmware.
Download and install FAT by following the commands shown below to recursively clone a git project:
git clone --recursive https://github.com/attify/firmware-analysis-toolkit.gitNext, we need to install several individual tools, such as: Binwalk, Firmadyne, and Firmware-Mod-Kit.
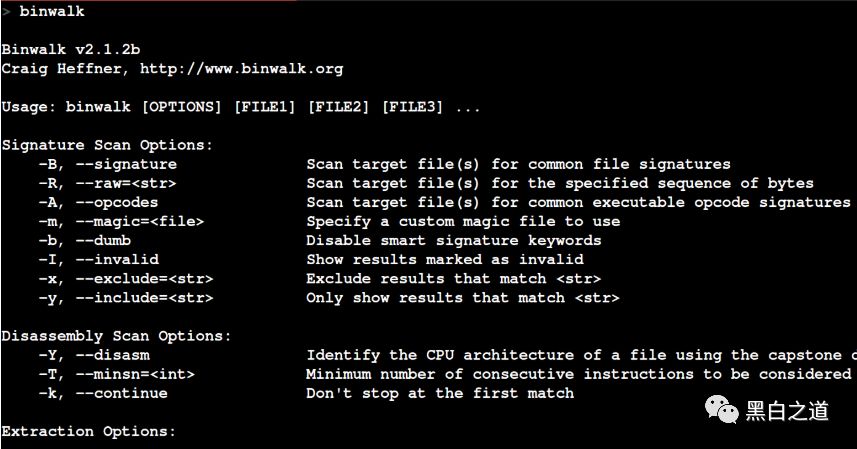
Installing Binwalk
Installing Binwalk only requires installing dependencies, for example:
cd firmware-analysis-toolkit/binwalk
sudo ./deps.sh
sudo python setup.py install
If everything goes smoothly, we should be able to run binwalk and see the output below:
Installing Firmadyne
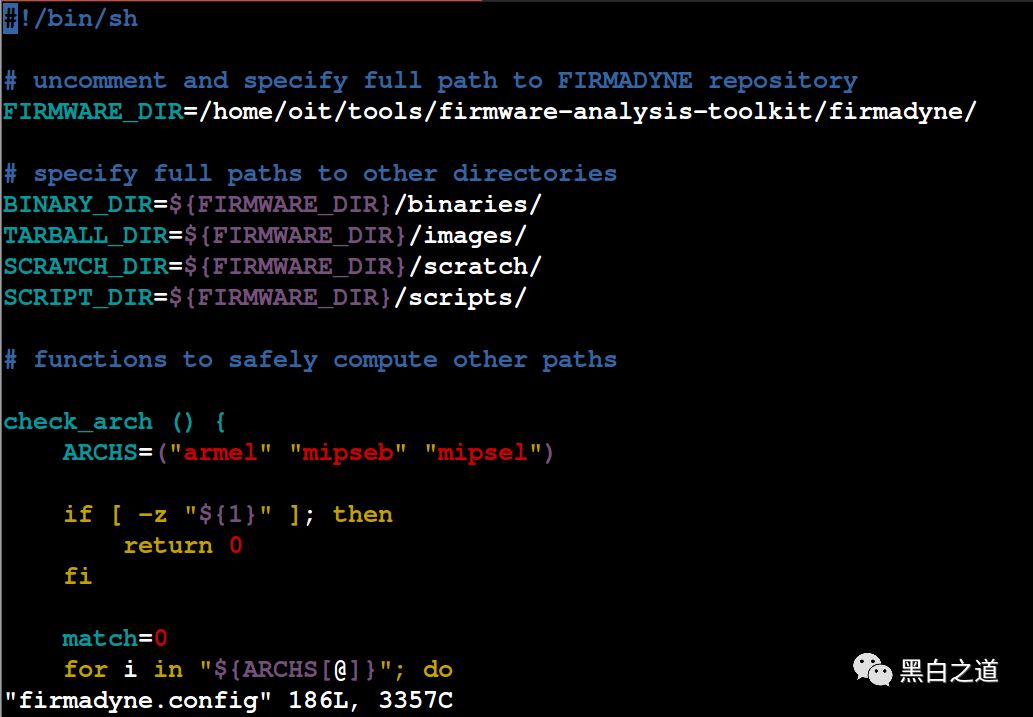
To install Firmadyne, navigate to the Firmadyne directory and open the firmadyne.config file, which contains the following:
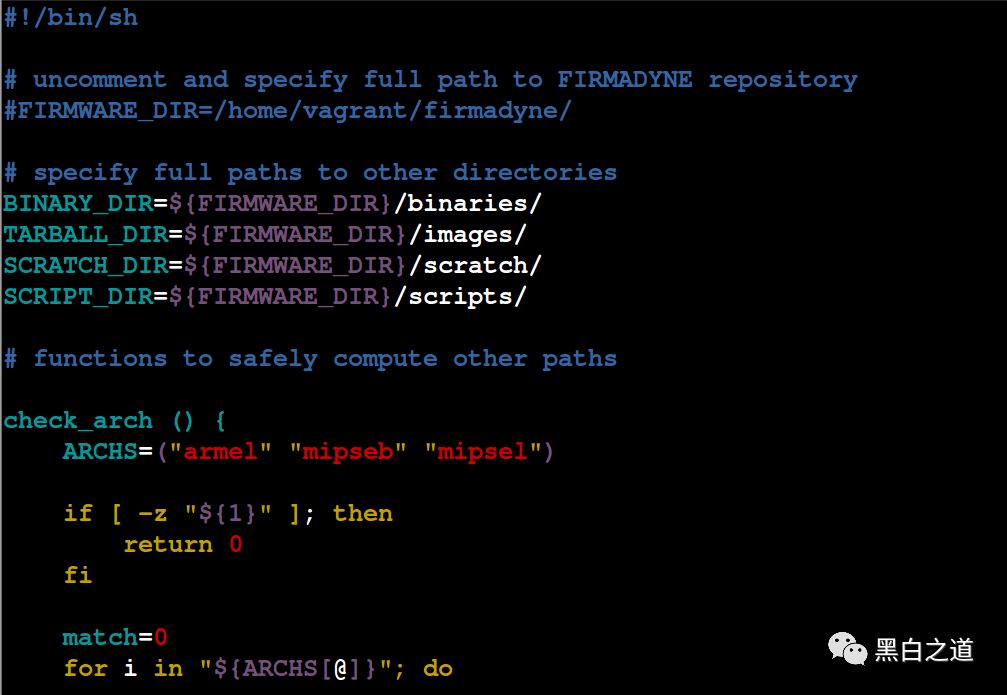
Find the line FIRMWARE_DIR=/home/vagrant/firmadyne/ and change the address of Fireadyne to the current full path. After modification, it looks like this:
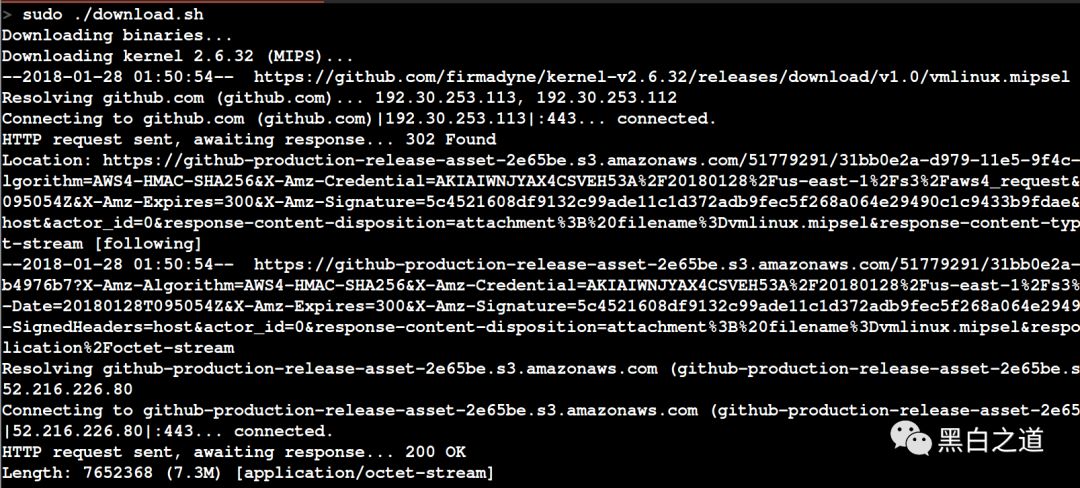
After modification, the next step is to download other files required by Firmadyne. If the network is good, this process takes about 1-2 minutes; during this time, we can enjoy some coffee or have a smoke.
After downloading, the next step is to install the remaining dependencies for Firmadyne:
sudo -H pip install git+https://github.com/ahupp/python-magic
sudo -H pip install git+https://github.com/sviehb/jefferson
sudo apt-get install qemu-system-arm qemu-system-mips qemu-system-x86 qemu-utils
Next, we also need to install the PostgreSQL database. This step can be completed by following the instructions provided in the official Firmadyne wiki:
sudo apt-get install postgresql
sudo -u postgres createuser -P firmadyne
sudo -u postgres createdb -O firmadyne firmware
sudo -u postgres psql -d firmware < ./firmadyne/database/schema
When prompted for the database password, we set it to firmadyne (to avoid unnecessary issues later).
At this point, we have completed the installation of Firmadyne.
Installing Firmadyne Analysis Toolkit
First, we need to move fat.py and reset.py to the firmadyne directory. Then, open fit.py and change the root password (so that you won’t need to enter a password when running this script) and specify the firmadyne directory, for example:
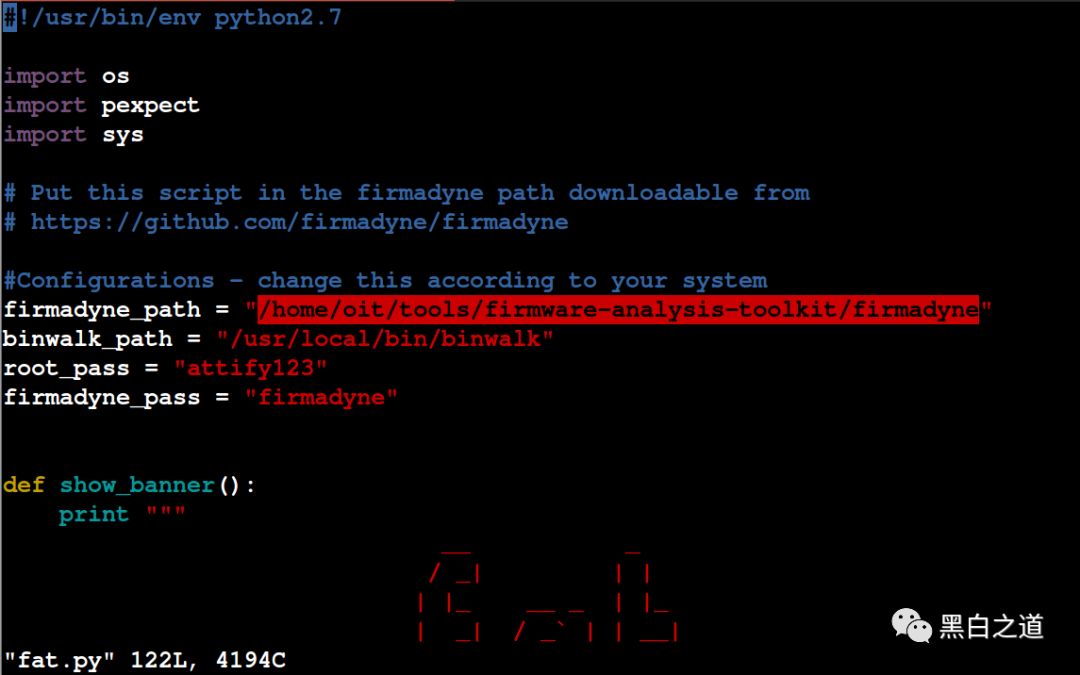
At this point, the installation work is complete. Please ensure that the postgresql database is started and running normally.

..It seems everything is going smoothly.
Simulating a Firmware
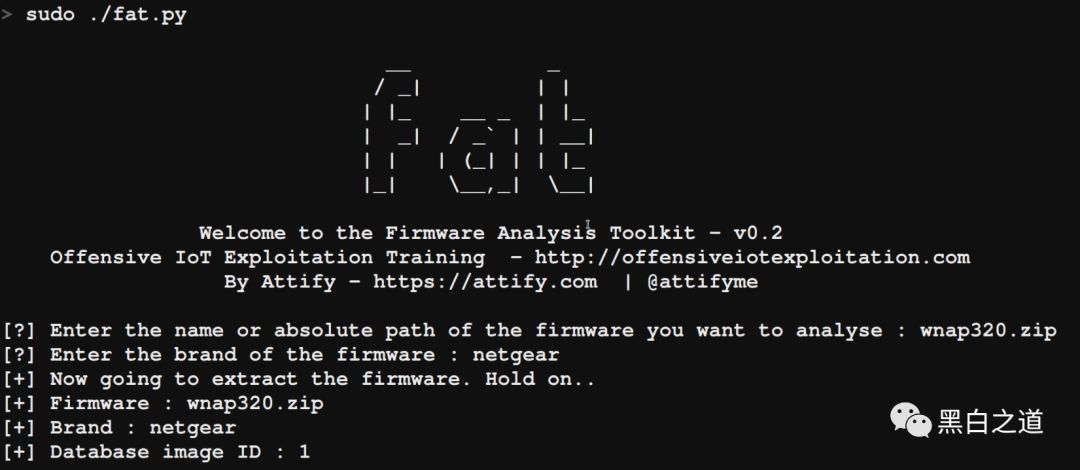
Now, all you need to do is specify a firmware name and run fat.py to simulate a firmware; here we are running the WNAP320.zip firmware.
For the Brand parameter, you can specify any brand; this parameter is only for the convenience of the database.
The output should look like below:
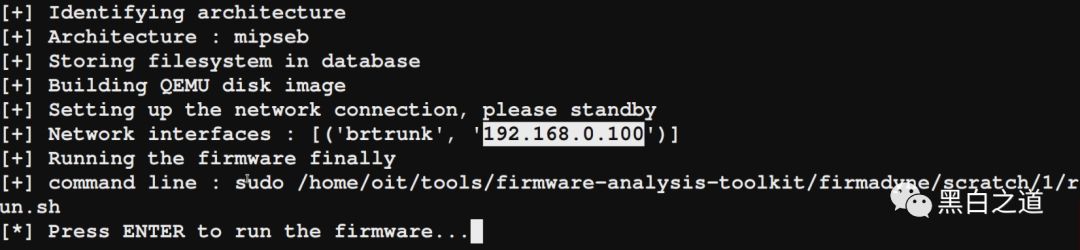
After we complete the firmware initialization process, we will obtain an IP address. In this case, the firmware is running a web service. You can access this web interface via SSH, allowing you to complete other network-based exploits.
Let’s open Firefox to verify whether we can access this web interface.
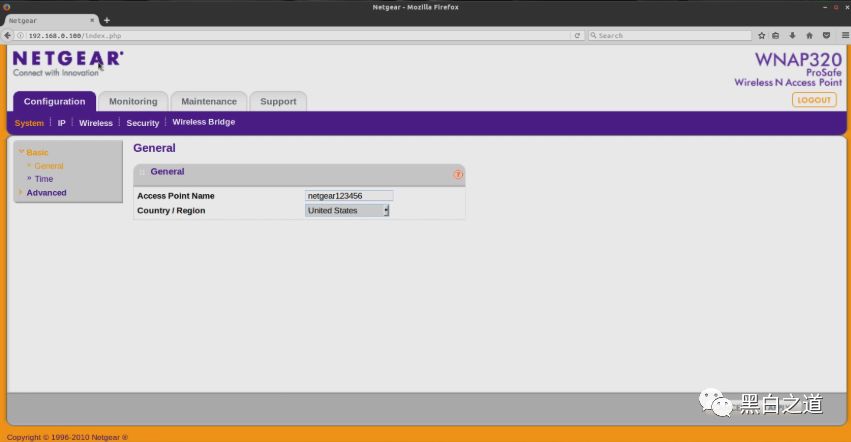
Congratulations!!! – We have successfully simulated a firmware (originally for MIPS Endian architecture) and obtained a web interface to access the firmware.
Source: Anquanke
Original link: https://www.anquanke.com/post/id/151277

You may also like