-
1. Introduction
-
2. Example Code Explanation
-
3. Steps for Linux System
-
4. Steps for Windows System
-
5. Conclusion
1. Introduction
During the process of writing applications, we often face a development scenario: writing cross-platform applications.
This requirement is relatively easy to handle for Linux-based platforms; in most cases, you only need to switch to a cross-compilation toolchain, and for hardware platform-related parts, you can embed a few inline assembly instructions.
However, for the Windows platform, it can be a bit more troublesome. You might say that you can unify the compilation on Windows using Cygwin or MinGW, but can you expect your customers to deploy a Linux-compatible environment when installing your program? The best solution is still to use Microsoft’s own development environment, such as Visual Studio (VS), etc.
Previously, I uploaded a similar video on Bilibili, where I wrote a cross-platform application structure in C++. Later, some friends requested a C language version, which led to this article.
In this article, we will describe how to use CMake, a build tool, to organize a cross-platform application framework with the simplest program.
By reading this article, you can gain the following knowledge points:
Instructions related to compiling library files and applications using CMake;
Dynamic library export and import syntax in Windows;
How to use macro definitions for cross-platform programming;
Leave a message in the public account backend with 【430】 to receive the example code. It can be compiled and executed directly on Linux/Windows systems, ready to use.
2. Example Code Explanation
1. Function Description
The main purpose of the example code is to describe how to organize a cross-platform application structure. Its functionality is quite simple, as shown in the figure below:

2. File Structure
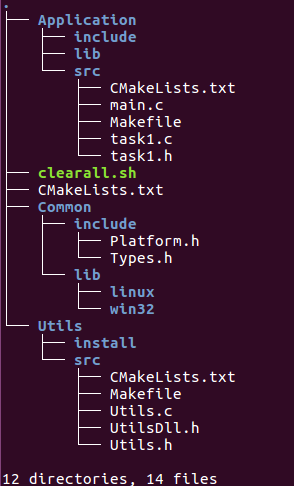
Common: Contains some open-source third-party libraries, such as network processing, JSON format parsing, etc.;
Application: The application that uses the libraries generated by Utils;
Utils: Contains some tools and helper functions, such as file handling, string processing, platform-related helper functions, etc. It will ultimately compile to library files (dynamic library libUtils.so, static library libUtils.a);
If you want to extend other modules, you can simply copy the file structure of Utils.
3. CMake Build Steps
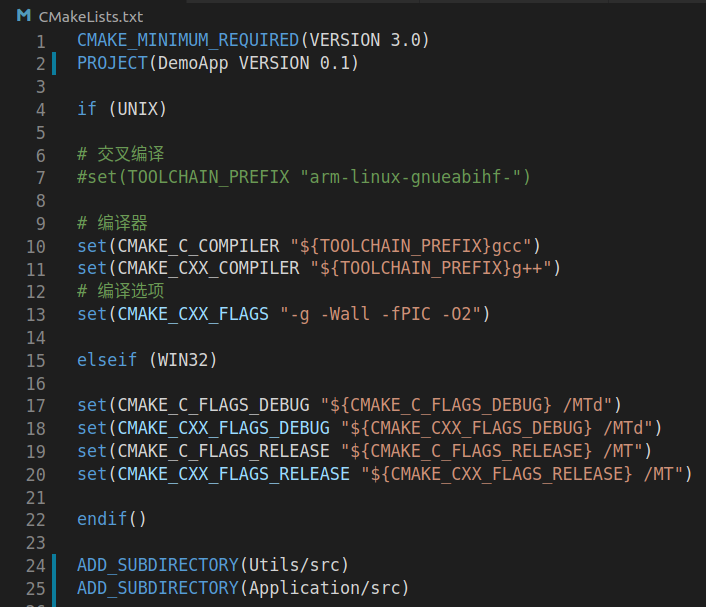
In the root directory of the example code, there is a main CMakeLists.txt file, which is mainly used to set the compiler and compilation options, and then include the CMakeLists.txt files from other folders, as shown below:
4. Utils Directory Explanation
The compilation output of this directory is library files:
Linux System: libUtils.so, libUtils.a;
Windows System: libUtils.dll, libUtils.lib, libUtils.a;
The content of the CMakeLists.txt file is as follows:
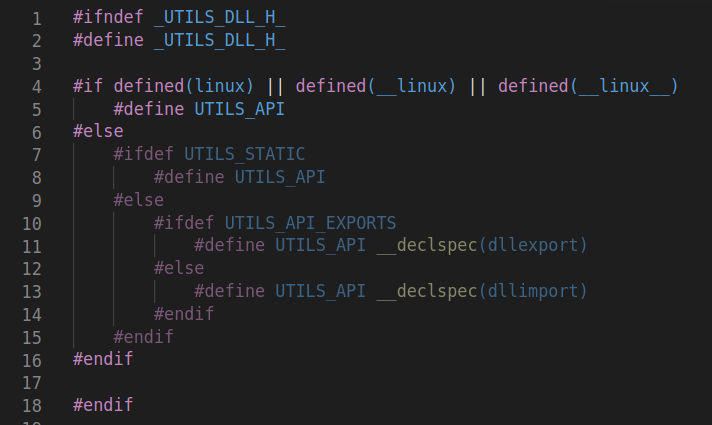
Currently, the code only contains the simplest function getSystemTimestamp(), which will be called in the executable application.
5. Application Directory Explanation
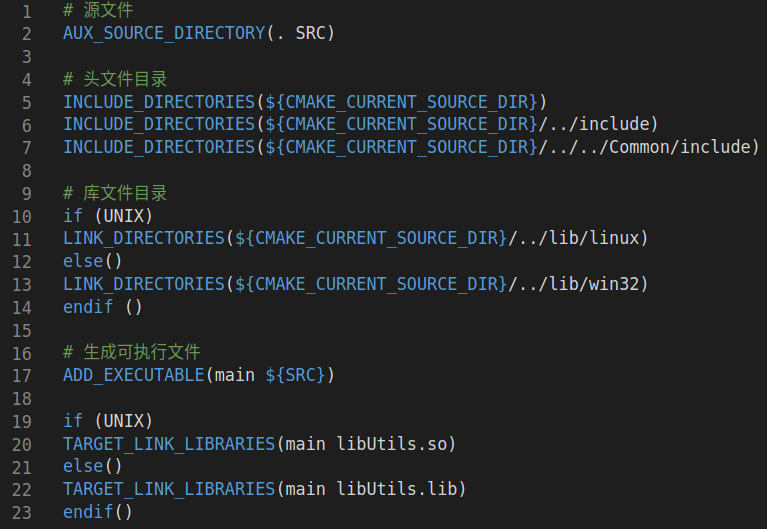
The compilation output of this directory is: an executable program, which calls functions from the libUtils library.
The content of the CMakeLists.txt file is as follows:
3. Steps for Linux System
1. Create Build Directory
$ mkdir build
Compile in a separate build directory to ensure that the generated intermediate code does not pollute the source code. This is very convenient for version control tools like git; when committing, you only need to ignore the build directory. It is highly recommended to handle it this way.
2. Execute CMake to Generate Makefile
$ cd build
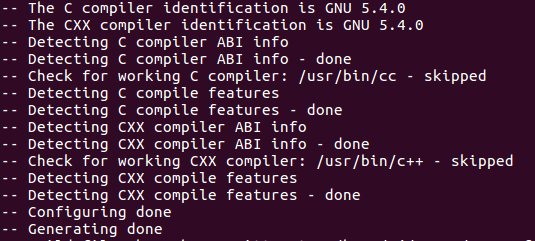
$ cmake ..
3. Compile Utils Library
$ cd Utils/src
$ make

The last part of the CMakeLists.txt contains the install instructions, which install the generated library files and header files into the install directory in the source code.
$ make install

4. Compile Executable Program Application
The Application uses the libUtils.so library, so you need to manually copy libUtils.so and the header files to the corresponding lib/linux and include directories under Application.
Of course, you can also write this operation in the install command of Utils.
$ cd build/Application/src
$ make

Execute the generated executable program main to see the output result.
4. Steps for Windows System
1. Generate VS Project with CMake Command
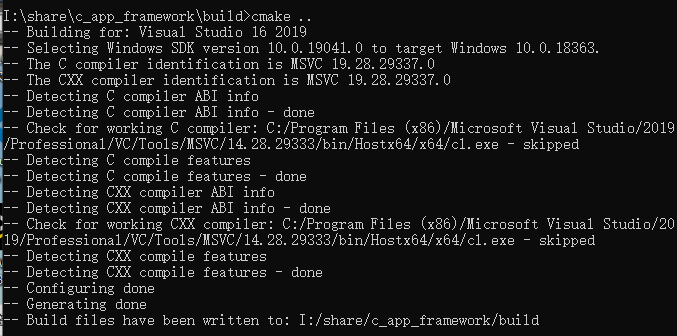
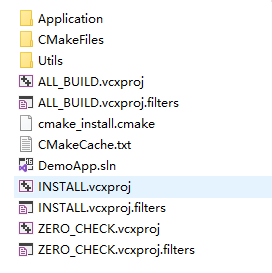
Similarly, create a build directory, then execute cmake .. in it to generate a VS solution. I used VS2019:
2. Compile Utils Library Files
Open the project file DemoApp.sln using VS2019. In the solution on the right, you can see:
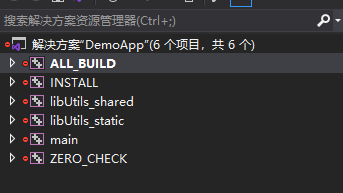
Right-click on libUtils_shared and select 【Build】:
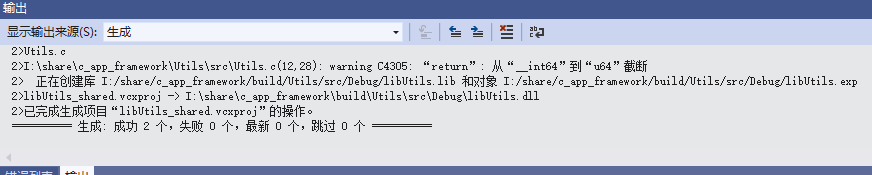
At this point, you can see the generated files in the directory build\Utils\src\Debug:

3. Compile Executable Program Application
Since the Application needs to use the library generated by Utils, you need to manually copy the library and header files to the Application’s lib/win32 and include directories.
In the VS solution window, right-click on the main target and select 【Build】:
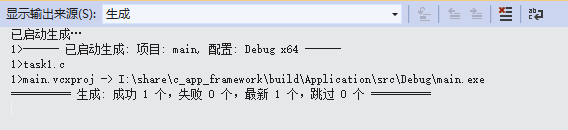
At this point, you can see the generated executable program in the directory build\Application\src\Debug:

Directly click main.exe to execute, and you will see an error:

You need to copy the libUtils.dll dynamic library file to the directory where main.exe is located, and then execute it again to succeed.

5. Conclusion
The process described in this article mainly focuses on dynamic libraries. If you compile and use static libraries, the execution process is the same.
If you encounter any issues during the process, feel free to leave a message or discuss. Thank you!
Leave a message in the public account backend with 【430】 to receive the example code. It can be compiled and executed directly on Linux/Windows systems, ready to use.
Good luck!
1. C Language Pointers – From Basic Principles to Various Techniques, Explained Thoroughly with Diagrams and Code 2. The Underlying Debugging Principles of GDB are So Simple 3. Step-by-Step Analysis – How to Implement Object-Oriented Programming in C 4. Diagrammatic Analysis: How to Use Google’s Protobuf to Think, Design, and Implement Your Own RPC Framework 5. It is said that software architecture should be layered and modular; how should this be done specifically (Part 1) 6. It is said that software architecture should be layered and modular; how should this be done specifically (Part 2)