Author: HelloGitHub-Anthony
Have you ever thought about becoming a Geek, like the “wild Iron Man” Zhi Hui Jun, who can create various novel and interesting electronic devices but doesn’t know where to start? Today, we won’t talk about embedded systems, circuit boards, or microcontroller principles; we’ll dive right in!
I believe that for electronic enthusiasts with no background, an easy-to-use development board is crucial. Otherwise, complicated installation steps and debugging processes can extinguish initial enthusiasm before seeing a finished product. Therefore, today HelloGitHub presents Arduino, which is a very user-friendly open-source hardware platform:
Project Address: https://github.com/arduino/Arduino
This project includes both development boards (like Arduino UNO) and software (Arduino IDE), and it has a comprehensive Chinese community and numerous examples of open-source projects, making it easy to find solutions when you encounter problems, and complete code and projects to refer to when doing your own projects.
Back when I wasn’t very familiar with C language, I was able to follow tutorials to implement some fancy functions using Arduino in just one day, which shows that Arduino is indeed very suitable as an initial development board for electronic enthusiasts.
Below, I will help electronic enthusiasts with no background quickly get started with Arduino through three parts: Introduction, Hands-on, and Getting Started, so you can begin your “Iron Man” journey.
1. Introduction
1.1 Recommended Model
So far, there are many types of Arduino development boards. I recommend using the UNO as your first development board for the following reasons:
-
Popularity: Many people use UNO, and there are many tutorials available online. -
Affordability: Compared to other types of development boards, UNO is very cheap. -
Modularity: As the board ages, it may encounter various issues, but its modularity allows you to replace only the problematic components.
1.2 UNO R3 Development Board
Currently, the most common UNO development board on the market is the UNO R3, as shown in the figure:
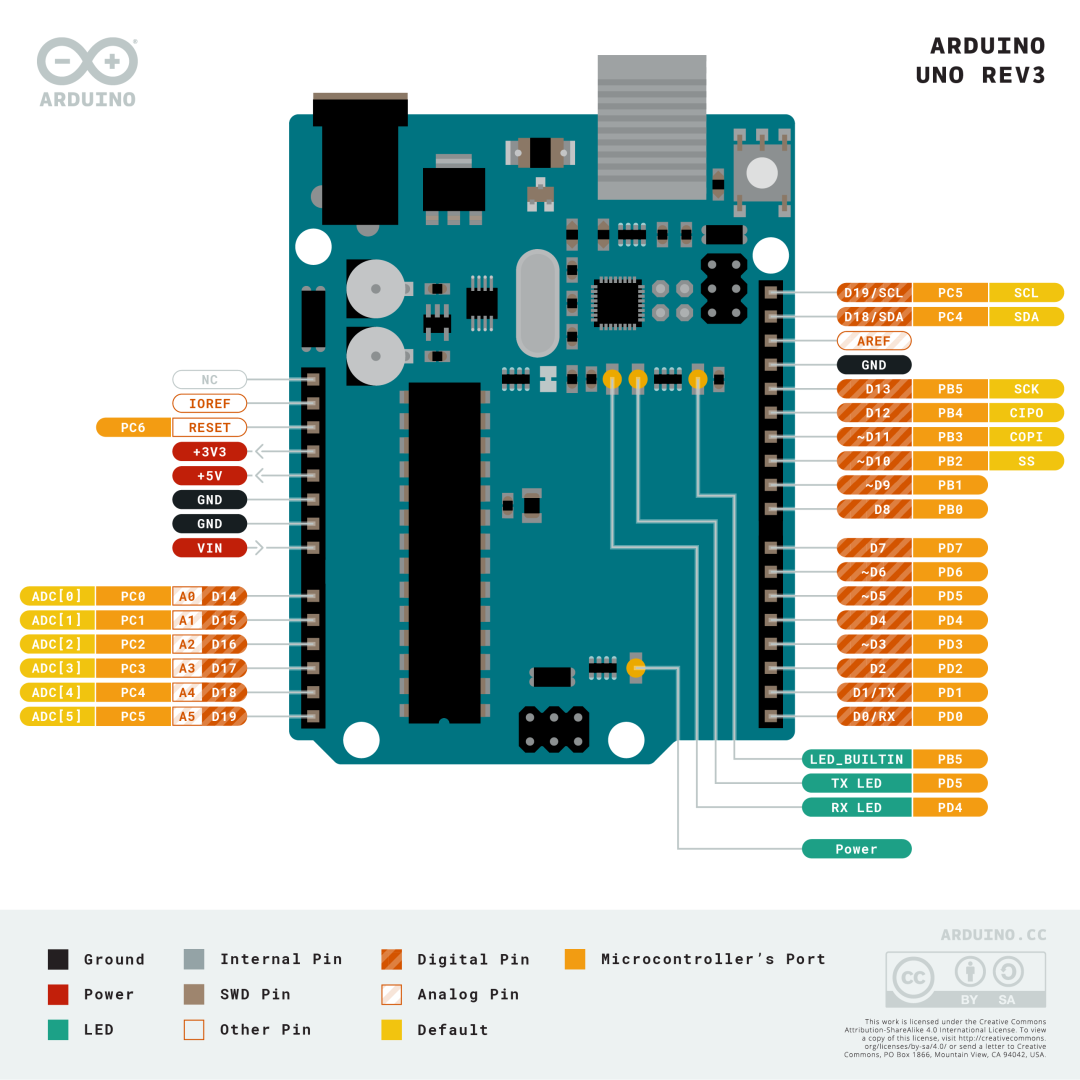
The Arduino UNO R3 can be powered, programmed, and communicated with a computer via a data cable.
| Hardware Detailed Parameters | |
|---|---|
| Microcontroller | ATmega328P |
| Operating Voltage | 5 Volts |
| Input Voltage (Recommended) | 7-12 Volts |
| Input Voltage (Limits) | 6-20 Volts |
| Digital Input/Output Pins | 14 |
| PWM Pins | 6 |
| Analog Input Pins | 6 |
| Input/Output Pin DC Current | 20 mA |
| 3.3V Pin Current | 50 mA |
| Flash Memory | 32 KB (ATmega328P), of which 0.5 KB is used for the bootloader |
| SRAM | 2 KB (ATmega328P) |
| Clock Frequency | 16 MHz |
| EEPROM | 1 KB (ATmega328P) |
| Built-in LED Pin | 13 |
| Length | 68.6 mm |
| Width | 53.4 mm |
| Weight | 25 grams |
Don’t be surprised by the limited resources of the development board compared to a computer; this specification is sufficient for most embedded applications. A sufficient voltage input range allows the device to be powered through various means, including computer USB ports, dry batteries, and power banks, without being damaged.
For purchasing, you can find a large number of options on major e-commerce platforms by searching for “Arduino UNO R3”.
You can choose to buy a package directly or buy the board and components separately according to your needs. Buying a package is more convenient, while buying components separately can save you about 100-200 yuan.
1.3 Development Environment
The Arduino open-source project has its own cross-platform programming environment—Arduino IDE—which supports Windows/Linux/macOS operating systems.
It integrates all the environments and support libraries needed for Arduino development, allowing you to select the development board and perform functions like compilation, burning, and serial monitoring with just a few clicks.
Additionally, in recent years, Arduino has launched a web-based editor and Arduino CLI, further lowering the development threshold.
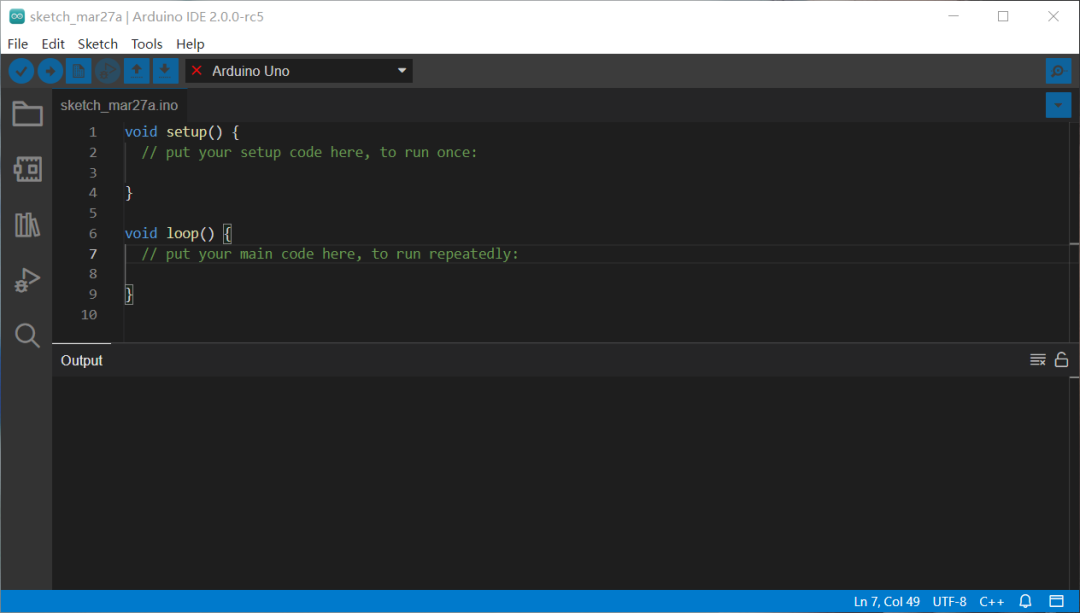
If you don’t like Arduino or want to use other IDEs, you can choose to install VSCode with the Platform IO plugin for development. Platform IO also provides the necessary environment for most embedded development, including Arduino, and allows for one-click compilation, downloading, and debugging.
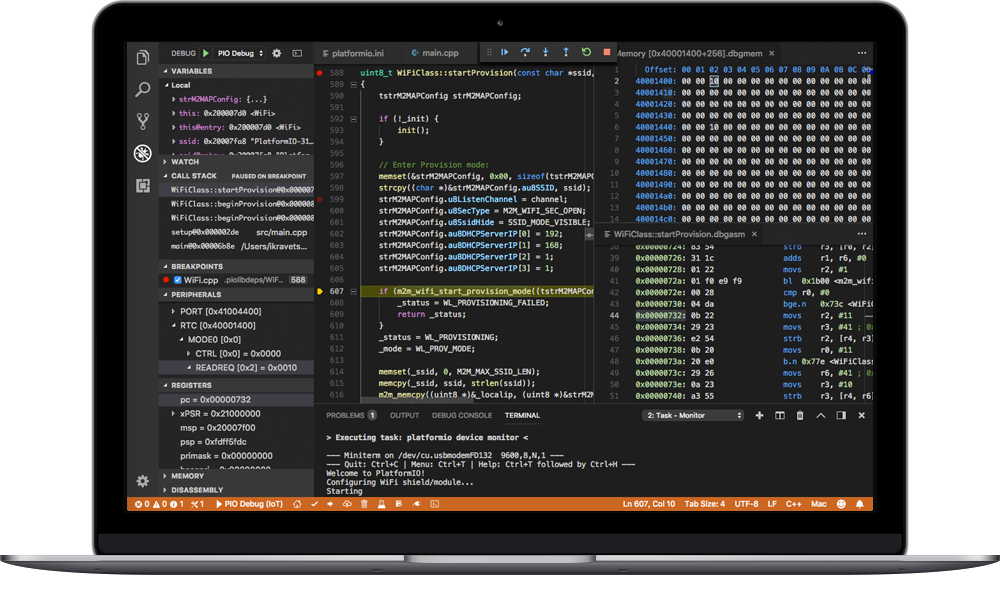
Note: This tutorial will use Arduino IDE for explanations and demonstrations.
1.4 Configuring the Environment
There are already many tutorials for version 1.8 online, as version 1 does not handle code auto-completion very well.
So, we will use Arduino IDE 2.0 RC version for demonstrations on the Windows operating system.
Official Download Address: https://www.arduino.cc/en/software
After entering the download page, scroll down to find the download link for Arduino IDE 2.0 RC:
Since the server is located abroad, the download speed may not be very fast, so please be patient.
After downloading, follow the prompts to install and start the program to see the following interface:
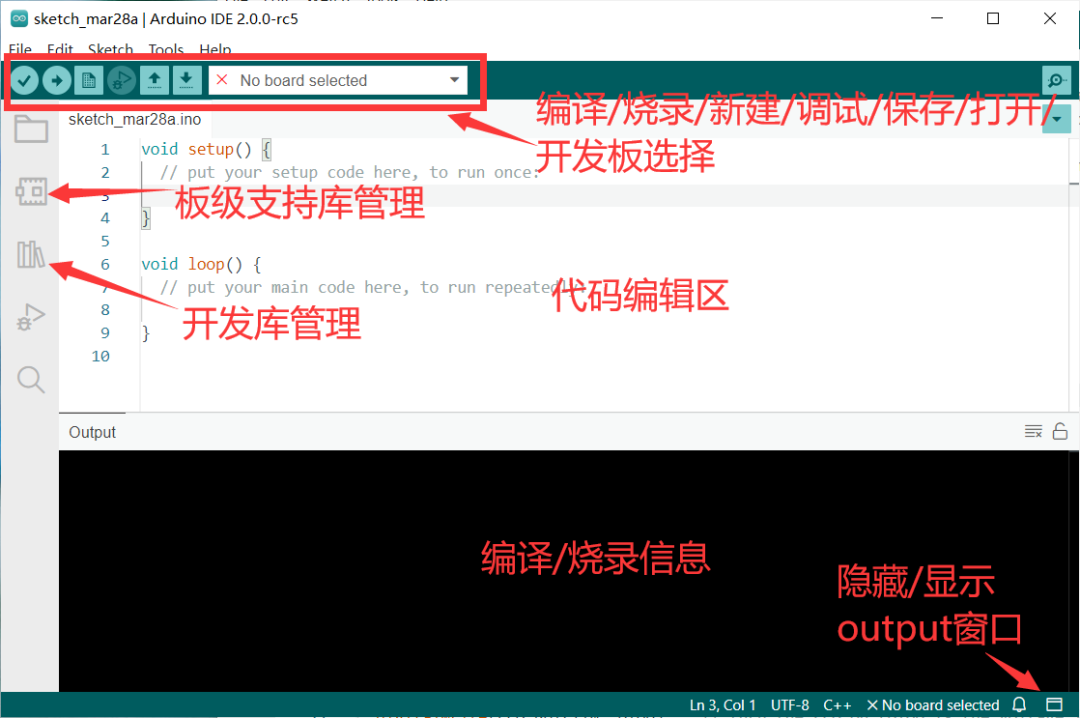
Note: Your color scheme may differ; the default is black background with white text, which can be changed in File->Preference->Theme.
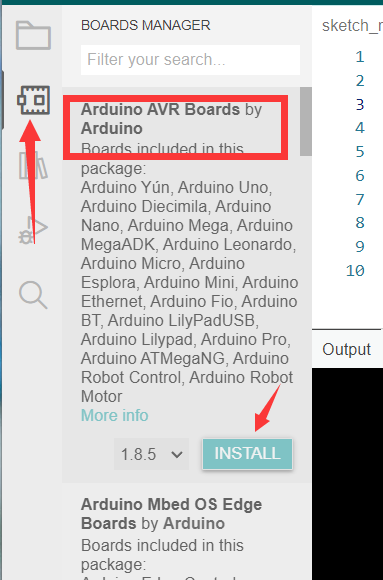
Next, let’s open the “Board Manager” to install the “Arduino AVR Boards” library:
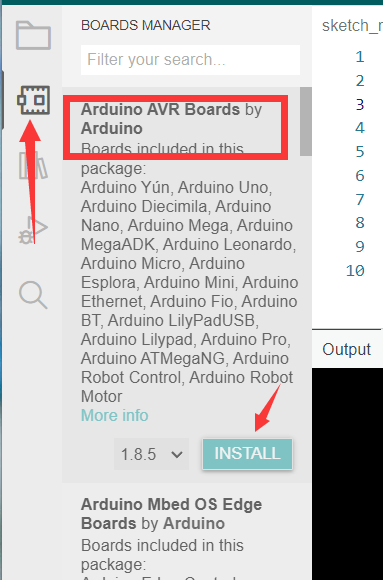
Warning: Due to issues with Arduino CLI, you may encounter errors like Access is denied. You need to turn off your antivirus software to install normally!
During this process, drivers will be automatically installed, so please confirm by selecting “Yes” when prompted.
After installation, you should see the following text output:
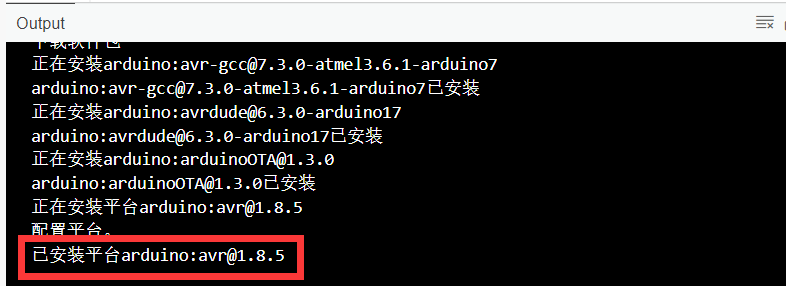
Once the driver installation is complete, connect your development board and select it from the Board Selection dropdown:
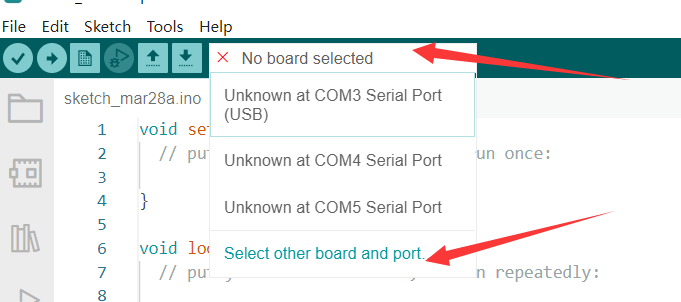
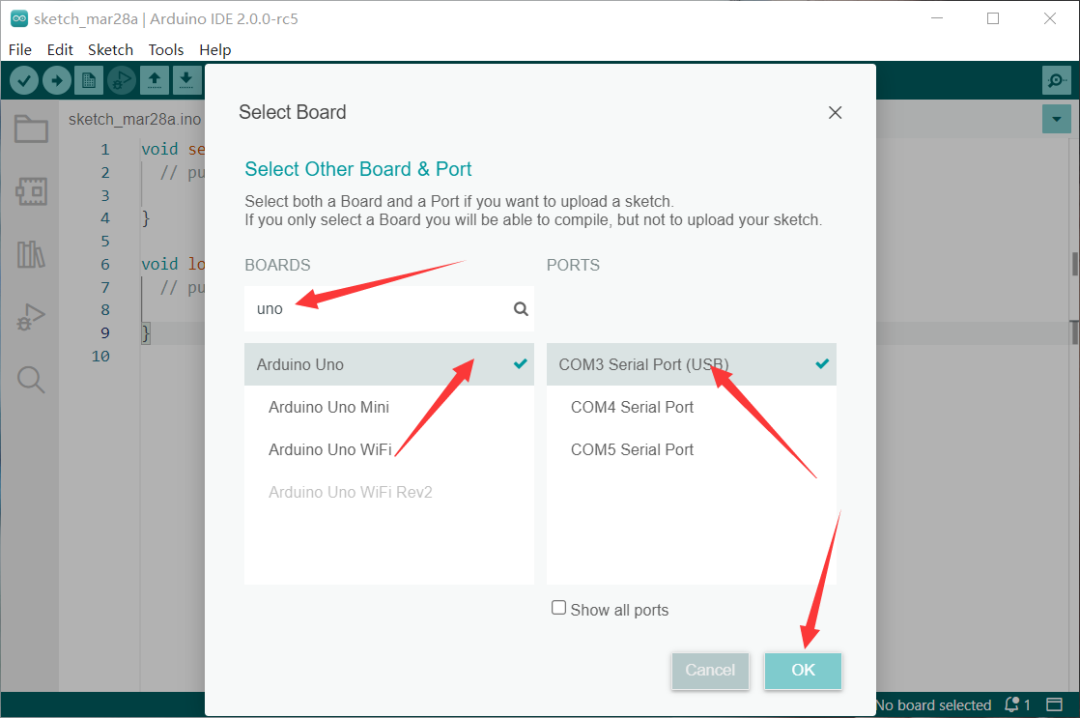
Depending on how you connect the USB port, this may not always be COM3; you need to determine this yourself. You can either check the serial port in Device Manager or plug and unplug the development board to see which COM port appears.
1.5 Running Code
Now let’s run a piece of code that lights up an LED, similar to “Hello World”; everything starts with lighting up!
After selecting the development board, copy the following content into the Editor Window:
void setup() {
  pinMode(LED_BUILTIN, OUTPUT);
}

void loop() {
  delay(300);
  digitalWrite(LED_BUILTIN, HIGH);
  delay(300);
  digitalWrite(LED_BUILTIN, LOW);
}
It’s okay if you don’t understand this code right now; there will be a line-by-line explanation below.
Click the Burn button, and the terminal will show the following prompt:

And the LED on the development board will start flashing:
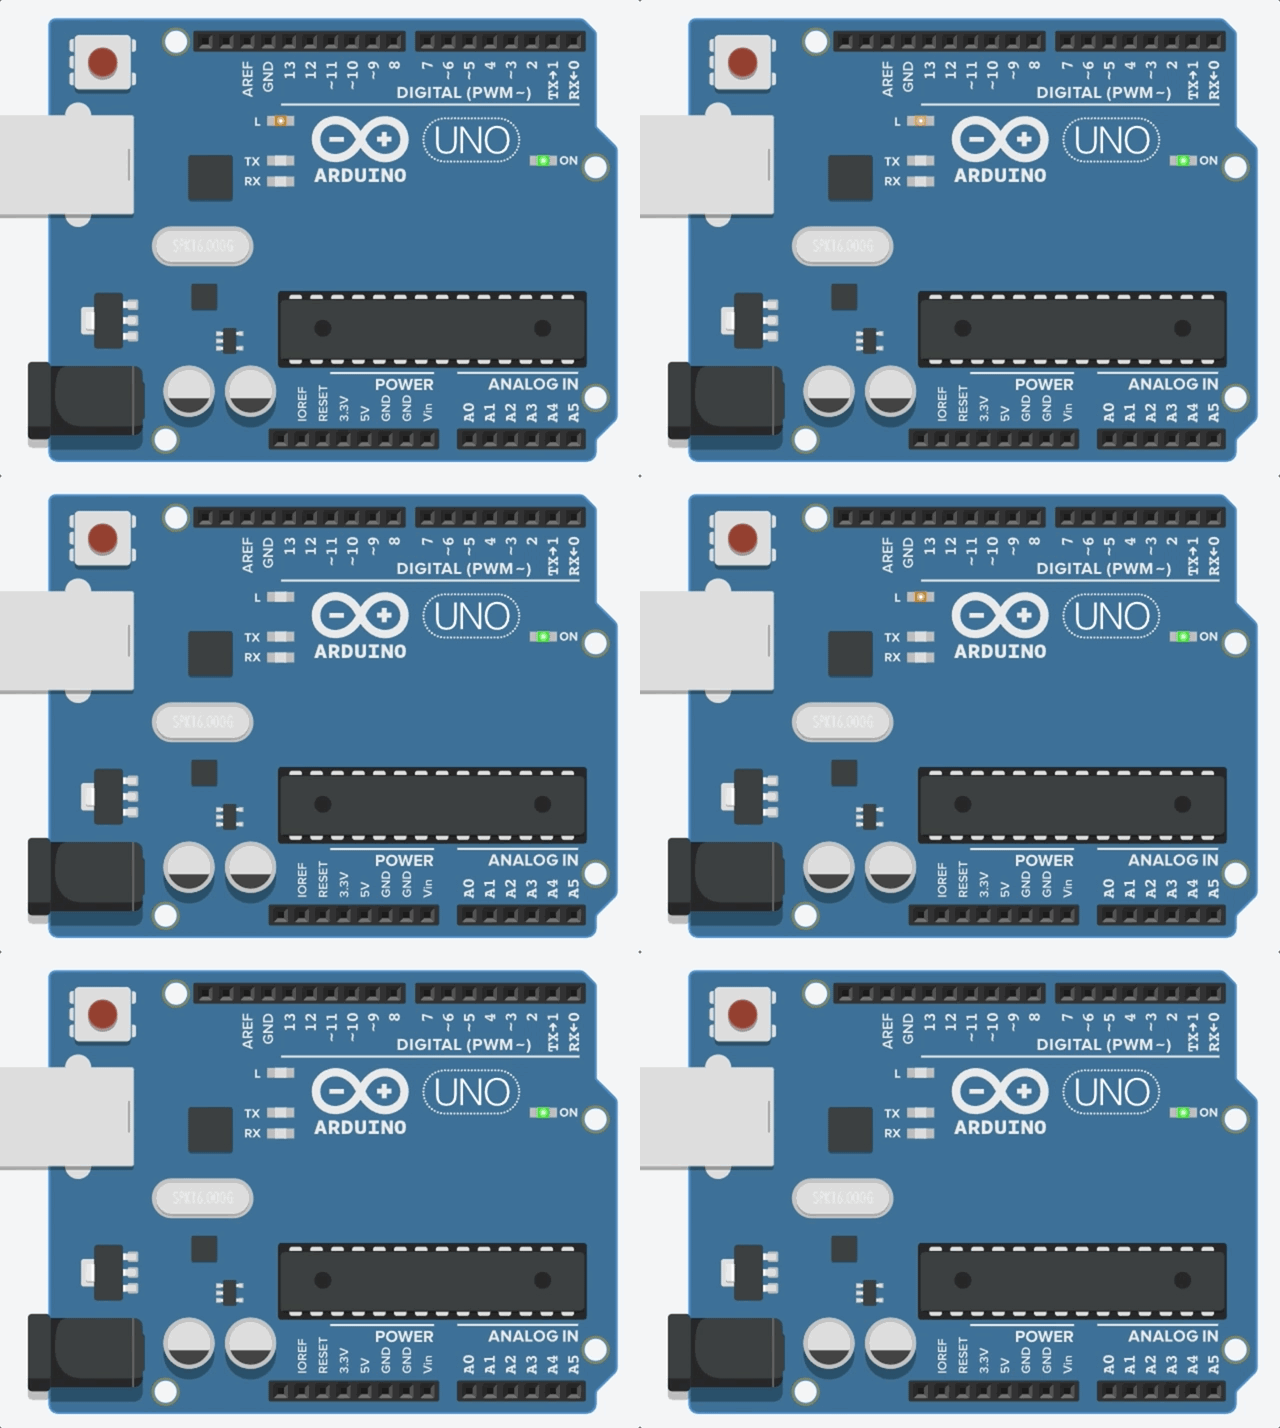
Thus, the environment is successfully configured!
2. Hands-on
Here, I will introduce how to write Arduino code.
The Arduino library is written in C++, and the official has wrapped many functions into individual functions. However, for beginners, you don’t need to understand so much; just having a bit of C language background is enough to use it smoothly.
The Arduino library shields the underlying details of the AVR microcontroller, allowing us to easily get started even without knowledge of analog and digital electronics or microcontrollers. Now, let’s first get a brief understanding of the Arduino language.
2.1 Startup Process
Generally speaking, our C language programs start from a main function, but in the previous tutorials, we found that the files generated by the IDE only contain setup and loop functions. So how does Arduino call them?
In fact, the real main function exists in our Arduino library file (located at Arduino->main.cpp), defined as follows:
int main(void)
{
    // Perform some hardware and variable initialization
 init();
 initVariant();
#if defined(USBCON)
 USBDevice.attach();
#endif
 // Call our setup() function
 setup();

 for (;;) {
        // Call our loop() function
  loop();
  if (serialEventRun) serialEventRun();
 }
 return 0;
}
As you can see, our setup and loop functions are called within main. Of course, how the related files are organized and compiled is a function of the Arduino toolchain, which we won’t delve into; in the initial stages, we only need to focus on how to use it.
2.2 Common Functions
Arduino provides us with various functions for use; you can refer to the Arduino API manual for specific details.
Don’t memorize the related functions; make good use of the IDE’s smart completion and search engines to quickly get started.
Next, let’s introduce a few common functions through the previously mentioned LED lighting code:
void setup(): Initializes related pins and variables.
In Arduino, the program first calls the setup() function to initialize variables, set the output/input types of pins, configure serial ports, and include library files, etc. The setup function runs only once every time the Arduino is powered on or rebooted. For example:
void setup()
{
  pinMode(LED_BUILTIN, OUTPUT); // Set the built-in LED pin to output mode
}
Then the loop() function is executed, which, as the name suggests, continuously loops during program execution until the chip is powered off.
void loop()
{
  delay(300); // Wait for 300ms
  digitalWrite(LED_BUILTIN, HIGH);// Output high level to built-in LED, turning it on
  delay(300);
  digitalWrite(LED_BUILTIN, LOW);// Output low level to built-in LED, turning it off
}
The code within the loop lights up and turns off the LED every 300ms, creating a flashing effect. Below are the constants and function explanations used:
Constants
-
HIGH | LOW: Indicates the voltage level of the digital I/O port; HIGH means high level (1, i.e., output voltage to “light up”), and LOW means low level (0, i.e., no output voltage to “turn off”). -
INPUT | OUTPUT: Indicates the direction of the digital I/O port; INPUT means input (high impedance state, which is like a very high resistance that can read input voltage signals), and OUTPUT means output (output voltage signals).
Digital I/O
-
pinMode(pin, mode): Function to define the input/output mode of the digital I/O port, where the parameter mode can be INPUT or OUTPUT. -
digitalWrite(pin, value): Function to define the output voltage level of the digital I/O port, where the parameter value can be HIGH or LOW, which can be used to light up the LED. -
int digitalRead(pin): Function to read the input voltage level of the digital I/O port, returning HIGH or LOW, which can be used to read digital sensors.
Note: The parameter pin value ranges from 0 to 13, representing 14 pins.
Time Functions
-
delay(ms): Delay function (in ms).
The above are common functions; you don’t need to memorize them, just have a general impression, and you’ll remember them as you use them more often.
2.3 What is Serial Port
Before writing code, you need to understand what a serial port is.
This question has already been answered by various encyclopedias, but for beginners, the wording can be a bit formal. Simply put, a serial port is a communication channel between chips.
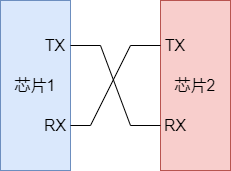
Generally, we use the UART serial port on the development board for communication, which uses two signal lines: one named TX (the message sender) and one named RX (the message receiver), each with a very specific role.
-
TX: Can only send messages. -
RX: Can only receive messages.
So when using them, TX and RX should be cross-connected:
Additionally, when using a serial port without an additional cable to provide a synchronization clock signal, you need to specify the baud rate of the serial port, which is essentially an agreement between the two chips: if I say I can output 100 binary signals in one minute, then on average, each signal lasts 1/100 seconds, and you only need to receive once every 1/100 seconds to keep up with me.
Of course, this analogy has some flaws; the actual communication process is a bit more complex to ensure reliability and correctness.
Now let’s put this into practice! Due to space constraints, you can refer to the API manual for the specific functions used.
2.4 Sending HelloGitHub
Arduino has already prepared a Serial (serial port) for us, and we can implement message sending in just a few simple steps.
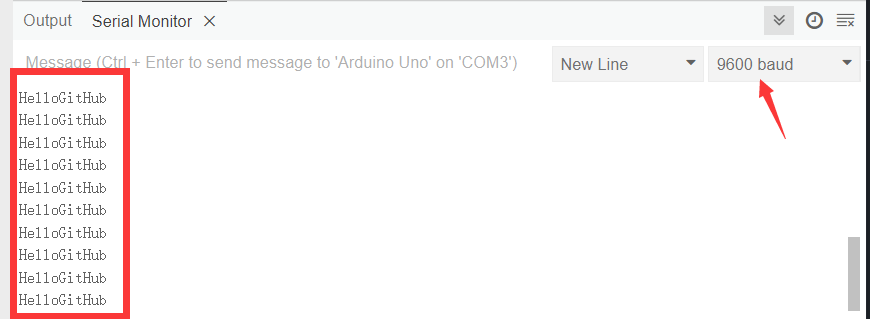
Here we use an official Arduino library, which prepares a Serial object for us. If you are not familiar with C++ object concepts, it won’t affect your usage; syntax like Serial.begin() is essentially a function call (or more formally called a “method”). The code is as follows:
#include <Arduino.h>

void setup()
{
    // Set the baud rate to 9600; our computer must maintain the same rate
  Serial.begin(9600);
}

void loop()
{
  // Output a line of text to the serial port, automatically adding a newline character
  Serial.println("HelloGitHub");
  // Wait a moment to prevent sending too fast and causing a hang
  delay(1000);
}
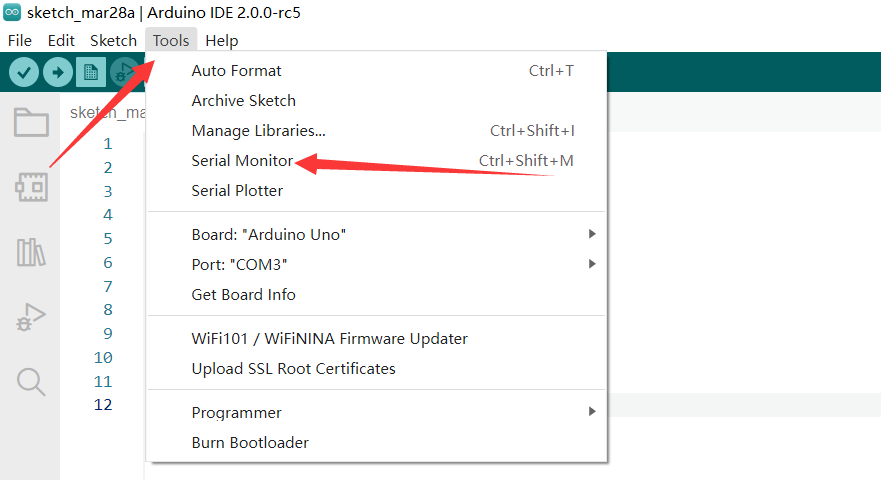
Burn the above program into the development board, then click “Serial Monitor” (similar to the developer mode in a browser) to view the serial port.
At this point, you can see the sent message in the console:
2.5 Receiving Messages
Having covered how to send messages, let’s talk about how to receive messages on Arduino from a computer or another source.
Below is a piece of “echo” code:
#include <Arduino.h>

int count; // Record the number of bytes in the buffer
char buffer[65]; // Store the characters read from the buffer

void setup()
{
  // Perform some initialization work
  Serial.begin(9600);
  count = 0;
}
void loop()
{
  // Serial.available() returns the number of characters currently stored in the buffer
  count =  Serial.available();

  if (count > 0) // If there is something in the buffer
  {
    // Read count characters into the buffer
    Serial.readBytes(buffer, count);
    // Add a terminator for later sending
    buffer[count] = '\0';
    // Send
    Serial.println(buffer);
  }
  // Wait a moment to receive more messages; otherwise, it can only return one letter at a time
  delay(800);
}
Burn the above program, and follow the previous method to check the serial port. You need to input the content you want to send in this box and use the shortcut Ctrl+Enter to send.

Here, you will see in the console that the board receives the message sent from the computer and sends it back, echoing the same message.
Thus, the basic usage of the serial port has been covered. Although the functionality implemented here is quite simple, it is a necessary path for all experts. All complex functionalities are actually implemented using these seemingly simple basic functions.
3. Getting Started
3.1 Community
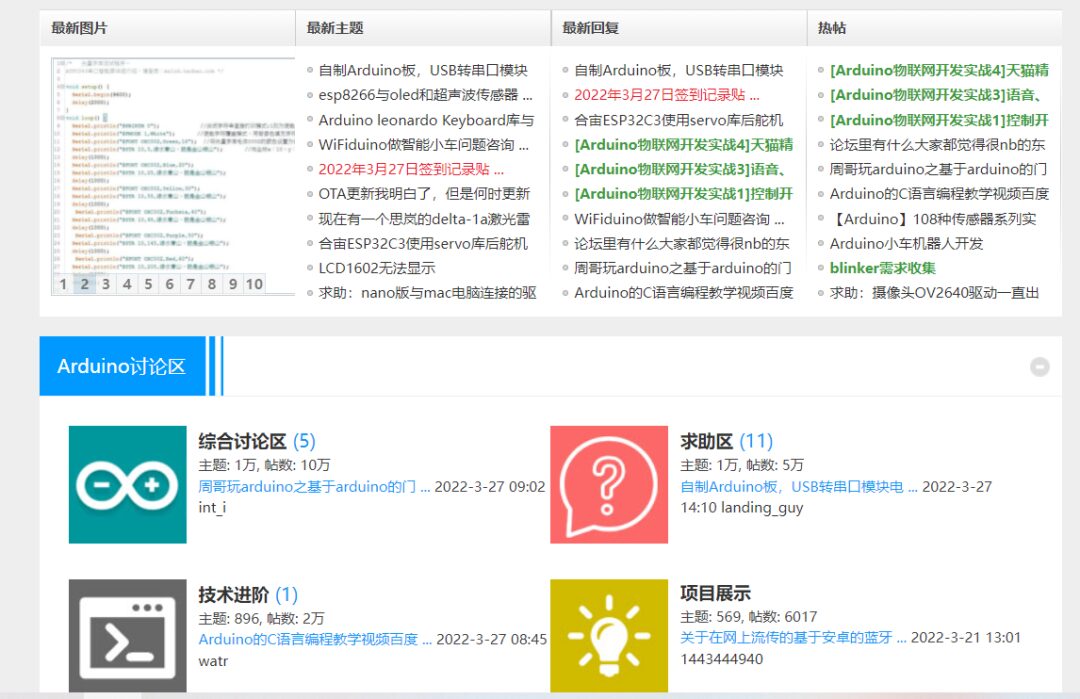
Arduino has a very active Chinese community, where most new questions can receive warm answers from netizens. Many people share their projects in the community, allowing even complete beginners to grow quickly.
3.2 Project Showcase
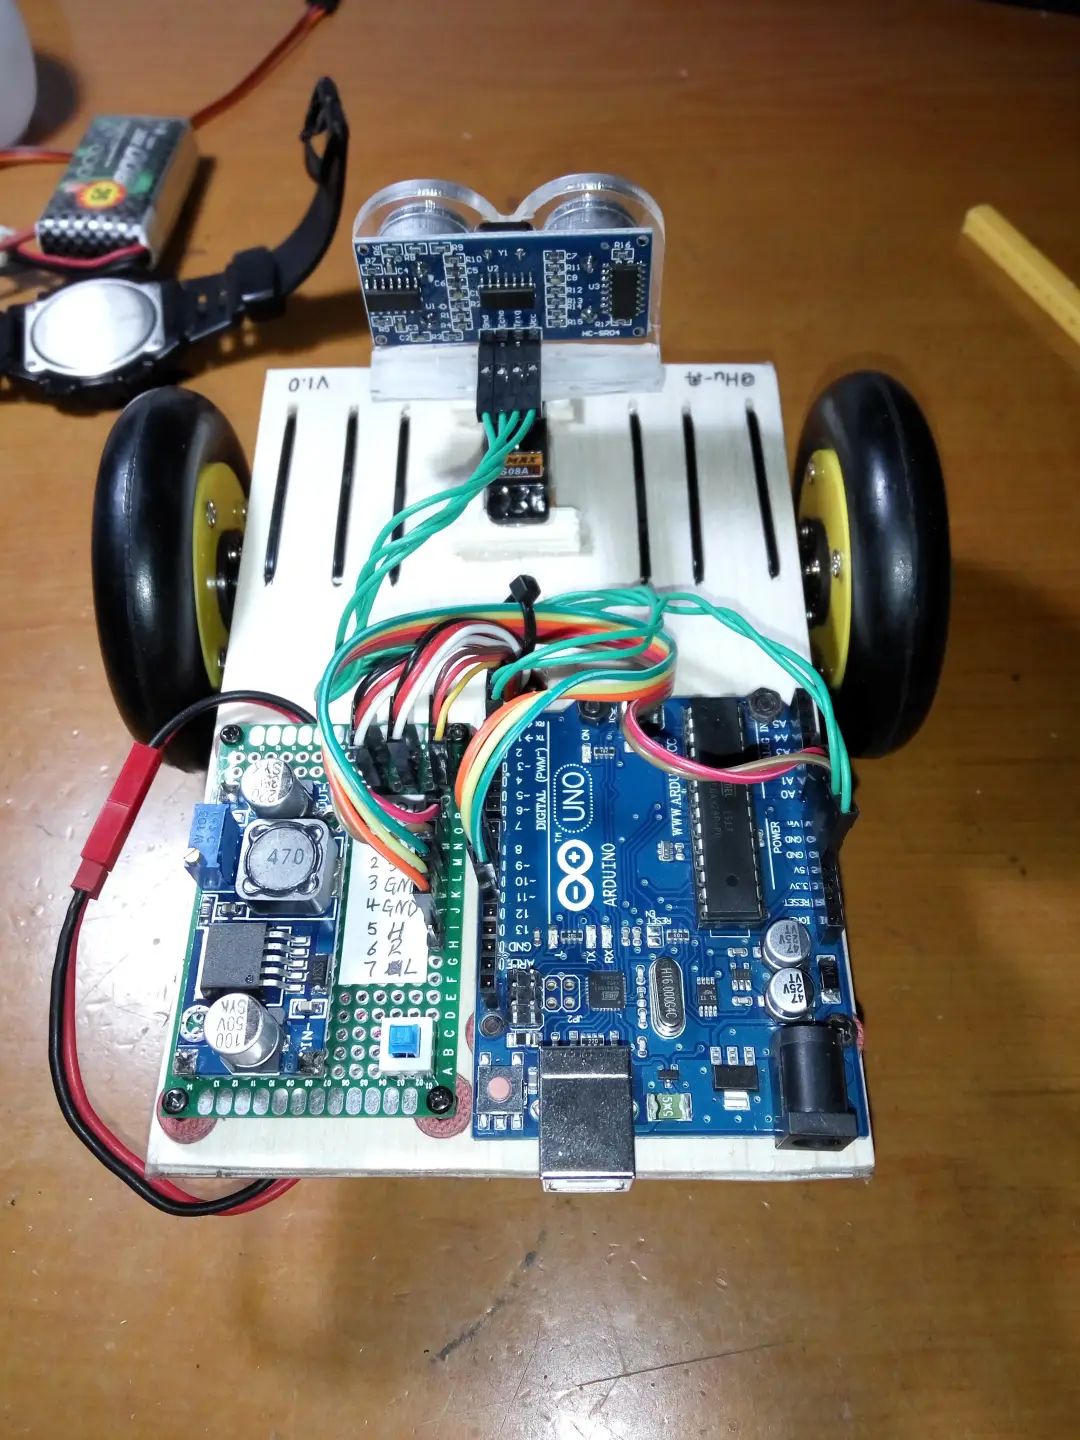
Ultrasonic Obstacle Avoidance Car
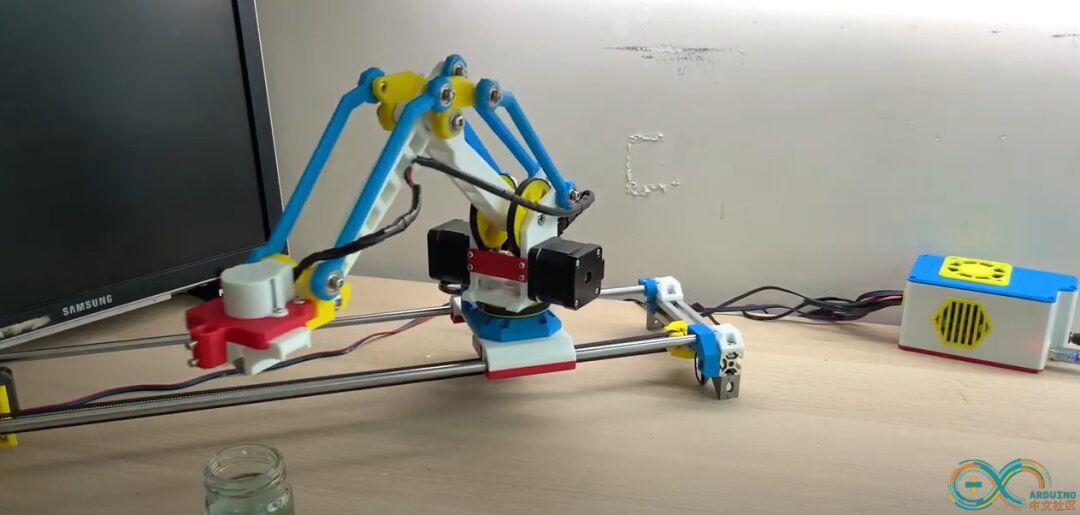
Three-Degree-of-Freedom Robotic Arm
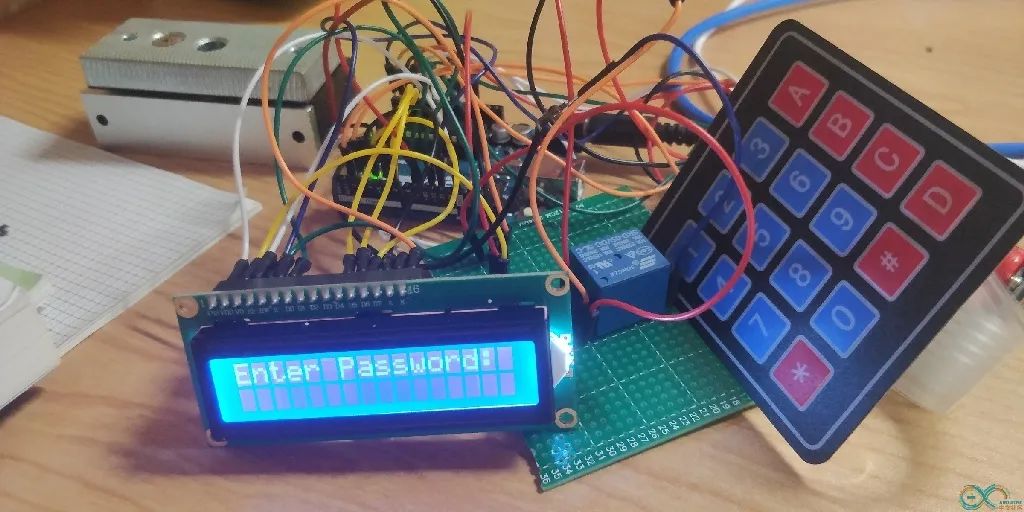
Making a Simple Password Lock
Multi-Functional Transparent Display Desktop Station

I believe that soon you will also be able to create such cool electronic gadgets.


Course: “Git Basics Course”
Course Introduction: By studying this course, you will master Git installation knowledge and workflow; basic Git operations; learn about remote repository and branch management; and learn Git tag management and custom Git.
Course Features:
-
28 knowledge points presented in text and images for better understanding;
-
50+ in-class exercises to practice learning by doing;
-
Text and image explanations combined with code block examples for practical learning.
Learning Method: Scan the QR code ↓ to go to the course page immediately~

