QT is one of the mainstream UI design software today, and the Linux system also supports QT applications, providing many convenient interfaces. Therefore, it is necessary to document the various details of implementing UI functionality based on QT on an LCD screen.
Learning video link:
https://www.bilibili.com/video/BV1pt4y1b7Mf/?spm_id_from=333.999.0.0&vd_source=4a2954680b189d193ad37cd99526e685)
1. System Configuration
For convenience, I used the factory system provided by ZhiDian YuanZi, which has QT installed and configured, allowing for direct flashing of QT programs to implement functionality.
It already has ZhiDian YuanZi’s factory UI interface written in it, so the next step is to modify it.
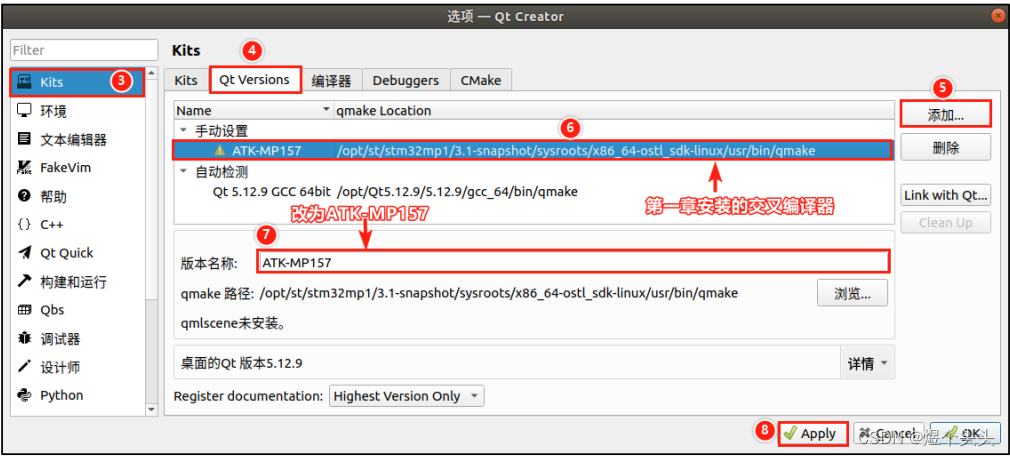
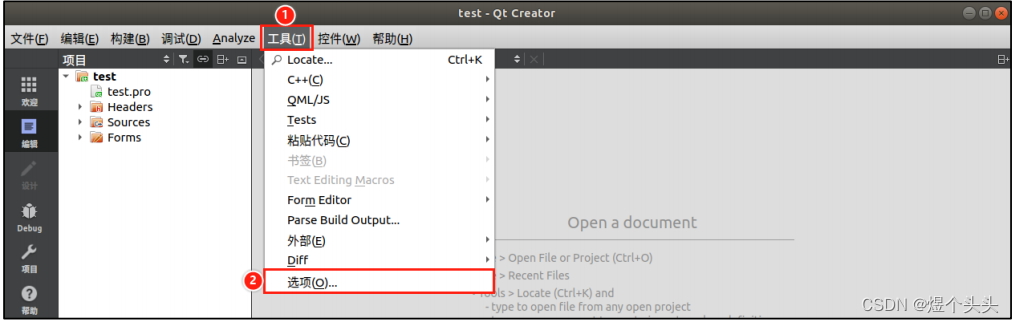
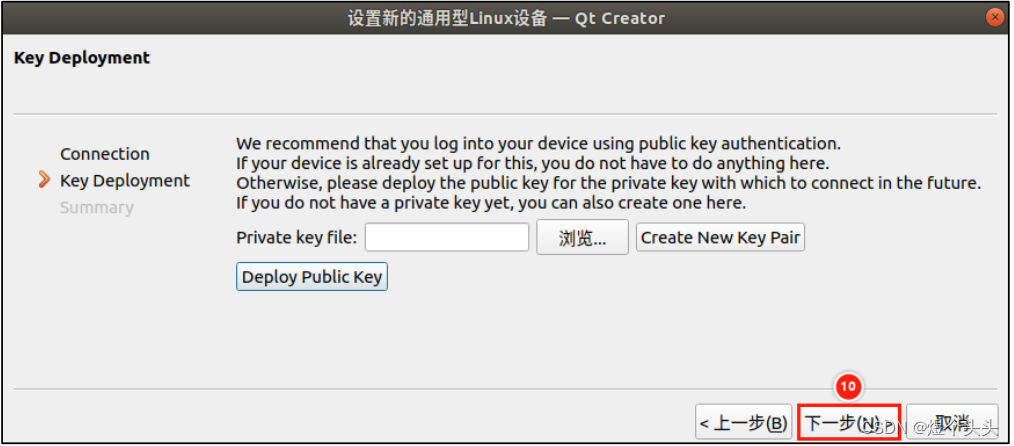
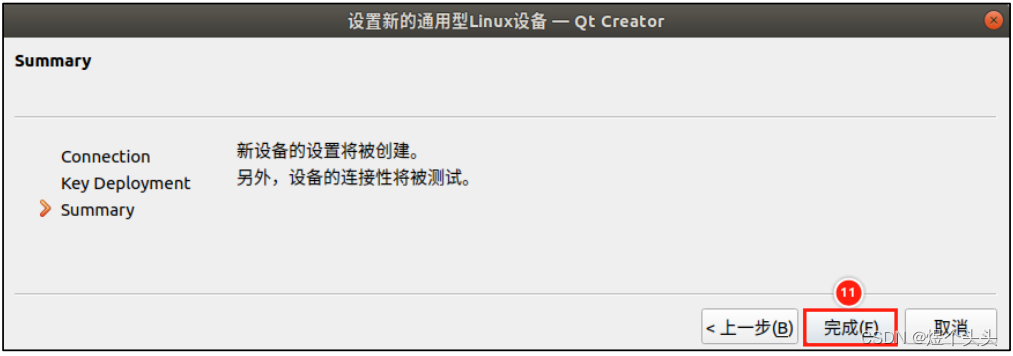
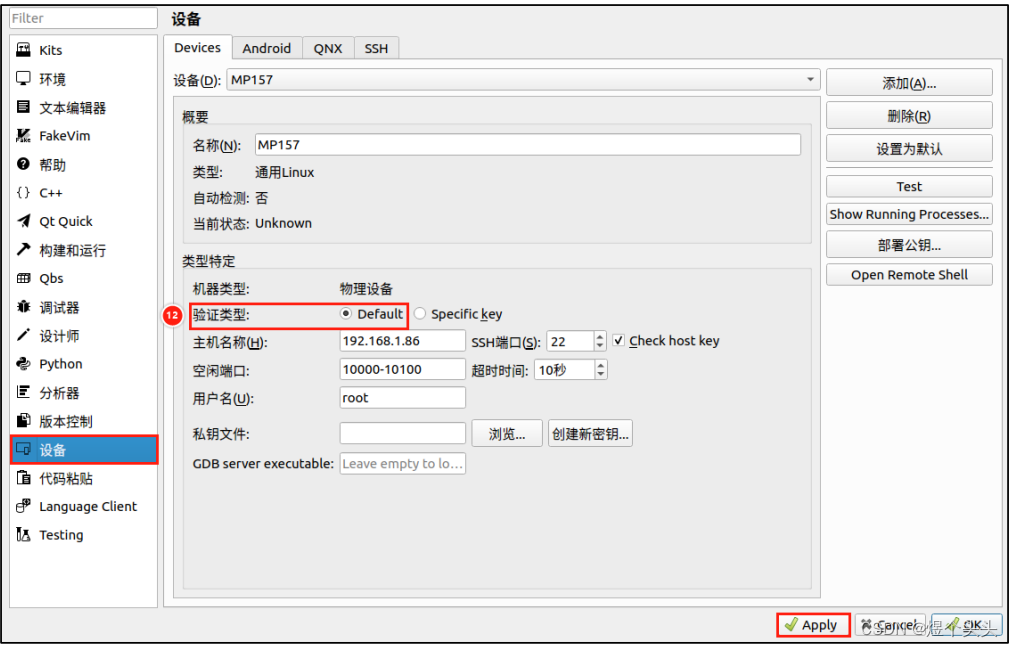
2. Configuring Qt Creator
Refer to ZhiDian YuanZi’s related documents for the installation of cross-compilation work; I will not elaborate here.
Starting Up
When starting up, you need to load the cross-compiler, so you need to insert the corresponding command in qtcreator.sh
sudo vi /opt/QT5.12.12/Tools/QtCreator/bin/qtcreator.sh # Adjust according to your own QT installation pathInsert the following command on the first line
source /opt/st/stm32mp1/3.1-snapshot/environment-setup-cortexa7t2hf-neon-vfpv4-ostl-linux-gnueabi
Use the following command to start up (you can also write it into a .sh file for easier startup)
/opt/Qt5.12.9/Tools/QtCreator/bin/qtcreator.sh &Compiler Configuration
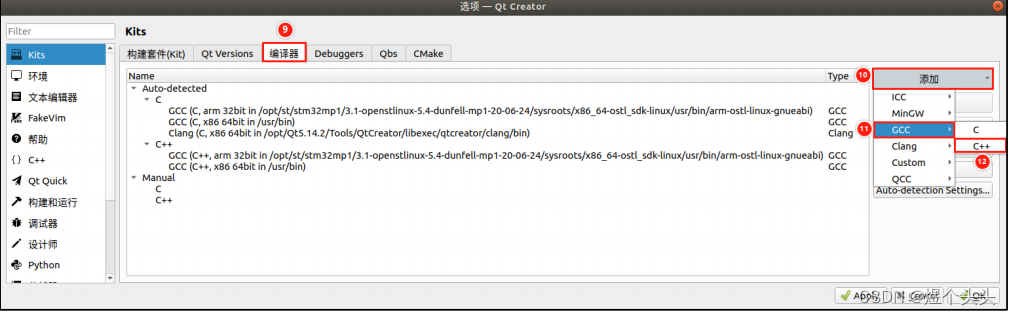
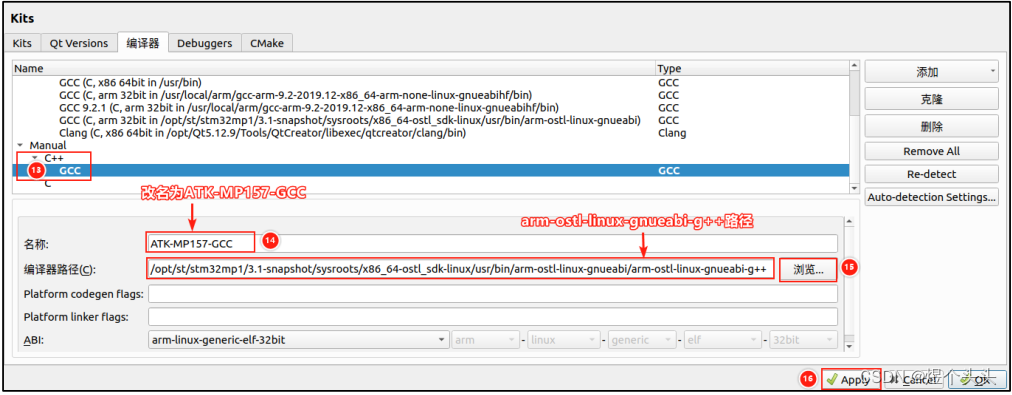
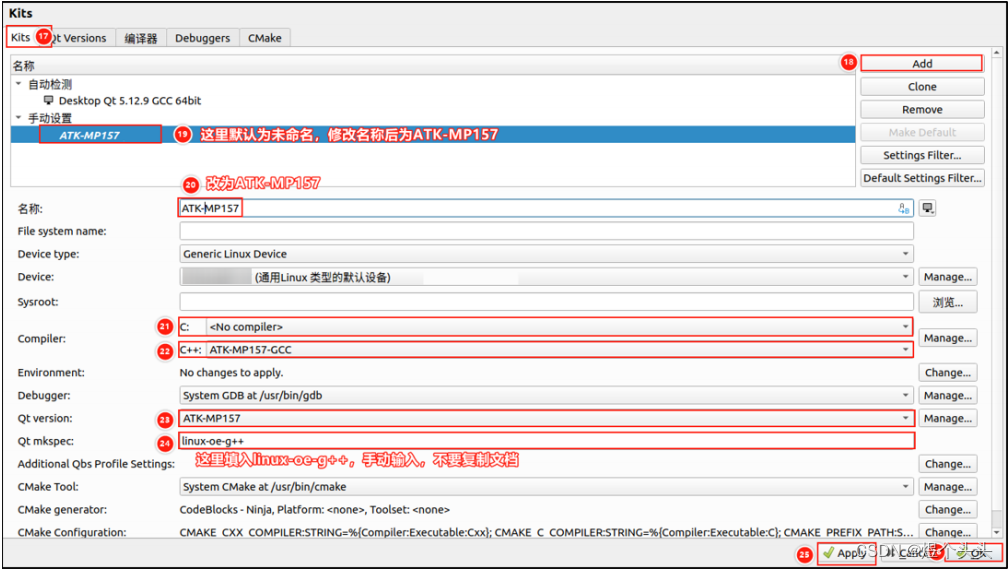
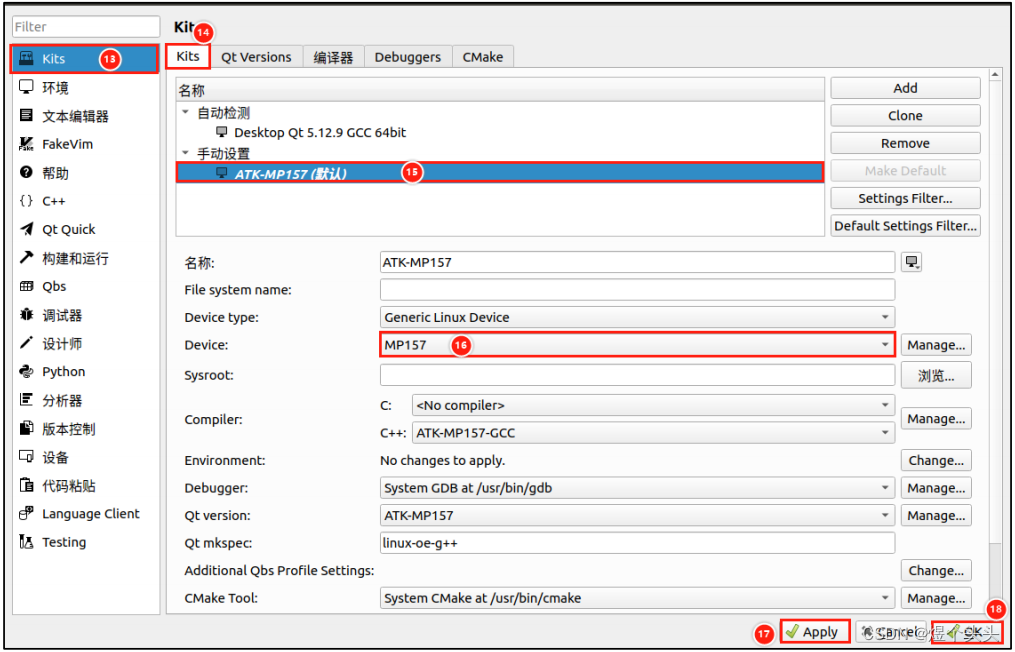
Create a new project and select the following compilation suite
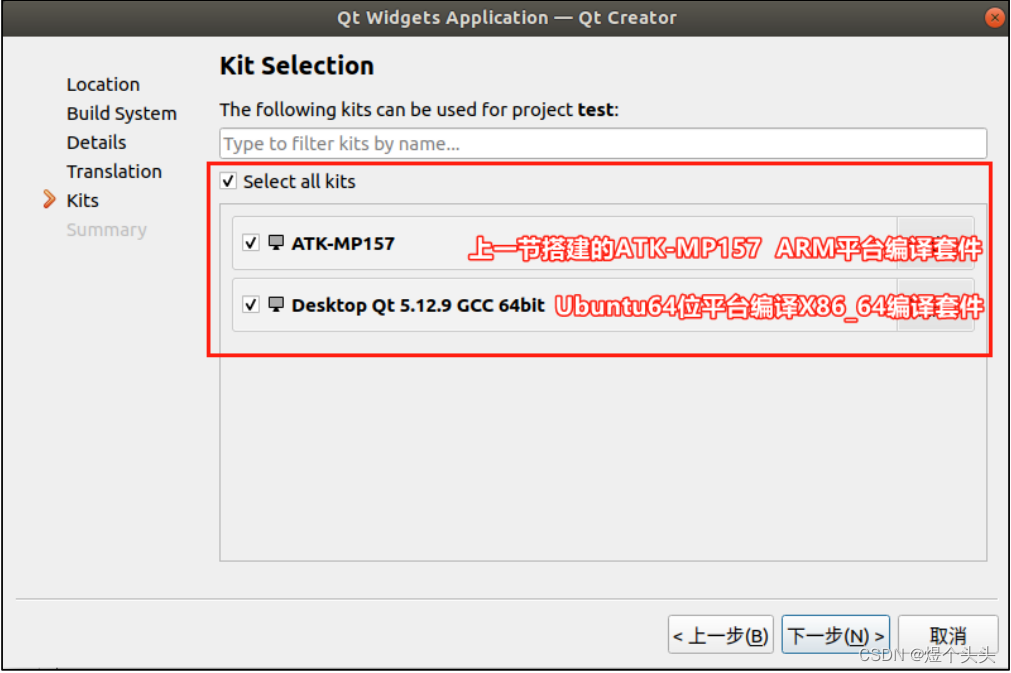
Compile
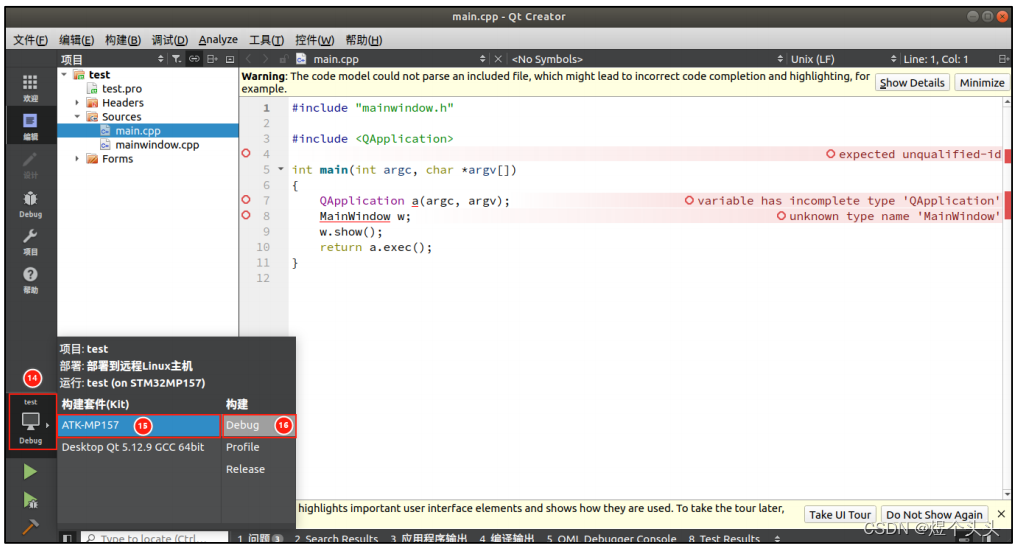
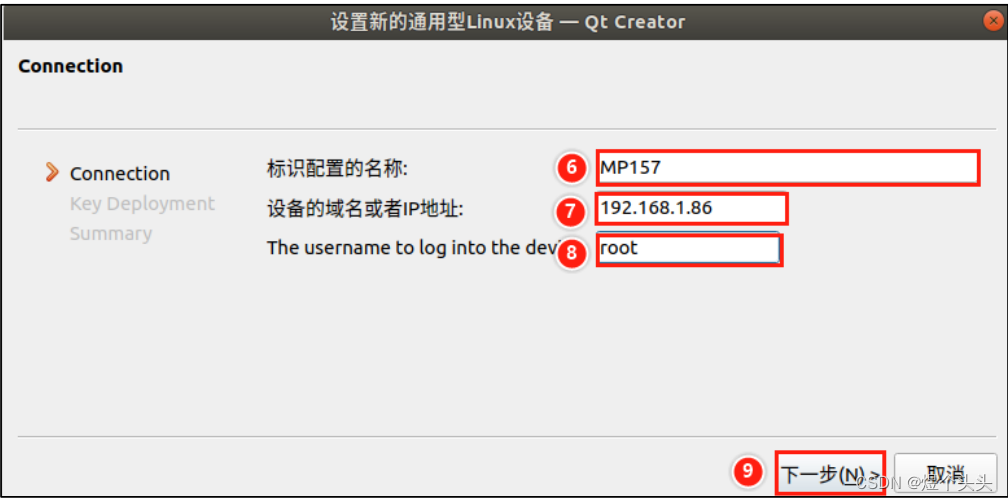
Remote Debugging

Configure debugging in linuxfb/eglfs mode (just modify Command line arguments to linuxfb or eglfs)
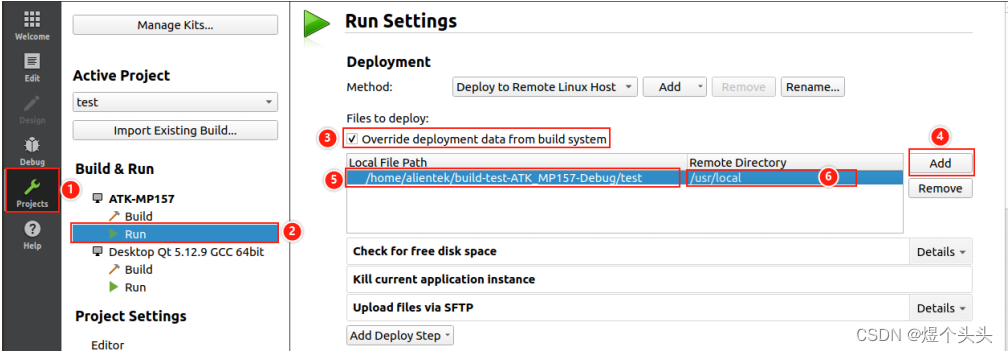
Note: This step of Upload Files via SFTP must also be added, otherwise the new code will not be automatically uploaded to the development board
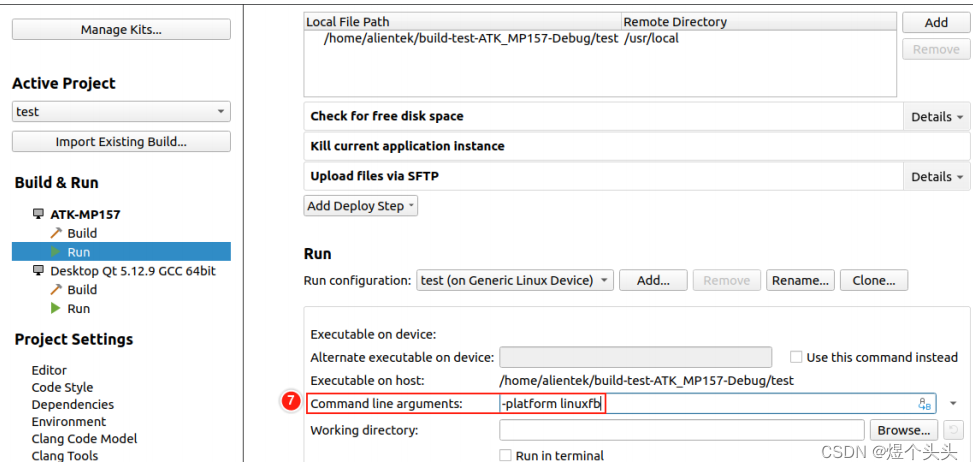
Note: linuxfb uses pure software rendering, while eglfs uses GPU rendering, which will display more smoothly.
However, eglfs is only available when using EMMC to boot the Linux kernel and root filesystem; for remote network debugging, only the linuxfb mode can be used.
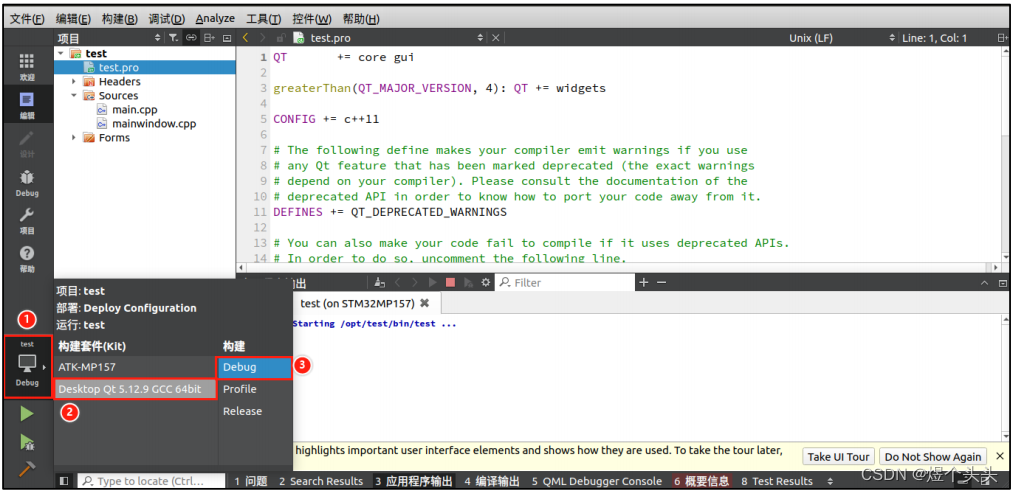
After configuration, when running the program, Qt Creator will send the program to the development board and then start running.
Local Debugging on Ubuntu
3. Modify Kernel Boot LOGO
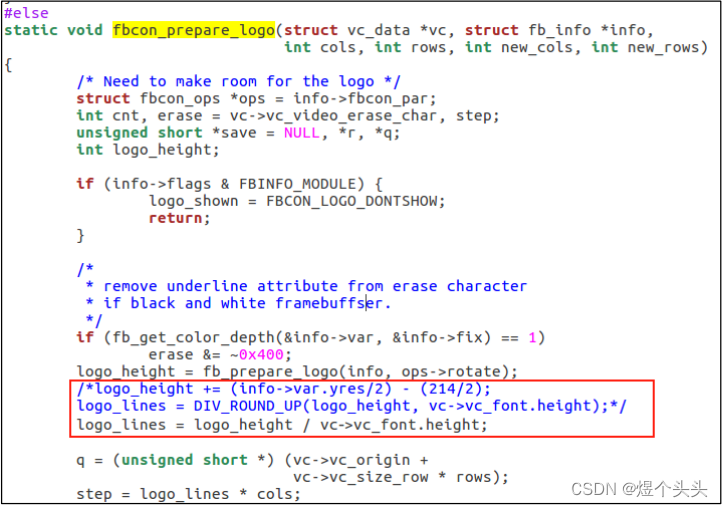
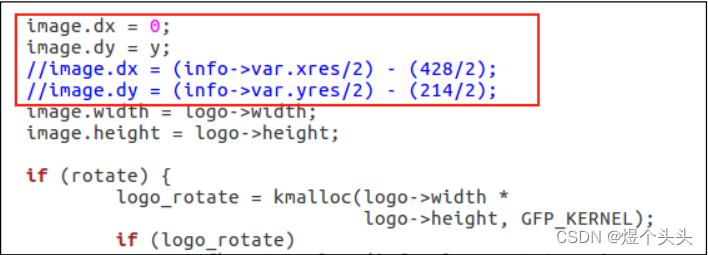
(1) Modify logo display source code
Modify the fbcon.c file’s fbcon_prepare_logo function
Modify the fbmem.c’s fb_show_logo_line function
(2) Prepare a .png image that fits the screen size

(3) Use netpbm image conversion library to process the image
pngtopnm logo.png > logo.pnm # Convert formatpnmquant 224 logo.pnm > logo_224.pnm # Change color channel numberpnmtoplainpnm logo_224.pnm > logo_linux_clut224.ppm # Convert format**(4) Place the file in the specified path **
sudo cp logo_linux_clut224.ppm kernel_path/drivers/video/logoAfter recompiling the kernel, use the new kernel to start the development board.
4. Configure Auto-Start UI
Disable ZhiDian YuanZi’s factory UI service
systemctl disable atk-qtapp-start.service # Execute this to disable Qt desktop service, it will not take effect on next startupsystemctl enable atk-qtapp-start.service # Execute this to enable Qt desktop service systemctl stop atk-qtapp-start.service # Temporarily stop Qt desktop service, restart service with restartCommand to start the UI interface
/usr/local/test -platform linuxfb # Adjust according to the path where you placed the UI programWrite an auto-start service
cd /lib/systemd/systemtouch jozen-qt-start.servicevi jozen-qt-start.service
# add the following content[Unit]Description=Run a Custom Script at StartupAfter=default.target
[Service]ExecStart=/usr/local/test -platform linuxfb
[Install]WantedBy=default.target
After writing, use the syscmd command above to enable it.
Copyright statement: This article is an original article by CSDN blogger “煜个头头”, following the CC 4.0 BY-SA copyright agreement. Please attach the original source link and this statement when reprinting.
Original link:
https://blog.csdn.net/weixin_45728705/article/details/129805576


↑ Hot course, limited-time coupon! 🎉 Grab it quickly ↑


 Click “Read the original text” to view the course