I have been using the SSD1306 OLED monochrome display, and this time I will share the usage of the TFT color screen.
This article introduces the use of the TFT color screen with ESP32C3 on the Arduino platform.
First, let’s take a look at the display effect:
You can also watch the video demonstration:
|
|
|
|
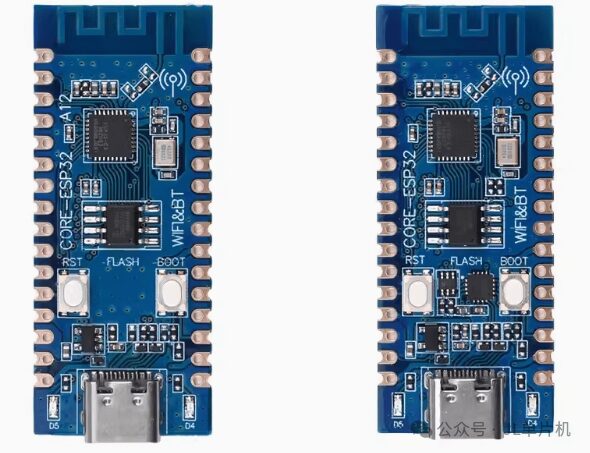
ESP32C3 Minimum System Board
|
|
|
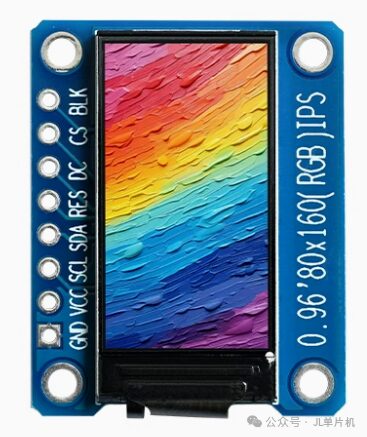
TFT Display, ST7735 Driver Chip, Resolution 80×160
|
|
Environment Configuration
The installation of the Arduino software and the configuration of the ESP32C3 environment can refer to this article:
ESP32C3 Arduino OLED Display Usage Demonstration
No further elaboration here.
After the above environment is configured, the next step is to install the driver code for the TFT display.
ST7735 Driver Library Installation
The next step is to install the driver library for the TFT screen ST7735.
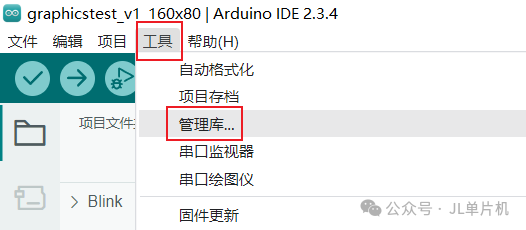
Click Tools —- Manage Libraries.
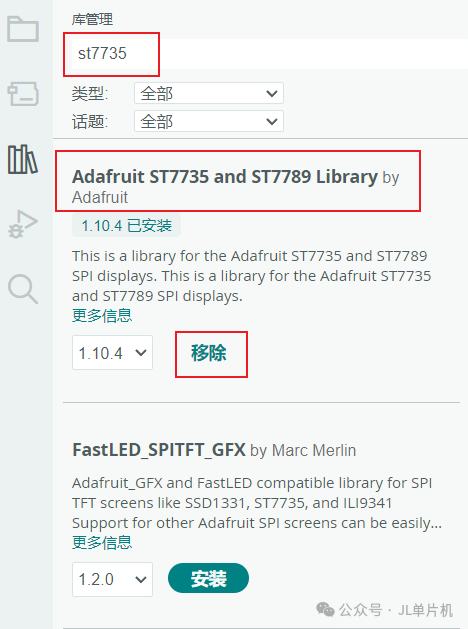
Search for st7735, then click install. In the image below, since I have already installed this library, it shows “Remove”. If it is not installed, it will show “Install”.
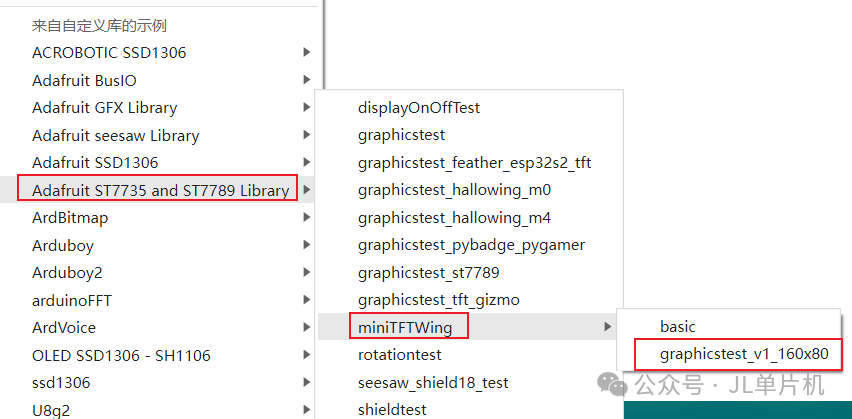
Click File — Examples, then click as shown in the image below, select graphicstest_v1_160x80.
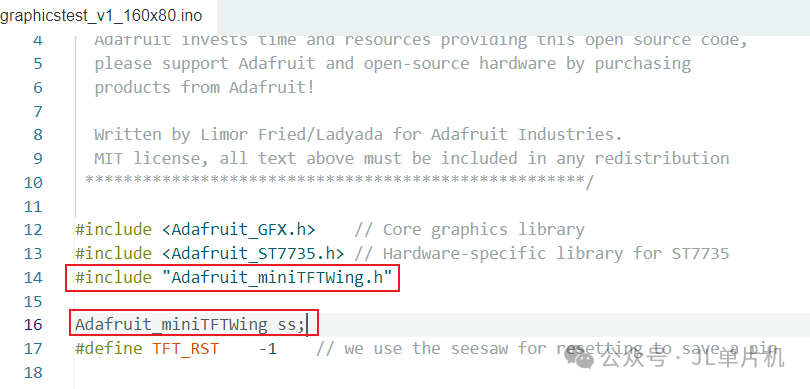
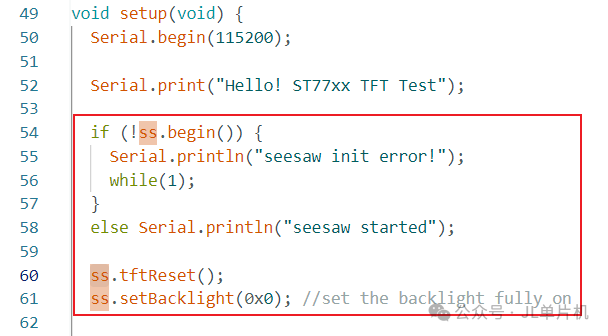
First, the part of the code related to Adafruit_miniTFTWing is not used, we need to delete the relevant code.
Next, we need to change the connection pins between the ESP32C3 microcontroller and the TFT display.
Adafruit_ST7735 has two constructors, as follows:
Adafruit_ST7735(int8_t cs, int8_t dc, int8_t rst);Adafruit_ST7735(int8_t cs, int8_t dc, int8_t mosi, int8_t sclk, int8_t rst);
The first constructor above uses the hardware SPI interface, and does not require specifying the mosi and sclk corresponding IO pins;
The second constructor requires specifying the mosi and sclk connected to the microcontroller IO pins, at this time it is software SPI, and the screen refresh speed will be slower.
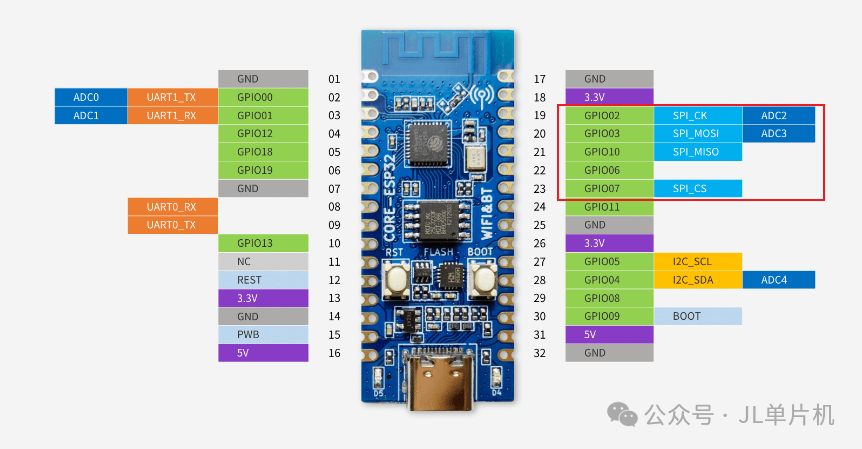
When we want to use hardware SPI, we need to connect the display’s SCL to GPIO02 of ESP32C3, the display’s SDA to GPIO03 of ESP32C3, and the display’s CS to GPIO07 of ESP32C3.
The other pins can be connected freely.
The pinout of ESP32C3 is as follows:
Therefore, if using hardware SPI, the IO connection example code is as follows:
int TFT_CS = 7;int TFT_DC = 6;int TFT_RST = 10;Adafruit_ST7735 tft = Adafruit_ST7735(TFT_CS, TFT_DC, TFT_RST);
If using software SPI, the example code is as follows. You can customize it in practice.
int sclk = 2;int mosi = 3;int rst =10;int dc = 6;int cs = 7;int bl = 11;Adafruit_ST7735 tft = Adafruit_ST7735(cs, dc, mosi, sclk, rst);
The overall code is as follows:
#include <Adafruit_GFX.h> // Core graphics library#include <Adafruit_ST7735.h> // Hardware-specific library for ST7735int TFT_CS = 7;int TFT_DC = 6;int TFT_RST = 10;Adafruit_ST7735 tft = Adafruit_ST7735(TFT_CS, TFT_DC, TFT_RST);// int sclk = 2;// int mosi = 3;// int rst =10;// int dc = 6;// int cs = 7;// int bl = 11;// Adafruit_ST7735 tft = Adafruit_ST7735(cs, dc, mosi, sclk, rst);float p = 3.1415926;void setup(void) { Serial.begin(115200); Serial.println("Hello! ST77xx TFT Test"); // Use this initializer (uncomment) if you're using a 0.96" 180x60 TFT tft.initR(INITR_MINI160x80); // initialize a ST7735S chip, mini display tft.setRotation(3); Serial.println("Initialized"); // Due to space issues, omitted other parts of the code, just use the official code directly}void loop() { // Due to space issues, omitted other parts of the code, just use the official code directly}
At this point, compile the code and upload it to the ESP32C3 microcontroller to see the demonstration effect in the video.